AMQ ACTIV-Pro3 Assembly Manual
Hide thumbs
Also See for ACTIV-Pro3:
- Installation manual (9 pages) ,
- Installation manual (10 pages) ,
- User & troubleshooting manual (12 pages)
Table of Contents
Advertisement
Quick Links
Advertisement
Table of Contents

Related Manuals for AMQ ACTIV-Pro3


Summary of Contents for AMQ ACTIV-Pro3
- Page 1 ACTIV-Pro3 assembly guide...
-
Page 2: Table Of Contents
. . . . . . . . . . . . . . . . . . . . 3-5 SAFETY STATEMENT . -
Page 3: Safety Statement
. Consult the dealer or an experienced radio/TV technician for help . Important: Changes or modifications to this product not authorized by AMQ could void your authority to operate the product . amqsolutions.com... - Page 4 AMQ adjustable-height bases may NOT be accepted as compliant to municipal electrical codes or OSHA federal workplace standards, because this use does not create an NRTL (UL, ETL, etc .) listed product . AMQ is not responsible for the ultimate determinations of compliance for height-adjustable bases with non-AMQ work surfaces .AMO assumes NO liability for lack of standards compliance in these instances .
- Page 5 PLUG ILLUSTRATION DISCLAIMER - Illustrations shown here may not match your product. Depending on your region, the plug pin size and shape may change. OPERATING INSTRUCTIONS Please refer to the User Guide, which is available online . amqsolutions.com ACTIV-PRO3 ASSEMBLY GUIDE | 5...
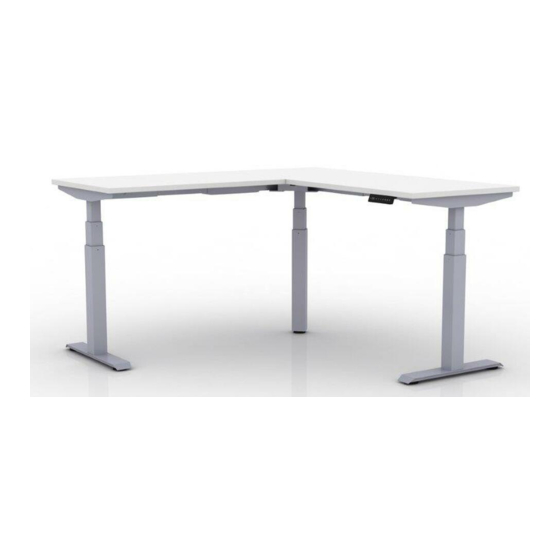
- Page 6 ACTIV-PRO3 90°...
-
Page 7: Components
FL x 1 FR x 1 end x 2 Hardware handset x 1 wood handset screw screw x 12 (special) x 23 power box cable clips screw caps 8mm 5mm x 12 allen keys amqsolutions.com ACTIV-PRO3 ASSEMBLY GUIDE | 7... -
Page 8: Leg Attachment
Identify center leg . Assemble center leg to center bracket with M6 screws . Front Right, Back Right, Front Left and Back Left are indicated on Center Bracket with the initials FR, BR, FL and BL amqsolutions.com ACTIV-PRO3 ASSEMBLY GUIDE | 8... -
Page 9: Attaching Stretcher Bar
Match up frames to center bracket, lining up the holes to the degree that you are setting (90° or 120°) . Screw in with M6 screws . Note limit of stretch length and assemble base within that limitation . maximum mounting distance amqsolutions.com ACTIV-PRO3 ASSEMBLY GUIDE | 9... - Page 10 . Assemble end legs to the stretcher bar ends using M6 (special) screws . Trim caps will be attached in Phase 4 . NOTE: *For 48” width worksurfaces, do not install stretcher bars . amqsolutions.com ACTIV-PRO3 ASSEMBLY GUIDE | 10...
-
Page 11: Attaching Cantilevers & Feet
. Add screws M6 (special) . Tighten using Trim caps will be attached in Phase 4 . NOTE: #4 allen key (or a long extension angle-tipped allen key to expedite the process) . amqsolutions.com ACTIV-PRO3 ASSEMBLY GUIDE | 11... -
Page 12: Adjusting Stretcher Bars
The worksurface should be center aligned NOTE: with the cantilever depth and should have equal amount of overhang on each end . 1” 1” Make sure the screw bracket stays in the center of the stretcher bars amqsolutions.com ACTIV-PRO3 ASSEMBLY GUIDE | 12... -
Page 13: Connecting Power
. Connect each plugs according to the drawing . Orientate yourself to the table assembly by facing as user to identify left and right motor . amqsolutions.com ACTIV-PRO3 ASSEMBLY GUIDE | 13... -
Page 14: Connecting Worksurface
Step 4 Step 2 Attach Mending Plates (Applicable to Attach the handset to desired location using ACTIV-Pro3 90° using 2 piece worksurface handset screws (count x2) . setup) to the worksurface using wood screws . 1 piece worksurface setup does not NOTE: need mending plates . -
Page 15: Program Height Memory Presets
Step 1 . You may need to hold for 2-3 seconds to activate the base . If it does not adjust to the programmed NOTE: height, repeat Step 1 followed by Step 2 . amqsolutions.com ACTIV-PRO3 ASSEMBLY GUIDE | 15... - Page 16 ACTIV-PRO3 120°...
-
Page 17: Components
FL x 1 FR x 1 end x 2 Hardware handset x 1 wood handset screw screw x 12 (special) x 23 power box cable clips screw caps 8mm 5mm x 12 allen keys amqsolutions.com ACTIV-PRO3 ASSEMBLY GUIDE | 17... -
Page 18: Leg Attachment
Identify center leg . Assemble center leg to center bracket with M6 screws . Front Right, Back Right, Front Left and Back Left are indicated on Center Bracket with the initials FR, BR, FL and BL amqsolutions.com ACTIV-PRO3 ASSEMBLY GUIDE | 18... -
Page 19: Attaching Stretcher Bar
Match up frames to center bracket, lining up the holes to the degree that you are setting (90° or 120°) . Screw in with M6 screws . Note limit of stretch length and assemble base within that limitation . maximum mounting distance amqsolutions.com ACTIV-PRO3 ASSEMBLY GUIDE | 19... - Page 20 . Assemble end legs to the stretcher bar ends using M6 (special) screws . Trim caps will be attached in Phase 4 . NOTE: *For 48” width worksurfaces, do not install stretcher bars . amqsolutions.com ACTIV-PRO3 ASSEMBLY GUIDE | 20...
-
Page 21: Attaching Cantilevers & Feet
. Add screws M6 (special) . Tighten using Trim caps will be attached in Phase 4 . NOTE: #4 allen key (or a long extension angle-tipped allen key to expedite the process) . amqsolutions.com ACTIV-PRO3 ASSEMBLY GUIDE | 21... -
Page 22: Adjusting Stretcher Bars
Adjust stretcher bar to desired length . Place caps . Step 2 Tighten 4 factory inset screws to hold desired length in place . Make sure the screw bracket stays in the center of the stretcher bars amqsolutions.com ACTIV-PRO3 ASSEMBLY GUIDE | 22... -
Page 23: Connecting Worksurface And Power
. Attach cable management clips if using . Facing Direction Connect each plugs according to the drawing . Orientate yourself to the table assembly by facing as user to identify left and right motor . amqsolutions.com ACTIV-PRO3 ASSEMBLY GUIDE | 23... -
Page 24: Program Height Memory Presets
Step 1 . You may need to hold for 2-3 seconds to activate the base . If it does not adjust to the programmed NOTE: height, repeat Step 1 followed by Step 2 . amqsolutions.com ACTIV-PRO3 ASSEMBLY GUIDE | 24... - Page 25 Please contact cc@amqsolutions .com if you are missing any parts, have difficulty with assembly, or have any product related questions .
Need help?
Do you have a question about the ACTIV-Pro3 and is the answer not in the manual?
Questions and answers