Table of Contents
Advertisement
Quick Links
Advertisement
Table of Contents

Subscribe to Our Youtube Channel
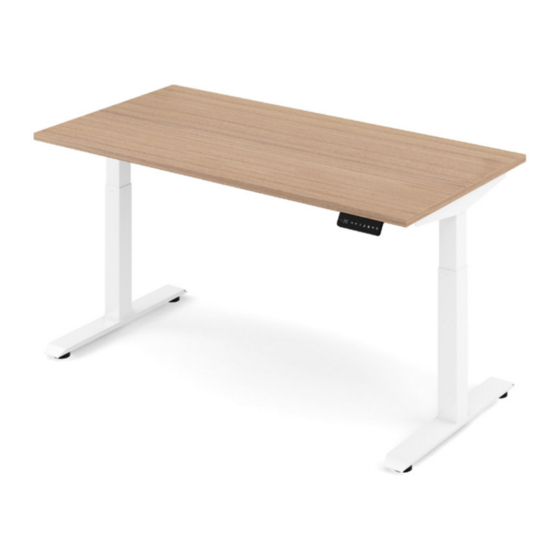
Summary of Contents for AMQ Activ Pro 2.0
- Page 1 Activ Pro 2.0 Assembly Guide...
-
Page 2: Table Of Contents
....... . Activ Pro 2.0 Assembly Guide | 2 amqsolutions.com... -
Page 3: Safety Statement
Use only SJT, minimum 18/3 AWG, 105 degree C cord. Maximum load 250 lbs including worksurface. Activ Pro 2.0 height adjustable base model APS2B and APS3B doesn't include a worksurface. • The base is not complete until assembled with a worksurface. - Page 4 Repairs are to be made using only factory authorized parts and methods. For information on furniture maintenance, or to report furniture which requires service, call AMQ toll-free at (877) 801-0370. FAILURE TO FOLLOW THESE INSTRUCTIONS COULD RESULT IN PROPERTY DAMAGE OR PERSONAL INJURY.
- Page 5 AMQ adjustable-height bases may NOT be accepted as compliant to municipal electrical codes or OSHA federal workplace standards, because this use does not create an NRTL (UL, ETL, etc.) listed product. AMQ is not responsible for the ultimate determinations of compliance for height-adjustable bases with non-AMQ worksurfaces.
-
Page 6: Fcc Statement
Consult the dealer or an experienced radio/TV technician for help. Important: Changes or modifications to this product not authorized by AMQ could void your authority to operate the product. Activ Pro 2.0 Assembly Guide | 6... -
Page 7: Hardware, Components & Optional Accessories
Feet set Feet set (either 23” or 28”) (either 23” or 28”) • Activ Pro 2.0 Height Adjustable Desk, model APS2, APS3. Activ Pro 2.0 Height Adjustable Base, model APS2B, APS3B. • Castor with brake RATING: 120Vac, 60Hz, 5A. •... -
Page 8: Preparing For Assembly
1” in thickness) Maximum load including the worksurface is 250 lbs. Maximum weight of AMQ worksurface is 60 lbs. The maximum load allowed on Activ Pro 2.0 height adjustable desk (provided with AMQ worksurface) model APS2 and APS3 is 190 lbs. -
Page 9: Adjusting The Stretcher Frame & Cantilevers
Note: The worksurface should be center aligned with the cantiliver depth and should have 1’’ of overhang on each end. Use 4mm allen key to tighten pre-mounted inset screws 1’’ The connector of middle stretcher bar Activ Pro 2.0 Assembly Guide | 9 amqsolutions.com... -
Page 10: Attaching Stretcher Frame
fix 8 frame screws with a wireless drill. Note: The worksurface should be center aligned with the cantiliver depth and should have 1’’ of overhang on each end. ST5*25 1’’ Activ Pro 2.0 Assembly Guide | 10 amqsolutions.com... -
Page 11: Attaching Columns
Phase 4 | Attaching Columns Step 1 Step 2 Press column to make the buckle on the column Adjust the Columns and Cantilevers, fixed snap into the groove on stretcher frame. tighten M6*16 screws. M6*16 Activ Pro 2.0 Assembly Guide | 11 amqsolutions.com... -
Page 12: Attaching Cantilevers And Handset
Option 1:Flush with Worksurface Option 2: Inset 1/2” Benefit: Allows for easy access to controls Bottom edge of handset is flush with work surface, leaving the top inset by 1/2” Installation recommendations Activ Pro 2.0 Assembly Guide | 12 amqsolutions.com... -
Page 13: Feet Assembly
Phase 6 | Feet Assembly Step 1 Attach feet using M10 socket screws. Match all 4 holes first to confirm fit before tightening completely. M10*16 Activ Pro 2.0 Assembly Guide | 13 amqsolutions.com... -
Page 14: Attaching Wire Management
Note: The Wire Management should be center aligned with the worksurface width, and the Wire Management centered between the Stretcher Frame and the edge of the worksurface. ST5*25 Activ Pro 2.0 Assembly Guide | 14 amqsolutions.com... -
Page 15: Attaching Control Box
Place the control box on top of the slot plate and push it inside. Snap the control box onto the slot plate. Note: The M1 connector faces the connector of middle stretcher bar. The connector of middle stretcher bar Activ Pro 2.0 Assembly Guide | 15 amqsolutions.com... -
Page 16: Connecting Handset And Power
Power Right Handset motor Power Left motor Connect each plug according to the drawing. Orient yourself to the table assembly by facing as a user to identify the left and right motors. Activ Pro 2.0 Assembly Guide | 16 amqsolutions.com... -
Page 17: Replacing Glides With Castors (Optional)
floor by flipping it over approximately 90° (Handset facing up). Note: It is recommended to operate on a level floor with carpets. And when flipping the table, 2 people need to operate at the same time. Activ Pro 2.0 Assembly Guide | 17 amqsolutions.com... - Page 18 It need 2 people to operate it at the same time to turn the desk to its upright position. Number 17 open wrench Locking Caster Not provided by AMQ Activ Pro 2.0 Assembly Guide | 18 amqsolutions.com...
-
Page 19: Program Height Memory Presets
Step 1. You may need to hold for 2-3 seconds to activate the base. Note: If it does not adjust to the programmed height, repeat Step 1 followed by Step 2. Activ Pro 2.0 Assembly Guide | 19 amqsolutions.com... - Page 20 Please contact cc@amqsolutions.com if you are missing any parts, have di culty with assembly, or have any product related questions. Rev. C- 07/06/2023...


Need help?
Do you have a question about the Activ Pro 2.0 and is the answer not in the manual?
Questions and answers