Table of Contents
Advertisement
Quick Links
K-144
98666 00144
8
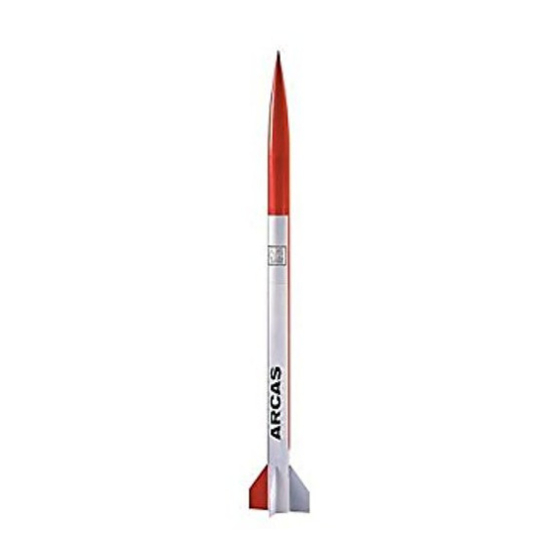
ARCAS HV
Specifications:
Length: 52.25"
Diameter 2.6"
Weight: 34oz
Recovery: 30" Nylon Chute
Motor Mount: 38mm
Fins: 4 - 1/16" G10
Recommended CG: 40"
Suggested Motors:
Aerotech
G67R-6
H148R-10 2150'
Parts List
1.
2.
3.
4.
5.
6.
7.
8.
9.
10. (1) Nylon shock cord
11. (2) Rail Buttons and Screws
12. (1) Vinyl Decal
Optional Recovery System
1.
2.
Required to complete: 5 minute epoxy, 120/220
sandpaper, masking tape,
Rubbing Alcohol for cleaning.
4
Cesaroni
1070'
G115WT-8 1440'
H143SS-10 2430'
(1) Fiberglass nose cone
(1) G10 coupler bulk plate
(1) Fiberglass coupler
(1) Pre-slotted body tube
(1) Forward body tube
(2) G10 centering rings
(1) 38mm motor tube
(4) G10 fins
(2) Eyebolts, (3) nuts, (1) washer
(1) 9"x9" flameproof chute protector
(1) 30" Nylon chute
finishing filler/paint,
Advertisement
Table of Contents

Related Manuals for Madcow Rocketry ARCAS HV


Summary of Contents for Madcow Rocketry ARCAS HV
- Page 1 ARCAS HV Specifications: Length: 52.25” Diameter 2.6” Weight: 34oz Recovery: 30” Nylon Chute Motor Mount: 38mm Fins: 4 - 1/16” G10 Recommended CG: 40” Suggested Motors: Aerotech Cesaroni G67R-6 1070’ G115WT-8 1440’ H148R-10 2150’ H143SS-10 2430’ Parts List (1) Fiberglass nose cone...
- Page 2 Continue sliding the assembly inside the body tube until the aft end of the motor tube is even with the aft end of the body tube. It’s a good idea to test fit a fin in each slot here before the epoxy sets. Hold the body tube with the motor tube assembly down until the epoxy sets. Make sure Ensure rings are clear of the fin slots the weight of the motor assembly doesn’t cause it to slide out of alignment. ©2010 MadCow Rocketry™ ARCAS Assembly...
- Page 3 Make sure the coupler is straight and the body tubes are aligned properly when they are assembled later. Step 6 – Balance and Nose Cone Assembly At this point, pack the chute and assemble the rocket. Insert the largest motor that you intend to fly (or simulate the weight with an appropriate substitute) and ensure that the rocket balances in front of the recommended CG in the specifications on the first page. The CG should be measured from the tip of the nose cone. If the rocket balances aft of the recommended CG point, add weight inside the nose cone and secure with epoxy until the rocket balances at or in front of the recommended point. When you are satisified with the balance of the rocket, epoxy the nose cone into the forward end of the front body tube. ARCAS Assembly ©2010 MadCow Rocketry™...
- Page 4 Madcow Rocketry. Your purchase and use of any Madcow Rocketry product constitutes your agreement to and acceptance of these terms. If you do not agree to these terms and conditions, you must return the unused product in resalable condition for a refund or credit.
Need help?
Do you have a question about the ARCAS HV and is the answer not in the manual?
Questions and answers