
Related Manuals for HP Engage One Pro


Summary of Contents for HP Engage One Pro
- Page 1 User Guide SUMMARY This guide provides information about components, network connection, power management, security, backing up, and more.
- Page 2 United States and/or other countries. USB bound by the terms of the HP End User License Not all features are available in all editions or Type-C and USB-C are registered trademarks of Agreement (EULA).
- Page 3 Safety warning notice Reduce the possibility of heat-related injuries or of overheating the computer by following the practices described. WARNING! To reduce the possibility of heat-related injuries or of overheating the computer, do not place the computer directly on your lap or obstruct the computer air vents. Use the computer only on a hard, flat surface.
- Page 4 Safety warning notice...
- Page 5 About this guide This guide provides basic information for using and upgrading this product. WARNING! Indicates a hazardous situation that, if not avoided, could result in serious injury or death. CAUTION: Indicates a hazardous situation that, if not avoided, could result in minor or moderate injury. IMPORTANT: Indicates information considered important but not hazard-related (for example, messages related to property damage).
- Page 6 About this guide...
-
Page 7: Table Of Contents
Engage One Pro serial number location ........................ 8 Fanless hub serial number location ........................8 Installing a security cable on the fanless hub ....................... 9 Installing a security cable on the Engage One Pro ....................9 2 Hardware setup ............................10 Tools needed ................................ 10 Warnings and cautions ............................ - Page 8 International Association of Accessibility Professionals (IAAP) ............28 Finding the best assistive technology ....................28 Assessing your needs ..................... 28 Accessibility for HP products ..................28 Standards and legislation ............................ 29 Standards ............................29 Mandate 376 – EN 301 549 .................... 29 Web Content Accessibility Guidelines (WCAG) ..............
-
Page 9: Computer Features
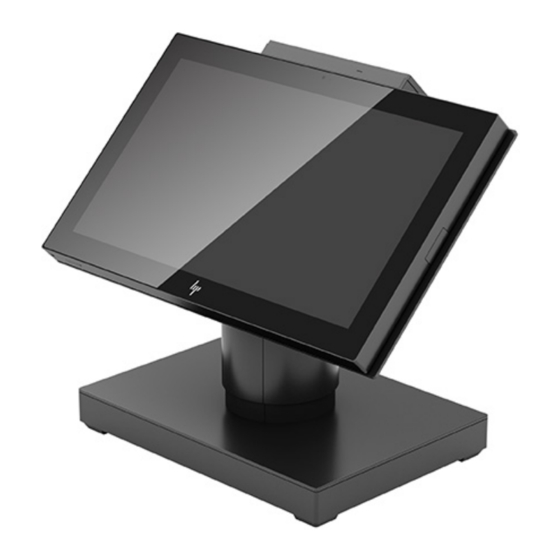
To identify a typical computer configuration, read this section. Features vary depending on the model. Landscape orientation Portrait orientation The Engage One Pro is designed for long-term deployment within general retail, hospitality, and other markets. It includes the following features: Integrated All-in-One (AiO) form factor available in landscape or portrait orientation ●... -
Page 10: Integrated Features
Three available hubs: ● Fanless hub – Column hub – VESA hub – Major HP peripherals: ● Magnetic strip reader (MSR) (integrated into the head unit as configure to order) – LCD customer-facing display (CFD) – 2D barcode scanner –... -
Page 11: Stand Options
Table 1-1 Identifying the integrated features Features Near-field communication (NFC) Fanless base hub (select products only) Camera Customer-facing display (CFD) Display panel Integrated magnetic stripe reader (MSR) Fingerprint reader Optional USB interface barcode scanner Stand Internal column hub NOTE: You can configure the head unit in either landscape or portrait orientation. Stand options To identify the available stands, use this illustration and table. -
Page 12: Fanless Hub Components
USB powered port (140 W) IMPORTANT: Use only with a HP-provided USB cable that is rated at a minimum of 140 W. IMPORTANT: To avoid damage to the computer, do not plug a telephone cable into the cash drawer jack. -
Page 13: Column Hub Components
Table 1-4 Identifying the VESA hub features Features RJ-45 (network) jack Powered USB 12 V port Power connector USB Type-C charging port (27 W) Powered USB 24 V port USB SuperSpeed ports (3) Column hub components To identify the column hub features, use this illustration and table. Table 1-5 Identifying the column hub features Features... -
Page 14: Locating The Engage One Pro Power Button
USB SuperSpeed ports (3) Power light Powered USB 24 V port Locating the Engage One Pro power button The computer power button is located on the bottom left edge of the bezel. Locating the fanless hub power button The power button is located on the underside of the hub. -
Page 15: Adjusting The Head Unit
After the system has been turned off, you can press the power button on the underside of the hub to allow power to be available on the hub ports while the head unit remains turned off. Adjusting the head unit The stands offer various tilt and height-adjustment options. -
Page 16: Engage One Pro Serial Number Location
Engage One Pro serial number location Each computer has a unique serial number and a product ID number that are located on the exterior of the computer. Keep these numbers available when you contact customer service for assistance. Fanless hub serial number location Each hub has a unique serial number and a product ID number that is located on the exterior of the hub. -
Page 17: Installing A Security Cable On The Fanless Hub
Locate the security cable slot on the back of the hub. Insert the security cable lock into the slot, and then use the key to lock it. Installing a security cable on the Engage One Pro NOTE: The security cable is sold separately as an aftermarket option kit only. -
Page 18: Hardware Setup
Hardware setup Use these sections to set up and configure your HP Engage One Pro All-in One. Every configuration ships with at least one of three available hubs: a fanless hub, column hub, or VESA hub. Tools needed You need a Phillips screwdriver and a Torx T15 screwdriver for procedures described in this guide. -
Page 19: Removing The Door On The Performance Stand
USB Type-A ports ● USB Type-C port ● Network jack ● Removing the door on the Performance stand To remove the Performance stand door, use this procedure and illustration. Loosen the captive screw (1). Slide the door up (2), and then remove it from the stand (3). Removing the door on the Pro stand To remove the Pro stand door, use this procedure and illustration. -
Page 20: Removing The Cover From The Vertical Stand
Removing the cover from the Vertical stand To remove the Vertical stand cover, use this procedure and illustration. Lift the access cover off the top of the stand (1). Loosen the thumbscrew (2). Disconnect the cables from the inside of the stand (3). Lift the head unit and stand cover assembly off the stand. -
Page 21: Mounting The Engage One Pro To A Countertop
Install the voltage switch cover onto the hub. Reconnect the hub power cord and peripheral devices. Mounting the Engage One Pro to a countertop You can use an optional countertop mounting bracket to mount the computer head unit and column to a countertop. - Page 22 The mounting bracket requires an 80 mm (3 in) hole in the countertop. The thickness of the countertop must be 10 mm (0.4 in) to 50 mm (2 in). To mount the Engage One Pro: Route the cables through the routing hole on the top piece of the mounting bracket (1), and connect the cables to the computer (2).
-
Page 23: Installing A Slim Vesa Mount
Route the cables through the bottom piece of the mounting bracket (1). Press the mounting bracket against the bottom of the mounting surface and over the top mounting bracket (2), and then tighten the bracket (3). Installing a slim VESA mount To install a slim VESA mount, use this procedure and illustration. - Page 24 Remove the two screws (1), and then separate the stand from the head unit (2). Insert the slim VESA mount bracket into the head unit (1), and then tighten the two captive screws (2). Chapter 2 Hardware setup...
-
Page 25: Installing The Customer-Facing Display (Cfd)
Connect the USB power cord (1) and network cable (2) to the head unit. Connect the other end of the USB power cord to the fanless hub. Press the slim VESA mount cover onto the bracket until it snaps into place. Installing the customer-facing display (CFD) To install the customer-facing display, use this procedure and illustration. - Page 26 Disconnect the network cable (2) and the USB power cord (3) from the head unit. Remove the two screws (1), and then separate the stand from the head unit (2). Remove the Phillips screw that secures the back plate to the head unit (1). Chapter 2 Hardware setup...
- Page 27 Slide the back plate toward the bottom of the head unit (2), and then lift the back plate off the head unit (3). Loosen the two captive screws that secure the CFD insert (1), and then remove the insert from the top of the head unit (2).
- Page 28 Insert the connector on the CFD into the slot in the head unit (1), and then tighten the two Phillips screws (2). Replace the back plate. Install the stand to the head unit, connect the cables, and replace the cable cover. Chapter 2 Hardware setup...
-
Page 29: Configuring The Software
To configure the integrated USB peripheral, see the HP Point of Sale Configuration Guide (available in English only). The guide is located with the documentation on your retail computer and at http://www.hp.com/ support. To access the guide on the retail computer, select Start, and then select HP Point of Sale Information. NOTE: Check http://www.hp.com/support... -
Page 30: Updating The Engage One Pro
Choose to restart now or later. The computer might not work until the next restart. Click Finish. Installing updates You can update the Engage One Pro immediately or the next time the computer is shut down. To install updates: Open Windows Explorer and navigate to where you saved HP Firmware Installer. -
Page 31: Computer Operating Guidelines, Routine Care, And Shipping Preparation
Follow these guidelines to ensure the best performance and useful life of your computer. Operating guidelines and routine care HP has developed guidelines to help you properly set up and care for the computer and monitor. Keep the computer away from excessive moisture, direct sunlight, and extreme heat and cold. -
Page 32: Cleaning Your Computer With A Disinfectant
Keep liquids away from the product. Avoid getting moisture in any openings. If liquid makes its way inside your HP product, it can cause damage to the product. Do not spray liquids directly on the product. Do not use aerosol sprays, solvents, abrasives, or cleaners containing hydrogen peroxide or bleach that might damage the finish. -
Page 33: Touch Screen Maintenance
Keep liquids away from the product. Avoid getting moisture in any openings. If liquid makes its way inside your HP product, it can cause damage to the product. Do not spray liquids directly on the product. Do not use aerosol sprays, solvents, abrasives, or cleaners containing hydrogen peroxide or bleach that might damage the finish. -
Page 34: Electrostatic Discharge
Electrostatic discharge Electrostatic discharge is the release of static electricity when two objects come into contact—for example, the shock you receive when you walk across the carpet and touch a metal door knob. A discharge of static electricity from fingers or other electrostatic conductors may damage electronic components. -
Page 35: Accessibility
HP and accessibility Because HP works to weave diversity, inclusion, and work/life into the fabric of the company, it is reflected in everything HP does. HP strives to create an inclusive environment focused on connecting people to the power of technology throughout the world. -
Page 36: International Association Of Accessibility Professionals (Iaap)
As a founding member, HP joined to participate with other organizations to advance the field of accessibility. This commitment supports HP’s accessibility goal of designing, producing, and marketing products and services that people with disabilities can effectively use. -
Page 37: Standards And Legislation
If you need additional support with the accessibility features on your HP product, see Contacting support on page Additional links to external partners and suppliers that may provide additional assistance: Microsoft Accessibility information (Windows 7, Windows 8, Windows 10, Microsoft Office) ●... -
Page 38: Legislation And Regulations
NOTE: This is not an exhaustive list. These organizations are provided for informational purposes only. HP assumes no responsibility for information or contacts you encounter on the Internet. Listing on this page does not imply endorsement by HP. -
Page 39: Other Disability Resources
HP comfort and safety guide HP public sector sales Contacting support HP offers technical support and assistance with accessibility options for customers with disabilities. NOTE: Support is in English only. Customers who are deaf or hard of hearing who have questions about technical support or accessibility ●... -
Page 40: Index
23 touch screen 25 VESA hub features 4 column hub cabling 10 mount column hub features 5 Engage One Pro to a countertop computer operating guidelines 23 Wake-on Touch 21 configure MSR maintenance 25 WOT 21...
Need help?
Do you have a question about the Engage One Pro and is the answer not in the manual?
Questions and answers