
Related Manuals for Hioki 3504


Summary of Contents for Hioki 3504
- Page 1 Instruction Manual 3504 3504-10 C HiTESTER December 2008 Revised edition 2 3504A981-02 08-12H...
-
Page 3: Table Of Contents
Contents Contents Introduction.................1 Verifying Package Contents ............1 Safety Information ..............2 Operating Precautions..............4 Chapter 1 Overview ___________________________________ 7 Product Overview ............7 Features ...............7 Entire Workflow ............9 Names and Functions of Parts ........11 Chapter 2 Measurement Preparations ____________________ 15 Preparation Flowchart ..........15 Checking the Power Voltage ........ - Page 4 Contents Chapter 4 Application Functions _________________________ 41 Comparator Function ..........41 BIN Measurement Function (Only for 3504) ....50 Synchronous Measurement Function (3504 special specification) ........60 Trigger Synchronous Output Function ....... 62 Keylock Function ............64 Panel Save Function ..........65 Panel Load Function ..........
- Page 5 Controlling the Unit from a PC __________________ 91 Outline and Features ..........91 Specifications .............92 7.2.1 RS-232C Specifications ..........92 7.2.2 GP-IB Specifications (Only for 3504) ......93 Connection and Setting Procedures ......94 7.3.1 Connecting the RS-232C Cable / GP-IB Cable .....94 7.3.2 Setting the Interface Communication Conditions ..96 Remote Function ............98...
- Page 6 Contents Chapter 9 Maintenance and Service_____________________ 195 Inspection, Repair, and Cleaning ......195 Replacing the Power Fuse ........197 Discarding the Unit ..........198 Chapter 10 Options ___________________________________ 199 Appendix _________________________________ A1 Appendix 1 Mounting the Unit in a Rack......A1 Appendix 2 External View ............
-
Page 7: Introduction
Introduction Introduction Thank you for purchasing the HIOKI “Model 3504, 3504-10 C HiTester.” To obtain maximum performance from the unit, please read this manual first, and keep it handy for future reference. Verifying Package Contents When you receive the unit, inspect it carefully to ensure that no damage occurred during shipping. -
Page 8: Safety Information
Safety Information Safety Information This unit is designed to comply with IEC 61010 Safety Standards, and has been thoroughly tested for safety prior to shipment. However, mis- handling during use could result in injury or death, as well as damage to the unit. - Page 9 Safety Information Measurement Categories (Overvoltage categories) To ensure safe operation of measurement units, IEC 60664 establishes safety standards for various electrical environments, categorized as CAT I to CAT IV, and called overvoltage categories. These are defined as follows. CAT I: Secondary electrical circuits connected to an AC elec- trical outlet through a transformer or similar device.
-
Page 10: Operating Precautions
Operating Precautions Operating Precautions Follow these precautions to ensure safe operation and to obtain the full bene- fits of the various functions. Unit Installation Operating Temperature and Humidity °C : 0 to 40 ), 80%RH or less, no con- densation °C Storage Temperature and Humidity: -10 to 55 , 80%RH or less, no conden-... - Page 11 • Do not apply heavy downward pressure with the stand extended. The stand could be damaged. Handling this device Never modify the unit. Only Hioki service engineers should disassem- ble or repair the unit. Failure to observe these precautions may result in fire, electric shock, or injury.
- Page 12 Operating Precautions About the guarantee You should be aware that HIOKI cannot accept any responsibility directly or indirectly if the unit has been incorporated in some other system, or if it is resold to a third party. Preliminary Checks Before using the unit the first time, verify that it operates normally to ensure that the no damage occurred during storage or shipping.
-
Page 13: Chapter 1 Overview
Capacitance-specific units These capacitance meters use 120 Hz and 1 kHz measurement frequencies. High-speed measurement The 3504 and 3504-10 are capable of high-speed measurement: 2 ms at measurement frequency 1 kHz, and 10 ms at 120 Hz. Constant-voltage measurements Provides constant-voltage measurement capability. - Page 14 Trigger-synchronous measurement capability The measurement signal can be input to the sample in sync with a trigger. Synchronous measurement (Special feature of Model 3504) Synchronize multiple meters to reduce interference-induced measurement instability. *1. Capability to store electric charge.*2. An indicator of capacitor losses.
-
Page 15: Entire Workflow
Synchronous mea- Reduce the differences in mea- 4.3 (p. 60) surement function surement values caused by inter- (special specification ference when using multiple 3504 for 3504) units for measurement. Trigger synchro- Apply the measurement signal 4.4 (p. 62) nous output function... - Page 16 1.3 Entire Workflow Application Chapter 6 "Application Measurement" (p. 81) Measurement using EXT I/O Measurement Measurement of high impedance components Measurement of components in circuit networks Other Settings Chapter 5 "Other Settings" (p. 73) Beep tone setting Reset of system Countermeasures against incorporation of external noise...
-
Page 17: Names And Functions Of Parts
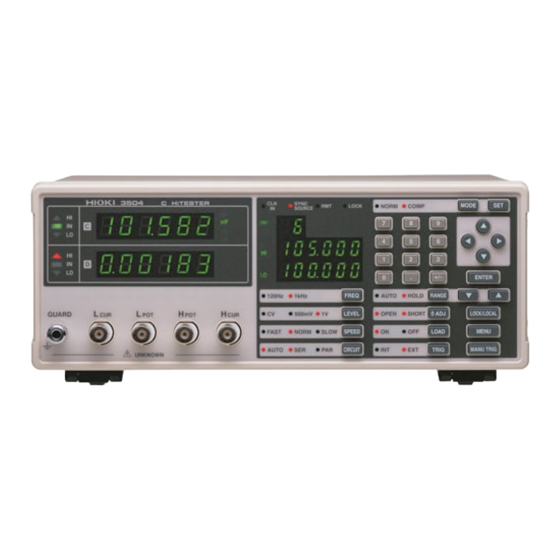
Displays judgment results in Measurement-signal settings BIN mode. input terminal 4.2 "BIN Measurement Func- (⇒ p. 12) Detected voltage high tion (Only for 3504)" (p. 50) terminal Detected voltage low terminal Measurement current detected terminal GUARD Guard terminal 2.4 "Connecting the Probes and... - Page 18 25) Comparator and BIN measurement func- tion settings 4.1 "Comparator Function" (p. 41), 4.2 "BIN Measure- ment Function (Only for 3504)" (p. Arrow keys Used to change set- tings and move to menu items or digits. Enter Measurement range setting ⇒...
- Page 19 1.4 Names and Functions of Parts Back Phase Synchronization Connector (Special Specification) Power Inlet Voltage Connect this to another 3504 (3504-10) unit when per- Selectors Connect the supplied forming synchronous measurement. Changes the power power cord voltage 2.3 "Connecting the 4.3 "Synchronous Measurement Function (3504 special...
- Page 20 1.4 Names and Functions of Parts...
-
Page 21: Measurement Preparations
2.1 Preparation Flowchart Measurement Chapter 2 Preparations Be sure to read "Operating Precautions" (p. 4) prior to setting up the unit. 2.1 Preparation Flowchart Check the power voltage. 2.2 "Checking the Power Voltage" (p. 16) Back Connect the power cord. 2.3 "Connecting the Power Cord"... -
Page 22: Checking The Power Voltage
2.2 Checking the Power Voltage 2.2 Checking the Power Voltage • Before turning the unit on, make sure the supply voltage matches that indicated on the its power connector. Connection to an improper supply voltage may damage the unit and present an electrical hazard. •... -
Page 23: Connecting The Power Cord
2.3 Connecting the Power Cord 2.3 Connecting the Power Cord To avoid electrical accidents and to maintain the safety specifications of this unit, connect the power cord only to a 3-contact (two-conductor + ground) outlet. • To avoid damaging the power cord, grasp the plug, not the cord, when unplugging it from the power outlet. -
Page 24: Connecting The Probes And Fixtures
For details such as the connection procedure for a fixture, refer to the corre- sponding instruction manual. • Use Hioki probes, fixtures (option), etc. Chapter 10 "Options" (p. 199) • If all four terminals are disconnected, a meaningless number may be dis- played on the unit. -
Page 25: Turning The Power On And Off
2.5 Turning the Power On and Off 2.5 Turning the Power On and Off Turning the power On Set the power switch on the rear of the unit to ON ( ). All LEDs on the front panel light up. The measurement conditions at startup are the same as the last time the power was turned off. - Page 26 2.5 Turning the Power On and Off...
-
Page 27: Chapter 3 Basic Measurement
_______________ When the power is turned If the fan does not spin or the “3504 (3504-10)” on, does the fan spin and do and version number indications are not dis- the “3504 (3504-10)” and played, the unit may be malfunctioning. - Page 28 3.1 Pre-Operation Inspection Items Countermeasure See: Are the measurement values If the measurement values are abnormal, check/ • Measurement Condi- indicated on the unit normal perform the following. tions: when measuring known • Are the measurement conditions set appro- 3.3.2 (page 25) samples such as standard priately? 3.3.3 (page 26)
-
Page 29: Measurement Example
3.2 Measurement Example 3.2 Measurement Example The following example shows a measurement operation using the 3504 (3504-10) Example The 9263 SMD Test Fixture is used for the measurement of mul- tilayer ceramic capacitors.: Necessary tools • 3504 (3504-10) • 9263 SMD Test Fixture •... - Page 30 3.2 Measurement Example Connect the sample to be measured to the 9263 SMD Test Fixture. For the connection method, refer to the in- struction manual supplied with the fixture. Check the measurement results.
-
Page 31: Setting The Measurement Conditions (Required Settings)
4.1 (page 41) surement mode. Select this when using BIN measurement 4.2 (page 50) mode. (Model 3504 only) The measurement conditions cannot be changed in comparator mode and BIN mode. Set them in normal measurement mode. 3.3.2 Measurement Frequency Set the measurement frequency. -
Page 32: Measurement Signal Level
3.3 Setting the Measurement Conditions (Required Settings) 3.3.3 Measurement Signal Level A voltage of ±12 V is generated at the L terminal when the L terminals are in an open state. Set the measurement signal level. Set a signal level appropriate for the sample to be measured. 500 mV, 1 V Measurement signal level: Press... -
Page 33: Measurement Speed
3.3 Setting the Measurement Conditions (Required Settings) 3.3.4 Measurement Speed Set the measurement speed. FAST NORM SLOW Measurement speed: Press to change the mode. The selected item is indicated by the lit LED lamp. FAST Measures at high speed. NORM Measures at normal speed. - Page 34 3.3 Setting the Measurement Conditions (Required Settings) Equivalent Circuit The 3504 (3504-10) unit analyses the measurement sample in terms of an equivalent circuit construction composed of a pure capacitive component (C) Mode and a pure resistive component (R), and calculates as though these compo- nents were connected in series, or alternatively connected in parallel.
-
Page 35: Measurement Range
3.3 Setting the Measurement Conditions (Required Settings) 3.3.6 Measurement Range Select a measurement range. Automatic selection is also possible. AUTO HOLD Measurement Range: Press to change the mode. The selected item is indicated by the lit LED lamp. AUTO The optimal measurement range is selected automatically. (Auto range) This is useful for the measurement of unknown samples. - Page 36 3.3 Setting the Measurement Conditions (Required Settings) • If the measurement values displayed on the unit are outside of the guar- anteed accuracy range, the HOLD LED flashes. • If the values are outside of the measurement value range, the following may be displayed.
-
Page 37: Measurement Conditions (Optional Settings)
3.4 Measurement Conditions (Optional Settings) 3.4 Measurement Conditions (Optional Set- tings) 3.4.1 Open Circuit Compensation • Short Circuit Com- pensation Open circuit compensation and short circuit compensation enable you to reduce the effect of impedance remaining in parts such as the probe or fixture and improve measurement accuracy. - Page 38 3.4 Measurement Conditions (Optional Settings) Performing Open Circuit Compensation, Short Circuit Compensation In normal measurement mode, press The state becomes as follows. • The OPEN LED flashes. • The “oPEn SEt” indication is displayed and the “SEt” indication flashes in the MAIN display area.
- Page 39 3.4 Measurement Conditions (Optional Settings) What if there is an • If is pressed, the unit enters short circuit compensation incorporate mode. (Proceed to Step 4. (page 33).) (The settings for open circuit com- error? pensation remain the same as last time.) •...
- Page 40 3.4 Measurement Conditions (Optional Settings) What if there is an • If is pressed, the unit returns to normal measurement mode. (The settings for short circuit compensation remain the same as last time.) error? • Are the measurement terminals in a short circuit state? Short circuit the measurement terminals and then perform compensation again.
- Page 41 3.4 Measurement Conditions (Optional Settings) Short circuit compensation is set to OFF and the state becomes as follows. • The SHORT LED goes out. • The “Short CAnSEL” indication lights up in the MAIN display area for one second. The unit returns to normal measurement mode. If you do not want to cancel short circuit compensation, press to return to normal measurement mode...
-
Page 42: Load Compensation
• When using multiple 3504 (3504-10) units, reduce the measurement errors of individual 3504 (3504-10) units and match the measurement values. • Match the measurement values of the 3504 (3504-10) unit to those of the reference measure device. The conditions that are currently set (frequency, level, range, equivalent cir- cuit mode, open circuit compensation, and short circuit compensation) are used as the measurement conditions for load compensation. - Page 43 3.4 Measurement Conditions (Optional Settings) Use the numeric keypad or arrow keys to enter a reference value for C and then press Use the numeric keypad to enter a number. (If you enter a number, each digit moves one place to the right.) Settable Range: 1 to 999999 You can use to move to the digit you want to change.
- Page 44 3.4 Measurement Conditions (Optional Settings) The conditions that are currently set (frequency, level, range, equivalent cir- cuit mode, open circuit compensation, and short circuit compensation) are used as the measurement conditions for load compensation. Changing the measurement conditions while load compensation in enabled results in load compensation being disabled.
-
Page 45: Trigger Signal
3.4 Measurement Conditions (Optional Settings) 3.4.3 Trigger Signal The internal trigger or the external trigger can be set. Trigger signal: Press to change the mode. • Continuous measurement is performed while auto- (Internal trigger matically generating an internal trigger signal. mode) •... - Page 46 3.4 Measurement Conditions (Optional Settings)
-
Page 47: Application Functions
4.1 Comparator Function Application Chapter 4 Functions 4.1 Comparator Function This function enables you to set the upper limit and lower limit values for each of C and D, and then indicates the judgment result with HI, IN, or LO in the comparator judgment result display area. - Page 48 4.1 Comparator Function Setting Judgment Mode First, set the judgment mode. (Select the count value setting or the deviation Δ percent [ %] setting.) The judgment modes are the same for both the comparator and BIN. In normal measurement mode, press The menu items are displayed at the top of the MAIN display area and the setting items are displayed at the bottom of the MAIN display area.
- Page 49 4.1 Comparator Function Setting the Upper Limit and Lower Limit Values for the Comparator Setting Workflow Normal measurement Switch to comparator measurement mode. The range is automatically set to HOLD. mode Comparator measurement Switch to the setting mode for the upper limit and lower limit values.
- Page 50 4.1 Comparator Function Setting Procedure to switch to the comparator measurement mode and press The state becomes as follows. • The COMP LED flashes. • The “C” indication at the top of the SUB display area flashes. Δ Δ • For the % setting: The % and REF LEDs light up.
- Page 51 4.1 Comparator Function Press to confirm C. The unit switches to the setting mode for the C upper limit value and the state becomes as follows. • The HI and LO LEDs light up. • The “C” indication at the top of the SUB display area lights up. •...
- Page 52 4.1 Comparator Function Press to confirm “d”. Δ (Only for the % setting) The unit switches to the setting mode for the D reference value and the state becomes as follows. • The “d” indication at the top of the SUB display area lights up. •...
- Page 53 4.1 Comparator Function Use the numeric keypad or arrow keys to enter a lower limit value for D and then press The D lower limit value is confirmed and the state becomes as follows. • The COMP LED flashes. • The “C” indication at the top of the SUB display area flashes. Δ...
- Page 54 In comparator measurement mode, press twice. The measurement mode LEDs light in the order of COMP BIN (only for 3504) NORM, and then the unit switches to normal measurement mode. Performing Comparator Measurement Follow the procedure below to perform comparator measurement.
- Page 55 4.1 Comparator Function Displaying Judgment Each of the judgment results for C and D is displayed in the comparator judg- ment result display area. Results The comparator judgment is not performed for parameters with the upper limit and lower limit values set to OFF. Measurement value judgment Upper limit and lower limit value...
-
Page 56: Bin Measurement Function (Only For 3504)
4.2 BIN Measurement Function (Only for 3504) 4.2 BIN Measurement Function (Only for 3504) This function enables you to set up to 14 categories of upper limit and lower limit values for C and one category of upper limit and lower limit values for D, and indicates the judgment results in the BIN judgment result display area. - Page 57 4.2 BIN Measurement Function (Only for 3504) Setting Judgment Mode First, set the judgment mode. (Select the count value setting or the devia- tion percent [ Δ %] setting.) The judgment modes are the same for both the comparator and BIN.
- Page 58 4.2 BIN Measurement Function (Only for 3504) Setting the Upper Limit and Lower Limit Values for the BIN Setting Workflow Normal measurement Switch to comparator measurement mode. mode Switch to BIN measurement mode. The range is automatically set to HOLD.
- Page 59 4.2 BIN Measurement Function (Only for 3504) Upper limit and lower limit Confirm D. value settings for D. Set the upper limit value for D. • Numeric keypad • Arrow keys Confirm the upper limit value. Set the lower limit value for D.
- Page 60 4.2 BIN Measurement Function (Only for 3504) Use the numeric keypad or arrow keys to enter a reference value for Δ (Only for the % setting) Use the numeric keypad to enter a number. (If you enter a number, each digit moves one place to the right.) Settable Range: 1 to 999999...
- Page 61 4.2 BIN Measurement Function (Only for 3504) Use the numeric keypad or arrow keys to enter a lower limit value for BIN1 and then press The BIN1 lower limit value is confirmed and the state becomes as follows. The “2” indication at the top of the SUB display area flashes.
- Page 62 4.2 BIN Measurement Function (Only for 3504) Press to confirm “d”. The unit switches to the setting mode for the D upper limit value and the state becomes as follows. • The HI and LO LEDs light up. • The “d” indication at the top of the SUB display area lights up.
- Page 63 4.2 BIN Measurement Function (Only for 3504) • The upper limit and lower limit values for the count setting and the refer- Δ ence value for the % setting become display count values that are inde- pendent of the measurement conditions. If the measurement conditions differ, the absolute values that signify the count values change.
- Page 64 4.2 BIN Measurement Function (Only for 3504) Performing BIN Measurement Follow the procedure below to perform BIN measurement. In normal measurement mode, press twice. The state becomes as follows (BIN measurement mode). • The BIN LED lights up. • For the deviation percent setting: Δ...
- Page 65 4.2 BIN Measurement Function (Only for 3504) Outputting Judgment • Output the judgment result for BIN (BIN1 to 14, OUT OF BINS, and D-NG) from EXT.I/O. Results 6.1 "Measurement Using EXT I/O" (p. 81) • The BIN judgment results (IN/NG) can be differentiated by beep tones.
-
Page 66: Synchronous Measurement Function (3504 Special Specification)
3504 units for measurement. Use the 9679 Connection Cable to connect the phase synchronization con- nector of this unit to that of another 3504 unit and set the same conditions for the measurement signals and frequencies of each of the units. - Page 67 Turn on the 3504 unit set to slave. Turn on the 3504 unit set to master. • If the 3504 units are turned on in the wrong order, the 3504 unit set to slave will not work properly. • When changing the frequency, first change the frequency on the 3504...
-
Page 68: Trigger Synchronous Output Function
4.4 Trigger Synchronous Output Function 4.4 Trigger Synchronous Output Function This function enables the measurement signal to be output after measure- ment is triggered and ensures that the signal is applied to the sample only during measurement. Thus reducing the generation of heat in the sample and decreasing electrode wear. - Page 69 4.4 Trigger Synchronous Output Function Press The unit returns to normal measurement mode. • Only use this function within the constant voltage measurement range. If it used outside the constant voltage measurement range, accurate values will not be displayed. 3.3.3 "Measurement Signal Level" (p. 26) •...
-
Page 70: Keylock Function
In the case of internal triggers: When the interface is a printer, the mea- surement values can be output to the printer. • The keylock can be set in normal measurement mode, comparator mea- surement mode, and BIN measurement mode (only for 3504). Canceling the Keylock Press and hold for at least two seconds. -
Page 71: Panel Save Function
• When the panel save function is used, the measurement mode and all of the measurement conditions are saved. The saved values include compar- ator and BIN (only for 3504) upper limit and lower limit values and the open circuit, short circuit, and load compensation values. -
Page 72: Panel Load Function
4.7 Panel Load Function 4.7 Panel Load Function The saved measurement values and compensation values can be loaded from internal memory. First, set the load condition. There are the following three load conditions. • All Loads the measurement conditions (frequency, level, range, upper limit and lower limit values, etc.) and the open circuit, short circuit, and load compensation values. - Page 73 4.7 Panel Load Function Press The load condition setting is confirmed. The “JudGE” indication is displayed in the MAIN display area. (Judgment mode selection screen) The load condition setting is not confirmed unless is pressed. Press The unit returns to the measurement mode it was in prior to the menu items being displayed.
- Page 74 4.7 Panel Load Function Use the numeric keypad or to select the panel number to load. The number is entered at the bottom of the MAIN display area. • Only saved numbers can be set. If a number that was not saved with the numeric keypad is set, the set number flashes and then changes to the nearest saved number after one second elapses.
-
Page 75: Printing Function
Printer with this unit. • At the time of shipment, the 9442 Printer is configured to be connected and used with the Hioki 3166 Clamp On Power HiTester. Be sure to change the settings of the software DIP SW. • For details on handling the printer, be sure to careful read the instruction manual supplied with the printer. - Page 76 4.8 Printing Function Press the ON LINE switch to change the settings. “Dip SW-1” is printed and the printer enters the configuration state for the software DIP SW1. Set the switches numbered 1 to 8 of DIP SW1 to either ON or OFF in accordance with the table below.
-
Page 77: Connection Procedure
Configure the printer and unit beforehand. 7.3.2 "Setting the Interface Communication Conditions" (p. 96) Procedure Turn off the power of the 3504 (3504-10) unit and the 9442 Printer . Connect the 9444 Connection Cable to the unit and the printer. 9442 Printer... -
Page 78: Printing
Turn on the power of the 9442 Printer . Turn on the power of the 3504 (3504-10) unit before you turn on the power of the 9442 Printer . If the 9442 Printer is on when you turn on the 3504 (3504-10) unit, undefined values may be sent from the 3504 (3504- 10) unit because of BA(TxD) being unstable. -
Page 79: Chapter 5 Other Settings
Other Settings 5.1 Setting Beep Tones Setting the Beep Tone for Judgment Results of Com- parator and BIN (only for 3504) Any of following three settings is possible for the beep tone. • A beep tone is not played. • A beep tone plays when there is an IN judgment (AND) for both C and D during comparator measurement and a judgment corresponding to a BIN number during BIN measurement. -
Page 80: Setting The Beep Tone For Key Operations
5.1 Setting Beep Tones to select a setting item. switches between “oFF” ↔ “in” ↔ “nG” ↔ “oFF”... Pressing Press The beep tone setting for judgment results is confirmed. The "bEEP_K" indi- cation is displayed in the MAIN display area. (Beep tone setting screen for key operations) The beep tone setting for judgment results is not confirmed unless is pressed. - Page 81 5.1 Setting Beep Tones After confirmation, "CLK" is displayed at the top of the MAIN display area if there is a synchronous measurement function and "SYnC" (trigger synchroni- zation output function setting screen) is displayed if there is no synchronous measurement function.
-
Page 82: Performing A System Reset
5.2 Performing a System Reset 5.2 Performing a System Reset Performing a system reset returns all the measurement conditions to their ini- tial states at the time of shipment. These measurement conditions also include measurement conditions saved for panels. Reset Procedure Turn the power of the unit off. - Page 83 :LF with EOI 3504-10 Interface :RS-232C Baud Rate :9600 bps Terminator :CR+LF Reset EXT I/O Judgment Results The settings of the RS-232C interface in the 3504 unit are initialized to 9600 bps for the baud rate and CR+LF for the terminator.
-
Page 84: Countermeasures Against Incorporation Of External Noise
5.3 Countermeasures Against Incorporation of External Noise 5.3 Countermeasures Against Incorpora- tion of External Noise The unit is designed not to malfunction as a result of noise incorporated from the probes, fixture, and power line. However, extremely large levels of noise may still cause measurement errors and malfunctions. -
Page 85: Countermeasures Against Incorporation Of Noise From The Input Line (Types Of Probe)
5.3 Countermeasures Against Incorporation of External Noise Attaching an EMI Suppression Ferrite Core to the Power Cord Pass the power cord through a commercially available EMI suppression fer- rite core and secure the core as close as possible to the AC power inlet of the unit in order to suppress the incorporation of noise from the power line. - Page 86 5.3 Countermeasures Against Incorporation of External Noise...
-
Page 87: Application Measurement
6.1.1 About the EXT I/O Connector The EXT I/O connector includes the following functions. • Output signal for comparator result • Output signal for BIN result (only for 3504) • Output end of measurement signal (/EOM) • Output analog end of measurement signal (/INDEX) •... - Page 88 Outputs a result if both judgments results are IN or if one of either the first or second parameters was not judged but the judgment result of the judged parameter is IN. BIN1 to BIN14 Outputs judgment results for BIN measurement (only for 3504). OUT OF BINS D-NG /INDEX This is the analog end of measurement signal.
-
Page 89: Circuit Configuration And Connections Of The Ext I/O Connector
6.1 Measurement Using EXT I/O 6.1.2 Circuit Configuration and Connections of the EXT I/O Connector • The range of power voltages that can be connected to the external DC power supply EXT DCV and EXT COM terminals is 5 to 24 V DC. Do not apply a voltage that exceeds +24 V DC. -
Page 90: About Input And Output Signals
6.1 Measurement Using EXT I/O 6.1.3 About Input and Output Signals Electrical Characteristics of Output Signals The output signals are photocoupler open collector output. Inside the unit, a Ω 3.3 k pull-up resistor is used to connect to the external DC power source (EXT DCV). - Page 91 6.1 Measurement Using EXT I/O Approximate Symbol Description Time 100 μ s TRIG width (LOW) : Trigger signal minimum time 200 μ s *1 From TRIG (LOW) to /INDEX (HIGH) : Time from trigger to circuit response /INDEX width (HIGH) : Minimum chuck time, switching chuck 1 ms *2 with /INDEX (LOW) is possible...
-
Page 92: About Measurement Times
The calculation time differs if comparator is executed. Measurement Mode (ms) Normal Measurement Mode Comparator Measurement Mode MAX 0.4 The calculation time differs if BIN is executed. (Only for 3504.) Measurement Mode (ms) Normal Measurement Mode BIN Measurement Mode MAX 0.4... -
Page 93: Measurement Of High Impedance Components
6.2 Measurement of High Impedance Components 6.2 Measurement of High Impedance Com- ponents Since high impedance components (for example, capacitors of 1 μ F or less) are susceptible to things like external induction noise, measurement values may become unstable. When this happens, stable measurement can be per- formed by measuring components on a metal plate connected to the GUARD terminal (shielding process). -
Page 94: Measurement Of In-Circuit Components
6.3 Measurement of In-circuit Components 6.3 Measurement of In-circuit Components 6.3.1 Measurement Using Guarding Technique Measure an in-circuit component after providing guarding. When measuring the capacitance of × capacitor C as shown in the diagram, ------------------ - measure the parallel capacitance by add- ing up the value of the current that flows through capacitor C and the values of... -
Page 95: Synchronous Measurement
6.3 Measurement of In-circuit Components 6.3.2 Synchronous Measurement You can measure an in-circuit component using multiple 3504 (3504-10) units. Configure the units for the state of synchronous measurement and set the measurement signal and frequency for each unit to the same conditions. - Page 96 6.3 Measurement of In-circuit Components...
-
Page 97: Controlling The Unit From A Pc
The following marks are used in this section to indicate whether a description applies to each of GP-IB and RS-232C. If no specific mark is shown, the description applies to both. Only for GP-IB (only for 3504) Only for RS-232C 7.1 Outline and Features You can connect a PC to the unit via the GP-IB interface or RS-232C inter- face and control the unit from the PC. -
Page 98: Specifications
5 to 9 V -9 to -5 V If a PC is used to read data from the 3504 (3504-10) unit immediately after the power of the 3504 (3504-10) unit is turned on, undefined values may be read because of BA(TxD) being unstable. After turning the power on, wait at least six seconds before starting to read data. -
Page 99: Gp-Ib Specifications (Only For 3504)
When using software (XON/XOFF control): When XOFF is received, the sending of data is halted. When XON is received, the sending of data is resumed. 7.2.2 GP-IB Specifications (Only for 3504) Interface Functions Supports all source handshake functions. Supports all acceptor handshake functions. -
Page 100: Connection And Setting Procedures
7.3 Connection and Setting Procedures 7.3 Connection and Setting Procedures 7.3.1 Connecting the RS-232C Cable / GP-IB Cable • Always turn both devices OFF when connecting and disconnecting an interface connector. Otherwise, an electric shock accident may occur. • To avoid damage to the unit, do not short-circuit the terminal and do not input voltage to the terminal. - Page 101 CB (CTS) SHELL Hardware control will not work properly if you use a cable that has CA(RTS) and CB(CTS) short-circuited. GP-IB Connector Pin Configuration (Only for 3504) Connect the GP-IB cable. Recommended Cables 9151-02 GP-IB Connector Cable (2 m) 9151-04 GP-IB Connector Cable (4 m)
-
Page 102: Setting The Interface Communication Conditions
7.3.2 Setting the Interface Communication Conditions This section describes how to set the communication conditions for the inter- face used by the 3504 (3504-10) unit. A GP-IB interface (only for 3504), RS-232C interface, and 9442 Printer can be set. Setting Procedure for Communication Conditions___________________... - Page 103 The setting items are configured as follows. • If "IF.GPib" was selected (for using the GP-IB interface) (only for 3504): 1. Use the numeric keypad or ÇÝto set an address (0 to 30) and then press to confirm the address.
-
Page 104: Remote Function
7.4 Remote Function When a connection is established to the interface and communication begins, the 3504 (3504-10) unit enters remote mode (remote control state) and the RMT LED lights up. Connecting to the interface: 7.3 "Connection and Setting Procedures" (p. 94) Starting communication: 7.5 "Communication Procedure"... -
Page 105: Things To Know Before Beginning Communication
7.6 Things to Know before Beginning Communication 7.6 Things to Know before Beginning Com- munication 7.6.1 About Message Formats Program Messages Program messages can be divided into command messages and query mes- sages. • Command Message A command for controlling the unit such as an instruction to configure a setting or reset the settings of the device. - Page 106 7.6 Things to Know before Beginning Communication Command Syntax Command names are selected for functions to be executed in a language that is as easy as possible to understand, and command names can also be shortened. The unshortened form of a command name is known as the "long form" and the shortened form of a command name is know as the "short form."...
- Page 107 • CR+LF • CR+LF • EOI • LF with EOI The 3504 (3504-10) unit analyzes a message after it has confirmed the message terminator. Depending on the interface setting, the following can be selected as termina- tors of response messages.
- Page 108 7.6 Things to Know before Beginning Communication Data Section A data section indicates the content of a command. In the unit, character data and decimal numeric data are used for data sections, and use differs depend- ing on the command. (1) Character Data Character data begins with an alphanumeric character and consists of alpha- betic characters and numbers.
- Page 109 A colon does not need to be added to the beginning of simple and compound command headers. However, Hioki recommends adding a colon to the begin- ning of these headers to prevent them from being mixed up with headers that have omissions and to prevent an incorrect operation from being performed.
-
Page 110: About The Output Queue And Input Buffer
7.6 Things to Know before Beginning Communication 7.6.2 About the Output Queue and Input Buffer Output Queue The output queue is the area in the unit where response messages are stored. Stored response messages are cleared once they are read by the controller of the PC. -
Page 111: About The Status Byte Register
7.6 Things to Know before Beginning Communication 7.6.3 About the Status Byte Register RS-232 reads the status bytes to find out the status of the unit. The unit adopts the IEEE488.2 defined status model for parts related to the serial polling performed by the service request function. A trigger for generat- ing a service request is called an event. - Page 112 7.6 Things to Know before Beginning Communication Status Byte Register (STB) A status byte register is an 8-bit register output from the unit to the controller during serial polling. If even one of the status byte register bits enabled by the service request enable register changes from "0"...
-
Page 113: About Event Registers
7.6 Things to Know before Beginning Communication 7.6.4 About Event Registers Standard Event Status Register (SESR) A standard event status register is an 8-bit register. If even one of the standard status byte register bits enabled by the standard event status enable register becomes “1,” bit 5 (ESB) of the status byte regis- ter becomes 1. - Page 114 7.6 Things to Know before Beginning Communication Standard Event Status Enable Register (SESER) When the standard event status enable register is used to set each of the bits to "1," the corresponding bits are enabled in the standard event status regis- ter.
- Page 115 7.6 Things to Know before Beginning Communication Event Status Register 0 (ESR0) Bit 7 Non-guaranteed accuracy bit Bit 6 CV operation error bit Bit 5 Unused Bit 4 First parameter over range bit Bit 3 First parameter under range bit Bit 2 Data incorporation end bit Bit 1...
- Page 116 7.6 Things to Know before Beginning Communication Event Status Register 0 (ESR0), 1 (ESR1), 2 (ESR2), and 3 (ESR3) and Event Status Enable Register 0 (ESER0), 1 (ESER1), 2 (ESER2), and 3 (ESER3) Status Byte Register (STB) bit4 bit3 bit2 bit1 bit0 Event Status Register 0 (ESR0)
- Page 117 Event Status Register 3 :ESR3? Event Status Enable Register 3 :ESE3? :ESE3 GP-IB Command (Only for 3504) The following commands can be used by interface functions. Command Description Go To Local Cancels the remote state and switches to the local state.
-
Page 118: Message List
7.7 Message List 7.7 Message List Common Commands Reference Command Data Section Explanation Error Page *CLS Clearing of the event register *1, 3 *ESE Numeric values 0 to Setting of the standard event status enable register *3, 5 255 (NR1) *ESE? Query of standard event status enable register *1, 2, 3... - Page 119 :BEEPer:KEY Setting of key input beep tone *2, 3 ON/ OFF :BEEPer:KEY? Query of key input beep tone *1, 2 BIN Function (Only for 3504) :BIN ON/OFF setting of BIN measurement *2, 3 ON/OFF :BIN? ON/OFF query of BIN measurement...
- Page 120 7.7 Message List Unique Commands Refer Command Data Section Explanation ence Error Page :BIN:FLIMit:DEViation? Query of upper limit and lower limit val- *1,2,3 <BIN Number> = Numer- ues of first parameter for BIN function in ic Value from 1 to 14 (NR1) deviation percent mode :BIN:FLIMit:REFerence...
- Page 121 7.7 Message List Unique Commands Refer Command Data Section Explanation ence Error Page :CIRCuit:AUTO? Query of automatic setting of equivalent *1, 2 circuit mode Comparator Function :COMParator ON/OFF setting of comparator function ON/ OFF *2, 3 :COMParator? ON/OFF query of comparator function *1, 2 :COMParator:DISPlay Setting of the SUB display area indica-...
- Page 122 7.7 Message List Unique Commands Refer Command Data Section Explanation ence Error Page :COMParator:SLIMit:DEViation <Reference Value>, Setting of reference value and upper *2, 3 <Lower Limit Value>, limit and lower limit values of second <Upper Limit Value> parameter for comparator function in <Reference Value>...
- Page 123 7.7 Message List Unique Commands Refer Command Data Section Explanation ence Error Page :CORRection:LOAD:DATA COEFficient/ZPH/CD Setting of output format for load compensa- *2, 3 tion values :FORMat :CORRection:LOAD:DATA Query of output format for load compensation *1, 2 values :FORMat? :CORRection:LOAD:REFerence <Reference Value 1>, Setting of load compensation condition refer- *2,3,5...
- Page 124 7.7 Message List Unique Commands Refer Command Data Section Explanation ence Error Page Communication Handshake Setting of RS-232C communication *2,3,7 OFF/X/HARDware/ :HANDshake BOTH handshake Query RS-232C communication *1,2,7 :HANDshake? handshake Header :HEADer Setting of header for response mes- *2, 3 ON/ OFF sages :HEADer?
- Page 125 7.7 Message List Unique Commands Refer Command Data Section Explanation ence Error Page Normal Measurement :MEASure? Query of measurement data *1, 2 Measurement Value Memory Function :MEMory? Query of measurement values saved to No Data/ALL *1,2,6 memory by the measurement value memory function :MEMory:CLEar Deleting data from memory of measure-...
- Page 126 7.7 Message List Unique Commands Refer Command Data Section Explanation ence Error Page Trigger Synchronous Output Function :SSOurce ON/ OFF Setting of trigger synchronous output *2,3,5 function :SSOurce? Query of trigger synchronous output *1, 2 function :SSOurce:WAIT <Wait Time 1>, <Wait Setting of wait time for trigger synchro- *2,3,5 Time 2>...
-
Page 127: Ability To Use Commands By State
Refer to the following table. ( Yes : Available No : Unavailable) Common Commands Normal Comparator Measurement Performing Reference Command Name Measurement Measurement Mode Compensation Page Mode Mode (Only for 3504) *CLS *ESE *ESE? *ESR? *IDN? *OPC *OPC? *RST *SRE *SRE? *STB? *TRG *TST? *WAI... - Page 128 7.8 Ability to Use Commands by State Unique Commands Normal Comparator Measurement Performing Reference Command Name Measurement Measurement Mode Compensation Page Mode Mode (Only for 3504) :CIRCuit :CIRCuit? :CIRCuit:AUTO :CIRCuit:AUTO? :COMParator :COMParator? :COMParator:DISPlay :COMParator:DISPlay? :COMParator:FLIMit:COUNt :COMParator:FLIMit:COUNt? :COMParator:FLIMit:DEViation :COMParator:FLIMit:DEViation? :COMParator:SLIMit:COUNt :COMParator:SLIMit:COUNt? :COMParator:SLIMit:DEViation...
- Page 129 7.8 Ability to Use Commands by State Unique Commands Normal Comparator Measurement Performing Reference Command Name Measurement Measurement Mode Compensation Page Mode Mode (Only for 3504) :ESR3? :FREQuency :FREQuency? :HANDshake :HANDshake? :HEADer :HEADer? :IO:RESult:RESet :IO:RESult:RESet? :JUDGment:MODE :JUDGment:MODE? :KEYLock :KEYLock? :LEVel :LEVel?
-
Page 130: Message Reference
Sets the measurement signal level to 500 This explanation is normally for when HEADER ON. (Ex- Query :LEVEL? cept for HEADER com- (when HEADER ON) :LEVEL 0.5 mand.) (when HEADER OFF) The measurement signal level is set to 500 Command/query (message) 3504 , 3504-10 Response (message) -
Page 131: Common Commands
D reference value: 0 Short circuit compensation OFF Upper and lower values: Output parameter for short circuit compensation val- BIN measurement (only Count setting value, de- for 3504) viation percent setting value Load compensation OFF, Reference value For both the first and (C,D)=(100000,0) - Page 132 7.9 Message Reference Query of Self Test Execution and Results Syntax Query ∗ TST? Response <Numeric Value> <Numeric Value> = 0 to 15 (NR1) Explanation Returns the results of the self check of the unit as an NR1 numeric value. No header is added to the response message.
- Page 133 7.9 Message Reference Continuing Execution of Commands after Command Processing Ends Syntax Command ∗ Example A;B;*WAI;C Executes *WAI and then the C command after processing ends for commands A and B. Current Frequency:1 kHz when in internal trigger state • When the *WAI command was not used (Send) :FREQuency 120;:MEASure? In this case, it is not certain which frequency measurement value will be sent in...
- Page 134 7.9 Message Reference Reading and Writing of Standard Event Status Enable Register (SESER) ∗ Syntax Command <Numeric Value> ∗ Query ESE? <Numeric Value> Response <Numeric Value> = 0 to 255 (NR1) Explanation Command Sets the mask pattern of the SESER to a numeric value from 0 to 255. A numeric value in NRf format is accepted but non significant digits are rounded off so the numeric The initial value (when the power is turned on) is 0.
- Page 135 7.9 Message Reference Reading and Writing of Service Request Enable Register (SRER) Syntax Command *SRE <Numeric Value> Query *SRE? <Numeric Value> Response <Numeric Value> = 0 to 255 (NR1) Explanation Command Sets the mask pattern of the SRER to a numeric value from 0 to 255. A numeric value in NRf format is accepted but non significant digits are rounded off so the numeric The values of bit 6 and the unused bit (bit 7) are ignored.
- Page 136 7.9 Message Reference Sampling Request Syntax Command ∗ Explanation Performs sampling once when there is an external trigger. Example :TRIGger EXTernal;*TRG;:MEASure?
-
Page 137: Unique Commands
7.9 Message Reference 7.9.2 Unique Commands Setting and Query of Comparator and BIN Judgment Beep Tone Setting Syntax Command :BEEPer:JUDGment <Character> Query :BEEPer:JUDGment? Response <Character> <Character> = IN/ NG/ OFF : Set so that the beep tone plays when the value is within the range : Set so that the beep tone plays when the value is outside the range... - Page 138 7.9 Message Reference Setting and Query of ON/OFF Setting of BIN Measurement (Only for 3504) Syntax Command :BIN <ON/ OFF> Query :BIN ? <ON/ OFF> Response : Starts BIN measurement OFF : Ends BIN measurement Explanation Command Sets the BIN measurement function to ON/OFF.
-
Page 139: Bin:flimit:count
DEFerence when the judgment mode is count value mode, an execu- tion error is generated. Setting and Query of Upper Limit and Lower Limit Values of First Parame- ter for BIN Function in Count Value Mode (Only for 3504) Syntax Command :BIN:FLIMit:COUNt <BIN Number>,<Lower Limit Value>, <Upper... -
Page 140: Bin:flimit:deviation
7.9 Message Reference Setting and Query of Upper Limit and Lower Limit Values of First Parame- ter for BIN Function in Deviation Percent Mode (Only for 3504) Syntax Command :BIN:FLIMit:DEViation <BIN Number>,<Lower Limit Value>, <Upper Limit Value> Query :BIN:FLIMit:DEViation? <BIN Number>... -
Page 141: Bin:slimit:count
Setting and Query of Upper Limit and Lower Limit Values of Second Parameter for BIN Function in Count Value Mode (Only for 3504) Command Syntax :BIN:SLIMit:COUNt <Lower Limit Value>, <Upper Limit Value>... -
Page 142: Bin:slimit:deviation
7.9 Message Reference Setting and Query of Upper Limit and Lower Limit Values of Second Parameter for BIN Function in Deviation Percent Mode (Only for 3504) Syntax Command :BIN:SLIMit:DEViation <Lower Limit Value>, <Upper Limit Value> Query :BIN:SLIMit:DEViation? Response <Lower Limit Value>, <Upper Limit Value>... - Page 143 7.9 Message Reference Setting and Query of Reference Value of Second Parameter for BIN Function in Deviation Percent Mode (Only for 3504) Syntax Command :BIN:SLIMit:REFerence <Reference Value> Query :BIN:SLIMit:REFerence? <Reference Value>=Numeric Value from 0 to 199000 (NR1) Response Explanation Command Sets the reference value of the second parameter in deviation percent mode.
- Page 144 7.9 Message Reference Automatic Setting and Query of Equivalent Circuit Syntax Command :CIRCuit:AUTO <ON/ OFF> Query :CIRCuit:AUTO? Response <ON/ OFF> : Switching is performed automatically. OFF : Switching is not performed automatically. Explanation Command Sets equivalent circuit mode to be switched automatically. Query Returns ON or OFF for the automatic setting of equivalent circuit mode.
- Page 145 7.9 Message Reference Setting and Query of SUB Display Indication during Comparator Measure- ment Syntax Command :COMParator:DISPlay <Character> Query :COMParator:DISPlay? Response <Character>=C/ D/ CREFerence/ DREFerence/ OFF : Sets the upper limit and lower limit values of C to be displayed in the SUB display area. : Sets the upper limit and lower limit values of D to be displayed in the SUB display area.
-
Page 146: Comparator:flimit:count
7.9 Message Reference Setting and Query of Upper Limit and Lower Limit Values of First Parame- ter for Comparator Function in Count Value Mode Syntax Command :COMParator:FLIMit:COUNt <Lower Limit Value>,<Upper Limit Value> Query :COMParator:FLIMit:COUNt? Response <Lower Limit Value>,<Upper Limit Value> <Lower Limit Value>... -
Page 147: Comparator:flimit:deviation
7.9 Message Reference Setting and Query of Reference Value and Upper Limit and Lower Limit Values of First Parameter for Comparator Function in Deviation Percent Mode Syntax Command :COMParator:FLIMit:DEViation <Reference Value> <Lower Limit Value>,<Upper Limit Value> Query :COMParator:FLIMit:DEViation? Response <Reference Value>,<Lower Limit Value>,<Upper Limit Value> <Reference Value>... -
Page 148: Comparator:slimit:count
7.9 Message Reference Setting and Query of Upper Limit and Lower Limit Values of Second Parameter for Comparator Function in Count Value Mode Syntax Command :COMParator:SLIMit:COUNt <Lower Limit Value>,<Upper Limit Value> Query :COMParator:SLIMit:COUNt? Response <Lower Limit Value>,<Upper Limit Value> <Lower Limit Value> = OFF/Numeric Value from 0 to 199000 (NR1) <Upper Limit Value>... -
Page 149: Comparator:slimit:deviation
7.9 Message Reference Setting and Query of Reference Value and Upper Limit and Lower Limit Values of Second Parameter for Comparator Function in Deviation Percent Mode Syntax Command :COMParator:SLIMit:DEViation <Reference Value> <Lower Limit Value>,<Upper Limit Value> Query :COMParator:SLIMit:DEViation? Response <Reference Value>,<Lower Limit Value>,<Upper Limit Value> <Reference Value>... -
Page 150: Correction:data
7.9 Message Reference Query of Compensation Values for Open Circuit and Short Circuit Com- pensation Syntax Query :CORRection:DATA? Output parameter for short circuit compensation values Response Output parameter ZPH: <Residual Impedance>=OFF/Numeric Value (NR3), <Phase Angle>=OFF/Numeric Value (NR2) Output parameter RSX: <Rs>=OFF/Numeric Value (NR3),<X>=OFF/Numeric Value (NR3) Output parameter LSRS: <Ls>=OFF/Numeric Value (NR3),<Rs>=OFF/Numeric Value (NR3) - Page 151 7.9 Message Reference Setting and Query of Open Circuit Compensation Function Syntax Command :CORRection:OPEN <Character> <Character>ALL/ON/OFF/RETurn :CORRection:OPEN? Query <Character>=ALL/ON/SPOT/OFF Explanation Command Sets the open circuit compensation function. If ALL or ON is set, open circuit compensation data begins to be incor- porated and then open circuit compensation is enabled after incorpo- ration ends.
- Page 152 7.9 Message Reference Setting and Query of Open Circuit Compensation Function Note About Recovering Compensation Values If :CORRection:OPEN RETurn is executed, open circuit compensation values that were disabled once can be recovered. However, if open cir- cuit compensation is executed again while compensation values are in a disabled state, the open circuit compensation values prior to the disabling of the values cannot be recovered.
- Page 153 7.9 Message Reference Setting and Query of Open Circuit Compensation Function Note Example of when compensation values cannot be recovered a. State when open circuit compensation was executed at any of the points from the state of B (the table below shows an example of when :CORRection:OPEN ON was executed at a frequency of 1 kHz and level of 0.5 V).
- Page 154 7.9 Message Reference Setting and Query of Short Circuit Compensation Function Syntax Command :CORRection:SHORt <Character> <Character>=ALL/ON/OFF/RETurn Query :CORRection:SHORt? <Character>=ALL/ON/SPOT/OFF Explanation Command Sets the short circuit compensation function. If ALL or ON is set, short circuit compensation data begins to be incor- porated and then short circuit compensation is enabled after incorpo- ration ends.
- Page 155 7.9 Message Reference Setting and Query of Output Parameter for Short Circuit Compensation Values Syntax Command :CORRection:SHORt:DATA:FORMat <Character> :CORRection:SHORt:DATA:FORMat? Query Response <Character>=ZPH/RSX/LSRS Explanation Command :Sets the output parameter format of short circuit compensation val- ues for when :CORRection:DATA? is executed. Query Returns the setting of the output parameter format for short circuit compensation values for when :CORRection:DATA? is executed.
- Page 156 7.9 Message Reference Setting and Query of Load Compensation Function Syntax Command :CORRection:LOAD <Character> <Character>=ON/OFF/RETurn :CORRection:LOAD? Query <Character>=ON/SPOT/OFF Explanation Command Sets the load compensation function. If ON is set, load compensation data begins to be incorporated based on the current measurement conditions (frequency, level, range, equivalent circuit mode, open circuit compensation, short circuit com- pensation) and reference values for load compensation conditions.
-
Page 157: Correction:load:data
7.9 Message Reference Query of Load Compensation Values Syntax Query :CORRection:LOAD:DATA? Output format COEFficient: Response <Impedance Compensation Coefficient>=OFF/Numeric Value (NR2), <Phase Compensation Coefficient>=OFF/Numeric Value (NR2) Output format ZPH: <Impedance>=OFF/Numeric Value (NR3), <Phase Angle>=OFF/Numeric Value (NR2) Output format CD: <C>=OFF/Numeric Value (NR3), <D>=OFF/Numeric Value (NR2) Explanation Query... -
Page 158: Correction:load:reference
7.9 Message Reference Setting and Query of Reference Values for Load Compensation Conditions Syntax Command :CORRection:LOAD:REFerence <Reference Value 1>, <Reference Value 2> Query :CORRection:LOAD:REFerence? Response <Reference Value 1> =Numeric Value from 1 to 999999 (NR1) <Reference Value 2> =Numeric Value from 0 to 199000 (NR1) Explanation Command Sets the reference values for the load compensation conditions <Reference Value 1>... - Page 159 7.9 Message Reference Setting and Query of Event Status Enable Register 0 (ESER0) Syntax Command :ESE0 <Numeric Value> Query :ESE0? <Numeric Value> Response <Numeric Value> = 0 to 255 (NR1) Explanation Command Sets the mask pattern of the ESER0 to a numeric value from 0 to 255. A numeric value in NRf format is accepted but non significant digits are rounded off so the numeric The initial value (when the power is turned on) is 0.
- Page 160 BIN3 BIN2 BIN1 Example Command :ESE2 1 Sets bit 0 of ESER2. :ESE2? Query Response :ESE2 1 (when HEADER ON) (when HEADER OFF) Bit 0 of ESER2 is set to 1. Note There is no BIN function for the 3504-10.
- Page 161 Query Response :ESE3 64 (when HEADER ON) (when HEADER OFF) Bit 6 of ESER3 is set to 1. Note There is no BIN function for the 3504-10. Query of Event Status Register 0 Syntax Query :ESR0? <Numeric Value> Response <Numeric Value>...
- Page 162 Returns the event status register 2 (ESR2) setting content as NR1 numeric data from 0 to 255 and then clears that content. No header is added to the response message. For the 3504-10, 0 is always returned. bit 7 bit 6...
- Page 163 7.9 Message Reference Setting and Query of Measurement Frequency Syntax Command :FREQuency <Numeric Value> Query :FREQuency? Response <Numeric Value> <Numeric Value>=120/ 1000 (NR1) Explanation Command Sets the measurement frequency. A numeric value in NRf format is accepted but non significant digits are rounded off so the numeric Query Returns the setting of the current measurement frequency as an NR1...
- Page 164 7.9 Message Reference Setting and Query of Header for Response Messages Syntax Command :HEADer <ON/ OFF> Query :HEADer? <ON/ OFF> Response Explanation Command Sets whether there is a header for response messages. This is initialized to ON when the power is turned on. Query Returns ON or OFF for the header setting of response messages.
- Page 165 7.9 Message Reference Setting and Query of Judgment Mode for Comparator and BIN Functions Syntax Command :JUDGment:MODE <Character> Query :JUDGment:MODE? <Character>=COUNt/DEViation Response COUNt : Count value mode DEViation: Deviation percent ( %) mode Explanation Command Selects the judgment mode. Query Returns the judgment mode as characters.
- Page 166 7.9 Message Reference Setting and Query of Measurement Signal Level Syntax Command :LEVel <Numeric Value> Query :LEVel? Response <Numeric Value> <Numeric Value>= 1/ 0.5 (NR2) 1: 1 V, 0.5: 500 mV Explanation Command Sets the measurement signal level. A numeric value in NRf format is accepted but non significant digits are rounded off so the numeric Query Returns the setting of the measurement signal level as an NR2...
- Page 167 7.9 Message Reference Setting and Query of Load Method Query :LOAD:TYPE? Response :LOAD:TYPE CORRECTION (when HEADER ON) CORRECTION (when HEADER OFF) Only the data of the compensation values are set to be loaded at load time.
-
Page 168: Measure
-1 : LO : Not judged (when the upper limit and lower limit values are OFF) • During BIN measurement (only for the 3504) <BIN Result>, <Measurement Value of C (NR3)>, <Measurement Value of D (NR2)> <BIN Result>=-1, -2, 1 to 14 1 to 14 BIN No. - Page 169 (when HEADER ON) 0,1.23456E-06,0,0.12345,-1 (when HEADER OFF) Indicates that the judgment result for C is IN and the judgment result for D is LO. • During BIN measurement (only for the 3504) Query :BIN ON Response :MEASure? 1,CP 1.23456E-06, D 0.12345 (when HEADER ON) 1,1.23456E-06, 0.12345...
-
Page 170: Memory
7.9 Message Reference Query of Measurement Values Saved to Memory by the Measurement Value Memory Function Syntax Query :MEMory? <Character> <Character>=No Data/ALL Response • When there is no data section <First Item in Memory><Message Terminator><Second Item in Memory><Message Terminator>...<nth Item in Memory> <Message Terminator>... - Page 171 7.9 Message Reference Deleting Data from Memory of Measurement Value Memory Function Syntax Command :MEMory:CLEar Explanation Command Deletes all measurement values saved to memory by the measure- ment value memory function. If this command is sent, subsequent measurement values are saved from the beginning of memory.
- Page 172 7.9 Message Reference Setting and Query of Measurement Range Syntax Command :RANGe <Numeric Value> Query :RANGe? Response <Numeric Value> <Numeric Value> = 1 to 10 (NR1) Explanation Command Sets the measurement range. A numeric value in NRf format is accepted but decimals are rounded off so the numeric value can be handled.
- Page 173 7.9 Message Reference Automatic Setting and Query of Measurement Range Syntax Command :RANGe:AUTO <ON/ OFF> Query :RANGe:AUTO? Response <ON/ OFF> Changes the measurement range automatically. OFF Does not change the measurement range automatically. Explanation Command Sets the measurement range to be changed automatically. Query Returns ON or OFF for the automatic setting of the measurement range.
- Page 174 Query :SPEEd? Response :SPEED NORMAL (when HEADER ON) NORMAL (when HEADER OFF) The measurement speed is set to normal speed. Setting and Query of Synchronous Measurement Function (Special Speci- fication for 3504) Syntax Command :SPHase <Character> Query :SPHase? Response <Character>...
- Page 175 7.9 Message Reference Setting and Query of Trigger Synchronous Output Function Syntax Command :SSOurce <ON/ OFF> Query :SSOurce? Response <ON/ OFF> : Enables the trigger synchronous output function. OFF : Disables the trigger synchronous output function. Explanation Command Enables/disables the trigger synchronous output function. Query Returns ON or OFF for the current setting of the trigger synchronous output function.
- Page 176 Sets the terminator to CR+LF. • GP-IB(3504ÇÃÇ›) Sets the terminator to LF+EOI. Query :TRANsmit:TERMinator? Response :TRANSMIT:TERMINATOR 0 (when HEADER ON) (when HEADER OFF) : The terminator is set to CR+LF. : The terminator is set to LF+EOI. (Only for the 3504)
- Page 177 7.9 Message Reference Setting and Query of Trigger Mode Syntax Command :TRIGger <Character> Query :TRIGger? Response <Character> <Character> = INTernal/ EXTernal INTernal : Internal trigger EXTernal : External trigger Explanation Command Sets the trigger mode. Query Returns the setting of the trigger mode as characters. Example Command :TRIGger INTernal...
-
Page 178: Response Format Of Queries For Returning Values
7.9 Message Reference 7.9.3 Response Format of Queries for Returning Values Measurement Values C(Capacitance)<NR3> E± 1: Mantissa part: 6 digit numeric value + decimal point 2: Exponent part: 2 digit numeric value When over and under range Over range: 999999E+99 Under range: -999999E+99 When CV operation error 777777E+77... - Page 179 7.9 Message Reference • Phase Compensation Values and Phase Angle < > 1:Sign part : The only sign added is the minus sign (-) when the value is negative 2: Numeric value part: Numeric value with 3 digits after the decimal point •...
-
Page 180: Initialized Items
Status byte register × Event register × × Enable register × × Current path × Header ON/OFF (Only for the 3504) : Initialized/ x: Not Initialized Initialization Method Upon Pow- *RST Clearing of *CLS Command Device* Command Item er On ×... -
Page 181: Creating Programs
7.11 Creating Programs This section describes an example of how to use the Windows development language Visual Basic 6.0 to operate the 3504 (3504-10) unit from a PC via RS-232C, incorporate measurement values, and save measurement values to a file. - Page 182 While the (phone) icon is selected, change the settings in the Properties window in accordance with the commu- nication conditions of the 3504 (3504- 10) unit and the operating conditions of the PC. Be especially sure to configure the following settings.
- Page 183 7.11 Creating Programs Select [Form1] in the Project window and then click to display the code of Form1 in the Code window. Follow the procedure below so that the VB window becomes as shown in the diagram below. • The layout and display items may differ depending on the operating environment, etc. Next, place buttons on Form1 as indicated by (a) and (b) and then write the program code in the window indicated by (c).
-
Page 184: Sample Programs
7.11 Creating Programs 7.11.2 Sample Programs The following shows sample programs for using VB to communicate with the 3504 (3504-10) unit via RS-232C, incorporate measurement values, and save measurement values to a file. The descriptions in the sample programs are as follows. - Page 185 PC from the 3504 (3504-10) unit. (f) Sends the CommandData character string to the 3504 (3504-10) unit. (g) Waits for the response character string to be returned from the 3504 (3504-10) unit. (h) Incorporates the response character string in the strbuf variable...
- Page 186 (c) Opens a "data.csv" file. However, if a file of the same name already exists, the previous "data.csv" file is deleted and a new file is created. (d) Sends to the 3504 (3504-10) unit the command for performing one mea- surement and returning the measurement result to the PC, and then incorporates the measurement result in the strbuf variable.
-
Page 187: Troubleshooting The Interface
Cannot perform RS-232C/GP-IB • Are the RS-232C settings (baud rate, data bit length, parity, and stop communication properly. bits) of the 3504 (3504-10) unit and PC the same? • Configure the message terminator (delimiter) of the controller prop- erly. "Message Terminator" (p. 101) - Page 188 7.12 Troubleshooting the Interface Symptom Cause/Solution Service requests are sometimes • Are the service request enable register and each event status enable register configured properly? not generated. *CLS • At the end of the SRQ process subroutine, use an command to clear all event registers.
-
Page 189: Device Document Requirements (Only For The 3504)
Standard implementation method related information based on the IEEE 488.2 standard (1) Functionality of IEEE 488.1 interface function This is included in 7.2.2 "GP-IB Specifications (Only for 3504)" (p. 93). (2) Explanation of operation when the address is set to other than a value from 0 to 30. - Page 190 7.13 Device Document Requirements (Only for the 3504) (6) List of the functional elements used for device-specific commands and explanation of whether to use compound command program headers The following are used • Program message • Program message terminator • Program message unit •...
- Page 191 7.13 Device Document Requirements (Only for the 3504) (15) Use/non use of the macro command In the case of the macro command being executed, the maximum macro label length, the maximum block length used to define the macro, and how to process reflection when extending the macro.
- Page 192 7.13 Device Document Requirements (Only for the 3504)
-
Page 193: Chapter 8 Specifications
The setting and canceling of this function by pressing a key on the front pan- el is possible BIN Measurement (Only for the The setting of 14 categories for C and upper limit and lower limit values for 3504) D is possible (absolute value setting, % setting) Comparator... - Page 194 Approx. 6 years tery) Lifespan Interfaces EXT I/O (standard) RS-232C Interface (standard) GP-IB Interface (only for the 3504) Standard Accessories • 2 pin power cord with ground • Instruction manual • Spare fuse for power supply (Select from 100 to 120 V and 220 to 240 V in accordance with destina- tion) For 100 to 120V: 250VF1.0AL φ...
- Page 195 8.1 Basic Specifications Basic Specifications Options Probes and Fixtures • 9140 4-Terminal Probe • 9143 Pincher Probe • 9261 Test Fixture • 9262 Test Fixture • 9263 SMD Test Fixture • 9677 SMD Test Fixture • 9699 SMD Test Fixture Printer Related •...
-
Page 196: Accuracy
8.2 Accuracy 8.2 Accuracy Basic Accuracy ± Guaranteed accuracy for temperature and humidity ranges: 23 5°C, 80% RH or less (no condensation) Warm-up time: 1 hour × × Measurement Accuracy = Basic Accuracy Measurement Signal Level Coefficient Measurement Speed × ×... - Page 197 2 mF • When D>0.1, the measurement values are the reference values. • Using the 3504 or 3504-10 to measure a high-volume capacitor that uses a transformer may cause the transformer to enter into the feedback loop of the constant voltage (CV), causing the loop to become unstable, which can lead to problems such as measurement inaccuracies and CV error display.
-
Page 198: Measurement Parameters And Arithmetic Expressions
8.3 Measurement Parameters and Arithmetic Expressions 8.3 Measurement Parameters and Arith- metic Expressions In general, impedance Z is used to evaluate the characteristics of, for exam- ple, circuit components. Measure voltage and current vectors for circuit components relative to AC measurement frequency signals. - Page 199 8.3 Measurement Parameters and Arithmetic Expressions The unit calculates each of the elements using the following arithmetic expressions, based on a voltage V applied between terminals of the mea- surement sample, a current I that flows through the sample at that time, a θ...
- Page 200 8.3 Measurement Parameters and Arithmetic Expressions...
-
Page 201: Maintenance And Service
9.1 Inspection, Repair, and Cleaning To ensure safe use, periodically inspect the unit Never modify the unit. Only Hioki service engineers should disassem- ble or repair the unit. Failure to observe these precautions may result in fire, electric shock, or injury. - Page 202 Measurement val- Is the slave setting set? Set the setting to master ues are not dis- 4.3 "Synchronous Measurement Func- tion (3504 special specification)" (p. 60) played. Is the unit in a trigger synchronous output Cancel the trigger synchronous output state? state 4.4 "Trigger Synchronous Output Func-...
-
Page 203: Replacing The Power Fuse
9.2 Replacing the Power Fuse 9.2 Replacing the Power Fuse • To avoid an electric accident, be sure to turn the power switch off and disconnect the power cord before replacing the fuse or switching the power voltage. Afterwards, be sure to check that the power voltage set for the power switch with power selectors on the rear of the unit and the voltage to be used match before reconnecting the power cord. -
Page 204: Discarding The Unit
9.3 Discarding the Unit 9.3 Discarding the Unit The unit uses a lithium battery as power for storing measurement conditions. • To avoidelectric shock, turn off the power switch and disconnect the power cord, probes, and fixtures before removing the lithium battery. •... -
Page 205: Options
Chapter 10 Options Chapter 10 Options Probes 9140 4-Terminal Probe This is an alligator clip measurement probe. It is a versatile probe that can be clipped on wires ranging from relatively thin to thick. 9143 Pincher Probe This pincher probe is convenient for measur- ing components such as chips. - Page 206 Chapter 10 Options Fixtures 9261 Test Fixture It is relatively easy to attach and remove samples when you use this type of fixture. 9262 Test Fixture 9263 SMD Test Fixture This fixture is suitable for measuring compo- nents such as chips. 9677 SMD Test Fixture 9699 SMD Test Fixture...
- Page 207 Chapter 10 Options Connection Cables 9679 Connection Cable Use this cable when using the synchronous measurement function Printer 9442 Printer Use this cable when using the synchronous measurement function • 9443-01 AC Adapter (when using the printer in Japan) • 9443-02 AC Adapter (when using the printer in the EU) •...
- Page 208 Chapter 10 Options...
-
Page 209: Appendix
Appendix 1 Mounting the Unit in a Rack Appendix Appendix 1 Mounting the Unit in a Rack You can remove the screws on the sides of the unit and attach rack mounting brackets. To avoid damage to the unit or an electrical accident, be sure to observe the following precautions on using screws. - Page 210 Appendix 1 Mounting the Unit in a Rack M3 x 6 mm Remove the support legs from the bot- tom of the unit and screws from the side covers (4 screws at the front). M4 x 6 mm Insert spacers on both sides of the unit and attach the mounting brackets with M4 x 10 mm screws.
-
Page 211: Appendix 2 External View
Appendix 2 External View Appendix 2 External View (Unit: mm) - Page 212 Appendix 2 External View...
-
Page 213: Index
Index Index Accuracy ............190 Judgment results .......... 49, 58 Arithmetic expressions ........192 MAIN display ............11 Beep tones ............73 Measurement parameters ........ 192 BIN measurement function .........50 Measurement times ..........86 Message terminator ......... 101 Cleaning ............196 Command error ..........107 Noise .............. - Page 214 Index System reset ............76 Timing of input signals ........84 Trigger synchronous output function ....62 Troubleshooting the interface ......181 Unique event status registers (ESR0, ESR1, ESR2, ESR3) ......108...
Need help?
Do you have a question about the 3504 and is the answer not in the manual?
Questions and answers