GeoMax Zenith40 GNSS Series Installation Manual
Hide thumbs
Also See for Zenith40 GNSS Series:
- User manual (34 pages) ,
- Installation manual (17 pages)

Related Manuals for GeoMax Zenith40 GNSS Series


Summary of Contents for GeoMax Zenith40 GNSS Series
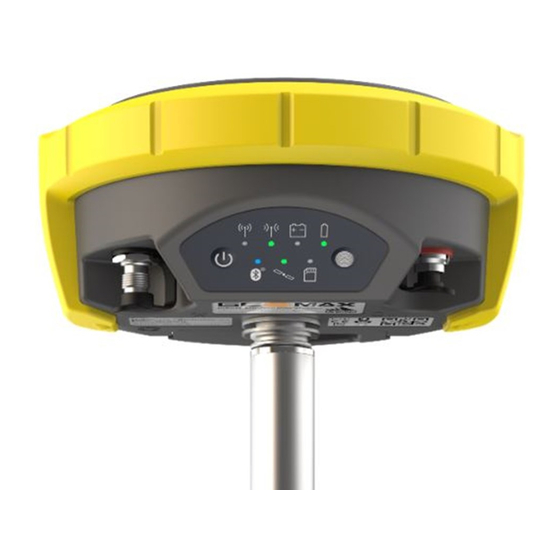
- Page 1 GeoMax GNSS Zenith40 Series Installation Guide Version 1.00 English - 1 - Zenith40 GNSS Series Installation Guide © 2019 GeoMax AG, Widnau Switzerland...
-
Page 2: Table Of Contents
Antenna Management ................12 Installation of licences ................14 Disconnecting from the PC ................. 15 ............... 16 QUIPMENT SETUP Rover setup ....................16 Base setup ....................17 - 2 - Zenith40 GNSS Series Installation Guide © 2019 GeoMax AG, Widnau Switzerland... -
Page 3: Introduction
40 F ENITH IRMWARE ON ICRO CARD Visit GeoMax Downloads to check for the current versions of both System and GNSS firmware’s. Download the files and store them on the provided MicroSD card in the SYSTEM folder. 2.2 B ATTERY HARGING 2.2.1 Zenith40 receiver... - Page 4 USB port of the PC, the cable's drivers will be initialized automatically and the aforementioned WMDC will appear showing that the receiver is connected. - 4 - Zenith40 GNSS Series Installation Guide © 2019 GeoMax AG, Widnau Switzerland...
-
Page 5: Receiver Connection With Zenith Manager
ENITH ANAGER 3.2.1 Installation of Zenith Manager Locate the Zenith Manager software on the Zenith40 folder on the GeoMax partner area and download it to your PC. Run Setup_Zenith_Manager.exe and follow the instructions of the installer. Click on the Zenith Manager icon of your desktop to launch it. -
Page 6: Checking The Receiver Firmware Version
Before using the receiver, it should be checked that the loaded firmware is the latest version. Once connected with Manager, the installed firmware’s can be seen on the Information panel in the left side. - 6 - Zenith40 GNSS Series Installation Guide © 2019 GeoMax AG, Widnau Switzerland... - Page 7 If the firmware is older as the one downloaded from the GeoMax partner Area, it is recommended to perform an update. To update the receiver firmware, download the respective *.FW file, copy to the SYSTEM directory on a MicroSD card and insert it into the Zenith40 receiver.
-
Page 8: Receiver Configuration
GPRS, select Configure from the bottom of the configuration panel and the GNSS configuration window will appear. There it will be possible to configure the Zenith40 as needed. - 8 - Zenith40 GNSS Series Installation Guide © 2019 GeoMax AG, Widnau Switzerland... -
Page 9: Changing The Uhf Radio Settings
At the Radio Settings field the internal radio can be configured with default channel, protocol type, channel spacing, transmission power and correction format. - 9 - Zenith40 GNSS Series Installation Guide © 2019 GeoMax AG, Widnau Switzerland... - Page 10 Click Finish to configure the receiver with the selected settings. - 10 - Zenith40 GNSS Series Installation Guide © 2019 GeoMax AG, Widnau Switzerland...
-
Page 11: Changing The Gprs Settings
After choosing the rest of the settings click Finish to configure the receiver. To start receiving corrections select Connect GPRS at the bottom in the status panel. - 11 - Zenith40 GNSS Series Installation Guide © 2019 GeoMax AG, Widnau Switzerland... -
Page 12: Antenna Management
All available GeoMax GNSS antennas are currently supported in the antenna management by default. If your Base-Rover set up will include a non GeoMax device, you should make sure the base antenna is recognised on the Zenith40. To do that, it’s needed to add this specific antenna manually with the Zenith Manager. - Page 13 L1 east PCO value in meters: -0.0002 L1 north PCO value in meters: -0.0002 L2 vertical PCO value in meters: 0.0887 L2 east PCO value in meters: 0 - 13 - Zenith40 GNSS Series Installation Guide © 2019 GeoMax AG, Widnau Switzerland...
-
Page 14: Installation Of Licences
Zenith40. The licence key file can be uploaded onto the receiver by using Zenith Manager. With the - 14 - Zenith40 GNSS Series Installation Guide © 2019 GeoMax AG, Widnau Switzerland... -
Page 15: Disconnecting From The Pc
Yes. If the connection was via cable, it may now be removed and the Zenith40 is ready for use. - 15 - Zenith40 GNSS Series Installation Guide © 2019 GeoMax AG, Widnau Switzerland... -
Page 16: Equipment Setup
When working with the UHF radio, ensure the correct frequency and protocol are set as described in section 3.5. Attach a radio antenna suitable for the set frequency. The following UHF antennas can be ordered from GeoMax: - 16 -... -
Page 17: Base Setup
For long range RTK, a high powered radio can be used at the base station. Available from GeoMax is the 789359 Satel EASyPro 35W radio. This radio is connected to the receiver and an external power supply, with the 797024 ZDC225 cable. The cable needs to be connected to the Lemo port of the receiver.
Need help?
Do you have a question about the Zenith40 GNSS Series and is the answer not in the manual?
Questions and answers