GeoMax Zoom90 User Manual
Hide thumbs
Also See for Zoom90:
- Quick manual (116 pages) ,
- Installation manual (14 pages) ,
- User manual (72 pages)
Table of Contents
Advertisement
Quick Links
Advertisement
Table of Contents

Related Manuals for GeoMax Zoom90


Summary of Contents for GeoMax Zoom90
- Page 1 GeoMax Zoom90 User Manual Version 1.1 English...
- Page 2 Read carefully through the User Manual before you switch on the product. Product Identification The model and serial number of your product are indicated on the type plate. Always refer to this information when you need to contact your agency or GeoMax authorised service centre. Trademarks •...
-
Page 3: Table Of Contents
Setting up for Remote Control (with the RadioHandle) Connecting to a Personal Computer Power Functions Batteries 4.7.1 Operating Principles 4.7.2 Battery for the Zoom90 Instrument Working with the Memory Device Working with Bluetooth 4.10 LED Indicators 4.11 Guidelines for Correct Results... - Page 4 RadioHandle 8.7.3 Dangerous Goods Regulations General Technical Data of the Instrument Scale Correction 8.10 Reduction Formulas Software Licence Agreement Glossary Appendix A Menu Tree Appendix B Directory Structure Appendix C Pin Assignments and Sockets Zoom90 | 4 Table of Contents...
-
Page 5: Safety Directions
• Use after misappropriation. • Use of products with obvious damages or defects. • Use with accessories from other manufacturers without the prior explicit approval of GeoMax. • Inadequate safeguards at the working site. • Aiming directly into the sun. -
Page 6: Limits Of Use
Responsibilities Manufacturer of the GeoMax AG, CH-9443 Widnau, hereinafter referred to as GeoMax, is responsible for supplying the product, product including the user manual and original accessories, in a safe condition. - Page 7 Always prevent access to the product by unauthorised personnel. Product-specific treatment and waste management information can be downloaded from the GeoMax website at http://www.geomax-positioning.com/treatment or received from your GeoMax distributor. Only GeoMax authorised service centres are entitled to repair these products.
-
Page 8: Laser Classification
User Manual. Description Value Wavelength 658 nm Pulse duration 800 ps Pulse repetition frequency (PRF) 100 MHz Maximum average radiant power 0.33 mW Beam divergance 1.5 mrad x 3 mrad Labelling a) Laser beam 009823_001 Zoom90 | 8 Safety Directions... -
Page 9: Distance, Measurements Without Reflectors
(1) This device may not cause harmful interference, and (2) This device must accept any interference received, including interference that may cause undesired operation. λ = 660 nm Pav = 4.8mW tp = 800ps IEC 60825-1:2014 009828_001 Zoom90 | 9 Safety Directions... -
Page 10: Red Laser Pointer
(1) This device may not cause harmful interference, and (2) This device must accept any interference received, including interference that may cause undesired operation. λ = 660 nm Pav = 4.8mW tp = 800ps IEC 60825-1:2014 009828_001 Zoom90 | 10 Safety Directions... -
Page 11: Automatic Prism Aiming Aim
User Manual. Description Value Wavelength 850 nm Maximum average radiant power 11 mW Pulse duration 20 ns, 40 ns Pulse repetition frequency (PRF) 24.4 kHz Beam divergance 0.4 mrad x 700 mrad Zoom90 | 11 Safety Directions... -
Page 12: Navigation Light (Navlight)
The product described in this section, is classified as exempt group in accordance with IEC 62471 (2006-07) and does not pose any hazard provided that the product is used and maintained in accordance with this user manual. a) LED beam red 009830_001 b) LED beam yellow Zoom90 | 12 Safety Directions... -
Page 13: Laser Plummet
Electromagnetic radiation can cause disturbances in other equipment. WARNING Although the product meets the strict regulations and standards which are in force in this respect, GeoMax cannot completely exclude the possibility that other equipment may be disturbed. There is a risk that disturbances may be caused in other equipment if the product is used with accessories... -
Page 14: Fcc Statement, Applicable In U
Disturbances caused by electromagnetic radiation can result in erroneous measurements. CAUTION Although the product meets the strict regulations and standards which are in force in this respect, GeoMax cannot completely exclude the possibility that the product may be disturbed by intense electromagnetic radiation, for example, near radio transmitters, two-way radios or diesel generators. - Page 15 (2) this device Made in ..must accept any Contains interference received, transmitter module: including interference FCC-ID: PVH0946 that may cause IC: 5325A-0946 S.No.: XXXXXX undesired operation. 009109_001 Zoom90 | 15 Safety Directions...
-
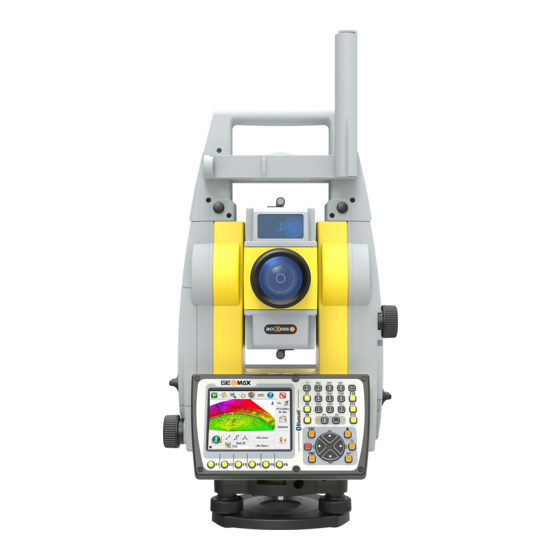
Page 16: Description Of The System
A component is the ZRT82 RadioHandle. It is an instrument carry handle with an integrated radio modem with attached antenna. Communication side Communication side cover with integrated Bluetooth, SD card slot and USB port is cover standard for a Zoom90 instrument. Zoom90 | 16 Description of the System... -
Page 17: System Concept
Software for Description All Zoom90 models The GeoMax Toolkit is stored in the flash RAM of the Zoom90 instrument. Software update instructions • Download the most recent Zoom90 firmware file from http://www.geomax-positioning.com. -
Page 18: Power Concept
Unplugging connecting cables or removing the SD card or USB stick during the measurement can cause loss of data. Only remove the SD card or USB stick or unplug connecting cables when the Zoom90 instru- ment is switched off. -
Page 19: Instrument Components
Scout, transmitter Scout, receiver g) Coaxial optics for angle and distance measure- ment, and exit port of visible laser beam for distance measurements h) Communication side cover Horizontal drive 009835_001 Tribrach securing screw Zoom90 | 19 Description of the System... - Page 20 Compartment lid b) USB device port (mini AB OTG) c) USB host port for USB stick d) SD card port 009838_001 Instrument components for Robotic a) RadioHandle b) Communication side cover 009839_001 Zoom90 | 20 Description of the System...
-
Page 21: User Interface
Access: <FNC> + <0> g) Level key/ Access: <FNC> + <.> h) ESC User key* * User key is not used by GeoMax Toolkit. Keys Function Function keys F1-F6 Correspond to six softkeys that appear on the bottom of the screen when the screen is activated. -
Page 22: Softkeys
Edit fields ESC Deletes any change and restores the previous value. Moves the cursor to the left Moves the cursor to the right. Sets focus to the previous setting. Sets focus to the next setting. Zoom90 | 22 User Interface... - Page 23 In the alphanumeric character set "+" and "-" are treated as normal alphanumeric char- acters with no mathematical function. “+” / “-” only appear in front of an entry. In this example selecting 1 on an alphanumeric keyboard starts Level. Zoom90 | 23 User Interface...
-
Page 24: Operation
Main Menu Description The MAIN MENU is the starting place for accessing most functionality of the instrument. It is displayed when selecting the Zoom90 basic application from the WinCE main screen. MAIN MENU Description of the MAIN MENU functions Function... -
Page 25: Setting Up The Tps Instrument
Turn on the instrument by pressing . Activate the laser plummet and electronic level by pressing the key combination <FNC>+<.> or by starting up the GeoMax Toolkit and selecting from MAIN MENU: Level. Move the tripod legs (1) and use the tribrach footscrews (6) to centre the plummet (4) over the ground point. -
Page 26: Setting Up For Remote Control (With The Radiohandle)
• _USB_64bit_itanium.exe The InstallShield Wizard window appears. Ensure that all GeoMax devices are disconnected from your PC before you continue! Next>. The Ready to Install the Program window appears. Install. The drivers will be installed on your PC. ... - Page 27 Allow USB connections inside the Connection Settings window of ActiveSync. Click Explore in ActiveSync. The folders on the Zoom90 instrument are displayed under Mobile Devices. For PCs with Windows Vista or Windows 7/Windows 8 operating system: Windows Mobile Device Center starts up automatically. If does not start automati- cally, start Windows Mobile Device Center.
-
Page 28: Power Functions
• For Li-Ion batteries, a single discharging and charging cycle is sufficient. We recommend carrying out the process when the battery capacity indicated on the charger or on a GeoMax product deviates signif- icantly from the actual battery capacity available. -
Page 29: Working With The Memory Device
To remove the SD card, gently press on the top of the card to release it from the slot. Close the lid and turn the knob to the horizontal position to lock the communication compart- ment. Insert and Remove a USB Stick Step-by-Step 009859_001 Zoom90 | 29 Operation... -
Page 30: Working With Bluetooth
Refer to the device user manual for information on how to configure and search for a Bluetooth connection. The instrument will appear on the external device. Some devices ask for the identification number of the Bluetooth. The default number for a Zoom90 Bluetooth is 0000. This can be changed by: •... -
Page 31: Guidelines For Correct Results
If a temporary obstruction, for example a passing vehicle, heavy rain, fog or snow is between the instrument and the point to be measured, the EDM may measure to the obstruction. Do not measure with two instruments to the same target simultaneously to avoid getting mixed return signals. Zoom90 | 31 Operation... - Page 32 If the prism location is changed too quickly, the target may be lost. Make sure that the speed does not exceed the figure given in the technical data. Zoom90 | 32 Operation...
-
Page 33: Settings
US feet-inch-1/16 inch [ft]. Temperature Sets the units shown for all temperature fields. °C Degree Celsius. °F Degree Fahrenheit. Pressure Sets the units shown for all pressure fields. Hecto Pascal. mbar Millibar. mmHg Millimeter mercury. inHg Inch mercury. Zoom90 | 33 Settings... -
Page 34: Date/Time Settings
Communication is via the serial interface. Bluetooth Handle Communication is via Bluetooth Handle. This option is only available if the ZRT81 or ZRT82 bluetooth handle is fitted on the Zoom90. Internal Bluetooth Communication is via Internal Bluetooth. Press OK to confirm or CONF to proceed to configuration mode. - Page 35 Number of bits in a block of digital data. Data transfer is realised with 7 databits. Data transfer is realised with 8 databits. Stop bits Number of bits at the end of a block of digital data. Flow control None Zoom90 | 35 Settings...
-
Page 36: Atmospheric Settings
Sets the humidity. Atmos PPM The atmospheric ppm is calculated from the values in the previous fields. Refr. Coeff Refraction coefficient to be used for calculation. Use Refr.C. If YES, refraction correction is applied to measurements. Zoom90 | 36 Settings... -
Page 37: Apps
Apps Update Description The GeoMax Toolkit software can be loaded via a SD card. This process is described below. Access 1) Select Apps from the MAIN MENU. 2) Select Update from the APPS menu. Never disconnect power supply during data transfer. Battery capacity must be at least 75% capacity before commencing the upload. -
Page 38: Preparation
This means that the horizontal and vertical angles are corrected twice: first by the determined AiM errors for Hz and V, and then by the individual small deviations of the current aiming. Zoom90 | 38 Apps... -
Page 39: Calibrate (A, L, T, I, C And Aim)
Press OK to measure and continue to the next step. Motorised instruments change automatically to the other face. It is recommended carefully fine-point to the target manually. 180° 180° 009864_001 Press OK to measure and continue to the next step. Zoom90 | 39 Apps... -
Page 40: Adjusting The Circular Level Of The Instrument And Tribrach
Using the tribrach footscrews, level the instrument with the electronic level. Access the electronic level and laser plummet by using the key-combination <FNC>+<.> or by starting GeoMax Toolkit and go to MAIN MENU screen and select Level. Check the position of the circular level on the instrument and tribrach. -
Page 41: Inspecting The Laser Plummet Of The Instrument
Access the electronic level and laser plummet by using the key-combination <FNC>+<.> or by starting GeoMax Toolkit and go to MAIN MENU screen and select Level. The laser plummet is switched on automatically when the Level up screen is entered. Adjust the laser plummet intensity. -
Page 42: Format
1) Select Apps from the MAIN MENU. 2) Select Format from the APPS menu. Before selecting Format, to format the System, ensure that all important data is first transferred to a computer. Keys, uploaded firmware and languages are deleted by formatting. Zoom90 | 42 Apps... -
Page 43: Care And Transport
Shipping When transporting the product by rail, air or sea, always use the complete original GeoMax packaging, container and cardboard box, or its equivalent, to protect against shock and vibration. -
Page 44: Maintenance
Maintenance An inspection of the motorisation in motorised instruments must be done in a GeoMax authorised service centre. GeoMax recommends an inspection of the product every 12 months. For instruments which are in intensive or permanent use, for example tunnelling or monitoring, the recom- mended inspection cycle may be reduced. -
Page 45: Technical Data
Beam interruptions, severe heat shimmer and moving objects within the beam path can result in devia- tions of the specified accuracy. The display resolution is 0.1 mm. Principle: Phase measurement Characteristics Type: Coaxial, visible red laser Carrier wave: 658 nm Measuring system: System analyser basis 100 MHz - 150 MHz Zoom90 | 45 Technical Data... -
Page 46: Distance Measurement Without Reflectors
[s] Long Range 5 mm + 2 ppm Beam interruptions, severe heat shimmer and moving objects within the beam path can result in devia- tions of the specified accuracy. The display resolution is 0.1 mm. Zoom90 | 46 Technical Data... -
Page 47: Automatic Prism Aiming Aim
3” 2” ZPR1 1” GRZ122 ZPR100, ZMP100 009867_001 GeoMax ZPR1 prism (360°) GeoMax GRZ122 prism (360°) GeoMax circular prisms and GeoMax circular Mini prisms AiM accuracy [mm] Distance measurement [m] " Instrument angle accuracy ["] Zoom90 | 47 Technical Data... -
Page 48: Prism Search (Scout)
FCC Part 15 (applicable in US) regulations • Hereby, GeoMax AG, declares that the Zoom90 is in compliance with the essential requirements and other relevant provisions of Directive 1999/5/EC. The declaration of conformity is available from http://www.geomax-positioning.com/Downloads.htm. Class 1 equipment according European Directive 1999/5/EC (R&TTE) can be placed on the market and be put into service without restrictions in any EEA member state. -
Page 49: Radiohandle
IATA Dangerous Goods Regulations. GeoMax has developed Guidelines on “How to carry GeoMax products” and “How to ship GeoMax products” with Lithium batteries. Before any transportation of a GeoMax product, we ask you to consult these guidelines on our web page (http://www.geomax-positioning.com/dgr) to ensure... - Page 50 Endless horizontal and vertical drives Maximum rotating speed: 50 gon/s Motorisation External supply voltage: Nominal voltage 12.8 V DC, Range 11.5 V-13.5 V Power Type: Li-Ion Internal Battery Voltage: 7.4 V Capacity: ZBA400: 6.0 Ah Zoom90 | 50 Technical Data...
-
Page 51: Scale Correction
For highest precision distance measurements, the atmospheric correction should be determined with an accuracy of 1 ppm. The following parameters must be redetermined: • Air temperature to 1 °C • Air pressure to 3 mbar • Relative humidity to 20 % Zoom90 | 51 Technical Data... - Page 52 The values for D are always negative and are derived from the following formula: level D D Reduction to mean sea level [ppm] ΔD · 10 Height of EDM above sea level [m] 6.378 * 10 TS_106 Zoom90 | 52 Technical Data...
-
Page 53: Reduction Formulas
Mean Sea Level b) Instrument c) Reflector Slope distance Horizontal distance Height difference TS_110 Reflector types The reduction formulas are valid for measurements to all reflector types: • measurements to prisms, to reflector tape and reflectorless measurements. Zoom90 | 53 Technical Data... - Page 54 Earth curvature (1/R) and mean refraction coefficient (k) are automatically taken into account when calcu- lating the horizontal distance and height difference. The calculated horizontal distance relates to the station height and not to the reflector height. Zoom90 | 54 Technical Data...
-
Page 55: Software Licence Agreement
GeoMax. Such software is protected by copyright and other laws and its use is defined and regulated by the GeoMax Software Licence Agreement, which covers aspects such as, but not limited to, Scope of the Licence, Warranty, Intellectual Property Rights, Limitation of Liability, Exclusion of other Assurances, Governing Law and Place of Jurisdiction. -
Page 56: Glossary
This could be eliminated by measuring in both faces. (horizontal collimation) TS0X_005 Vertical index error With a horizontal line of sight the vertical circle reading should be exactly 90°(100 gon). The deviation from this value is termed the Vertical index error (i). TS0X_006 Zoom90 | 56 Glossary... -
Page 57: Appendix A Menu Tree
System, SD Card Appendix B Directory Structure Description On the USB memory stick, files are stored in certain directories. The following diagram is the default direc- tory structure. |—— SYSTEM • Firmware files Directory structure Zoom90 | 57 Menu Tree... -
Page 58: Appendix C Pin Assignments And Sockets
Pin Assignments and Sockets Description Some applications require knowledge of the pin assignments for the instrument port. In this chapter, the pin assignments and socket for the RS232 port of the Zoom90 instrument are explained. Ports at the Zoom90 instrument... - Page 60 GeoMax Zoom90 Series 837009-1.1.0en Original text © 2017 GeoMax AG, Widnau, Switzerland GeoMax AG www.geomax-positioning.com...
Need help?
Do you have a question about the Zoom90 and is the answer not in the manual?
Questions and answers