Advertisement
Table of Contents
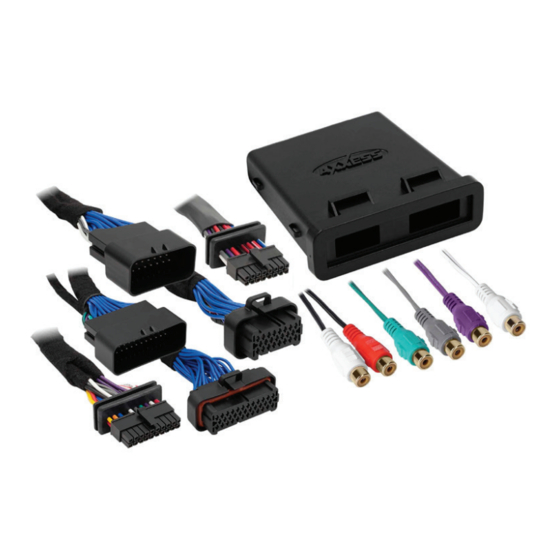
INTERFACE COMPONENTS
• AXDSP-L circuit board
• AXDSPL-HD1 harness (with gaskets)
• AXDSPL-HD1 enclosure
• Case
• Cap (with O-ring)
AxxessInterfaces.com
Harley Davidson DSP Package with Water
Resistant Enclosure 1998-2013
INTERFACE FEATURES
• AXDSP-L included
• Water resistant enclosure with zip tie mounts included
• Amplifier, if equipped, does not need to be retained
• All wiring will be done at the radio location
• Micro-B USB updatable
© COPYRIGHT 2020 METRA ELECTRONICS CORPORATION
AXDSPL-HD1
I N S T A L L A T I O N I N S T R U C T I O N S
TABLE OF CONTENTS
Connections ............................................................2
Installation ......................................................... 3-4
TOOLS & INSTALLATION ACCESSORIES REQUIRED
• Crimping tool and connectors, or solder gun,
solder, and heat shrink • Tape • Wire cutter
• Zip ties
Apple App Store
Google Play Store
iOS 12.1 or higher
REV. 8/4/20 INSTAXDSPL-HD1
Advertisement
Table of Contents

Related Manuals for Axxess AXDSPL-HD1


Summary of Contents for Axxess AXDSPL-HD1
- Page 1 • Tape • Wire cutter • Micro-B USB updatable • Zip ties INTERFACE COMPONENTS • AXDSP-L circuit board Apple App Store • AXDSPL-HD1 harness (with gaskets) Google Play Store iOS 12.1 or higher • AXDSPL-HD1 enclosure • Case • Cap (with O-ring) AxxessInterfaces.com...
- Page 2 Circuit Board Gray/Black Front Right - Purple/Black / Rear Right - Cap (with O-ring) 16-Pin 20-Pin Additionable Outputs AXDSPL-HD1 Gasket For Optional Amps Harness AXDSPL-HD1 Harness An SPDT relay, Metra part number E-123, must be used if the amp turn-on current of all amps exceed 1-amp.
- Page 3 3. With the arrow stamped onto the cap facing upwards, push the 16-pin connector from the AXDSPL-HD1 harness into the left side of the cap. The locking clip on the connector should face upward. Make sure the gasket is seating properly in the cap. (Figure A) AXDSP-L 4.
- Page 4 9. Scroll to the Configuration tab then select the vehicle type. Press the Lock Down button to save the configuration. (Figure C) 10. Connect the amp turn-on wire from the AXDSPL-HD1 harness. 11. Click the Identify button to confirm that the interface is connected properly. If so, a chime will be heard from the front left speaker.
- Page 5 REV. 8/4/2019 INSTAXDSPL-HD1...
- Page 7 REV. 8/4/2019 INSTAXDSPL-HD1...
- Page 8 AXDSPL-HD1 I N S T A L L A T I O N I N S T R U C T I O N S Having difficulties? We’re here to help. Contact our Tech Support line at: 386-257-1187 Or via email at: techsupport@metra-autosound.com...
Need help?
Do you have a question about the AXDSPL-HD1 and is the answer not in the manual?
Questions and answers