U-Line H-7033 Quick Start Manual
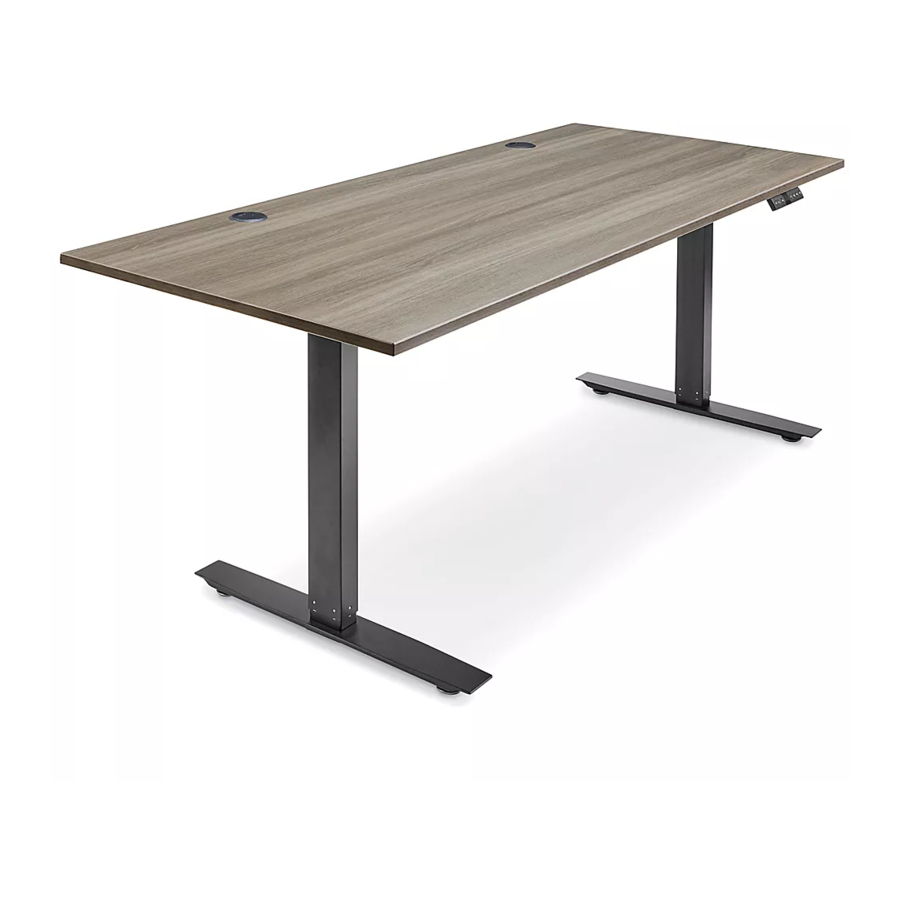
Adjustable height desk
Hide thumbs
Also See for H-7033:
- Manual (18 pages) ,
- Manual (18 pages) ,
- Assembly instructions manual (18 pages)
Table of Contents
Advertisement
Available languages
Available languages
Quick Links
H-7033, H-7034, H-7035
π
H-7598, H-7599, H-8362
ADJUSTABLE
HEIGHT DESK
TOOLS NEEDED
Drill
4 mm Hex Wrench
(Included)
Desktop x 1
Top Support
Control Box x 1
Bracket x 2
M6 x 33 mm
Power Cord x 1
Machine Screw x 5
NOTE: Count and inspect all pieces before
disposing of any carton or packing materials.
NOTE: Two-person assembly is recommended.
CAUTION! Adjustable frame is heavy and
care should be used when moving it during
assembly.
1.
Place adjustable frame with lifting columns on a
smooth, non-marring surface to prevent scratching.
NOTE: Lifting columns are pre-installed to
adjustable frame and are folded down toward
center of adjustable frame for shipping.
PAGE 1 OF 15
1-800-295-5510
uline.com
5 mm Hex Wrench
(Included)
PARTS
Adjustable Frame
with Lifting Columns x 1
Programmable
Handset x 1
M6 x 15 mm Machine
Screw with Lock
Washer and Flat
Washer x 18
ASSEMBLY
#
1
2
Foot with Leveling
3
Glides x 2
4
5
6
7
8
Cable
Management
9
Tray x 2
10
11
5 mm x 20 mm
12
Wood Screw x 11
13
2. Unfold the lifting columns to an upright position.
(See Figure 1)
Figure 1
Lifting
Column
Para Español, vea páginas 6-10.
Pour le français, consulter les pages 11-15.
DESCRIPTION
Desktop
Adjustable Frame with
Lifting Columns
Foot with Leveling Glides
Top Support Bracket
Control Box
Programmable Handset
Cable Management Tray
Power Cord
M6 x 33 mm Machine Screw
M6 x 15 mm Machine Screw with
Lock Washer and Flat Washer
5 x 20 mm Wood Screw
4 mm Hex Wrench
5 mm Hex Wrench
2
QTY.
1
1
2
2
1
1
2
1
5
18
11
1
1
0421 IH-7033
Advertisement
Table of Contents

Related Manuals for U-Line H-7033


Summary of Contents for U-Line H-7033
- Page 1 Para Español, vea páginas 6-10. Pour le français, consulter les pages 11-15. H-7033, H-7034, H-7035 π 1-800-295-5510 H-7598, H-7599, H-8362 uline.com ADJUSTABLE HEIGHT DESK TOOLS NEEDED Drill 4 mm Hex Wrench 5 mm Hex Wrench (Included) (Included) PARTS DESCRIPTION QTY.
- Page 2 ASSEMBLY CONTINUED 3. Insert top support bracket (4) into outside of 5. Attach foot (3) to lifting column using four M6 x 15 mm adjustable frame (2). Repeat this step on the machine screws (10). Tighten using 4 mm hex wrench (12). opposite side.
- Page 3 ASSEMBLY CONTINUED 8. Attach top support brackets and adjustable frame 10. Connect the power for the control box (5) using to desktop using drill and eight 5 x 20 mm wood the power cord (8). Connect the programmable screws (11). (See Figure 6) handset (6) and lifting column cables into the control box.
-
Page 4: Operation
OPERATION CONTROLS 24.5 USB Charger Down Setting Display Four Preset Button Button Button Position Buttons PROGRAMMING PRESET HEIGHT NOTE: The desk must be initialized prior to first use. • Use up and down buttons to move desk to the • To initialize, press and hold the down button on the desired position. -
Page 5: Troubleshooting
OPERATION CONTINUED PROGRAMMING ANTI-COLLISION SENSITIVITY LOCKING OPERATION OF DESK NOTE: Desk is equipped with a gyroscope with NOTE: Desk is equipped with a locking feature an anti-collision feature. This feature allows for to prevent operation. various levels of sensitivity to prevent collisions •... -
Page 6: Herramientas Necesarias
H-7033, H-7034, H-7035 π 800-295-5510 H-7598, H-7599, H-8362 uline.mx ESCRITORIO DE ALTURA AJUSTABLE HERRAMIENTAS NECESARIAS Taladro 1 Llave Hexagonal 1 Llave Hexagonal de 4 mm (Incluida) de 5 mm (Incluida) PARTES DESCRIPTION QTY. Cubierta Armazón Ajustable y Columnas de Elevación 1 Cubierta Armazón Ajustable y... - Page 7 CONTINUACIÓN DE ENSAMBLE 3. Inserte un brazo de soporte superior (4) en la parte Diagrama 4 exterior del armazón ajustable (2). Repita este paso en el lado opuesto. (Vea Diagrama 2) NOTA: El reborde de acero con tres orificios en el brazo de soporte superior debe quedar hacia abajo.
- Page 8 CONTINUACIÓN DE ENSAMBLE 8. Ensamble los brazos de soporte superiores y el 10. Conecte la caja de control a la electricidad (5) armazón ajustable a la cubierta usando el taladro y utilizando el cable (8). Conecte el control manual ocho tornillos para madera de 5 mm x 20 mm (11). programable (6) a la caja de control.
- Page 9 FUNCIONAMIENTO CONTROLES 24.5 Cargador USB Botón Botón Botón de Pantalla Cuatro Botones de Arriba Abajo Ajuste Posiciones Preprogramadas PROGRAMACIÓN DE LA ALTURA PREESTABLECIDA NOTA: El escritorio debe de ser programado antes de usarse. • Utilice los botones Arriba y Abajo para mover el •...
-
Page 10: Solución De Problemas
CONTINUACIÓN DEL FUNCIONAMIENTO PROGRAMACIÓN DE LA SENSIBILIDAD DE • Presione el botón de ajuste para confirmar la elección. ANTICOLISIÓN BLOQUEO DE OPERACIÓN DEL ESCRITORIO NOTA: El escritorio está equipado con un giroscopio con una medida anticolisión. NOTA: El escritorio está equipado con una Esta característica permite varios niveles de medida de bloqueo para evitar la operación. -
Page 11: Outils Requis
H-7033, H-7034, H-7035 π 1-800-295-5510 H-7598, H-7599, H-8362 uline.ca BUREAU À HAUTEUR RÉGLABLE OUTILS REQUIS Perceuse Clé hexagonale Clé hexagonale de 4 mm (incluse) de 5 mm (incluse) PIÈCES DESCRIPTION QTÉ Surface de bureau Colonne de levage Patte avec patins réglables... - Page 12 MONTAGE SUITE 3. Insérez la ferrure de support de la surface (4) dans 5. Fixez la patte (3) à la colonne de levage en utilisant le cadre réglable (2) de l'extérieur. Répétez cette quatre vis à métaux M6 de 15 mm (10). Vissez à l'aide étape sur le côté...
- Page 13 MONTAGE SUITE 8. Fixez les ferrures de support de la surface et le 10. Branchez l'alimentation du boîtier de commande (5) cadre réglable à la surface de bureau en utilisant à l'aide du cordon d'alimentation (8). Branchez la perceuse et huit vis à bois de 5 mm x 20 mm (11). le combiné...
- Page 14 FONCTIONNEMENT COMMANDES 24.5 Chargeur USB Touche Touche Touche Affichage Quatre touches de haut de réglage position préréglée PROGRAMMATION DU PRÉRÉGLAGE DE LA HAUTEUR REMARQUE : Le bureau doit être initialisé avant la première utilisation. • Utilisez les touches haut et bas pour bouger le •...
-
Page 15: Dépannage
FONCTIONNEMENT SUITE PROGRAMMATION DE LA SENSIBILITÉ • Appuyez sur les touches haut et bas pour alterner les niveaux de sensibilité. Les niveaux vont de 1 à ANTICOLLISION 8. Les niveaux plus élevés produisent une sensibilité REMARQUE : Le bureau est doté d'un supérieure.
Need help?
Do you have a question about the H-7033 and is the answer not in the manual?
Questions and answers