Advertisement
Available languages
Available languages
Quick Links
H-7589
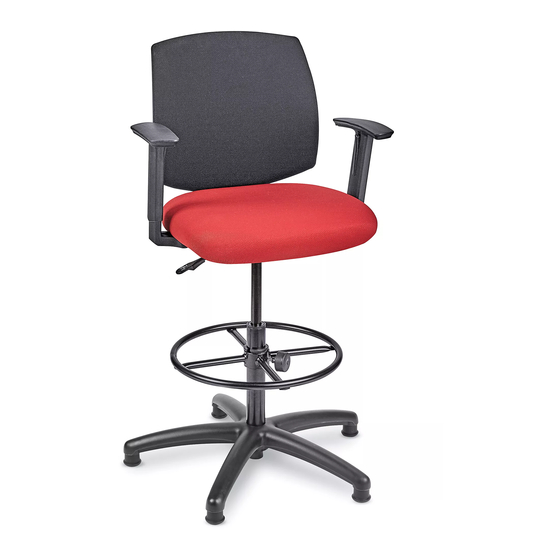
OFFICE STOOL
TOOL INCLUDED
Allen Wrench
Back Cushion x 1
Seat Cushion x 1
5-Star Base x 1
Glide x 5
Figure 1
Gas Lift
PAGE 1 OF 9
1-800-295-5510
uline.com
PARTS
Armrest x 2
Mechanism x 1
Foot Ring x 1
Gas Lift x 1
ASSEMBLY INSTRUCTIONS
8
Screw x 2
1/4 x 1⁄"
11
Screw x 4
5/16 x 1⁄"
1.
Insert glides into each leg hole on underside of
five-star chair base. Place gas lift into center hole
on top side of base. (See Figure 1)
Para Español, vea páginas 4-6.
Pour le français, consulter les pages 7-9.
Hardware Kit
9
10
Screw x 4
Screw x 4
1/4 x 1⁄"
5/16 x 1"
12
Washer x 6
0221 IH-7589
Advertisement

Related Manuals for U-Line H-7589


Summary of Contents for U-Line H-7589
- Page 1 Para Español, vea páginas 4-6. Pour le français, consulter les pages 7-9. H-7589 1-800-295-5510 uline.com OFFICE STOOL TOOL INCLUDED Allen Wrench PARTS Hardware Kit Back Cushion x 1 Seat Cushion x 1 Armrest x 2 Mechanism x 1 Screw x 2...
- Page 2 ASSEMBLY INSTRUCTIONS CONTINUED 2. Align armrest with arm holes on underside of seat Figure 2 cushion and insert two 1/4 x 1¾" screws (9) and one 1/4 x 1½" screw (8) to attach. Use washers (12) with all screws and fully tighten using Allen wrench. Repeat on opposite side.
- Page 3 ASSEMBLY INSTRUCTIONS CONTINUED 5. Push and hold together inner and outer rings Figure 5 located on center of foot ring to slide foot ring over gas lift. Move foot ring to desired position and release rings. Once separated, foot ring will lock in place.
-
Page 4: Instrucciones De Ensamble
H-7589 800-295-5510 uline.mx SILLA DE OFICINA HERRAMIENTA INCLUIDA Llave Allen PARTES Kit de Tornillería 1 Asiento 2 Descansabrazos 1 Mecanismo 1 Respaldo 2 Tornillos 4 Tornillos 4 Tornillos 1/4 x 1⁄" 1/4 x 1⁄" 5/16 x 1" 1 Pistón de Gas... - Page 5 CONTINUACIÓN DE INSTRUCCIONES DE ENSAMBLE 2. Alinee el descansabrazos con los orificios debajo Diagrama 2 del asiento para los brazos e inserte dos tornillos 1/4 x 1¾" y un tornillo 1/4 x 1½" para fijar. Use rondanas con todos los tornillos y apriete por completo con la llave Allen.
- Page 6 CONTINUACIÓN DE INSTRUCCIONES DE ENSAMBLE 5. Presione y sostenga unidos los anillos interior y Diagrama 5 exterior ubicados en el centro del reposapiés para deslizar el reposapiés sobre el pistón de gas. Una vez separados, el reposapiés se acomoda en su lugar.
-
Page 7: Instructions De Montage
H-7589 1-800-295-5510 uline.ca TABOURET DE BUREAU OUTIL INCLUS Clé Allen PIÈCES Hardware Kit Coussin de Accoudoir x 2 Mécanisme x 1 Coussin de Vis x 2 Vis x 4 Vis x 4 siège x 1 dossier x 1 1⁄ x 1⁄ po 1⁄... - Page 8 INSTRUCTIONS DE MONTAGE SUITE 2. Alignez l'accoudoir sur les trous situés sous le coussin Figure 2 du siège. Fixez-le à l'aide de deux vis de 1/4 x 1 ¾ po et une vis de 1/4 x 1 ½ po. Utilisez des rondelles avec toutes les vis et serrez à...
- Page 9 INSTRUCTIONS DE MONTAGE SUITE 5. Pour faire glisser l'anneau repose-pieds par-dessus Figure 5 le vérin pneumatique, poussez et maintenez ensemble les anneaux intérieur et extérieur situés au centre de l'anneau repose-pieds. Placez l'anneau repose-pieds à la position souhaitée et relâchez les anneaux.
Need help?
Do you have a question about the H-7589 and is the answer not in the manual?
Questions and answers