U-Line H-7034 Manual
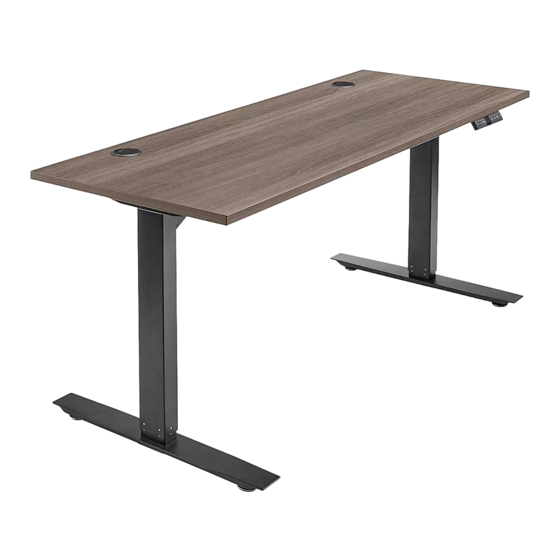
Adjustable height desk
Hide thumbs
Also See for H-7034:
- Quick start manual (16 pages) ,
- Manual (18 pages) ,
- Assembly instructions manual (17 pages)
Table of Contents
Advertisement
Available languages
Available languages
Quick Links
H-7033, H-7034, H-7035
π
H-7598, H-7599, H-8362
ADJUSTABLE
HEIGHT DESK
TOOLS NEEDED
Drill
4 mm Hex Wrench
(Included)
Desktop x 1
Top Support
Control Box x 1
Bracket x 2
M6 x 33 mm
Power Cord x 1
Machine Screw x 4
NOTE: Count and inspect all pieces before
disposing of any carton or packing materials.
NOTE: Two-person assembly is recommended.
CAUTION! Adjustable frame is heavy and
care should be used when moving it during
assembly.
1.
Place adjustable frame with lifting columns on a
smooth, non-marring surface to prevent scratching.
NOTE: Lifting columns are pre-installed to
adjustable frame and are folded down toward
center of adjustable frame for shipping.
PAGE 1 OF 17
1-800-295-5510
uline.com
5 mm Hex Wrench
(Included)
PARTS
Adjustable Frame
with Lifting Columns x 1
Programmable
Handset x 1
M6 x 15 mm Machine
Screw with Lock
Washer and Flat
Washer x 16
ASSEMBLY
#
1
2
Foot with Leveling
3
Glides x 2
4
5
6
7
8
Cable
Management
9
Tray x 2
10
11
5 x 20 mm
12
Wood Screw x 10
13
2. Unfold the lifting columns to an upright position.
(See Figure 1)
Figure 1
Lifting
Column
Para Español, vea páginas 6-10.
Pour le français, consulter les pages 11-15.
DESCRIPTION
Desktop
Adjustable Frame with
Lifting Columns
Foot with Leveling Glides
Top Support Bracket
Control Box
Programmable Handset
Cable Management Tray
Power Cord
M6 x 33 mm Machine Screw
M6 x 15 mm Machine Screw with
Lock Washer and Flat Washer
5 x 20 mm Wood Screw
4 mm Hex Wrench
5 mm Hex Wrench
2
QTY.
1
1
2
2
1
1
2
1
4
16
10
1
1
1022 IH-7033
Advertisement
Table of Contents

Subscribe to Our Youtube Channel
Related Manuals for U-Line H-7034


Summary of Contents for U-Line H-7034
- Page 1 Para Español, vea páginas 6-10. Pour le français, consulter les pages 11-15. H-7033, H-7034, H-7035 π 1-800-295-5510 H-7598, H-7599, H-8362 uline.com ADJUSTABLE HEIGHT DESK TOOLS NEEDED Drill 4 mm Hex Wrench 5 mm Hex Wrench (Included) (Included) PARTS DESCRIPTION QTY.
- Page 2 ASSEMBLY CONTINUED 3. Insert top support bracket (4) into outside of 5. Attach foot (3) to lifting column using four M6 x 15 mm adjustable frame (2). Repeat this step on the machine screws (10). Tighten using 4 mm hex wrench (12). opposite side.
- Page 3 ASSEMBLY CONTINUED 8. Attach top support brackets and adjustable frame 10. Connect the power for the control box (5) using to desktop using drill and eight 5 x 20 mm wood the power cord (8). Connect the programmable screws (11). (See Figure 6) handset (6) and lifting column cables into the control box.
-
Page 4: Operation
OPERATION CONTROLS 24.5 USB Charger Down Setting Display Four Preset Button Button Button Position Buttons PROGRAMMING PRESET HEIGHT NOTE: The desk must be initialized prior to first use. • Use up and down buttons to move desk to the • To initialize, press and hold the down button on the desired position. -
Page 5: Troubleshooting
OPERATION CONTINUED PROGRAMMING ANTI-COLLISION SENSITIVITY LOCKING OPERATION OF DESK NOTE: Desk is equipped with a gyroscope with NOTE: Desk is equipped with a locking feature an anti-collision feature. This feature allows for to prevent operation. various levels of sensitivity to prevent collisions •... -
Page 6: Herramientas Necesarias
H-7033, H-7034, H-7035 π 800-295-5510 H-7598, H-7599, H-8362 uline.mx ESCRITORIO DE ALTURA AJUSTABLE HERRAMIENTAS NECESARIAS Taladro 1 Llave Hexagonal 1 Llave Hexagonal de 4 mm (Incluida) de 5 mm (Incluida) PARTES DESCRIPTION QTY. Cubierta Armazón Ajustable y Columnas de Elevación 1 Cubierta 1 Armazón Ajustable y... - Page 7 CONTINUACIÓN DE ENSAMBLE 3. Inserte un brazo de soporte superior (4) en la parte Diagrama 4 exterior del armazón ajustable (2). Repita este paso en el lado opuesto. (Vea Diagrama 2) NOTA: El reborde de acero con tres orificios en el brazo de soporte superior debe quedar hacia abajo.
- Page 8 CONTINUACIÓN DE ENSAMBLE 8. Ensamble los brazos de soporte superiores y el 10. Conecte la caja de control a la electricidad (5) armazón ajustable a la cubierta usando el taladro y utilizando el cable (8). Conecte el control manual ocho tornillos para madera de 5 mm x 20 mm (11). programable (6) a la caja de control.
- Page 9 FUNCIONAMIENTO CONTROLES 24.5 Cargador USB Botón Botón Botón de Pantalla Cuatro Botones de Arriba Abajo Ajuste Posiciones Preprogramadas PROGRAMACIÓN DE LA ALTURA PREESTABLECIDA NOTA: El escritorio debe de ser programado antes de usarse. • Utilice los botones Arriba y Abajo para mover el •...
-
Page 10: Solución De Problemas
CONTINUACIÓN DEL FUNCIONAMIENTO PROGRAMACIÓN DE LA SENSIBILIDAD DE • Presione el botón de ajuste para confirmar la elección. ANTICOLISIÓN BLOQUEO DE OPERACIÓN DEL ESCRITORIO NOTA: El escritorio está equipado con un giroscopio con una medida anticolisión. NOTA: El escritorio está equipado con una Esta característica permite varios niveles de medida de bloqueo para evitar la operación. - Page 11 CONTINUACIÓN DEL SOLUCIÓN DE PROBLEMAS PROBLEMA DE RECOMENDACIONES FUNCIONAMIENTO El escritorio es El escritorio tiene patas de dos etapas que producen ruido cuando una se inusualmente ruidoso. extiende sobre la otra. Para reducir el ruido, aplique lubricante de silicón en las patas.
-
Page 12: Outils Requis
H-7033, H-7034, H-7035 π 1-800-295-5510 H-7598, H-7599, H-8362 uline.ca BUREAU À HAUTEUR RÉGLABLE OUTILS REQUIS Perceuse Clé hexagonale Clé hexagonale de 4 mm (incluse) de 5 mm (incluse) PIÈCES DESCRIPTION QTÉ Surface de bureau Colonne de levage Patte avec patins réglables... - Page 13 MONTAGE SUITE 3. Insérez la ferrure de support de la surface (4) dans 5. Fixez la patte (3) à la colonne de levage en utilisant le cadre réglable (2) de l'extérieur. Répétez cette quatre vis à métaux M6 de 15 mm (10). Vissez à l'aide étape sur le côté...
- Page 14 MONTAGE SUITE 8. Fixez les ferrures de support de la surface et le 10. Branchez l'alimentation du boîtier de commande (5) cadre réglable à la surface de bureau en utilisant à l'aide du cordon d'alimentation (8). Branchez la perceuse et huit vis à bois de 5 mm x 20 mm (11). le combiné...
- Page 15 FONCTIONNEMENT COMMANDES 24.5 Chargeur USB Touche Touche Touche Affichage Quatre touches de haut de réglage position préréglée PROGRAMMATION DU PRÉRÉGLAGE DE LA HAUTEUR REMARQUE : Le bureau doit être initialisé avant la première utilisation. • Utilisez les touches haut et bas pour bouger le •...
-
Page 16: Dépannage
FONCTIONNEMENT SUITE PROGRAMMATION DE LA SENSIBILITÉ • Appuyez sur les touches haut et bas pour alterner les niveaux de sensibilité. Les niveaux vont de 1 à ANTICOLLISION 8. Les niveaux plus élevés produisent une sensibilité REMARQUE : Le bureau est doté d'un supérieure. - Page 17 DÉPANNAGE PROBLÈME RECOMMANDATIONS Le bureau est Le bureau possède des pieds à deux niveaux qui deviennent bruyants lorsqu'une particulièrement bruyant. partie s’engage dans l'autre. Pour réduire le bruit, appliquez un lubrifiant au silicone sur les pieds. s'affiche sur la Le bureau est en surchauffe. Cessez l'utilisation du réglage de la hauteur pendant commande.
Need help?
Do you have a question about the H-7034 and is the answer not in the manual?
Questions and answers