Advertisement
Quick Links
Assembly Instructions
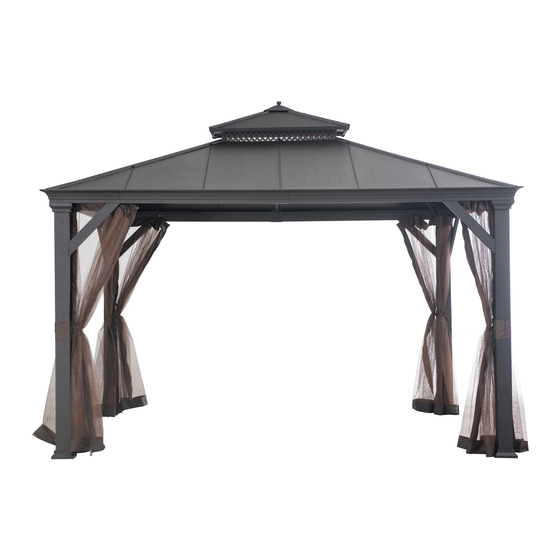
Bar Harbor 10x12 Screen House
Article # 182996
For technical assistance or replacement parts, please contact Sunjoy Group at 1(866) 578-6569 anytime
24 hour / 7 days a week or Email
bj@sunjoygroup.com
or visit www.sunjoyonline.com to place your order
or fax your parts replacement order form together with your purchase receipt to 1 (740) 283-3549 for
assistance.
Note: THIS UNIT IS HEAVY!
Do NOT assemble this item alone for safety. Six people are necessary.
You will need a screwdriver, hammer and two 8ft ladders.
While this screen house is manufactured to withstand winds through only the supplied ground stakes, in
areas subject to frequent severe weather, securing the screen house to a deck, concrete patio or footings
should be considered.
Snow must be cleared off regularly during snowy days. Remove the snow at the top when it is thicker than
4 inches. In order to avoid damage, use a plastic snow rake to remove excessive snow and ice buildup from
roof and keep away from falling debris.
Country of Origin: China
Production Number: 20193442
Advertisement

Related Manuals for Sunjoy L-GZ1048PCO-A


Summary of Contents for Sunjoy L-GZ1048PCO-A
- Page 1 Assembly Instructions Bar Harbor 10x12 Screen House Article # 182996 For technical assistance or replacement parts, please contact Sunjoy Group at 1(866) 578-6569 anytime 24 hour / 7 days a week or Email bj@sunjoygroup.com or visit www.sunjoyonline.com to place your order or fax your parts replacement order form together with your purchase receipt to 1 (740) 283-3549 for assistance.
-
Page 2: Parts List
Parts List Long left decorative Long side right J1 (x2) K1 (x2) slot decorative slot Long side decorative L1(X2) Short decorative slot M1(x2) slot connector Short side decorative F1(x4) N1(X4) Corner connector slot connector Long side netting Shot side netting H1(x4) I1(x4) tube... - Page 3 Big top right small Big top short side F5 (x4) G5 (x2) cover panel big cover panel H5 (x4) Top cover I5 (x18) Roof press sheet J5(x1) Netting Hardware Pack 1 Plastic end cap 16 PCS M6 Bigger flat washer 48 PCS M6*20 Hex bolt 48 PCS...
-
Page 4: Hardware Pack
Fig.1-1:Fasten the decorative slot connector (M1) on the K1 side of decorative slot (J1) using bolt (CC), spring washer (OO) and washer (BB). Fig.1-2: Fasten the decorative slot (J1,K1) tightly using bolt (CC), spring washer (BB) and washer (BB). Insert J1 end of slot (K1) into the K1 end of slot (J1). Fig.1-3: Fasten the slot connector (F1) on L1 end of the decorative slot (J1, K1) using bolt (CC) ,spring washer (OO) and washer (BB). - Page 5 Fig.4: Fix the top slanting bar (K2) onto the corner connector (N1) with bolt (CC) & washer (BB) . Fig.5: Fix the oblique beam (K2) on the big top frame (B2) using bolt (CC) and washer (BB). Fig.6: Fix the middle beam of big top (L2) onto big top frame (B2) with bolt (CC) & washer (BB). Fig.7: Fix the Middle beam (L2) onto decorative slot (J1, K1,L1) with bolt (CC) &...
- Page 6 Hardware Pack 3 M6 Bigger flat washer 20 PCS M6*20 Hex bolt 16 PCS M6 Nut 4 PCS Fig.10: Fix the small top oblique beam (A3, F3) on the small top connector (K3) using bolt (KK) and washer (BB). Fix hook (J3) from the bottom side of small top connector (K3) to upper side. Fig.11: Fix the lower end of small top beam (A3, F3) on the small top lower connector frame (E3) using bolt (CC) and washer (BB).
- Page 7 Fig.12-1: Fix the assembled small top on the big top frame (B2) through small top lower connector frame (E3),using bolt (CC) and washer (BB). Fig.12-2: See as the pic. fold the small top long and short side cover panel (C3, D3) on the small top. Fig.13-1: Fasten the small top cover panel (B3) on the small top oblique beam, and fix it using bolt (CC) and washer (BB).
- Page 8 Fig.14: Lift the Base protector (B4), attach the post base (A4) to the post (C4) with bolt (CC) & washer (BB). Fig.15: Fix the top block (H4) to the post (C4) with bolt (CC) & washer (BB). (Note: the screw holes on the post and the screw holes which install the block plate (E4) should be in the same direction as shown on drawing.) Fig.16: Lift the assembled pavilion roof and fix the assembled post to the corner of the roof with bolt (CC), bolt (OO) &washer (BB).
- Page 9 Hardware Pack 5 M6 Bigger flat washer 68 PCS M6*20 Bolt 60 PCS M6*40 Bolt 8 PCS Fig.21: See as the pic. buckle the cover panel (A5) on the right cover panel (B5). See the pic of big top cover panel for reference, buckle cover panels from left to right.
- Page 10 Fig.24: Fasten top cover panel (D5, C5) on the oblique beam (K2) using bolt (CC) and washer (BB). Fig.25: Fasten top cover panel (F5, E5) on the oblique beam (K2) using bolt (CC) and washer (BB). Fig.26: Fix the press sheet (I5) on the decorative slot (the place of 2 cover panels buckled), fix the cover panel using bolt (DD) and washer (BB).
-
Page 11: Limited Warranty
For comments or questions please contact BJ’s Wholesale Club at 1-800-934-1204. Please do not return this product to the store. For technical assistance on assembly or replacement parts call Sunjoy Group at 1(866) 578-6569 anytime 24 hour /7 days a week or Email bj@sunjoygroup.com...
Need help?
Do you have a question about the L-GZ1048PCO-A and is the answer not in the manual?
Questions and answers