Advertisement
1
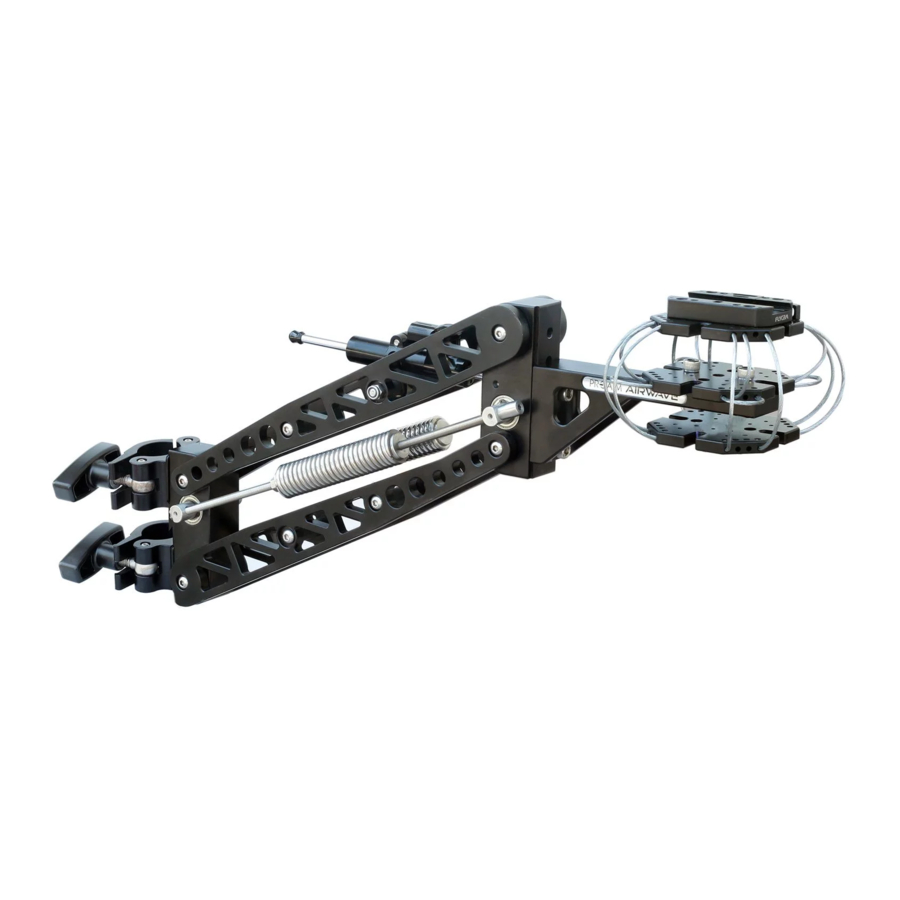
Airwave Vibration Isolator Arm
(VI-252-00)
A s s e m b l y M a n u a l
What's In The Box
Please inspect the contents of your shipped package to ensure you have received everything that
is listed below.
Ronin Mounting Plate
Flight Case
Proaim Airwave Vibration Isolator Arm
Isolator
All rights reserved.
No part of this document may be reproduced, stored in a retrieval system, or transmitted by any form or by any means,
electronic, mechanical, photo-copying, recording, or otherwise, except as may be expressly permitted by the applicable copyright
statutes or in writing by the Publisher.
Advertisement
Table of Contents

Related Manuals for PROAIM Airwave Vibration Isolator Arm


Summary of Contents for PROAIM Airwave Vibration Isolator Arm
- Page 1 Please inspect the contents of your shipped package to ensure you have received everything that is listed below. Ronin Mounting Plate Flight Case Proaim Airwave Vibration Isolator Arm Isolator All rights reserved. No part of this document may be reproduced, stored in a retrieval system, or transmitted by any form or by any means, electronic, mechanical, photo-copying, recording, or otherwise, except as may be expressly permitted by the applicable copyright statutes or in writing by the Publisher.
- Page 2 Airwave Arm Setup Loosen Pole Clamps via knobs. Insert a pole into clamps and tighten them properly. Attach Isolator onto the nose bracket of Airwave Arm with help of bolts. Then tighten these bolts with allen key. NOTE: Nose Bracket can be adjusted on two levels, top and bottom, as shown in image.
- Page 3 NOTE: It is very important to check the movement of arm. With arm at levelled position or slightly above the horizontal position, push down the front of arm. It moves 3 to 4 times before reaching normal position. In order to smoothen Spring Tension evenly, turn the adjustment knob.
- Page 4 YOUR PROAIM AIRWAVE VIBRATION ISOLATOR ARM ALL DRESSED UP AND READY TO GO! (SHOWN WITH OPTIONAL ACCESSORIES) Warranty: We offer one year warranty for our products from date of purchase. Within this period of time, we will repair it without charge for labor or parts. Warranty doesn’t cover transportation costs nor does it cover a product subjected to misuse or accidental damage.
Need help?
Do you have a question about the Airwave Vibration Isolator Arm and is the answer not in the manual?
Questions and answers