Advertisement
Quick Links
Advertisement

Related Manuals for PROAIM Airwave XL Shock


Summary of Contents for PROAIM Airwave XL Shock
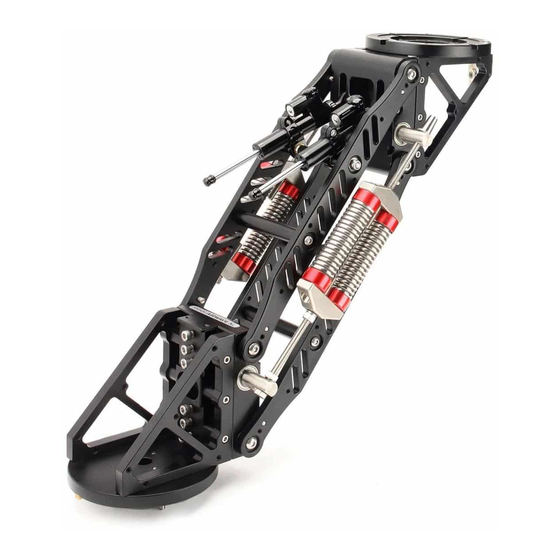
- Page 1 Airwave XL Shock Absorber Arm (VI-APRO-00) Instruction Manual...
-
Page 2: Table Of Contents
At Proaim, our goal is to ensure 100% Customer Satisfaction in all that we do. We back our sales with a 1 year warranty from the date of purchase and work hard to resolve any problems in the unlikely event one should arise. -
Page 3: Foreword
Proaim family. By purchasing your Airwave XL Shock Absorber Arm, you have just joined a host of designers, engineers, machinists, assembly, customer service and office staff that take great pride in all that they do. -
Page 4: Introduction
Introduction The Proaim Airwave XL Shock Absorber Arm with dual spring configuration (two springs on each side), is the biggest of our Vertical Vibration Isolator arms. Our precision engineered system will accommodate payloads of 30-65kg (66-143lb), making it suitable for Remote Pan Tilt heads and any 3-Axis Gimbal system like DJI Ronin, Movi and Shotover G1. -
Page 5: Safety Hints
Safety Hints ATTENTION: PLEASE READ THIS BEFORE USING TO PREVENT SERIOUS DAMAGE TO THE GEAR! IT IS RECOMMENDED TO HAVE PROPER SPRING ADJUSTMENTS For additional tension support, adjust both the spring sets to same degree of tension. ALWAYS KEEP FINGERS CLEAR FROM ANY OF THE MECHANICAL MOVING PARTS Operate the Arm from outside of any of the crossing arms and from the spring shaft. -
Page 6: Assembling
Assembling Mount Isolator Arm onto Mitchell stand and fix it with Castle Ring by twisting. Then tighten Castle Ring with the help of provided Castle Nut Wrench. Spring Adjustment Loosen the locking nuts of each spring. Turn the leveling springs clockwise to add tension as well as to raise the arm, turning it anti-clockwise will release tension and lower it. - Page 7 In order to smoothen Spring Tension, turn the adjustment knob. If the arm is too soft, turn it towards direction of H (Hard). If the arm is rigid turn it towards the direction of S (Soft). NOTE: The valves should always be adjusted evenly and set identically.
- Page 8 After attaching your Ronin to Mitchell Plate, tighten it with Castle Nut Wrench. Mount the setup, as shown in image. Attaching the Isolator Plate NOTE: For attaching the L-shaped Isolator Plate, you need to first detach Mitchell Mount from the Arm.
- Page 9 Attach Isolator Plate with the arm and tighten with help of provided screw and allen key. NOTE 1 : The Isolator Plate can be adjusted upwards at 3 levels. NOTE 2 : The Isolator Plate can be adjusted upside down at 3 levels.
- Page 10 Attach Mitchell Vibration Isolator (Not Included) with Isolator Plate and tighten it properly with allen key. Then loosen the bolts of Mitchell Plate. Insert Castle Ring as shown in the image and tighten it accurately. Mount your setup.
- Page 11 Attaching the Scaff Clamps Slide Scaff Clamps onto the Arm & then loosen the knob on clamps, as shown. Now insert the bolts into Scaff Clamp and tighten with the help of allen key. Then attach Shock Arm with Pole and tighten the Clamps appropriately to secure the Arm.
-
Page 12: Warranty
YOUR PROAIM AIRWAVE XL SHOCK ABSORBER ARM ALL DRESSED UP AND READY TO GO! (SHOWN WITH OPTIONAL ACCESSORIES) WARRANTY We offer a one year warranty for our products from the date of purchase. We will repair or replace your product, free of charge, in the event of a defect in materials or craftsmanship obtained during normal use or handling based on the user manual.
Need help?
Do you have a question about the Airwave XL Shock and is the answer not in the manual?
Questions and answers