Precor Energy Series Service Manual
Hide thumbs
Also See for Energy Series:
- Owner's manual (76 pages) ,
- Service manual (54 pages) ,
- Quick start card (111 pages)

Related Manuals for Precor Energy Series


Summary of Contents for Precor Energy Series
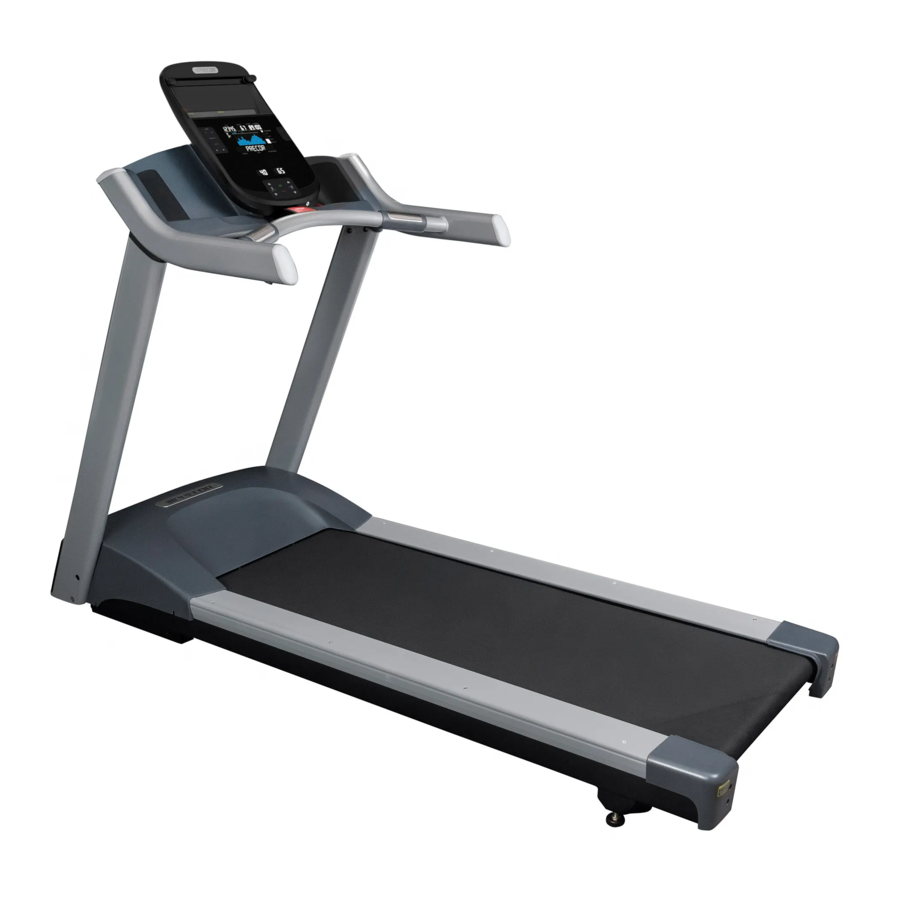
- Page 1 Service Manual Energy Series Treadmill TRM 223 TRM243 Page 1 of 56 © 2014 Precor Incorporated, Unauthorized Reproduction and Distribution Prohibited by Law...
-
Page 2: Table Of Contents
Procedure .............................. 21 Replacing the Incline Platform ........................23 Procedure .............................. 23 Replacing the Lower PCA ........................... 23 Procedure .............................. 23 Replacing the Speed Sensor ........................26 Page 2 of 56 ©2014 Precor Incorporated, Unauthorized Reproduction and Distribution Prohibited by Law... - Page 3 Cleaning the Equipment ......................... 46 Treadmill Deck and Running Belt Cleaning ....................47 Exploded View Diagram ..........................49 Parts List................................ 53 System Functional Diagram ........................... 56 Page 3 of 56 © 2014 Precor Incorporated, Unauthorized Reproduction and Distribution Prohibited by Law...
- Page 4 Page 4 of 56 ©2014 Precor Incorporated, Unauthorized Reproduction and Distribution Prohibited by Law...
-
Page 5: About This Document
Manual Part Number 20081-118 rev 04 Warning: This service manual is for use by Precor trained service providers only. If you are not a Precor certified servicer, you should not attempt to service any Precor products. Call your dealer for service. - Page 6 Page 6 of 56 ©2014 Precor Incorporated, Unauthorized Reproduction and Distribution Prohibited by Law...
-
Page 7: General Information
General Information Service Calls Before calling the Precor service center for troubleshooting assistance, gather and record the following information. • Model and serial number. Provide the model number as accessed in Procedure 2.2. • Upper and Lower program version running when the problem occurred •... - Page 8 The plug must be inserted into an outlet that is properly installed and grounded in accordance with all local codes and ordinances. Failure to properly ground the treadmill could void the Precor Limited Warranty. Page 8 of 56 ©2014 Precor Incorporated, Unauthorized Reproduction and Distribution Prohibited by Law...
-
Page 9: Operation Verification Test
Select the INCLINE control to raise and lower the deck. The incline A/D value is shown and verified at the following incline settings: • 37 ±5 @ 0% incline Page 9 of 56 © 2014 Precor Incorporated, Unauthorized Reproduction and Distribution Prohibited by Law... - Page 10 10. Go to the ERROR LOG and verify that no new error code events have occurred during these tests (refer to the Error Log section). Resolve any new error codes and repeat the Operation Verification procedure. Page 10 of 56 ©2014 Precor Incorporated, Unauthorized Reproduction and Distribution Prohibited by Law...
-
Page 11: Standard Service And Diagnostics Software
1. Go to the console default Home page. 2. Select the Settings softkey. 3. Simultaneously touch/release the My Settings (top right) and Edit (bottom right) softkeys. Page 11 of 56 © 2014 Precor Incorporated, Unauthorized Reproduction and Distribution Prohibited by Law... -
Page 12: R20 Console: How To Access The Service And Diagnostic Menus
• Use the Left and Right arrow keys to browse and scroll menus • Select the GO key (ENTER) to select or start a menu item. Page 12 of 56 ©2014 Precor Incorporated, Unauthorized Reproduction and Distribution Prohibited by Law... -
Page 13: Hardware Validation Diagnostic Tests (51765761)
The Belt test uses the SPEED controls and running belt operation. Belt Test • The Incline test uses the INCLINE controls to verify ramp operation Incline Test at 0.5 % increments. Page 13 of 56 © 2014 Precor Incorporated, Unauthorized Reproduction and Distribution Prohibited by Law... -
Page 14: Information Display (Access Code 65)
2) the Information service software (Access Code “65”) Accessing the Information Display and Error Log: 1. From the Home page select the Settings softkey. Page 14 of 56 ©2014 Precor Incorporated, Unauthorized Reproduction and Distribution Prohibited by Law... -
Page 15: R20 Console: Information Display (65)
MANUAL USED (number of manual workouts) o TIMES (number of times the machine was powered ON) o TOTAL MINUTES (total minutes the machine was used) Page 15 of 56 © 2014 Precor Incorporated, Unauthorized Reproduction and Distribution Prohibited by Law... - Page 16 Select the GO key (ENTER) to select or start a menu item. • Select WORKOUTS (BACK) to return to the previous menu item. • Select PAUSE to exit Service Software. Page 16 of 56 ©2014 Precor Incorporated, Unauthorized Reproduction and Distribution Prohibited by Law...
-
Page 17: Adjustment Procedures
Reattach the lift tube to the lift platform and secure using the removed 17 mm bolt and 17 mm nut. Switch the power OFF and return the treadmill to the upright position. Page 17 of 56 © 2014 Precor Incorporated, Unauthorized Reproduction and Distribution Prohibited by Law... -
Page 18: Drive Belt Tension Adjustment
Torque the four drive motor mounting bolts to 180 inch pounds. Re-install the hood. Page 18 of 56 ©2014 Precor Incorporated, Unauthorized Reproduction and Distribution Prohibited by Law... -
Page 19: Running Belt Tension Adjustment
Increase the treadmill speed to 4 mph. if the belt drifts away from center, touch up the tracking as described above. Increase the treadmill speed to 8 mph., if the belt drifts away from center, track it as described above Page 19 of 56 © 2014 Precor Incorporated, Unauthorized Reproduction and Distribution Prohibited by Law... - Page 20 If required track it as described above. 11. If applicable, replace the finger guard removed in step 2. 12. Replace the end caps and motor cover removed in step 1. Page 20 of 56 ©2014 Precor Incorporated, Unauthorized Reproduction and Distribution Prohibited by Law...
-
Page 21: Replacement Procedures
5. Plugin the AC power cord and set the ON/OFF switch in the “ON” position. 6. Calibrate the lift motor, see “Calibrating the Lift Motor” Adjustment procedure. 7. Verify operation and return to service, see “Operation Verification Test” procedure. Page 21 of 56 © 2014 Precor Incorporated, Unauthorized Reproduction and Distribution Prohibited by Law... - Page 22 Page 22 of 56 ©2014 Precor Incorporated, Unauthorized Reproduction and Distribution Prohibited by Law...
-
Page 23: Replacing The Incline Platform
12. Set the treadmill in its normal upright position and test incline operation. Replacing the Lower PCA Procedure Note: If the Lower PCA is replaced, the treadmill calibration must be performed to ensure proper operation. Page 23 of 56 © 2014 Precor Incorporated, Unauthorized Reproduction and Distribution Prohibited by Law... - Page 24 Reconnect the AC input “AC N” (wht) and AC L (blk) wire connections. o Reconnect the Yel/Grn wire earth ground wire terminal connection using a #1 Philips Page 24 of 56 ©2014 Precor Incorporated, Unauthorized Reproduction and Distribution Prohibited by Law...
- Page 25 Plugin the AC line cord. Set the treadmill circuit breaker to the “ON” position. Verify treadmill operation and return to service... Page 25 of 56 © 2014 Precor Incorporated, Unauthorized Reproduction and Distribution Prohibited by Law...
-
Page 26: Replacing The Speed Sensor
If the drive motor is replaced, the drive motor and flywheel should be replaced as a unit. Page 26 of 56 ©2014 Precor Incorporated, Unauthorized Reproduction and Distribution Prohibited by Law... -
Page 27: Replacing The Drive Motor Brushes
Remove the hood. Use a flat blade screw driver to remove the screws that retain the drive motor brush cover. Remove the brush from the brush holder. Page 27 of 56 © 2014 Precor Incorporated, Unauthorized Reproduction and Distribution Prohibited by Law... -
Page 28: Drive Roller Replacement
Remove the treadmill’s motor cover. Loosen, but do not remove the take up roller mounting bolts. The bolts are being loosened to remove tension from the running belt. Page 28 of 56 ©2014 Precor Incorporated, Unauthorized Reproduction and Distribution Prohibited by Law... - Page 29 Continue until the drive belt “walks” completely onto the drive roller pulley. Be sure that the drive belt is fully onto and correctly aligned on the drive roller pulley. Page 29 of 56 © 2014 Precor Incorporated, Unauthorized Reproduction and Distribution Prohibited by Law...
-
Page 30: Take Up Roller Replacement
This procedure is to be used to replace a take up roller while maintaining the running belt’s original tension and tracking settings. Two running belt gauges, Precor part number 20007-101, are required. It is important that this procedure be followed to maintain correct running belt tension. -
Page 31: Running Belt And/Or Deck Replacement
Remove the insert from the deck screw. Using one of the CATN025-150 bolts and a flat washer, to cover the hole, thread the bolt Page 31 of 56 © 2014 Precor Incorporated, Unauthorized Reproduction and Distribution Prohibited by Law... -
Page 32: Replacing The Data Cable
9. Install the console in its mounting position on the backplate and fasten with the attachment hardware. 10. Replace the treadmill hood. 11. Verify the treadmill operation. Page 32 of 56 ©2014 Precor Incorporated, Unauthorized Reproduction and Distribution Prohibited by Law... -
Page 33: Troubleshooting
Time the error event occurred. Date Date the error event occurred Clearing the Error Log 1. Access the Diagnostics Systems Tests page (51765761), see Accessing Service Software. Page 33 of 56 © 2014 Precor Incorporated, Unauthorized Reproduction and Distribution Prohibited by Law... -
Page 34: R20 Error Log Information
Note: Use the left/right arrow keys to scroll through the list of error codes. If there are no logged error codes, the message “0 ERRORS” will be shown. Page 34 of 56 ©2014 Precor Incorporated, Unauthorized Reproduction and Distribution Prohibited by Law... -
Page 35: Clearing The Error Log
Lift error: lift going in the wrong direction Fatal Error Codes Fatal Error Codes Code Error description Upstairs EEPROM checksum error Page 35 of 56 © 2014 Precor Incorporated, Unauthorized Reproduction and Distribution Prohibited by Law... -
Page 36: Troubleshooting The Lift System
If the lift motor operates but creates a lift error (error 40 or 42) go to step 11. If the lift motor will not move continue with step 2. Page 36 of 56 ©2014 Precor Incorporated, Unauthorized Reproduction and Distribution Prohibited by Law... - Page 37 Upper PCA per Procedure 6.8. If the AC voltmeter reads the presence of AC line voltage and an error 40 is displayed, go to step 10. Page 37 of 56 © 2014 Precor Incorporated, Unauthorized Reproduction and Distribution Prohibited by Law...
- Page 38 13. If the resistance readings in step 13 are normal, replace the lower logic PCA per Procedure 6.3. 14. If you have performed all of the procedures above and have been unable to correct the problem, call Precor customer service. Page 38 of 56 ©2014 Precor Incorporated, Unauthorized Reproduction and Distribution Prohibited by Law...
-
Page 39: Troubleshooting The Speed Sensor
PCA. If you have performed all of the above procedures and have been unable to correct the problem, call Precor Customer Support Page 39 of 56 © 2014 Precor Incorporated, Unauthorized Reproduction and Distribution Prohibited by Law... -
Page 40: Troubleshooting The External A.c. Power Source
Troubleshooting the External A.C. Power Source It is extremely important that any Precor treadmill be connected to and operated on a dedicated 20 amp A.C. circuit. A 20 amp dedicated circuit is defined as: a circuit fed by a 20 amp circuit breaker that feeds a single load. -
Page 41: Troubleshooting Heart Rate
If neither a chest strap signal or a hand held signal is being accepted, replace the console Page 41 of 56 © 2014 Precor Incorporated, Unauthorized Reproduction and Distribution Prohibited by Law... - Page 42 Constant or intermittent readings when neither the hand held or chest strap is in use Replace the console Page 42 of 56 ©2014 Precor Incorporated, Unauthorized Reproduction and Distribution Prohibited by Law...
-
Page 43: Troubleshooting Running Belt & Deck
Creating personal input current benchmarks The Precor typical belt condition input current ratings are based on a loading weight of 220 lbs (100 kgs). A lighter weight exerciser produces less loading effects resulting in lower input current values for the same belt/deck condition. - Page 44 AC input current values. i. If not already cleaned, clean the belt/deck surfaces and repeat the AC input current draw measurement. Page 44 of 56 ©2014 Precor Incorporated, Unauthorized Reproduction and Distribution Prohibited by Law...
- Page 45 This type of damage would not generate an error code, but would cause the input breaker to trip intermittently. An amp draw test will comfirm this condition. Page 45 of 56 © 2014 Precor Incorporated, Unauthorized Reproduction and Distribution Prohibited by Law...
-
Page 46: Preventative Maintenance
CAUTION: Do not use any acidic cleaners. Doing so will weaken the paint or powder coatings and void the Precor Limited Warranty. Never pour water or spray liquids on any part of the treadmill, and remove any accumulated sweat from the treadmill after use. Allow the treadmill to dry completely before using it again. -
Page 47: Treadmill Deck And Running Belt Cleaning
Brace yourself using the handlebars or side hand rails. Push the Quick Start button once in position. Page 47 of 56 © 2014 Precor Incorporated, Unauthorized Reproduction and Distribution Prohibited by Law... - Page 48 8. Remove the towel from beneath the belt. 9. Turn the power switch to ON. 10. Verify operation and return to service. Page 48 of 56 ©2014 Precor Incorporated, Unauthorized Reproduction and Distribution Prohibited by Law...
-
Page 49: Exploded View Diagram
Exploded View Diagram For the most current exploded view diagram and parts list, go to the Precor Connect website. Page 49 of 56 © 2014 Precor Incorporated, Unauthorized Reproduction and Distribution Prohibited by Law... - Page 50 Page 50 of 56 ©2014 Precor Incorporated, Unauthorized Reproduction and Distribution Prohibited by Law...
- Page 51 Page 51 of 56 © 2014 Precor Incorporated, Unauthorized Reproduction and Distribution Prohibited by Law...
- Page 52 Page 52 of 56 ©2014 Precor Incorporated, Unauthorized Reproduction and Distribution Prohibited by Law...
-
Page 53: Parts List
GFX CUSHION RED (FOR 1" DECK) PPP000000035693101 PIVOT, DECK MOUNT, 9.3X-07 PPP000000035744101 FOOT, ADJUSTABLE PPP0000AT041899101 WELDMENT, LIFT PLATFORM PPP0000AT050648101 CUSHION, LIFT PPP0000AT060638101 TRANSPORT WHEEL, LIFT Page 53 of 56 © 2014 Precor Incorporated, Unauthorized Reproduction and Distribution Prohibited by Law... - Page 54 TRANSITION, TARGA, LEFT PPP0000AT061078101 TRANSITION, TARGA, RIGHT PPP0000AT060822102 HHHR GRIP, PACIFIC BLUE PPP0000AT190182101 HHHR, CABLE, BLACK PPP0000KARLN003002 HEX NUT, M3 X 0.5 X 2.4 PPP00000MMLN003035 SCREW,M3X35M,PHIL,NICKEL Page 54 of 56 ©2014 Precor Incorporated, Unauthorized Reproduction and Distribution Prohibited by Law...
- Page 55 PPP0000AT190013101 MOTOR BRUSH, CHI HUA, MK PPP0000AT190014101 MOTOR GROUND BRUSH, CHI HUA, MK PPP00000KFJN012012 LOCK NUT, NYLON, M12, BEC PPP000000303220111 KIT, LITERATURE, TRM 2XX, EN Page 55 of 56 © 2014 Precor Incorporated, Unauthorized Reproduction and Distribution Prohibited by Law...
-
Page 56: System Functional Diagram
System Functional Diagram Page 56 of 56 ©2014 Precor Incorporated, Unauthorized Reproduction and Distribution Prohibited by Law...
Need help?
Do you have a question about the Energy Series and is the answer not in the manual?
Questions and answers