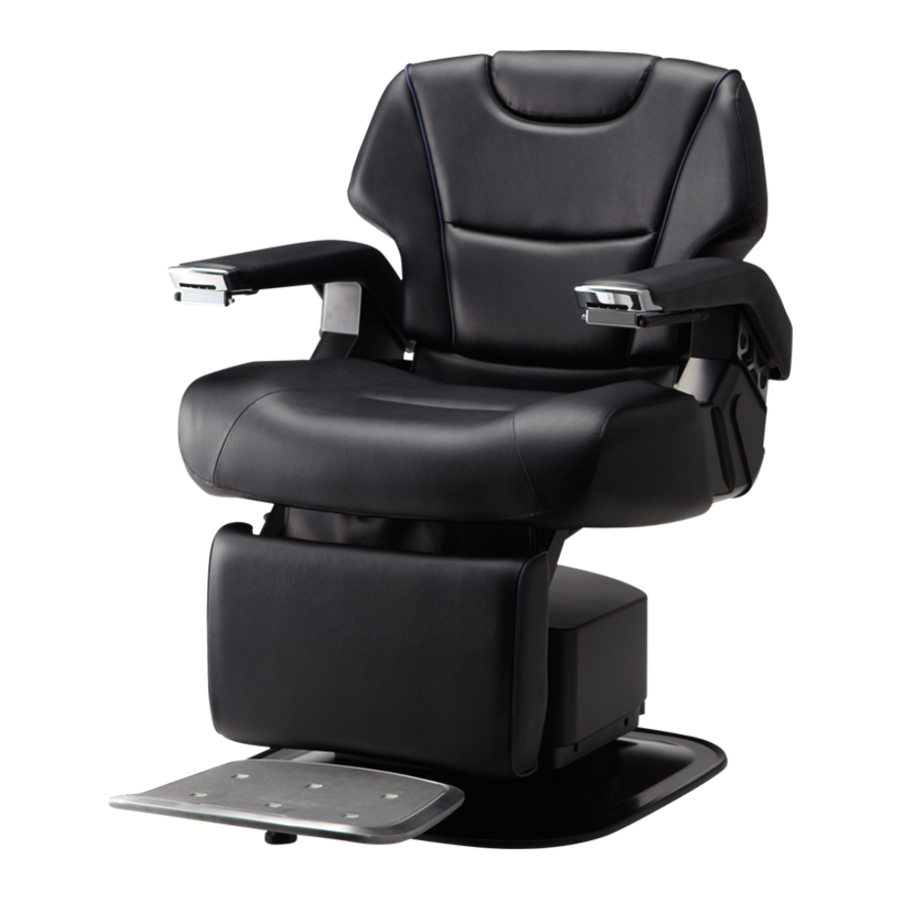
Takara Belmont LANCER Installation Manual
Hide thumbs
Also See for LANCER:
- Operation manual (28 pages) ,
- Operation manual (28 pages) ,
- Operation manual (28 pages)
Advertisement
Quick Links
Be sure to store this manual in a secure location together with the operation manual as it describes
items that must be understood by the customer.
Installation Procedures
1. Move the chair to the installation location.
Move the chair by holding the skid.
(Carrying the chair by the upper part is dangerous
because the base could come off and drop.)
2. Attach the rubber ring to the base.
Determine the installation location. Lift the base off the floor and attach the rubber ring to the rim of the base.
It is easier to attach the rubber ring by lifting up one side of the chair at a time. Hold the armrest and shoulder
part of the backrest to balance the force, and tilt the chair body to attach the rubber ring one side at a time.
Do not apply excessive force to the armrest or other parts, or strike it from above when tilting the chair body.
3. Connect the power plug with the outlet.
Prepare an available outlet
*
110 V, 120V, 220 V, 230 V, 240 V (7 A or more)
The chair must absolutely be grounded in order to prevent electric shock.
Be sure to ground the chair to prevent accident due to current leakage and to improve the noise-dampening
performance of the control circuit.
Takara Belmont has no responsibility for any current leakage that results if the above-indicated procedures are
not performed.
4. Check that the chair operates normally.
Turn the power on and check that the chair raises/lowers normally, the backrest raises/reclines normally, the
legrest raises/lowers
normally(AB-HPPN),
operate normally.
LANCER Installation Manual
Bang !
Rubber ring
Base
*
with an attached ground terminal.
and the rotation lock/release, preset feature, and auto-return features
Remove the chair from the skid. Raise the
chair off the floor by holding the metal plate
under the foot switch. Move the chair by
holding the base.
Foot switches
1
Base
1E04K4BE BOOK NO.
Advertisement

Subscribe to Our Youtube Channel
Related Manuals for Takara Belmont LANCER


Summary of Contents for Takara Belmont LANCER
- Page 1 Be sure to ground the chair to prevent accident due to current leakage and to improve the noise-dampening performance of the control circuit. Takara Belmont has no responsibility for any current leakage that results if the above-indicated procedures are not performed.
- Page 2 LANCER Installation Manual 5. Install the step. Place the step on the step mount, align the three fixing holes with those of the step, and fix the step using the provided plating flange nut (M6). Use a wrench (No. 10) to tighten the flange nut (M6).
- Page 3 LANCER Installation Manual 3. Press and hold the preset switch that you want to set, and turn on the power switch. Press and hold the preset switch located on either the left or right side of the armrest control panel (P1 or P2), and turn on the power switch.
- Page 4 LANCER Installation Manual 3. Pull out the legrest adjustment pin. Pull out the legrest adjustment pin. 4. Insert the legrest adjustment pin based on the desired setting. Hole at delivery Hole for Setting (1) Hole for Setting (2) 1. To set the legrest rising angle to Setting (1), insert the legrest adjustment pin into the Hole for Setting (1).
Need help?
Do you have a question about the LANCER and is the answer not in the manual?
Questions and answers