Advertisement
Quick Links
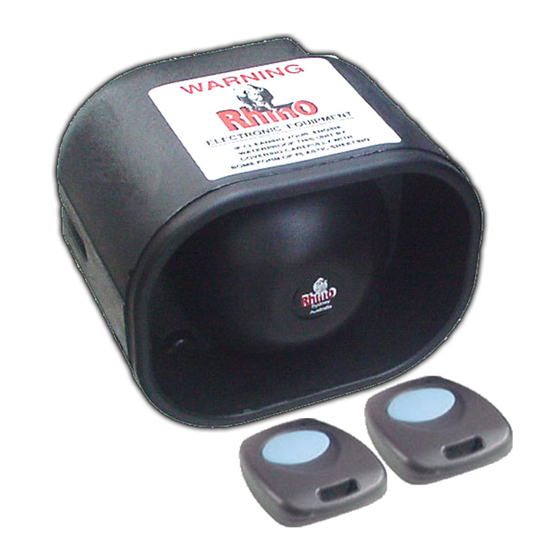
INSTRUCTION MANUAL FOR
Remote Control Compact Car Alarm
with 2 Stage Impact Sensor, plus
SYDNEY / AUSTRALIA
Central Locking & Immobilisation Outputs.
Build Date:
A.C.N 001 621 610
TO ARM/DISARM ALARM
The alarm is activated by pressing the button on the remote control transmitter once. The
blinkers will flash once, and the siren will beep once. The dash LED-light will stay on for 10
seconds then flash, THE ALARM IS NOW ON.
To deactivate the alarm, press the button again. The blinkers will flash twice and the siren will
beep twice. THE ALARM IS NOW OFF.
If the siren is sounding, and you wish to disarm, the first press will cancel the siren - the system
will then return to an armed state. A second press is required to fully turn the alarm off. The blinkers will flash twice
and the siren will beep twice. THE ALARM IS NOW OFF.
Note: If power is removed from the alarm system, i.e. when replacing your car battery, the alarm will automatically
return to the mode it was in prior to disconnecting power.
ALARM TRIGGER
When triggered, the siren will sound for 30 seconds and then will automatically rearm. If the alarm has been triggered
in your absence, the dash LED will be flashing twice as fast as normal when you return to your vehicle.
EMERGENCY PANIC BUTTON
The panic feature is activated by pressing & holding the button on the remote control transmitter for 3 seconds. The
system will arm or disarm first depending on what state it was in. The siren will then sound & the blinkers will flash for
30 seconds. To cancel "panic", follow disarm procedure as desribed above.
NOTE: Panic does not work when the ignition is on by requirement of Australian Law (EPA-Environmental Protection Authority).
PRE-ALERT (2 STAGE) IMPACT WARNING
This special feature provides a two stage impact sensing system. It gives the security conscious owner a sensitive car
body impact sensor that will give a potential thief prior warning that the vehicle is protected by this most formidable
alarm system. On detection of a low level impact i.e. from a tyre kick, the siren will simply beep 5 times to warn away
the would-be thief. If the vehicle is attacked any further, the system will move into full siren mode. The sensitivity level
reference point can be adjusted to suit your particular needs. Please refer to the programming section contained later
in this manual.
PROGRAMMABLE FEATURES:
The features outlined below are the most popular that can be turned on or off to suit your requirements. Please refer
to the section is this manual marked "Rhino Programmable Features" for full details.
PASSIVE ARMING: The alarm can automatically arm itself 30 seconds after you leave your vehicle provided that the
ignition is turned off, and that at least one door has been opened and closed ie. the owner has parked and has exited
the vehicle. This feature will not lock the vehicle where central locking is connected.
AUTOMATIC RE-ARM : This feature prevents accidental disarming by the owner ie. the owner turns the alarm off but
is then distracted and forgets that they have deactivated the system. If a door is not opened, or the ignition is not
turned on within 60 seconds from when the system is turned off by the remote, the system will re-arm, and if central
locking is connected, it will re-lock the vehicle.
QUIET ARM/DISARM : This feature when turned on, stops the siren from beeping for arm & disarm confirmation i.e.
only the blinkers will flash.
1
Advertisement

Subscribe to Our Youtube Channel
Related Manuals for RHINO GX


Summary of Contents for RHINO GX
- Page 1 The features outlined below are the most popular that can be turned on or off to suit your requirements. Please refer to the section is this manual marked “Rhino Programmable Features” for full details. PASSIVE ARMING: The alarm can automatically arm itself 30 seconds after you leave your vehicle provided that the ignition is turned off, and that at least one door has been opened and closed ie.
-
Page 2: Standard System Features
LEARNING REMOTES (Up to 3 remotes can be used with this alarm system) Before entering this mode,make sure you have all remotes present that you wish yo utilise with this alarm system, as the alarm automatically erases all remotes when you enter this mode. While the system is disarmed, open and close your drivers door &... - Page 3 Your Rhino Security system incorporates the latest in high security & convenience features. It is possible to customise your security system so that it suits your requirements perfectly. Detailed below is the full list of programmable features that can either be turned on or turned off.
- Page 4 seconds, the system will rearm & relock (where central locking is connected). Central Closure 1 Flash 0.8 0.8 sec You can select the lock & unlock outputs 2 Flash 5 sec to become a 5 second negative pulse instead of 0.8 seconds. This feature is for certain vehicles with vacuum central locking or those with a central closure wire (some BMW, Mercedes) ie doors...
- Page 5 WIRING INSTRUCTIONS FOR RHINO GX ALARM Power. Connect to constant +12 volts via the fuse box at the point where the interior light circuit is powered. Current (voltage) sensing will not work if this procedure is not followed. Earth. Connect to a suitable earth on the car body.
- Page 6 RHINO GX ALARM WIRING DIAGRAM REFER TO WIRING INSTRUCTIONS ON PAGE 5 FOR FULL EXPLANATION IGNITION START To Parking Light Circuit (10Amp Brown Green 12VDC Blue NEGATIVE Blue Grey White OUT ON ARM +12VDC NEGATIVE Yellow Black Orange TRIGGER INPUT...
- Page 7 You will have to repeat this procedure to restart the vehicle again. 4. Contact your Rhino Dealer for further assistance. INSTALLERS PLEASE NOTE: If power is removed from the alarm system, it will automatically return to the mode it was in (armed or disarmed) before power was...
- Page 8 All relays depicted are changeover type. CONNECTING TO RHINO CENTRAL LOCKING KIT (CLK) Connect Lock Wire to Connect Unlock Wire to Pin 8 on CLK Control Pin 10 on CLK Control Module Module INSTALLING A NEW MOTOR – often required in vehicles that have factory locking but have no motor in the driver’s door, or you would like “keyless entry”...
- Page 9 FOR POSITIVE AT REST THEN GOING NEGATIVE “OR” NEGATIVE AT REST THEN GOING POSITIVE PUT 87’S TO 12V & CONNECT RELAYS AS SHOWN LOCK +12V +12V OR GROUND (SUPPLY “A”) 15A Fuse UNLOCK +12V CAR’S EXISTING CENTRAL CENTRAL LOCKING LOCKING INTERFACE SWITCH FOR FLOATING SWITCHES - NEITHER +12V OR GROUND AT REST...
Need help?
Do you have a question about the GX and is the answer not in the manual?
Questions and answers