Table of Contents
Advertisement
Quick Links
Advertisement
Table of Contents

Subscribe to Our Youtube Channel
Related Manuals for BenQ EW2420


Summary of Contents for BenQ EW2420
- Page 1 LCD Monitor User Manual E2220HD E2420HD EW2420 Welcome...
-
Page 2: Copyright
Copyright Copyright © 2010 by BenQ Corporation. All rights reserved. No part of this publication may be reproduced, transmitted, transcribed, stored in a retrieval system or translated into any language or computer language, in any form or by any means, electronic, mechanical, magnetic, optical, chemical, manual or otherwise, without the prior written permission of BenQ Corporation. -
Page 3: Table Of Contents
How to assemble your monitor hardware ... 7 How to detach the stand base ...12 Getting the most from your BenQ monitor ... 13 How to install the monitor on a new computer ...14 How to upgrade the monitor on an existing computer ...15 How to install on Windows 7 system ...16... -
Page 4: Getting Started
1. Getting started When unpacking please check you have the following items. If any are missing or damaged, please contact the place of purchase for a replacement. BenQ LCD Monitor Monitor Base Quick Start Guide CD-ROM Power Cord (Picture may differ from product supplied for your region.) - Page 5 Video Cable: DVI-D (Optional accessory for models with DVI inputs, sold separately) Video Cable: HDMI (Optional accessory for models with HDMI inputs, sold separately) Audio Cable USB Cable Headphone hook Consider keeping the box and packaging in storage for use in the future when you may need to transport the monitor.
-
Page 6: Getting To Know Your Monitor
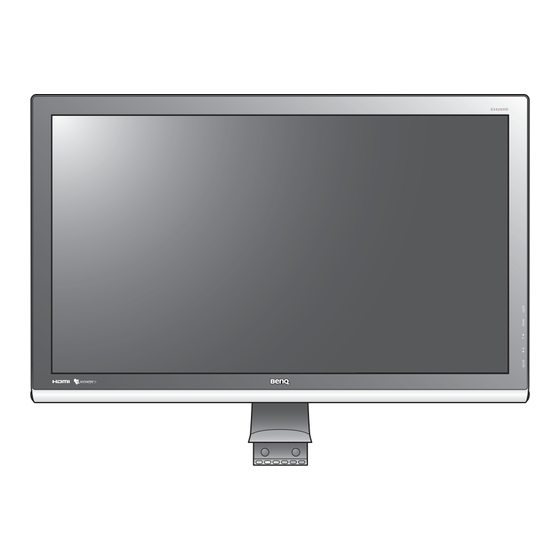
2. Getting to know your monitor Front view Back view Getting to know your monitor 1. Speakers 2. AC Power Input jack 3. Line In and Line Out 4. Cable clip 5. HDMI socket x 2 6. DVI-D socket 7. D-Sub socket 8. -
Page 7: How To Assemble Your Monitor Hardware
3. How to assemble your monitor hardware If the computer is turned on you must turn it off before continuing. Do not plug-in or turn-on the power to the monitor until instructed to do so. 1. Attach the monitor base. Please be careful to prevent damage to the monitor. - Page 8 2. Connect the PC video cable To Connect the D-Sub Cable Connect the plug of the D-Sub cable (at the end without the ferrite filter) to the monitor video socket. Connect the other end of the cable (at the end with the ferrite filter) to the computer video socket.
- Page 9 3. Connect the audio cable. Connect the audio cable between the socket on the rear of the monitor (Line In) and your computer audio outlet. If you prefer using external speakers, please also use another audio cable (usually supplied with the speakers) to connect the monitor (Line Out) to the input/Line In jack of the speakers.
- Page 10 5. Connect the power cable to the monitor. Plug one end of the power cord into the socket labelled ‘POWER IN’ on the rear of the monitor. Do not connect the other end to a power outlet just yet. 6. Route the cables via the cable clip. Release the cable retaining clip by squeezing the clip inwards as illustrated.
- Page 11 Turn on the monitor by pressing the power button on the right of the monitor. Turn on the computer too, and follow the instructions in Section 4: Getting the most from your BenQ monitor on page 13 to install the monitor software. How to assemble your monitor hardware...
-
Page 12: How To Detach The Stand Base
How to detach the stand base 1. Prepare the monitor and area. Turn off the monitor and the power before unplugging the power cable. Turn off the computer before unplugging the monitor signal cable. Protect the monitor and screen by clearing a flat open area on your desk and placing a soft item like a towel on the desk for padding, before laying the screen face down on a flat clean padded surface. -
Page 13: Getting The Most From Your Benq Monitor
4. Getting the most from your BenQ monitor To gain the most benefit from your new BenQ color LCD flat screen monitor, you should install the custom BenQ LCD Monitor driver software as provided on the BenQ LCD Monitor CD-ROM. -
Page 14: How To Install The Monitor On A New Computer
BenQ LCD Monitor is the first ever monitor to be connected to it. If you are adding the BenQ LCD Monitor to an existing computer that has already had another monitor connected to it (and has monitor driver software installed), you should not be following these instructions. -
Page 15: How To Upgrade The Monitor On An Existing Computer
The BenQ LCD Monitor driver for your model may well function perfectly with other versions of Windows, however, as at the time of writing, BenQ has done no testing of this driver on other versions of Windows and cannot guarantee its operation on those systems. -
Page 16: How To Install On Windows 7 System
3. Click Generic PnP Monitor 4. Click the tab and the Driver 5. Insert the BenQ LCD Monitor CD-ROM into a CD drive on the computer. 6. In the Update Driver Software software 7. Click and navigate to the following directory: d:\BenQ_LCD\Driver\ (where d is the Browse drive letter designator for the CD-ROM drive). -
Page 17: How To Install On Windows Vista Systems
Continue 5. Click the tab and the Driver 6. Insert the BenQ LCD Monitor CD-ROM into a CD drive on the computer. 7. In the Update Driver Software software 8. Click and navigate to the following directory: d:\BenQ_LCD\Driver\ (where d is the Browse drive letter designator for the CD-ROM drive). -
Page 18: How To Install On Windows Xp System
The Monitor Properties window will display. If the driver provider is listed as BenQ, and the model matches that of your new monitor, the proper drivers are already installed, and you need do nothing further. Cancel out of these property windows. -
Page 19: Picture Optimization
If you wish, you can always adjust the screen geometric settings manually using geometry menu items. To assist you in this endeavour, BenQ has provided a screen test image utility which you can use to check for screen color, grayscale and line gradient display. -
Page 20: How To Adjust Your Monitor
6. How to adjust your monitor The control panel : Adjusts vertical position, phase, horizontal position and pixel clock automatically. AUTO key: Activates OSD main menu and return to the previous menu or exit OSD. MENU key: For Up/Increase adjustment. The key is the hot key for Volume. Volume key: For Down/Decrease adjustment. -
Page 21: Hot Key Mode
Hot key mode The monitor keys perform as hot keys to provide direct access to particular functions whenever the menu isn't currently displaying on-screen. Volume hot keys Mode hot key Input hot key (not available for analog-only models) Press the key to display the indicators. -
Page 22: Main Menu Mode
Main menu mode You can use the OSD (On Screen Display) menu to adjust all the settings on your monitor. Available menu options may vary depending on the input sources, functions and settings. Press the key to display the following main OSD menu. MENU DISPLAY Auto Adjustment... -
Page 23: Display Menu
Display menu Available menu options may vary depending on the input sources, functions and settings. DISPLAY Auto Adjustment H. Position V. Position Pixel Clock Phase Move ENTER Item Function Auto Optimizes and adjusts the Adjustment screen settings automatically for you. The key is a ‘hot key’... - Page 24 H. Position Adjusts the horizontal position of the screen image. V. Position Adjusts the vertical position of the screen image. Pixel Clock Adjusts the pixel clock frequency timing to synchronize with the analog input video signal. Not applicable to a digital input signal.
-
Page 25: Picture Menu
Picture menu Available menu options may vary depending on the input sources, functions and settings. PICTURE Brightness Contrast Sharpness Gamma Color Move Item Function Brightness Adjusts the balance between light and dark shades. Contrast Adjusts the degree of difference between darkness and lightness. - Page 26 Press to leave the Color menu. MENU Improves the gray level (E2420HD/ response time of the LCD EW2420 only) panel. How to adjust your monitor Press the to select this option. Press the and the ENTER select .
-
Page 27: Picture Advanced Menu
Picture Advanced menu Available menu options may vary depending on the input sources, functions and settings. Picture Mode Senseye Demo Dynamic Contrast Display Mode Color Format HDMI RGB PC Range Move ENTER Item Function Picture Mode Selects a picture mode that best suits the type of images shown on the screen. - Page 28 Senseye Demo Displays the preview of screen images under the selected mode from Picture Mode. The screen will be divided into two windows; the left window demonstrates images of Standard mode, while the right window presents the images under the specified mode.
- Page 29 Color Format Determines the color space (RGB or YUV) based on the following detected video signal: • D-Sub (VGA) from PC: The default Color Format is RGB. • D-Sub (Component) from a video device: The default Color Format is YUV. You might need to manually set the Color Format if colors shown...
-
Page 30: Audio Menu
Audio menu Available menu options may vary depending on the input sources, functions and settings. AUDIO Volume Mute Audio Select ENTER Select Move Item Function Volume Adjusts the audio volume Mute Mutes the audio input Audio Select Allow users to select the audio source or let the monitor detect it automatically... -
Page 31: System Menu
System menu Available menu options may vary depending on the input sources, functions and settings. SYSTEM Input OSD Settings DDC/CI Auto Poowe Off Information HDMI Auto Switch Reset All Move Item Function Input Use this to change the input to that appropriate to your video cable connection type. - Page 32 - Press OSD Settings ENTER Language Sets the OSD menu language. H. Position Adjusts the horizontal position of the OSD menu. V. Position Adjusts the vertical position of the OSD menu. Display Time Adjusts the display time of the OSD menu. How to adjust your monitor to enter the menu.
- Page 33 DDC/CI* Allows the monitor settings to be set through the software on the PC. Auto Power Sets the time to power off the monitor automatically (EW2420 in power saving mode. only) Information Displays the current monitor property settings. HDMI Auto...
-
Page 34: Troubleshooting
7. Troubleshooting Frequently asked questions (FAQ) The image is blurred: Read the instructions on the link "Adjusting the Screen Resolution" on the CD, and then select the correct resolution, refresh rate and make adjustments based on these instructions. How do you use a VGA extension cable? Remove the extension cable for the test. - Page 35 Is the prompt on the display illuminated in orange? If the LED is illuminated in orange, the power management mode is active. Press any button on the computer keyboard or move the mouse. If that does not help, check the signal cable connectors.
-
Page 36: Need More Help
• Check whether upstream and downstream USB are properly connected. • Install a corresponding USB device driver if available. Need more help? If your problems remain after checking this manual, please contact your place of purchase or e-mail us at: Support@BenQ.com. Troubleshooting...
Need help?
Do you have a question about the EW2420 and is the answer not in the manual?
Questions and answers