Table of Contents
Advertisement
Quick Links
Advertisement
Table of Contents

Related Manuals for Allegion SES20171127F


Summary of Contents for Allegion SES20171127F
- Page 1 ENGAGE Managed Property 7.6.0 User’s Guide...
-
Page 2: Copyright
Initial release: ENGAGE 6.0 Copyright ©2021 Allegion All rights reserved. SCHLAGE is the property of Allegion. All other brand names, product names, or trademarks are the property of their respective owners. 2 • Schlage • ENGAGE Managed Property User's Guide... -
Page 3: Table Of Contents
Contents About this document 109 Mobile Application Copyright 109 Introduction 109 Supported Devices and Requirements Introduction Log In Purpose Main Menu Introduction to ENGAGE Technology Devices System and Product Revisions Users Customer Support My Team Terms and Definitions Sites ENGAGE or PACS Managed Properties No-Tour Feature Overview of ENGAGE Enabled Products Overview... -
Page 4: Introduction
• With links to training videos, frequently asked questions, and things to remember. Introduction to ENGAGE Technology The Allegion ENGAGE technology makes it easy to connect people, openings and access together, delivering cost-effective intelligence and efficiency to any property. Robust Access Control solutions featuring ENGAGE Technology can be customized to fit any size business or budget and easily adapt to growing or changing business needs. -
Page 5: System And Product Revisions
When updates are available, the latest firmware release notes are provided here for additional details. Note: Allegion strives to provide the best products and service for our customers and will update Î firmware and software periodically. As a result of periodic updates, your system or devices may be at a newer revision level than represented in this document. -
Page 6: Terms And Definitions
Introduction Terms and Definitions Terms and Definitions Terms Bluetooth: An open wireless technology standard for transmitting/exchanging data between fixed Mobile devices over short distances. Operates in the 2.4Ghz range shared with Wi-Fi. Credentials: Authorization for access. These can be physical cards and FOBs, or they can be Mobile, or NFC enabled using a Mobile device. -
Page 7: Engage Or Pacs Managed Properties
ENGAGE enabled devices. There are two basic options: • Use the free ENGAGE Cloud-based software and mobile applications offered by Allegion for robust property-wide access control and monitoring. • Use software managed by Allegion’s Physical Access Control Software (PACS) providers for additional features and access control and management by others. - Page 8 8 • Schlage • ENGAGE Managed Property User's Guide...
-
Page 9: Overview Of Engage Enabled Products
Overview of ENGAGE Enabled Products The ENGAGE enabled products described in this section are used with the ENGAGE technology cloud-based web and Mobile applications. LE and LEB Mobile Enabled Wireless Mortise Locks LE and LEB Wireless Mortise locks simplify installation by combining the lock, credential reader, door position sensor and request-to- exit switch all in one unit. -
Page 10: Nde80 And Ndeb
Overview of ENGAGE Enabled Products NDE80 and NDEB NDE80 and NDEB Mobile Enabled Wireless Cylindrical Locks NDE80 and NDEB Wireless Cylindrical Locks simplify installation by combining the lock, credential reader, door position sensor, and request-to-exit switch all in one unit. The NDE product family is ideal for office and suite entries, conference rooms, common area doors, resident units, and sensitive storage areas with a cylindrical door prep. -
Page 11: Control Mobile Enabled Smart Lock
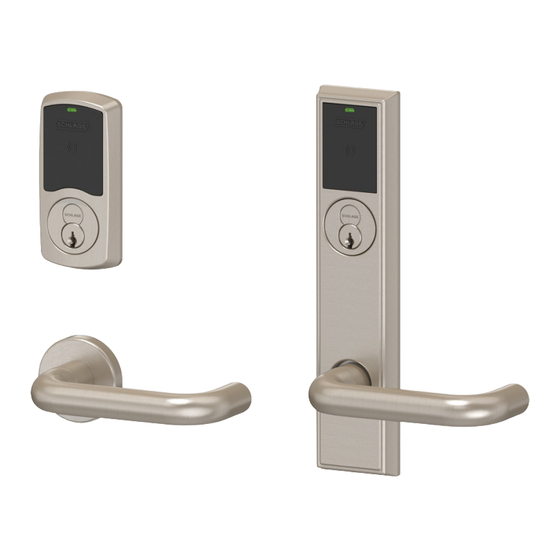
Overview of ENGAGE Enabled Products Control Mobile Enabled Smart Lock Control Mobile Enabled Smart Lock The Schlage Control Mobile Enabled Smart locks were designed specifically for multifamily resident doors and support for the advanced No-Tour access programming features. The Schlage Control Smart Interconnected Lock adds a lever lock, below the deadbolt that will also retract the deadbolt on exit and allows for one-motion egress. -
Page 12: Cte Single Door Controller
Overview of ENGAGE Enabled Products CTE Single Door Controller CTE Single Door Controller The CTE is an ENGAGE enabled single opening controller that allows perimeter and common area openings to be managed. The CTE single door controller is designed for flexibility and is managed with ENGAGE web and Mobile applications. -
Page 13: Mt20 Credential Enrollment Readers
Overview of ENGAGE Enabled Products MT20 Credential Enrollment Readers MT20 Credential Enrollment Readers • MT20 will only read the credential The Schlage MT20 Multi-Technology Enrollment Reader access ID simplifies the enrollment of smart and multi-technology credentials. • The MT20 will not write information The MT20 will use the computer USB port for power to a credential... -
Page 14: Wi-Fi Network Requirements
Wi-Fi Network Requirements Understanding and planning the Wi-Fi environment before starting an account is a good first step. • Please review the Although, Wi-Fi connectivity is not required for basic ENGAGE operation, using a convenient Wi-Fi following Wi-Fi communication connection across the property and enabling nightly device updates will greatly Network and automate and simplify daily management operations. -
Page 15: Best Practices And Things To Remember
Best Practices and Things to Remember ENGAGE System Set-up • Administrators who review and confirm default settings before commissioning the first device, will save time setting up their property and should not require device Sync updates after commissioning. • Before commissioning any devices, the Administrator should confirm: •... -
Page 16: Control Mobile Enabled Smart Locks
Best Practices and Things to Remember Control Mobile Enabled Smart locks Control Mobile Enabled Smart locks • Control devices do not support Wi-Fi connectivity. CAUTION: • Every door access or device setting update MUST use the local Sync Control device Audit (Door File updates) process and the ENGAGE Mobile Application. -
Page 17: Factory Default Reset
Best Practices and Things to Remember Factory Default Reset Note: The credential update ICON remains until the credential is successfully programmed with Î the desired changes. Changes are not valid until the credential is presented to affected doors/devices. • Device Update ICONs are provided next to the device name, any time the device has changes or updates pending, and the device needs to be programmed. -
Page 18: Daily System And Other Operations
Daily System and Other Operations This section describes a few of the day-to-day operations that need to be performed by ENGAGE Administrators, Managers, and Operators. Assign New Access To allow access to specific areas, the following steps are needed: User. Add a Physical Credential to a User Add a Mobile Credential to a User to be used for access. -
Page 19: Resident Move Out Processes
Daily System and Other Operations Resident Move Out Processes To complete this process, the credential must be updated with “todays” expiration setting and then stored away until “Tomorrow”. Follow the update the credential process to program the credential with newly defined expiration settings. -
Page 20: Remove User And Access From Engage
Daily System and Other Operations Remove User and Access from ENGAGE Updating door access to remove a credential will require one of the normal update options to be performed: Sync, Over-night update or No-Tour. WARNING: A lost credential or a credential not returned when moving out must have its access removed and be immediately removed (Sync) from all assigned devices to ensure security. - Page 21 Daily System and Other Operations Remove User and Access from ENGAGE Select the credential to be deleted from the Credentials list to continue. (2886) Select Delete this credential in the Edit Credential card. 21 • Schlage • ENGAGE Managed Property User's Guide...
-
Page 22: Delete User Access Rights
Daily System and Other Operations Delete User Access Rights Type the word ‘delete’ into the Confirm: Field. Select the Delete button. 10. VERIFY SUCCESS: When successfully deleted, the Credential is no longer listed under Credentials. WARNING: Deleting a credential requires all devices that previously had access with that credential, to Sync, overnight updated or perform No-Tour programming before the deleted credential is denied access at the door. -
Page 23: Updating Device Firmware
Daily System and Other Operations Updating Device Firmware Using the Web Application Delete Device. Using the Mobile Application Delete Device. Updating Device Firmware Device firmware should be kept up to date to ensure property-wide device compatibility and operations, and to ensure the latest features and security updates are provided at the door. All Schlage ENGAGE enabled products will occasionally have firmware updates for new features and continued robust performance. - Page 24 Daily System and Other Operations Updating Device Firmware Note: If the device you need is not presented, ensure the device is already commissioned and Î that you are within Bluetooth (BLE) range. Select the local device to be updated with the latest firmware. •...
- Page 25 Daily System and Other Operations Updating Device Firmware Then… Note: The device starts flashing the RED LED when connected and communicating. Î Select Update Firmware in the connected device menu. Select Update in the connected device menu. 25 • Schlage • ENGAGE Managed Property User's Guide...
- Page 26 Daily System and Other Operations Updating Device Firmware then… WARNING: This is a local Bluetooth (BLE) firmware update method so the Mobile device MUST stay within BLE communication range while downloading firmware. The following screen displays when the firmware update is successful. Note: The recently updated device loads the new firmware into its memory and REBOOTS Î...
- Page 27 Daily System and Other Operations Updating Device Firmware Select the local device to be updated with the latest firmware. • In this case we chose Storage which is a Schlage LE device with its Wi-Fi network connection properly enabled. Select More. 27 •...
- Page 28 Daily System and Other Operations Updating Device Firmware then… Select Update Firmware in the connected device menu. Note: Confirm the requested firmware update in the screen above. When the firmware version Î on the device is current a “Firmware is up to date” message is provided. Installing the firmware will take a few minutes, be patient.
- Page 29 Daily System and Other Operations Updating Device Firmware then… Note: This message is provided as an indication that the firmware has been downloaded from Î the server to the device. Select Finish. WARNING: After the firmware is downloaded, the new firmware will then automatically be installed into the device.
- Page 30 Daily System and Other Operations Updating Device Firmware Device firmware updates – at the door – Using Mobile Wi-Fi. When the device does not have a Wi-Fi network connection available or the local Wi-Fi network is not enabled, the firmware download can be performed by temporarily enabling a Wi-Fi connection through the Administrator’s Mobile device.
- Page 31 Daily System and Other Operations Updating Device Firmware then… Select Update Firmware in the connected device menu. Select Update. WARNING: Follow the displayed instruction to temporarily enable the ENGAGE device and the Mobile device to share a Wi-Fi connection. 31 • Schlage • ENGAGE Managed Property User's Guide...
- Page 32 Daily System and Other Operations Updating Device Firmware then scroll down … Note: Using the selected device NAME, ENGAGE will save the Wi-Fi PASSWORD into the Mobile Î devices’ “Clipboard”. Using the Mobile device “Cut and Paste” feature, the Wi-Fi password is then pasted into the password field.
- Page 33 Daily System and Other Operations Updating Device Firmware Select Next. Completing the device Firmware updates after download When new firmware has been downloaded into a device, the new firmware is not usable until the device installs the update into its internal memory. Each device automatically follows a successful firmware download with an additional firmware installation process.
-
Page 34: Scheduled "Overnight" Firmware Updates
Daily System and Other Operations Scheduled “Overnight” Firmware Updates Scheduled “Overnight” Firmware Updates Firmware update scheduling is available for Schlage NDE80, NDEB, LE, LEB CTE, and MT20W devices using the ENGAGE Web Application. Administrators use this feature to keep their devices updated with the latest firmware revision and functionality. - Page 35 Daily System and Other Operations Scheduled “Overnight” Firmware Updates Note: Garage 141B, Laundry 137, Lobby 83, Pool 142 and Pool 286 firmware is not at the Î latest revision. Notice that the Storeroom has outdated firmware as well, but that device is a Schlage Control device and cannot be selected for scheduled firmware updates.
-
Page 36: Retrieving Audit Data From Devices
Daily System and Other Operations Retrieving Audit Data from Devices • Be sure that the device has Wi-Fi connectivity enabled • Ensure the local Wi-Fi is operating • Ensure local Wi-Fi was available at the door over-night – was there an outage? •... - Page 37 Daily System and Other Operations Viewing Audit Information Select the desired lock from the list – we chose Storage Room. Select Device Audits button. View the available device Audits Note: Use the column headers to quickly sort and find the displayed Audit data. Î...
- Page 38 Daily System and Other Operations Viewing Audit Information Use the available Sort and Filter options, as desired. Note: Use the Sort and filter options and column headers to quickly sort the displayed Audit Î data. • Sort by all Devices or a specific device •...
- Page 39 Daily System and Other Operations Viewing Audit Information To enable nightly Wi-Fi updates, configure any Wi-Fi enabled device to use the Wi-Fi network that is locally available at the device. Once the Wi-Fi settings are entered, the Administrator will be able to verify the Wi-Fi connection using the “Test the Wi-Fi connection”...
- Page 40 Daily System and Other Operations Viewing Audit Information Then Once connected, scroll down and Select Settings. Select Wi-Fi menu under GENERAL. 40 • Schlage • ENGAGE Managed Property User's Guide...
- Page 41 Daily System and Other Operations Viewing Audit Information Fig. 7.6: Wi-Fi Then Move the Wi-Fi slider to the right to enable Wi-Fi connectivity View the full Wi-Fi Configuration menu. By default, the Display/Save Network List is enabled. Note: When enabled, the Wi-Fi network details you SAVE will be automatically stored by the Î...
- Page 42 Daily System and Other Operations Viewing Audit Information Fig. 7.7: Wi-Fi Enter the Wi-Fi network details: Name (SSID) Security selection, password may be required Select SAVE Note: Select Test Wi-Fi Connection to initiate the test to verify that the Wi-Fi network is Î...
- Page 43 Daily System and Other Operations Viewing Audit Information Device will connect. Fig. 7.8: Device Fig. 7.9: More Fig. 7.10: Connecting Once connected, scroll down and select Settings. Select Wi-Fi option. Fig. 7.11: Settings Fig. 7.12: Wi-Fi Option Slide on Wi-Fi to display the Wi-Fi Configuration. 43 •...
- Page 44 Daily System and Other Operations Viewing Audit Information Fig. 7.13: Wi-Fi Fig. 7.14: Wi-Fi Configuration WARNING: Wi-Fi networks that appear in the available network list may not be accessible at your current location. Select a Previously Saved Network Each time a unique Wi-Fi network is entered and saved; the network details are automatically saved by the Mobile device.
- Page 45 Daily System and Other Operations Viewing Audit Information Fig. 7.15: iOS Fig. 7.16: Android WARNING: A saved network may not be locally available at the physical location of your installed device. When using a Saved Network, ensure you select the Wi-Fi network that is local to the device being set up and in Wi-Fi range for good communication.
- Page 46 Daily System and Other Operations Viewing Audit Information Fig. 7.21: iOS Test Fig. 7.19: iOS Saved Fig. 7.22: Android Test Fig. 7.20: Android Saved Select Test Wi-Fi Connection • To test to verify that the Wi-Fi network is available, and the device Wi-Fi details settings are correct 46 •...
-
Page 47: Synchronization
Daily System and Other Operations Synchronization Fig. 7.23: Test Wi-Fi Fig. 7.24: Time Remaining Note: AMBER The device LED flashes while Wi-Fi Connection testing is in process. This Wi-Fi Î Connection test will take a several minutes. View, the device has successfully connected to the host. Fig. - Page 48 Daily System and Other Operations Synchronization The ENGAGE Sync feature updates devices using the latest ENGAGE system settings and programmed access rights. Sync also captures and returns the latest Device and User Audits for review by the Administrator. A device requires Sync when the exclamation point appears next to the device name while viewing All Devices.
- Page 49 Daily System and Other Operations Synchronization Select More ... to communicate (connect) with the Storage device then Scroll down the screen to reveal the Settings menu at the bottom. then Select Settings. Select the Wi-Fi menu (under GENERAL). 49 • Schlage • ENGAGE Managed Property User's Guide...
- Page 50 Daily System and Other Operations Synchronization then Slide the Wi-Fi button to display the Wi-Fi setup menu. Note: The Save Network button is enabled by default Î Wi-Fi network Security settings are automatically stored by the Mobile device and made available for menu selection (easier setup) on new Wi-Fi enabled devices.
- Page 51 Daily System and Other Operations Synchronization Then… Select the Wi-Fi menu under the General heading. Note: This example is for WPA2 (PEAP) network security. Username and Passwords are Î unique for this Wi-Fi network security Select Test Wi-Fi Connection menu. 51 •...
- Page 52 Daily System and Other Operations Synchronization Select Test Wi-Fi menu to initiate the test. Note: The device LED flashes AMBER while testing the Wi-Fi network connection. Be patient, Î this test can take a few minutes to complete Once the Wi-Fi connections is completed, the Administrator will see the Success message below. Acknowledge the Success message.
- Page 53 Daily System and Other Operations Synchronization WARNING: When the Wi-Fi Connection fails, recheck the following items: - Confirm that the network name (SSID) was entered correctly - Confirm the network security is at the correct setting (Verify with the local IT Administrator) - Confirm the PASSWORD entered was correct - Verify the local Wi-Fi network is ON and available at this location Alternatively, verify local Wi-Fi network settings using a Mobile phone to connect to the same Wi-Fi...
- Page 54 Daily System and Other Operations Synchronization Firmware device updates are performed manually at the door using the ENGAGE Mobile Application or devices may be set up to use the local Wi-Fi network for automated updates when the device supports Wi-Fi connectivity. •...
- Page 55 Daily System and Other Operations Synchronization Select the In-Range device to receive the firmware update. • The device being updated will be in an area without Wi-Fi network connectivity or the device does not have its Wi-Fi enabled (ON). Fig. 7.28: More Fig.
- Page 56 Daily System and Other Operations Synchronization Fig. 7.31: Current Version Select the Update button. Fig. 7.33: Downloading Fig. 7.32: Server Connecting Note: While downloading a progress bar is shown. Firmware downloads can take a few Î minutes. 56 • Schlage • ENGAGE Managed Property User's Guide...
- Page 57 Daily System and Other Operations Synchronization Fig. 7.34: Download Progress… Note: This download process will take a few minutes, be patient. After downloading, the Î device will take a few minutes to “Install the new firmware”. While installing the new firmware, the device will flash the LED RED and GREEN to show update status is progressing –...
- Page 58 Daily System and Other Operations Synchronization WARNING: The LE, NDE, CTE, and MT20W product families must have their Wi-Fi network configured and a local Wi-Fi network available before overnight firmware updates are possible. Control Mobile Enabled Smart Locks do not support automated overnight firmware updates.
-
Page 59: Viewing Audit Information
Daily System and Other Operations Viewing Audit Information • A ‘firmware updates have been scheduled’ message appears. Fig. 7.38: Updates Scheduled The scheduled firmware updates will process overnight. • The day after the firmware updates were scheduled, review the current firmware version for each of the selected devices to ensure they have been updated and match the latest firmware version. - Page 60 Daily System and Other Operations Viewing Audit Information For Schlage Control Mobile Enabled Smart Locks, audits can only be retrieved locally at the door using the ENGAGE Mobile Application while all other ENGAGE devices may have Device and User audits gathered at the door, or remotely by taking advantage of these devices’...
- Page 61 Daily System and Other Operations Viewing Audit Information Property Wide Device Audits Using the ENGAGE Web Application Open the ENGAGE Web Application. Select the AUDITS menu and the Audits tab. Use the available Device, User and All Audits sort and filter options. Select the button after each sort and filter action to view the updated fields and to view the latest Audits...
-
Page 62: Web Application
Web Application Introduction The ENGAGE Web Application is used to set up and manage a property with ENGAGE enabled devices. Administrators will use the ENGAGE Web Application for property management data entry and general maintenance. Management of the property may be accomplished from virtually anywhere using a web browser. -
Page 63: Interface Reference
Web Application Interface Reference Interface Reference Site name Settings Help 63 • Schlage • ENGAGE Managed Property User's Guide... -
Page 64: Create Account
Web Application Create Account Create Account Administrators must create an account in ENGAGE to manage team members, users, devices, schedules, global settings, and other functions for their properties. Create Account. Select Fig. 8.1: ENGAGE Logon Screen From the New Account screen, complete all fields. Email Address: must be unique and not used for any other ENGAGE Managed Property. -
Page 65: Log In
Web Application Log In Log In Navigate to https://portal.allegionengage.com/signin. Enter the email address you used to set up your account and your password. Sign Select Fig. 8.5: Login screen 65 • Schlage • ENGAGE Managed Property User's Guide... -
Page 66: Create Site
Web Application Create Site Create Site Administrators should think through their A Site is a group of users and devices; a property. property needs and desired features Log In. before beginning in order to save time and MANAGE From the Settings menu, choose streamline the SITES. -
Page 67: Users
Web Application Users Users Users are people who need to gain access to an opening in your site. They must also be assigned a Credential before access can be granted. Fig. 8.10: Users Tab Table 8.1 Users Properties Property Description Required Default First Name... - Page 68 Web Application Users Add User Log In Users Tab. and open the User. Select Fig. 8.12: Add User Button Add New User From the screen, complete the fields: Note: Table 8.1 Users Properties Î details. Select Save. Fig. 8.13: Add New User User added banner is displayed and the user information screen displays.
- Page 69 Web Application Users Edit User Log In Users Tab. and open the Select a current user. Fig. 8.15: Select a User Select the edit user button. Fig. 8.16: Edit User Button Edit User From the screen, make changes to the fields: First Name: enter the first name of the user.
- Page 70 Web Application Users Delete User Log In Users Tab. and open the Select a current user. Fig. 8.19: Select a User Select the edit user button. Fig. 8.20: Edit User Button Delete User. Select Fig. 8.21: Delete User Button DELETE Confirm: Type into the...
- Page 71 Web Application Users Add a Physical Credential to a User Adding a credential to a user connects the credential to the specific user. This process identifies the user in both the ENGAGE Audits and in the ENGAGE Device databases. Log In and open the Users Tab.
- Page 72 Web Application Users Add a Mobile Credential to a User Bluetooth communication is Adding a credential to a user connects the credential to the specific user. This process identifies the required for Mobile user in both the ENGAGE Audits and in the ENGAGE Device databases. Credential use and Log In and open the...
- Page 73 Web Application Users Edit Credential Log In Users Tab. and open the Select the user whose credential needs to be edited. Fig. 8.32: Select a User Select the credential you want to edit Fig. 8.33: Select Credential Select the desired Credential Function from the drop down list.
- Page 74 Web Application Users Delete Credential Log In Users Tab. and open the Select the user whose credential needs to be edited. Fig. 8.35: Select a User Select the credential you want to delete. Fig. 8.36: Select Credential Delete this credential. Select Fig.
- Page 75 Web Application Users Assign Access Users Devices You can assign access either from the section or from the section. Log In and open the Users Tab. Select the user whose access needs to be edited. Fig. 8.40: Select a User Assign Access Select the button.
- Page 76 Web Application Users Add Schedule (Users) CAUTION: For Control Mobile Enabled A maximum of 16 User Smart Locks: users exiting a room will not be Schedules can be User schedules are used to restrict access to able to use the outside thumbturn to relock the defined per property.
- Page 77 Web Application Users Edit Schedule CAUTION: For Control Mobile Enabled Smart Locks: users exiting a room will not be able to use the outside thumbturn to relock the deadbolt after scheduled access time has expired. Users Log In and select >...
- Page 78 Web Application Users Deactivate or Delete Schedule Deactivate a schedule if you want to keep the schedule for later use. Delete a schedule if you will not need it again. Users Log In and select > Schedules. Select the schedule you want to deactivate or delete.
-
Page 79: Devices
Web Application Devices Devices Device Settings When a device is commissioned, the defined Default Device Settings are programmed into the device. Administrators may want to adjust specific device settings to be unique for an opening, situation, or feature. To make individual setting changes, follow these steps for a particular device. Add Device Devices are added using the Devices. - Page 80 Web Application Devices Control Mobile Enabled Smart Lock Adjusting the settings here will change the Adjust as needed settings for the and Save to apply currently selected changes. device ONLY. For Control Mobile Enabled Smart Locks that commissioned, a Mobile Credential tab will be available.
- Page 81 Web Application Devices LE and LEB Adjusting the settings here will change the Adjust as needed and Save to apply changes. settings for the currently selected device ONLY. Reader Sensitivity is Normal set to default and is recommended for most properties. Use a Reader Sensitivity of High or Max to enable a more reliable...
- Page 82 Web Application Devices Table 8.3 LE and LEB Device Settings Setting Description Name The name of the device Settings Tab Relock Delay Immediately after unlocking, set the lock to automatically relock itself between 1 – 30 (seconds) seconds. ADA Relock Delay Enables ADA operation to allow additional time to access doors.
- Page 83 Web Application Devices NDE80 and NDEB These are the individual default Adjust as needed and Save to apply changes. Settings for the selected NDE product family. Adjusting the settings here will only change the settings for the currently selected device. Fig.
- Page 84 Web Application Devices Table 8.4 NDE80 and NDEB Device Settings Setting Description Settings Tab Name The name of the device Relock Delay Immediately after unlocking, set the lock to automatically relock itself between 1 – 30 (seconds) seconds. ADA Relock Delay Enables ADA operation to allow additional time to access doors.
- Page 85 Web Application Devices These are the individual default Adjust as needed and Save to apply changes. Settings for the selected CTE product family. Adjusting the settings here will only change the settings for the currently selected device. Fig. 8.61: CTE Individual Settings 85 •...
- Page 86 Web Application Devices Table 8.5 CTE Device Settings Setting Description Settings Tab Name Name of the device Relock Delay When a valid credential is presented, the locking device unlocks and then relocks. (seconds) Delayed relocks are from 1 – 30 seconds. ADA Relock Delay Enables ADA operation to allow additional time to access doors.
- Page 87 Web Application Devices Delete Device Devices Select the menu Devices and the pull down. Select device from the device list. Fig. 8.62: Devices > Devices Delete Select the button. delete Type into the Confirm: box. Select the Delete button to continue. Device deleted confirmation message will be displayed.
-
Page 88: Device Groups
Web Application Device Groups Device Groups Device Groups are created to manage any number of doors which have common user access such as a lobby, garage or a pool area. Device Groups reduce the number of sector (or folder) assignments on a user’s physical credential. Individual openings assigned into a Device Group are treated as a single assignment when programming the user credential and requires only one credential sector for access to all doors in the group. - Page 89 Web Application Device Groups Assign Devices to Device Group WARNING: A device can be included in ONLY one Device Group. Device Groups should be very static and not require frequent updates. Any updates to a Device Group require a sync of each affected device in the group before the group update is valid.
-
Page 90: Schedules
Web Application Schedules Devices for group updated successfully message appears. • The Device Group also now displays the Assigned Devices. Fig. 8.71: Assigned Devices in Device Group Schedules Only the Administrator can There are two types of Schedules: create, edit, and BEST PRACTICE: assign Access and... - Page 91 Web Application Schedules Add Device Schedule A device unlocking schedule and a device Device Schedules are defined to schedule automatic lock/unlock operations at a door. A maximum of locking schedule will eight (8) Device Schedules can be defined per property. require two device Note: Think of Device Schedules as Open Hours, Lock up Time, etc.
- Page 92 Web Application Schedules Assign Devices to a Schedule A device unlocking schedule and a device locking schedule will CAUTION: Control Mobile Enabled Smart Locks DO NOT support Device Schedules. require two device schedule assignments Log In. to be defined Devices >...
- Page 93 Web Application Schedules Edit Device Schedule Log In. Devices > Schedules. Select Figure 8.78: Devices > Schedules Select the schedule you want to edit. The schedule will be displayed. Edit Select the button. Figure 8.79: Schedules Edit Schedule From the screen, complete required fields.
- Page 94 Web Application Schedules Delete Device Schedule Log In. Devices > Schedules. Select Figure 8.81: Devices > Schedules Select the schedule you want to delete. The schedule will be displayed. Delete Select the button. Figure 8.82: Schedules Select the button. CAUTION: Devices that use the schedule must be programmed before the schedule will be updated.
-
Page 95: Holidays
Web Application Holidays Holidays Holidays are defined by the Administrator to manage CAUTION: doors during holidays or scheduled special events. A Control Mobile Enabled maximum of 32 Holiday can be defined per property. Smart Locks DO NOT support Holiday Holidays can be defined to span multiple days when Schedules. - Page 96 Web Application Holidays Assign Devices to a Holiday Schedule CAUTION: Control Mobile Enabled Smart Locks DO NOT support Holiday Schedules. Log In. Devices > Holidays. Select Fig. 8.87: Devices > Holidays Select the holiday to which you want to assign devices.
- Page 97 Web Application Holidays Edit Holiday Schedule Log In. Devices > Holidays. Select Fig. 8.90: Devices > Holidays Select the holiday you want to edit. Edit Select the button. Fig. 8.91: Edit Holiday Button Edit Holiday From the screen, complete the required fields: Name Enter a descriptive name for the...
- Page 98 Web Application Holidays Delete Holiday Schedule Log In. Devices > Holidays. Select Fig. 8.93: Devices > Holidays Select the holiday you want to edit. Delete Select the button. Fig. 8.94: Delete Holiday Button Select the button. Fig. 8.95: Delete Holiday 98 •...
-
Page 99: My Team
Web Application My Team My Team Team Member assignments and Adding Team Members allows other individuals to help the Administrator manage the property. Team updates can be members can be assigned roles to allow or limit specific capabilities. managed in the ENGAGE web and Note: For specific capabilities of each role, see... - Page 100 If email is never received, see Resend or Delete Invitation on page 101. Fig. 8.98: Allegion ENGAGE Invitation Email Read the Terms & Conditions and select I Accept button to acknowledge and accept the terms and conditions. Fig. 8.99: Accept Terms & Conditions Enter the Account details.
-
Page 101: Global Settings
Web Application Global Settings Resend or Delete Invitation It may be Notice the status of necessary to each team member. A resend or member who has delete an been invited but has invitation. not yet set up and verified their account Log In. -
Page 102: Credentials
Web Application Credentials Credentials Badge ID Search The badge id search The Badge ID Search can be used to search for a badge ID so the User can be identified. The ‘badge id’ only applies to smart cards scanned on can be found on the credential. - Page 103 Web Application Device Defaults Control Mobile Enabled Smart Lock Fig. 8.103: Control Default Settings Table 8.10 Control Mobile Enabled Smart Lock Property Wide Settings Setting Description Beeper Enabled When set to ON the lock beeper will sound to provide device status. When set to OFF the lock beeper will remain silent.
- Page 104 Web Application Device Defaults Fig. 8.104: CTE Default Settings Table 8.11 CTE Device Property Wide Settings Setting Description Beeper Enabled • ON: the lock beeper will sound to provide device status. • OFF: the lock beeper will remain silent. Relock Delay When a valid credential is presented, the locking device unlocks and then relocks.
- Page 105 Web Application Device Defaults LE and LEB Fig. 8.105: LE Default Settings Table 8.12 LE and LEB Device Property Wide Settings Setting Description Beeper Enabled • ON: the lock beeper will sound to provide device status. • OFF: the lock beeper will remain silent. Relock Delay When a valid credential is presented, the locking device unlocks and then relocks.
- Page 106 Web Application Device Defaults NDE80 and NDEB Fig. 8.106: NDE Default Settings Table 8.13 NDE80 and NEDB Device Property Default Settings Setting Description Beeper Enabled • ON: the lock beeper will sound to provide device status. • OFF: the lock beeper will remain silent. Relock Delay When a valid credential is presented, the locking device unlocks and then relocks.
- Page 107 The Remote Monitor and Remote Undog (RU/RM) product is included here only to enable Î Allegion sales teams a means to demonstrate the RU/RM exit device product line to prospective PACS customers. Customers using our PACS providers for their property...
-
Page 108: Reader Defaults
Web Application Reader Defaults Reader Defaults Notice that as you enable certain Reader Default settings allow for the most common settings, other WARNING: credentials to be available when a device is new out Any setting changes or settings are disabled. of the box or recently had a factory default reset updates made to an installed and Some settings conflict... -
Page 109: Mobile Application
While it is impossible to keep up with all the different Mobile devices and the latest operating software versions, Allegion endeavors to make our systems compatible with the widest variety of Mobile devices possible. Using the newest “Flagship” Mobile devices is recommended for optimum functionality and robust performance when using any ENGAGE products. -
Page 110: Log In
Mobile Application Log In Log In When the ENGAGE application is first opened on your mobile device, the Log In screen will be displayed. Enter the email address and password that is associated with your account, then tap the Log In button. - Page 111 Mobile Application Devices Add Device While near the device you want to add, open Devices screen. Tap the plus button. Choose the type of device you want to add, and follow the on-screen instructions. Note: Installation and Commissioning Î information about specific devices. Delete Device Devices Open the...
- Page 112 Mobile Application Devices Update Device Firmware While near the device you want to update, Devices open the screen. Devices that need to be updated have next to the name. Click on the device you want to update, and then click More. Update Firmware Click the button, and follow...
-
Page 113: Users
Mobile Application Users Users Add User Users Open the tab. Tap the plus button. First Name Last Name. Fill in the and the Click the save button (iOS) or icon (Android). You can now add Credentials Assign Access for the new user. Delete User Users Open the... -
Page 114: My Team
Mobile Application My Team My Team The My Team tab shows site administrators. See Team member roles for more information. Add Team Member My Team Open the tab. Tap the plus button. First Name, Last Name Email Fill in the and the Address. -
Page 115: Sites
Mobile Application Sites Sites All sites are displayed. Select to see all the devices in the site. More to see the Site Settings. Fig. 9.1: Sites Site Settings Table 9.3 Site Settings Name Options Description Edit in Mobile? Role Manager, Operator, Administrator Role of the Team Member who is currently logged in. -
Page 116: No-Tour Feature
No-Tour Feature Overview The No-Tour feature allows Administrators to assign and change access rights without having to physically visit the lock to make access programming updates. Note: When No-Tour is enabled, access right updates can still always be accomplished through the Î... -
Page 117: Enable No-Tour Feature
No-Tour Feature Enable No-Tour Feature No-Tour Physical Credentials Note: These limitations do not apply to No-Tour Mobile Credentials. Î A door assignment counter is displayed when assigning access using a physical credential. There are eleven (11) total available sectors. Each Door or Door Group takes up one sector. While programming access, the status of each credential sector is displayed as: •... -
Page 118: Update Credential For No-Tour Programming
No-Tour Feature Update Credential for No-Tour Programming Update Credential for No-Tour Programming Physical Credentials Update the user’s access rights. See Assign Access Remove Access. Obtain the user’s No-Tour credential to be programmed with changes. Ensure the MT20W credential reader is powered up ready for use with the “Blue”... - Page 119 No-Tour Feature Update Credential for No-Tour Programming Finish Click and remove the credential from the reader. The user’s credential and User account have now been updated. Fig. 10.4: Update Success Fig. 10.5: Updated User Account WARNING: The No-Tour feature will make the access changes at the door when the credential is presented by the user.
-
Page 120: No-Tour Temporary Maintenance Access
No-Tour Feature No-Tour Temporary Maintenance Access No-Tour Temporary Maintenance Access When Temporary or Maintenance Access is needed, it is recommended for the No-Tour Administrator to manipulate User Activation or Expiration settings, along with a limited User (Maintenance) Schedule. This allows the Administrator to use a User Activation / Expiration setting to specify the day (or days) maintenance access is needed, and then use a pre-defined maintenance User Schedule to specify the specific “Time-Of-Day”... - Page 121 No-Tour Feature No-Tour Temporary Maintenance Access Fig. 10.7: Set Expiration for Today to Limit Access When a Maintenance Contractor access expires per its Expiration setting • The credential can be reused as if new again. • Reprogram expired credentials new set of doors and/or Door Groups, new expiration date, iii.
-
Page 122: Installation And Commissioning
Some specific notes and places where installers have had concerns to be aware of are presented here for clarity. The links below are provided for quick reference to the individual ENGAGE product offerings. Select a link to go to the Allegion website for more product details. Table 11.1 Device Installation Guides Device... -
Page 123: Control Mobile Enabled Smart Lock
Installation and Commissioning Control Mobile Enabled Smart Lock Control Mobile Enabled Smart Lock Device Introduction The installation instructions outlined here are excerpts from the devices’ Installation Instructions found in the box and cover the most common issues encountered when installing the device. ... - Page 124 Installation and Commissioning Control Mobile Enabled Smart Lock Install the Device Install the Schlage Control Mobile Enabled Smart WARNING: DO NOT USE A Lock as directed in the installation instructions POWER DRILL for installation. Power provided in the box. tools may damage the product. Pay special attention to the following items during the installation process.
- Page 125 Installation and Commissioning Control Mobile Enabled Smart Lock When plugging in the cable, be sure to connect with the RED wire on the bottom. The connecter is designed to fit in only one orientation. DO NOT FORCE THIS CONNECTION as connector damage is possible.
- Page 126 Installation and Commissioning Control Mobile Enabled Smart Lock Factory Default Reset (FDR) Overview A Factory Default Reset (FDR) will return the Control Mobile Enabled Smart Lock to its original settings as shipped from the factory. Additionally, the following will occur. •...
- Page 127 Installation and Commissioning Control Mobile Enabled Smart Lock Create a Normal Construction Credential for Control Enter Construction Mode: • Control Mobile enabled Smart Locks will accept he first valid credential presented to set the “Facility Code” for all Construction cards to be used at the door. •...
- Page 128 Installation and Commissioning Control Mobile Enabled Smart Lock Commissioning the Control Mobile Enabled Smart Lock Commissioning a device enrolls the device into WARNING: ENGAGE, defines the device name, and prepares the Before commissioning a device for later setup steps. device, Administrators should create any needed schedules and review Property To commission a Control Mobile Enabled Smart Wide default device settings.
- Page 129 Installation and Commissioning Control Mobile Enabled Smart Lock The next screen displays: • Only once per property • Only once for each Administrator • Only once for each product type Note: This is the ONLY reminder to think about and use the Î...
- Page 130 Installation and Commissioning Control Mobile Enabled Smart Lock View the Schlage Control device commissioned successfully Check Mark message. Finish 16. Select to complete the commission Add another Control device process or, select to continue enrolling additional Schlage Control devices. Fig. 11.16: Preparing your Fig.
-
Page 131: Le And Leb Engage Devices
Installation and Commissioning LE and LEB ENGAGE Devices LE and LEB ENGAGE Devices There are no installation The installation instructions outlined here are excerpts from the Installation Instructions found in the differences for the LE box and highlight the most common issues encountered when installing the device. and LEB locks. - Page 132 Installation and Commissioning LE and LEB ENGAGE Devices Prepare to Install the Device Tools Needed: Verify the door is properly prepared before Phillips screwdriver WARNING: DO NOT USE A installation (#1, #2) POWER DRILL for installation. Power Verify the Door thickness, the Mortise pocket pin wrench tools may damage the product.
- Page 133 Installation and Commissioning LE and LEB ENGAGE Devices For best results, ensure the following: • Verify the chassis can be dry fit into the mortise pocket before final installation, without damaging external wiring. • The Request-To-Exit (RTE), Door Position Sensor (DPS) and other wiring should be verified.
- Page 134 Installation and Commissioning LE and LEB ENGAGE Devices Verify Success of Installation Once the lock is properly installed: • The inside lever moves the latch in and out of the door and frame smoothly and without resistance. • If the lock is a deadbolt version the thumb turn, and deadbolt also move in and out of the door and frame smoothly without restriction.
- Page 135 Installation and Commissioning LE and LEB ENGAGE Devices Construction Access Mode: • The Construction Access Mode is enabled by default out of the box. • Construction Mode is a temporary mode of operation and is NOT required to operate lock. •...
- Page 136 Installation and Commissioning LE and LEB ENGAGE Devices Commissioning the LE and LEB Locks Commissioning enrolls the device into ENGAGE, WARNING: Any setting changes or defines the device name, and prepares the device for updates made to an installed and later setup steps.
- Page 137 Installation and Commissioning LE and LEB ENGAGE Devices Select the LE device to be commissioned. If no device Note: information is Only devices with a recent inside lever turn will be displayed. Î displayed, ensure the The device “advertises” for 2 minutes to allow selection in following: this step.
- Page 138 Installation and Commissioning LE and LEB ENGAGE Devices 13. Select the lock function. • Apartment: Door doesn’t relock automatically to prevent the user from being locked out of their residence. The interior pushbutton or deadbolt will allow the resident to lock the door from the inside. •...
- Page 139 Installation and Commissioning LE and LEB ENGAGE Devices 17. Select: Finish • to complete the commission process. Add Another LE Device • to continue enrolling LE or LEB locks. Finish 18. When is selected, the newly commissioned device is shown in the ENGAGE Mobile Application Devices screen with its new name.
-
Page 140: Nde80 And Ndeb Engage Devices
Installation and Commissioning NDE80 and NDEB ENGAGE Devices NDE80 and NDEB ENGAGE Devices Device Introduction The installation instructions outlined here are excerpts from the devices’ Installation Instructions in-the-box and cover the most common issues encountered when installing the device. Before installing the device, review the Installation Instructions for the Schlage NDE80 and NDEB lock contained within their respective boxes. - Page 141 Installation and Commissioning NDE80 and NDEB ENGAGE Devices Install the Device Install the NDE or NDEB as indicated in the Installation Instructions. WARNING: Ensure cable is routed with no pinching and with both cable connections properly seated in the proper channels.
- Page 142 Installation and Commissioning NDE80 and NDEB ENGAGE Devices NDE80 ONLY: Install the Magnet and Strike Depending on the door frame requirements, ANSI and T-Strike DPS sensor options are available. Install the provided standard DPS magnet or install the magnet tray along with the appropriate strike. Note: ANSI Strikes with the Magnetic Tray are recommended.
- Page 143 Installation and Commissioning NDE80 and NDEB ENGAGE Devices With the DPS door drill preparation accomplished and the NDEB inside escutcheon properly installed, the DPS may be fully installed. • Feed the wires through the interconnected drill holes to bring the wires to the interior side of the door •...
- Page 144 Installation and Commissioning NDE80 and NDEB ENGAGE Devices Construction Access Mode: The Construction Access Mode is enabled by default and may be after a Factory Default Reset (FDR). • Construction Mode is a temporary mode and is NOT required to operate lock. •...
- Page 145 Installation and Commissioning NDE80 and NDEB ENGAGE Devices Commissioning the Device Commissioning a device enrolls the device into WARNING: ENGAGE, defines the device name, and prepares the Any setting changes or device for later setup steps. updates made to an installed and previously commissioned device will •...
- Page 146 Installation and Commissioning NDE80 and NDEB ENGAGE Devices The next screen displays: • Only once per property • Only once for each Administrator • Only once for each product type Note: This is the ONLY reminder to think about and use the Î...
- Page 147 Installation and Commissioning NDE80 and NDEB ENGAGE Devices 11. Select Yes, after verifying the device LED is blinking. Fig. 11.52: Light Blinking 12. Provide a descriptive name (Main Office) under Device Name. 13. Select Next. Fig. 11.53: Name Device 14. Select the lock function desired at this opening. Note: Notice, when a lock function is selected, a description Î...
- Page 148 Installation and Commissioning NDE80 and NDEB ENGAGE Devices 16. Select Skip Let’s assume that the propertied local Wi-Fi network has not been set up yet and there are no local Wi-Fi network connections available. Note: See Enabling Wi-Fi Network Connection Settings for setup Î...
-
Page 149: Cte Controller With Multi-Technology Readers
Installation and Commissioning CTE Controller with Multi-Technology Readers CTE Controller with Multi-Technology Readers Device Introduction WARNING: DO NOT USE A POWER DRILL! ONLY use a hand tool to install the The installation instructions outlined here are devices to prevent product damage. excerpts from the devices’... - Page 150 Installation and Commissioning CTE Controller with Multi-Technology Readers Mount/Install the Devices Install the Schlage CTE and all accessories as WARNING: directed in their respective installation instructions. To avoid damage to the Schlage CTE electronics during CTE Installation installation, use CAUTION when drilling holes for the external wiring exit/entry The Schlage CTE is provided in an enclosure that connector holes.
- Page 151 Installation and Commissioning CTE Controller with Multi-Technology Readers Credential Reader Connection to CTE The credential reader must be properly wired for power and communication and Paired (or linked) to the CTE for proper operation. • When properly connected and powered up, the attached credential reader will automatically be recognized during the initial Power-On process.
- Page 152 Installation and Commissioning CTE Controller with Multi-Technology Readers Perform an FDR Remove the lid. Press and HOLD the FDR button for 5 seconds, then release. • CTE will beep 2 times and the STATUS LED will blink GREEN 2 times at the end of 5 seconds. Press the Schlage button 3 times;...
- Page 153 Installation and Commissioning CTE Controller with Multi-Technology Readers Note: CTE Master Construction Credentials do not provide access. Master Construction Î Credentials can only add other User Access Construction Credentials to each installed CTE. If a credential is not presented within 20 seconds a timeout will occur and the CTE will begin working as an access control device again.
- Page 154 Installation and Commissioning CTE Controller with Multi-Technology Readers Commissioning the CTE Commissioning a CTE enrolls the device into ENGAGE, defines the device name, and prepares the device for later setup steps. While near the CTE, log in to the ENGAGE Mobile application. The blank Devices Screen will appear.
- Page 155 Installation and Commissioning CTE Controller with Multi-Technology Readers • Only once for each Administrator • Only once for each product type Note: This is the ONLY reminder to think about and use the predefined Property-Wide Î Settings (pg. 25) before setting up several devices. Administrators can use the currently defined default ENGAGE settings for this device or elect to modify the Property Wide settings now.
- Page 156 Installation and Commissioning CTE Controller with Multi-Technology Readers Fig. 11.68: Select CTE Device Note: The CTE “advertises” for 2 minutes to allow selection. When the device appears in this Î screen, the number is the device serial number. WARNING: If no device information is displayed, ensure the following: •...
- Page 157 Installation and Commissioning CTE Controller with Multi-Technology Readers Fig. 11.71: Please Wait Fig. 11.72: Name Device Provide a descriptive name under Device Name Select Next. Fig. 11.73: Strike Type Select the strike type installed on the door. • If your strike type is not listed, select Other. Select the AUX Relay type.
- Page 158 Installation and Commissioning CTE Controller with Multi-Technology Readers Fig. 11.74: AUX Relay Select if the door has a horn. • If there is no horn, select Nothing Connected. Fig. 11.75: Horn WARNING: The NEXT step in the commissioning process can enable the Wi-Fi network connection capabilities of the CTE.
- Page 159 Installation and Commissioning CTE Controller with Multi-Technology Readers Fig. 11.76: iPhone Wi-Fi Screen • Select Skip: Let’s assume that the property wide local Wi-Fi network has not been setup yet and there are no local Wi-Fi network connections available. Note: See Enabling Wi-Fi Network Connection Settings for setup requirements when a Wi-Fi Î...
- Page 160 Installation and Commissioning CTE Controller with Multi-Technology Readers Fig. 11.79: Device Added Fig. 11.80: Commissioning Successful Configuration Cards Configuration cards are special cards used for configuration and programming the Credential Readers. The original Schlage family of Multi-Technology (MT11 / MT15) Wall Mounted Credential Readers require configuration card programming to disable/enable card technologies.
-
Page 161: Mt20
Installation and Commissioning MT20 MT20 Before you begin, review the product information for the Schlage MT20 contained in the box. Also, in the box will be the MT20 Enrollment Reader User Guide and a set of output format configuration cards. WARNING: The MT20 is not compatible with the ENGAGE No-Tour features. - Page 162 Installation and Commissioning MT20 Fig. 11.83: Enroll New Credential • The MT20 will momentarily flash GREEN while reading the credential data and will return to solid RED, waiting for the next credential enrollment presentation. • If the MT20 does not respond to a credential presentation, and the LED remains with no beeps, the credential is not a valid credential type and is not supported.
-
Page 163: Mt20W Engage Device
Installation and Commissioning MT20W ENGAGE Device MT20W ENGAGE Device The MT20W does not read prox Before you begin, review the product information for the Schlage MT20W credentials. contained in the box. Also, in the box will be the MT20W Enrollment Reader User Guide and the Factory Reset Default Configuration card. - Page 164 Installation and Commissioning MT20W ENGAGE Device Commissioning the MT20W Commissioning a MT20W enrolls the enrollment reader into ENGAGE, defines the MT20W “Friendly Name” name, and prepares the MT20W for later setup steps. Note: When commissioning a MT20W Credential Enrollment reader, the No-Tour ENGAGE feature Î...
- Page 165 Installation and Commissioning MT20W ENGAGE Device Select the specific Schlage Reader (MT20W) device to be commissioned from the list of nearby devices provided. • More than one device may be available for commissioning. • We chose Schlage Reader serial number C20000000000010B by tapping on that specific Schlage Reader in the screen as shown below.
- Page 166 Installation and Commissioning MT20W ENGAGE Device • The Please wait… screen displays and is immediately followed by the data transfer method question that the Administrator must answer: • Which data transfer method are you using? Select USB (recommended). 10. Preparing your device and SUCCESS checkmark screen displays WARNING: When using USB communication, you must also INSTALL and RUN the ENGAGE PC Desktop Application.
- Page 167 Installation and Commissioning MT20W ENGAGE Device 13. Select Send Link. 14. Acknowledge the Notice and Select Ok. 15. Then Select Exit in the top right-hand corner to continue. The All Devices screen displays showing the recently commissioned MT20W. 167 • Schlage • ENGAGE Managed Property User's Guide...
- Page 168 Installation and Commissioning MT20W ENGAGE Device WARNING: Before using the MT20W with USB communication, you MUST complete the MT20W setup by installing and RUNNING the ENGAGE USB PC Desktop Application Installing the ENGAGE PC Desktop Application After the Desktop Application Send Link button is selected, the ENGAGE system sends a link to the Administrators email with instructions.
- Page 169 Installation and Commissioning MT20W ENGAGE Device Locate the Engage Setup installation application. Run (Double-Click) the Engage_Setup-X.x.x-win.exe installation application to install it. WARNING: PC Administration authority (permissions) are required in order to install the ENGAGE Desktop Application on the computer. The “Xs” in the installation application name is the software version Observe the installation process where the next screens are shown.
- Page 170 Installation and Commissioning MT20W ENGAGE Device anytime the MT20W is using USB connectivity. When running in the background, the ENGAGE Desktop Application ICON can be seen in the computer system tray. Note: After the MT20W reader and Computer connection is established, the serial number and Î...
- Page 171 Installation and Commissioning MT20W ENGAGE Device 10. The firmware is downloaded to the MT20W. The Installing firmware screen displays. 12. Select Finish. 13. The In Range Mobile device display is shown. (currently blank) 171 • Schlage • ENGAGE Managed Property User's Guide...
- Page 172 Installation and Commissioning MT20W ENGAGE Device 14. The MT20W will automatically finish its firmware installation process and then it will reboot. • Be patient, this may take a few minutes. • Wait for all LED flashing to stop. • The boot-up process is complete and the MT20W is communicating when a solid BLUE LED displays.
- Page 173 Installation and Commissioning MT20W ENGAGE Device MT20W USB communication mode The MT20W may be configured to communicate with ENGAGE via USB connection or via a local Wi-Fi network connection. USB connectivity is recommended for the most robust data connection. When connected and communicating with the MT20W, follow these steps to change from a local Wi-Fi network to USB communication mode.
- Page 174 Installation and Commissioning MT20W ENGAGE Device MT20W USB communication operation The Desktop Application acts as a transmitter/ WARNING: receiver between the MT20W and the ENGAGE Web The ENGAGE Desktop Application. Application is required to be running in the background anytime the MT20W is Note: The MT20W LED display indications Î...
- Page 175 Installation and Commissioning MT20W ENGAGE Device Fig. 11.91: Reader Connected • When a credential programming error occurs, an error message along with the error code displays on the screen along with a notification. Fig. 11.92: Error Detected • When the USB enabled MT20W reader is un-plugged from the computer, the Application screen shows that the reader is disconnected.
- Page 176 Installation and Commissioning MT20W ENGAGE Device MT20W Wi-Fi communication mode (Optional) When connected and communicating with the MT20W, follow these steps to change from USB to Wi-Fi communication mode. Ensure the Schlage MT20W is in signal range of the desired local Wi-Fi network access point. Select Next.
- Page 177 Installation and Commissioning MT20W ENGAGE Device Select Settings Select Comm Mode Select Wi-Fi Select Wi-Fi under Communication Mode. Enter the Wi-Fi network details: • Depending on the Wi-Fi network security chosen, you will need to enter different information. • In this case we chose Wi-Fi SSID 610baLWLAN and the WPA2 (PEAP) network security protocol.
- Page 178 Installation and Commissioning MT20W ENGAGE Device 10. Select the Blue Press here on solid blue bar to continue. Acknowledge the “Setup Complete” message. Select Exit. 12. The MT20W device is now shown in the ENGAGE Mobile Application All Devices menu and the In Range menu when the Mobile device is nearby the MT20W.
-
Page 179: Credentials
Credentials There are three types of User Access credentials supported by ENGAGE. Table 12.1 Credential Types Type Description Enrollment Notes Smart A physical card that may be Enrolled individually or Most secure swipe or contactless. Read/write In bulk. capable. Encrypted and secure. Based on open, global standards Proximity A physical card or fob that is... -
Page 180: Enroll Smart Credentials In Bulk
Credentials Enroll Smart Credentials in Bulk Enroll Smart Credentials in Bulk The Administrator must manage the Bulk physical credential enrollment is the recommended credential enrollment process. This will enrolled credentials allow faster initial property setup and streamline the credential assignment processes later. An and match each MT20W reader is used to complete enrollments. -
Page 181: Enroll A Smart Credential Individually
Credentials Enroll a Smart Credential Individually Enroll a Smart Credential Individually An administrator must enroll a new credential whenever a new user is added or a credential needs to be replaced. Plug the MT20W credential enrollment reader into the computer’s USB port. Wait a few seconds until the reader boots up and begins communication. - Page 182 Credentials Enroll a Smart Credential Individually Enrolling New Credentials at a Door (NOT Recommended) When using multi- technology It is possible to assign a credential to a User in credentials and WARNING: ENGAGE using the ENGAGE Mobile Application and ENGAGE cannot track ENGAGE locks with an installed device.
- Page 183 Credentials Enroll a Smart Credential Individually Select the sign to identify devices in- range that can be used as an enrollment reader. • In this case five (5) devices are in-range. We will use the lock named Storage as our enrollment reader. Select a specific device from the Available Enrollment Readers...
- Page 184 Credentials Enroll a Smart Credential Individually Resend Mobile Credential Invitation Log In and open the Users Tab. Select the appropriate user. Fig. 12.10: Select a User Select the mobile credential. Fig. 12.11: Select Mobile Credential Resend Text Message. Select Fig. 12.12: Resend Text Message The user will receive a text message.
- Page 185 Credentials Enroll a Smart Credential Individually No-Tour Credential Programming The ENGAGE No-Tour feature allows Administrators to assign and change access rights without visiting the lock or performing Sync. The Administrator can program a physical Smart credential and/or Mobile credential in their office with new or changed access rights and have that credential make the changes at the affected door(s) when the credential is presented by the credential holder for normal access.
-
Page 186: Physical Credential Reuse: Best Practices
Credentials Physical Credential Reuse: Best Practices Note: If a credential is enrolled using an installed device (enroll at a door) the credential is NOT Î searchable in the ENGAGE application. Only credentials enrolled individually in bulk using the MT20W or MT20 credential enrollment readers are searchable in the ENGAGE application. - Page 187 Credentials Mobile Credential Overview Users with Mobile Access Credential assignment will no longer need to use physical credentials to gain access to their assigned openings, however both credential types (Physical and Mobile) may be assigned to the same user if desired. Note: Users may be assigned ONLY one Mobile Credential at any one time.
- Page 188 Credentials Mobile Credential Overview To access an assigned door, users will follow these simple steps. Open the Schlage Mobile Access application on their Mobile phone. • Notice one level of security is required. Approach an assigned door to within a few feet View the available Mobile Enable devices that are nearby.
- Page 189 Credentials Mobile Credential Overview Use the Access Mobile Application with No-Tour functionality Replace a Credential Replacing a credential swaps one credential for another. The new credential carries the same access assignments as the original credential and blocks or deletes all access from the original (damaged/ broken or lost) credential.
- Page 190 Credentials Mobile Credential Overview Fig. 12.21: Edit Credential Card Select Replace this credential Note: If no credentials are available for replacement, you must enroll a credential now. Î Select a Replacement Credential from stock list. • In this case we chose the only available, Credential #1802. WARNING: Physically locate the credential in your Credential Stock and verify the ink stamp matches the assigned credential from the stock list before Confirming the...
- Page 191 Credentials Mobile Credential Overview Select Confirm. View the momentary Credential Replaced Successfully message. The new Credential 1802 is now listed under the Existing User Credentials and the old “Replaced” credential (1171) has been removed from the list. WARNING: The ICON by the credential indicates the credential now needs programming with the Schlage MT20W.
-
Page 192: Using Master Credentials
Credentials Using Master Credentials Using Master Credentials Master credentials may not be reused. Overview WARNING: Master Credentials may not be allowed for your property. Verify Serious consideration and consultation with local with your Authority Having Jurisdiction authority should be done BEFORE enabling and (AHJ) before proceeding. - Page 193 Credentials Using Master Credentials Enable Master Credential in ENGAGE • Add/Delete Users to become the Master Credential holder. Assign Credentials • to the User, to become the Master Credential. • Assign a Credential as Master. • Update each lock on the Device Firmware property by Updates.
- Page 194 Credentials Using Master Credentials Assign a Credential as Master Any type of credential can be a Master Log In Credential, including BEST PRACTICE: Give the mobile credentials. User a name that identifies them as a Master Credential holder in Device Audits. In this case we picked the current User, Master Credential-1 with Credential 39012...
- Page 195 Credentials Using Master Credentials Follow the instruction provided on screen, then select Next. Fig. 12.28: Update Credential Select Finish. Note: Every Device now has the Device Update Î ICON displayed to inform the Administrator that door updates are needed. The Master Credential itself and all devices are required to be updated before these changes are honored.
- Page 196 Credentials Using Master Credentials View & Delete Master Credential ADVANCED Select the menu and then select the Credentials tab. View All Master Select the Credentials button. All Users with Master Credential assignments are displayed. Fig. 12.30: View All Master Credentials To delete Master credentials Delete Master select...
-
Page 197: Troubleshooting
Troubleshooting Activity and Diagnostics Audits ENGAGE enabled devices provide diagnostic data anytime an action is taken at the device. Diagnostic data provided includes; Battery, Credential, debug-diagnostics, and door actions. Device Audit data is gathered from the device anytime a Sync is performed. When using the nightly W-Fi enabled call-in, device data is gathered automatically. -
Page 198: Mt20W
Troubleshooting MT20W MT20W • When power is applied, the Schlage MT20W LED is RED for about 20 seconds, until the Schlage MT20W boots-up and begins operation. • Boot-up is complete when the Schlage MT20W blinks red and beeps three times. •... -
Page 199: Setting Device Date And Time
Troubleshooting Setting Device Date and Time Setting Device Date and Time • Device date and time is automatically checked and set each time a Mobile device is connected and communicating with the ENGAGE device. • Setting the date and time should only be necessary when the device power has been removed for an extended period. -
Page 200: Frequently Asked Questions
Frequently Asked Questions How can I determine the local Wi-Fi network settings? • Consult with the local property IT responsible person. • Use a Mobile Phone to connect and verify the local Wi Fi network. Does ENGAGE work with 5.0GHz network routers? •... - Page 201 Frequently Asked Questions What are the Battery Life expectations of ENGAGE devices? • Schlage Control: Battery life is 1.5 - 2 years depending on use. • Schlage NDE: Battery life is 1 - 2 years depending on use. • Schlage LE: Battery life is 1 - 2 years depending on use. •...
- Page 202 • Physical Access Control Software (PACS) Partners may provide additional product and system functionality with features not available with ENGAGE. • When considering a PACS to manage Access Control, please consult with Allegion Sales and the PACS provider before registering for a Partner Managed Account in the ENGAGE Web Application.
- Page 203 Frequently Asked Questions Physical Credentials: • No Tour credentials have a limited number of sectors or folders to keep track of door assignments. • There is a maximum of eleven (11) sectors or folders available for device assignment. • For access programming that requires more than 11 devices, use Door Groups. •...
- Page 204 Frequently Asked Questions Mobile credential user is unable to unlock assigned door. Ensure the following tasks has been performed. Verify the Mobile credential is enabled within the lock settings. Verify that access has been given to the correct door. Mobile credentials are given access to doors the same method as physical credentials in ENGAGE.
-
Page 205: Appendix A: Capabilities By Property Role
Appendix A: Capabilities by Property Role Capability Administrator Manager Operator Roles & Application Access New ENGAGE Account Default Role Manage Property Information Multiple Roles per Property Account Access Multiple Property Accounts Web Application Access Mobile Application Access User Management Invite Users as Administrators Invite Users as Managers Invite Users as Operators Assign Users as Administrators... -
Page 206: Appendix B: Engage Training
Appendix B: ENGAGE Training Training Link View ‘how-to’ videos via the Schlage YouTube channel. For Schlage YouTube Channel best viewing results, use Chrome. iOS: Schlage Electronics How-To App View ‘how-to’ videos, product datasheets, and install sheets on your iPhone or iPad. View ‘how-to’... -
Page 207: Appendix C: Credential Functions
Appendix C: Credential Functions Credential Definition Function Normal Unlocks the lock momentarily. Relock delay period is 3 seconds, by default. Relock delay setting can be changed per device, as desired. Toggle Changes the state of the lock from locked to unlocked or unlocked to locked. Schlage Control does not support Toggle credentials. - Page 208 About Allegion Allegion (NYSE: ALLE) creates peace of mind by pioneering safety and security. As a $2 billion provider of security solutions for homes and businesses, Allegion employs more than 7,800 people and sells products in more than 120 countries across the world.
Need help?
Do you have a question about the SES20171127F and is the answer not in the manual?
Questions and answers