
Related Manuals for Macurco DVP-1200


Summary of Contents for Macurco DVP-1200
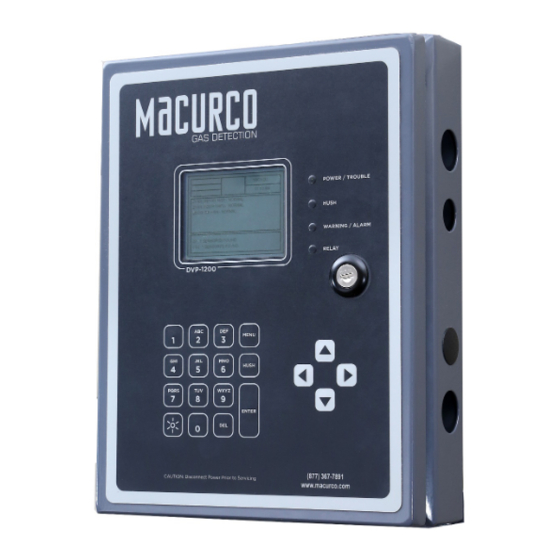
- Page 1 Macurco™ DVP-1200 Manual Detection and Ventilation Control Panel with BACnet Operation Instructions IMPORTANT: Keep these user instructions for reference.
-
Page 3: Table Of Contents
DVP-1200 Manual Table of Contents General Safety Information ................................ 5 List of warnings ................................. 5 Use Instructions and Limitations ..............................6 DVP-1200 General Description ............................6 Remote Relay ..................................6 MRS-485 Modbus Adapter ..............................6 Features ..................................... 7 Specifications ..................................7 Installation Instructions ................................ - Page 4 Appendix A – Table of Figures ..............................59 Appendix C – Replacement Parts ............................. 61 Appendix D – Setup Record ..............................62 Macurco Gas Detection Product limited warranty ........................65 Technical Support Contact Information ............................65 General Contact Information ................................ 65 REV –...
- Page 5 Macurco DVP-1200 Manual REV – 1.3.1 [34-8708-4770-7 ] P a g e...
-
Page 6: General Safety Information
For proper use, see supervisor or User manual, or call Macurco Technical Service at 1-844-325-3050. DVP-1200 may not function effectively below 32°F (0°C) or above 104°F (40°C). Using the equipment outside of this temperature range may adversely affect product. -
Page 7: Use Instructions And Limitations
This panel also has an additional four relay board option in addition to the existing standard four relay boards. With three analog outputs, four 24vdc drivers and another option for up to two remote relays, the DVP-1200 will fit into any gas detection application. -
Page 8: Features
Modular input and output connectors • Ethernet connection for BACnet output (BACnet IP) • USB connection Compatible with Macurco Commercial 6-Series gas detectors, MRS-485 adapter, Horn & Strobe Combo • • Four 24VDC Drivers for external Horn and Strobe •... -
Page 9: Installation Instructions
Mechanical room, Alarm Control Room, or other similar areas are recommended. Mounting holes are provided in the DVP-1200 case at the four corners. See Figure 3-1. The panel should be mounted with space around the panel for access to conduit entry holes provided on the top, bottom, and right side of the panel. -
Page 10: Installation
Do not bundle sensor power or sensor signal connections with other AC power cables to prevent electrical interference. If other AC power connections must be bundled with the DVP-1200 sensor cables, the sensor connections should be made with two REV – 1.3.1... -
Page 11: Installation Diagram
Macurco DVP-1200 Manual twisted pairs of the appropriate gauge, with an overall foil and braid shield. All shields should be terminated at the DVP-1200 end of the cable only. The power connections to the MRS-485 and remote mounted sensors should be size 18 AWG (minimum) for short runs. Refer to Table 3 1 for recommended wire gauges. -
Page 12: Power Connection
The main power cable should be routed into the bottom left conduit entry. Macurco recommends a minimum wire size of 18 AWG and the wire insulator must be rated for at least 140°F (60°C) service. The power connector will accept wire from 12-24 AWG. -
Page 13: Remote Sensor Connection
3.2.4.1 MRS-485 Connection and Operation The Macurco MRS-485 Adapter converts the Macurco 6-Series 4-20mA analog output to a digital output for use with the DVP- 1200 and other addressable network systems. To install the MRS-485 on a Macurco 6-Series detector, 1. - Page 14 DOWN means OFF or 0. For example, to configure a unit as address “50”, set switches “2, 5, 6” (see Table 3-3) to ON or in the up position (01001100). NOTE: If CX-6 is assigned address X and connected to DVP-1200, then address X is assigned to NO2 Sensor (Type: 2) and address X+1 is assigned to CO Sensor (Type: 1) by the panel.
- Page 15 Macurco DVP-1200 Manual Figure 3-7 – Address # "On" Switches Address # "On" Switches Address # "On" Switches Address # "On" Switches 49 = 1, 5, 6 97 = 1, 6, 7 145 = 1, 5, 8 50 = 2, 5, 6...
- Page 16 3.2.4.6 Baud Rate At the baud rate of 19200 (default baud rate for Macurco MRS-485 and DVP-485) and with cables less than 1,000 ft. in length, termination resistors are not recommended. At the baud rate of 19200 and with cables longer than 1,000 ft., termination resistors are recommended.
- Page 17 Macurco DVP-1200 Manual For any other baud rates calculate when (at what length) termination resistors are required. This is calculated by dividing the ���� length L by the ratio between the new baud rate and 19200 or (x/19200) where x is the new baud rate.
- Page 18 MRS-485. The power connections to the remotely mounted detectors should be size 18 AWG (minimum) for short runs. Since Macurco detectors are rated for operation between 12 and 24 VDC or VAC, the voltage drop REV – 1.3.1...
-
Page 19: Remote Relay Connection
5. Ensure that the wire cannot be easily pulled from the connector. 3.2.5 Remote Relay Connection In addition to the onboard relays (four standard and four optional), the DVP-1200 can be connected to two additional remote relays. Each remote relay box includes two relays. -
Page 20: Remote Relay Operation
Power LED will light up green to indicate the unit is operational. TX LED will flash blue to indicate the unit is communicating with DVP-1200. RELAY 1 and RELAY 2 LED will light up red when corresponding relay is activated. Refer to Figure above for location of Relay 1 and Relay 2. -
Page 21: Horn & Strobe Connection
Macurco DVP-1200 Manual 3.2.6.1 Changing RR-24 Settings The DIP switches are used to set the Modbus address and are also used to change the communication settings. Valid Modbus addresses for RR-24 are from 1 to 192 where switch 1 is the least significant bit (LSB) and switch 8 is the most significant bit (MSB). -
Page 22: Operations
This information can be accessed or changed via “TECHNICAL SUPPORT” in main menu. Select “MAIN MENU” and hit ENTER to go to DVP-1200 Main Menu. WARNING DVP-1200 may not function effectively below 32°F (0°C) or above 104°F (40°C). Using the equipment outside of this temperature range may adversely affect product. 4.1.1 Initial Operating Mode If the user has not entered any parameters, the system WILL NOT be controlling the ventilation system. -
Page 23: Keypad
4.2.3 Keypad The keypad is used to select the menu displayed and to enter the configuration parameters, which are stored in the DVP-1200 memory. The keypad consists of ten number keys, four cursor keys, a MENU key, a HUSH key, an ENTER key, a DEL key, and a brightness key. -
Page 24: Normal Status Display
Macurco DVP-1200 Manual State of the Panel Silence Period Alarm 5 minutes Warning 15 minutes Trouble 8 hours Table 4-1 – 4.2.3.5 Enter key The enter key is used to select menu items and to confirm any user input. 4.2.3.6 DEL Key The DEL key is used to delete characters if an incorrect character is entered or is used to delete the event log. -
Page 25: Alarm, Warning, And Trouble Status Display
Macurco DVP-1200 Manual 4.4 ALARM, WARNING, and TROUBLE Status Display If an alarm, warning, or trouble event occurs, the display will automatically switch to the corresponding screen. If multiple events occur simultaneously, the display will only show the event with higher priority. The event priority is (from highest to lowest) ALARM, GAS WARNING, TROUBLE. -
Page 26: Warning Status Display
Macurco DVP-1200 Manual 4.4.2 Warning Status Display When any sensor indicates a gas level that is at or above the configured warning level for the sensor, the panel will enter WARNING mode during which the internal buzzer will sound, the WARNING/ALARM status LED will be amber, and the display will switch to the WARNING status display. -
Page 27: Ventilation Control
(to ensure minimum run times for fans that must run for internal cooling). A VFD may be enabled and controlled by the DVP-1200 output relays or the DVP-1200 4-20mA output. This allows an operator to change fixed speeds for a VFD if it's used as a stand-alone control. -
Page 28: Main Menu
Menu path: Main Menu/CONFIGURE SYSTEM? / The DVP-1200 configuration can be changed manually. To enter the configuration menu, a password is required. While the DVP- 1200 is in configuration mode, alarm and ventilation control functions continue in the background with the previously set configuration values. - Page 29 Macurco DVP-1200 Manual Menu path: Main Menu-->CONFIGURE SYSTEM? -->MANUAL CONFIGURE? -->CONFIGURE ZONES? --> The “CONFIGURE ZONES?” menu is used to create a new zone, edit an existing zone, or delete an existing zone. To select a zone for editing select CONFIGURE ZONES from the CONFIGURE SYSTEM menu and press ENTER. The display will show the ADD/EDIT ZONES screen.
- Page 30 Macurco DVP-1200 Manual Figure 4-10 – Choose CANCEL to return to the previous screen. Choose RELOAD CONFIG to load the previous configuration for edit. Choose DELETE to delete the zone. Refer to Figure 4–11 for an example of a zone configuration screen. The top box displays the current zone (ZONE:1) you are configuring during the zone configuration process.
- Page 31 Macurco DVP-1200 Manual Figure 4-13 – Refer to Figure 4-14 for sequence of display screen during deleting sensor from a zone. To remove a sensor from the zone, select DELETE SENSOR and press ENTER. Enter the Modbus address of the sensor to remove from the zone and press ENTER.
- Page 32 Macurco DVP-1200 Manual Figure 4-16 – To assign a relay to the zone, select ADD RELAY and press ENTER. Input the relay number and press ENTER. The relay will be added to the zone and the display will return to the RELAYS menu with the bottom box of the display updated to reflect the changes made.
- Page 33 Macurco DVP-1200 Manual 4.6.2.3 HORN/STROBE(S) Menu path: Main Menu-->CONFIGURE SYSTEM? -->MANUAL CONFIGURE? -->CONFIGURE ZONES? -->ADD/EDIT ZONES-- >HORN/STROBE(S): --> To add Horn/Strobes to a zone or delete Horn/Strobes from a zone, select “HORN/STROBE(S)” from the zone configuration menu and press ENTER. Then, select ADD H/S or DELETE H/S. The bottom box of the display will display H/S assigned to the zone and will get updated as you make changes.
- Page 34 Macurco DVP-1200 Manual Figure 4-21 – If a horn/strobe is already assigned as a dedicated alarm, warning, or trouble (see Section 4.6.1.2.2.3 CONFIGURE H/S), it will not be able to be added to the zone configuration and vice-versa. In the example below, H/S 1 has already been assigned as a dedicated alarm.
- Page 35 Macurco DVP-1200 Manual Figure 4-23 – Then, enter the valid sensor type (displayed in bottom box) of the group to view and press ENTER. Once a valid sensor type has been entered, the current values for that sensor type or group of sensors in that zone will be displayed as shown below. To change the values, select the menu item and press ENTER.
- Page 36 Macurco DVP-1200 Manual VOTING: The number of sensors (of same type) in the group indicating a value greater than or equal to the rising trip point is counted. If the count is greater than or equal to the QUORUM, then the zone output(s) are activated.
- Page 37 Macurco DVP-1200 Manual Figure 4-26 – 4.6.2.5 4-20mA OUTPUT or Analog Output Menu path: Main Menu-->CONFIGURE SYSTEM? -->MANUAL CONFIGURE? -->CONFIGURE ZONES? -->ADD/EDIT ZONES-->4- 20MA OUTPUT: --> To assign 4-20mA output to a zone, select “4-20MA OUTPUT:” from the zone configuration menu and press ENTER. Then select “OUTPUT NUMBER:”...
-
Page 38: Configure Relays, H/S, Buzzer
Menu path: Main Menu-->CONFIGURE SYSTEM? -->MANUAL CONFIGURE? -->CONFIGURE RELAYS, H/S, BUZZER? --> The DVP-1200 includes 4 standard onboard relays with the option to add an additional 4 onboard relays. Additionally, remote relays can be added to the system. It also has an onboard buzzer and includes 4 outputs designed to operate standalone horn/strobe units. - Page 39 Macurco DVP-1200 Manual Figure 4-30 – 4.6.3.1 CONFIGURE RELAY? Menu path: Main Menu-->CONFIGURE SYSTEM? -->MANUAL CONFIGURE? -->CONFIGURE RELAYS, H/S, BUZZER? -->CONFIGURE RELAY? --> To configure an onboard relay, follow the menu sequence as shown in Figure 4–30. With “RELAY:” selected, press ENTER.
- Page 40 Macurco DVP-1200 Manual The following options are available for relay configuration: • RELAY – Select the relay number to view settings and make changes. RELAY ON/OFF – Sets the selected relay to normally closed (ON) or normally open (OFF). Default value for this setting is •...
- Page 41 Once the system has found remote relay, the screen shown in Figure 4-36 below will be display with address of remote relay. If DVP-1200 does not find any remote relay, then it will display NO RELAY FOUND in bottom box of the LCD. In this case it is recommended to verify the communication settings for Remote Relay in DVP-1200 matches with RR-24 unit in addition to verifying the wiring between RR-24 and DVP-1200.
- Page 42 • FAIL SAFE TIMEOUT (s) This is the time (in seconds) that the remote relay must wait for communication from the DVP-1200 before going into fail-safe mode if fail-safe setting is active (ON). Valid entries are 10 to 3600 seconds.
- Page 43 Macurco DVP-1200 Manual Figure 4-38 – Select CONFIGURATION and press ENTER. The current configuration for the selected horn/strobe will load and become editable as shown in the images below. Figure 4-39 – The following options are available for horn/strobe configuration: •...
- Page 44 BUZZER Figure 4-40 – The DVP-1200 includes an onboard buzzer. The buzzer is will activate during an ALARM, WARNING or TROUBLE condition. If the buzzer is activated, the user can press the HUSH button to silence it. To configure the onboard buzzer, follow the menu as shown in Figure 4-37. Select CONFIGURE BUZZER? and press ENTER. The display will show the buzzer configuration options.
- Page 45 Macurco DVP-1200 Manual 4.6.3.6 TIMED CONTROL? Menu path: Main Menu-->CONFIGURE SYSTEM? -->MANUAL CONFIGURE? -->TIMED CONTROL? --> Figure 4-42 – TIMED CONTROL can be used to turn the zone’s output ON at the START TIME and OFF at the next occurrence of STOP TIME irrespective of readings of sensors assigned to the zone.
- Page 46 Macurco DVP-1200 Manual Figure 4-44 – DAYS – Choose whether to configure weekdays or weekends. Select DAYS and press ENTER. Then, to set a schedule for WEEKDAY, press 1, then ENTER. To set a schedule for WEEKEND, press 2, then ENTER.
-
Page 47: Communication
Macurco DVP-1200 Manual NOTE: START TIME and END TIME are entered in 12-hour time format, only entries with START TIME earlier than END TIME are valid. E.g. 11:00 AM (Start Time) to 01:00PM (End Time) is a valid entry but 11:00PM (Start Time) to 01:00 AM (End Time) is an invalid entry. - Page 48 Macurco DVP-1200 Manual Figure 4-49 – Communication settings of the panel for communicating with sensors and remote relay connected can be configured via this setting. PORT – Select the port to configure. Available options are SENSOR or REMOTE RELAY. BAUD – The user can change the baud rate for communication with the detector using this menu. Available rates are: 4800, 9600, 19200 (default), 38400, 57600, 115200.
-
Page 49: View Sensors
Figure 4-52 – The VIEW SENSORS menu allows the user to view information about the sensors connected to the DVP-1200. Press the left/right cursor to scroll through the sensors. To select a specific sensor without scrolling, select “Sensor: x” and press ENTER. Then, enter the sensor address and press ENTER. - Page 50 Therefore, the sensor will not be added to any zones. Note: When replacing a sensor (already registered with DVP-1200) with a sensor of different type but same address(e.g. CO sensor with address 17 replaced with NO2 sensor with address 17) then it is recommended to perform a Delete operation for corresponding sensor address, after sensor replacement is complete, and verify correct sensor type is displayed for corresponding sensor address.
-
Page 51: Date/Time - Password
Figure 4-56 – The DVP-1200 keeps a log of events in its memory. To view the events, select EVENTS? and press ENTER. The display will load the latest logged events if this menu is entered first time after power up otherwise it will load event screen last visited. It can store up to 122,880 events and once this limit is reached it will start overwriting older events. -
Page 52: Technical Support
The TECHNICAL SUPPORT? menu item shows the contact information for Macurco technical support. It also displays the currently installed firmware version and the serial number of the DVP-1200. If the Company Information and Phone Number of the installation company was entered during initial power up, then it will be displayed in this screen. This information (COMPANY and PHONE) can be entered or edited by pressing ENTER in the TECHICAL SUPPORT screen. -
Page 53: Bacnet
1. Group Settings for each type of sensor for all Zones Information about Group Settings for each gas type can be accessed via BACnet output in DVP-1200. Table 5-3 shows the BACnet Object Type and Object Instance for each object. N in Table 5-3 refers to zone number. E.g. if I want to access the Alarm settings for CO sensor in Zone 3, then Object Instance for the corresponding object is 3+ (3-1) * 68= 139. - Page 54 Macurco DVP-1200 Manual Description BACnet Object Type BACnet Object Instance type Analog value 0+(N-1)*68 sensor Eng. unit Analog value 1+(N-1)*68 Zone[N] [CO] range Analog value 2+(N-1)*68 Alarm Analog value 3+(N-1)*68 N is from Warning Analog value 4+(N-1)*68 1 to 8...
- Page 55 Table 5-6 shows the BACnet Objects representing zone configuration for each zone. N in Table 5-6 refers Zone number. When binary output is set to 1 (or active), it means that the corresponding DVP-1200 output (Horn/Strobe, Relay) is configured or assigned to that zone, or in case of the group[X] means that the sensor of type X (Table 5-1 lists the valid values of type i.e.
- Page 56 For three analog outputs, the values of corresponding BACnet object represents the current output (in mA) from the analog or 4-20mA output in DVP-1200. Table 5-7shows the BACnet objects and corresponding Object Instance for DVP-1200 panel outputs. REV – 1.3.1...
- Page 57 Binary output … Relay 12 Binary output Analog output 1 Analog output Analog output 2 Analog output Analog output 3 Analog output Table 5-7 – BACnet Objects for DVP-1200 Outputs REV – 1.3.1 [34-8708-4770-7 ] 56 | P a g e...
-
Page 58: Testing & Maintenance
Macurco DVP-1200 Manual 6 Testing & Maintenance 6.1 Testing 6.1.1 Relay Functionality Test Access the Relay Configuration Menu (Refer to Section 4.6.3.1) and select the configuration for relay to be tested. b. Change the “RELAY ON/OFF” to ON and save the configuration. This will activate the corresponding relay and normally open connections will be closed. -
Page 59: Maintenance
DVP-1200 Manual 6.2 Maintenance DVP-1200 do not have parts that require regular maintenance. For fuse replacement, use 5x20 mm slow-blow glass body cartridge fuse with a rating of 1 Amp 250V, e.g. Littelfuse P/N 218001. Be sure to DISCONNECT POWER before removing the safety cover and REPLACE THE SAFETY COVER on F2 before re-applying power to theDVP-1200. -
Page 61: Appendix A - Table Of Figures
Figure 3-1 – Mounting Holes ................................8 Figure 3-2 – Typical Layout diagram ..............................9 Table 3-1 – Wire Gauge for run Length .............................. 9 Figure 3-3 – DVP-1200 Board Diagram ............................. 10 Table 3-2 – ......................................11 Figure 3-4 – System Wiring Diagram ..............................11 Figure 3-5 –... - Page 62 Table 5-5 – Bit Assignment for Zone[N]. mode value ........................55 Table 5-6 – BACnet Objects for Zone Configuration ......................... 55 Table 5-7 – BACnet Objects for DVP-1200 Outputs .......................... 56 Figure 7-1 – ....................................... 57 Figure 7-2 – ....................................... 57 REV –...
-
Page 63: Appendix C - Replacement Parts
DVP-120 Replacement Lock/Keys 70-2900-0017-6 DVP-120 DVP-120 Replacement Board 70-2900-0017-2 DVP-120M DVP-120M Replacement Board 70-2900-0017-5 DVP-120B DVP-120B Replacement Board 70-2900-0017-3 DVP-120C DVP-120C Replacement Board 70-2900-0017-4 DVP-1200 DVP-1200 Replacement Board 70-2900-0017-7 REV – 1.3.1 [34-8708-4770-7 ] 61 | P a g e... -
Page 64: Appendix D - Setup Record
Macurco DVP-1200 Manual 9 Appendix D – Setup Record Record network parameters and keep in a safe place to assist with installation and future troubleshooting will be simplified. Date of Install: _______________________________ Serial Number: _______________________________ Location of Install: ____________________________ Installed by: _________________________________ Detectors / Sensors Under Detector type record gas type (e.g. - Page 65 Macurco DVP-1200 Manual Modbus Detector Location Modbus Detector Location Modbus Detector Location Address Type Address Type Address Type Relays and outputs Relay connection Connected device Zone Configured Delay Runtime Relay 1 Relay 2 Relay 3 Relay 4 Relay 5 Relay 6 REV –...
- Page 66 Macurco DVP-1200 Manual Relay 7 Relay 8 Remote – Relay 9 Remote – Relay 10 Remote – Relay 11 Remote – Relay 12 Horn/Strobe 1 Horn/Strobe 2 Horn/Strobe 3 Horn/Strobe 4 4-20mA output 1 4-20mA output 2 4-20mA output 3 Notes: REV –...
-
Page 68: Macurco Gas Detection Product Limited Warranty
Macurco warrants the DVP-1200 control ventilation panel will be free from defective materials and workmanship for a period of two (2) years from the date of manufacture (indicated on inside cover of the DVP-1200), provided it is maintained and used in accordance with Macurco instructions and/or recommendations.
Need help?
Do you have a question about the DVP-1200 and is the answer not in the manual?
Questions and answers