
Related Manuals for Macurco DVP-120


Summary of Contents for Macurco DVP-120
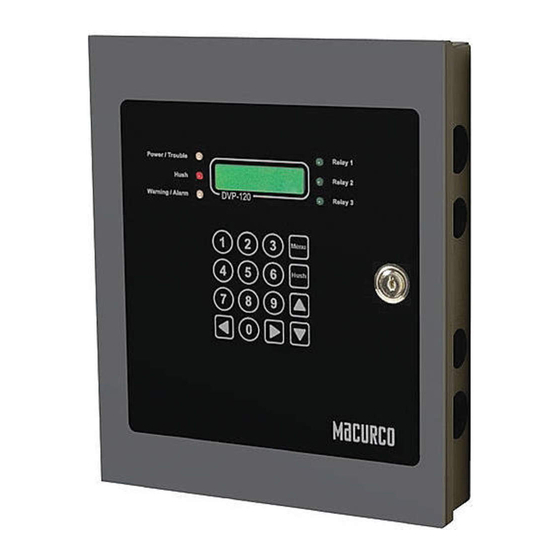
- Page 1 Macurco™ DVP-120 / DVP-120M Detection and Ventilation Control Panel User Instructions IMPORTANT: Keep these User Instructions for reference.
-
Page 2: Table Of Contents
TABLE OF CONTENTS Introduction 1.1 General Information 1.2 DVP-120M Addressable Detection and Ventilation Control Panel 1.3 Macurco MRS-485 Modbus Adapter 1.4 Features 1.5 Specifications Installation & Connection 2.1 Mounting the DVP-120 2.2 General Wiring Information 2.3 Main power Connection 2.4 Remote Sensor Connection 2.5 Relay Connection... - Page 3 4.5 The Keypad does not respond (LCD shows KEYS LOCKED) 4.6 The Keypad does not respond after silencing an Alarm, Warning or Trouble 4.7 After a power failure 4.8 Modbus Application Macurco Gas Detection products limited warranty Appendix A Quick Set-Up...
-
Page 4: Introduction
Uniform Building Code and OSHA 50ppm CO requirements. The DVP-120 can control up to twelve gas sensors in any combination (i.e. CO, NO2, EX). The DVP-120 is ready for operation after the wiring is complete and the user system configuration is entered. -
Page 5: Features
The system configuration is entered by the user through the LCD display and keypad. The system display provides the user with the system status, and the status of each configured sensor. In addition, all control functions of the DVP-120 may be accessed through the... -
Page 6: Mounting The Dvp-120
Mounting the DVP-120 Mounting holes are provided in the DVP-120 case at the four corners. The top two are keyhole shaped so that the panel can be hung and then the two bottom screws driven to hold the panel. See figure 2-1. The panel should be mounted with sufficient space all around for access to Conduit entry holes provided on the top, bottom and right side of the panel. -
Page 7: Main Power Connection
DVP-120 sensor cables, the sensor connections should be made with two twisted pairs of the appropriate gauge, with an overall foil and braid shield. All shields should be terminated at the DVP-120 end of the cable only. A ground stud is provided near the bottom left corner of the panel. -
Page 8: Remote Sensor Connection
Be sure that the 4-20mA output on each sensor is set to “On”. The sensors are connected to the control panel PCB with modular connectors, two sensors per connector. See Figure 2-5 for a view of a typical sensor connector. Refer to Table 2-2 for wire size recommendations. Figure 2-4 DVP-120 Internal View and DVP-120M with DVP-485 Modbus Adapter... - Page 9 Figure 2-5 Sensor Interface Connector – Channels 5 and 6 Each 8-terminal sensor modular connector may be disconnected from the PCB connector to ease wire installation. The terminals will accept wire from 16 to 28 AWG. To install a wire, strip back approximately 0.25 in. (6 mm) of insulation, and insert the bare wire into the terminal.
-
Page 10: Relay Connection
MRS-485. The power connections to the remote mounted detectors should be size AWG18 (minimum) for short runs. Since Macurco detectors are rated for operation between 12 and 24 VDC or VAC, the voltage drop between the power supply and the MRS-485 should not be an issue if the recommended power wire gauge guidelines below are followed. -
Page 11: Horn & Strobe Connection
Power connections to Macurco sensors used with the DVP-120 are polarity-insensitive (no polarity), since a bridge rectifier is connected to the power input terminals. All sensors used with the DVP-120 panel employ screw clamp terminal blocks for power and signal connections. Polarity of the current loop connections is marked on the printed circuit board of the sensor. - Page 12 Connection The Macurco MRS-485 output is connected via a four terminal screw type connector. The MRS-485 adapter is wired in the standard 2W-Modbus circuit definition with selectable built-in terminating resistors at the ends of the RS-485 bus. The power for the MRS-485 adapter is connected via a two terminal screw type connector, 12 to 24 VAC or 12 to 24 VDC and no polarity.
- Page 13 For example, to configure a unit as address “50”, set switches “2, 5, 6” (see table) to ON or in the up position (01001100). See page 11 for a list of applicable addresses and dip-switch settings. Line Termination - End of Line Resistor The MRS-485 adapter is wired in the standard 2W-Modbus circuits definition with selectable built-in terminating resistors at the ends of the RS-485 bus.
- Page 14 63 = 1, 2, 3, 4, 5, 6 127 = 1, 2, 3, 4, 5, 6, 7 189 = 1, 3, 4, 5, 6, 8 1 = 1 2 = 2 64 = 7 128 = 8 190 = 2, 3, 4, 5, 6, 8 3 = 1, 2 65 = 1, 7 129 = 1, 8...
-
Page 15: Operation
Initial Operating Mode When power is first applied to the DVP-120, a few simple self-tests will be performed, and the system will cycle through all status lights, and display the system name and model # (Figure 3-1). The system will then proceed to normal mode, if the operating parameters have been entered. -
Page 16: Status Light Display
MENU key also cancels any changes to the parameter. When the MENU key is used to return to normal mode, any changed configuration parameters are saved in the DVP-120’s memory. The third function of the MENU key is to change the LCD contrast by holding the MENU key for five (5) seconds, at which point the LCD will prompt for further activities, see sections 4.4 for... -
Page 17: Normal Status Display
Figure 3-5 Sensor prompt In this example, the first digit entered was 1. Since the DVP-120 can handle 12 sensors, the first digit for a sensor number is either 0 or 1. The leading zero must be entered when selecting a sensor less than ten. When the second digit is entered, the normal display will be restored;... -
Page 18: Warning Status Display
When all indicators have been silenced, the display will show that alarms have been silenced for five minutes. After any key is pressed (or five seconds), the display will return to normal mode. A L A R M S I L E N C E D F O R M I N U T E S Figure 3-7 Alarm Silenced message... -
Page 19: Ventilation Control
Ventilation Control The ventilation control function operates independently from the alarm function. It provides the ability to configure the DVP-120 for control of one to three zones. Each zone can respond to gas levels indicated by one or more of the sensors, with configurable turn on and turn off concentrations (rising and falling) for each gas type. -
Page 20: System Menu
While the DVP-120 is in the configuration mode, alarm and ventilation control functions continue in the background with the previously set configuration values. In particular, if an alarm condition is detected, the alarm lamp, the buzzer, the horn and the strobe will operate as configured but the LCD will not display the detailed information. -
Page 21: Configure System Submenu
3.3.2 Configure System Submenu The system configuration submenu provides entries to: Set the time of day, 24 hour format – Set the day of the week, day 1 is Monday – – Load Default Configuration Change Password – Configure Sensor Type –... -
Page 22: Load Default Configuration
3.3.2.3 Load Default Configuration L o a d D e f a u l t C o n f i g u r a t i o n Figure 3-20 Load Default Configuration When the number one (1) digit is pressed, the panel will prompt for the password, even if it has been entered previously. If the password is entered correctly, the panel will overwrite the existing configuration with the default configuration. -
Page 23: Configure Sensor Type
If the DVP-120 is in configuration mode (user is changing the configuration) the registration information is saved in the background and the message indicating that configuration was changed is delayed until user goes back to normal mode. - Page 24 T y p e : 0 1 D e p l e t i o n : 0 N o Figure 3-21.6 Depletion Type “Depletion” is “1” when the sensor is a depletion type and “0” when it is not a depletion type sensor. A depletion sensor detects when gas concentrations in a space fall below a specified level.
-
Page 25: Enter Password
Use only for monitoring the gases which the sensors and equipment are designed to monitor. Failure to do so may result in exposures to gases not detectable and result in sickness or death. For proper use, see supervisor or User Instructions, or call Macurco Technical Service. -
Page 26: Sensor Type
This display example shows that the sensor on channel 01 has been configured as a Carbon Monoxide sensor. The valid entries for Macurco type sensors are Carbon Monoxide (CO), Nitrogen Dioxide (NO2), Combustible Gas (EX), Ammonia (NH3), Hydrogen Sulfide (H2S), Refrigerants (REF), Carbon Dioxide (CO2) and Oxygen (O2). -
Page 27: Range
3.3.3.5 Range S e n s o r R a n g e : 2 0 0 p p m Figure 3-29 Sensor Range The range for each sensor is the gas concentration that corresponds to the 20 mA signal level. The default range values for the sensors are: Carbon Nitrogen... -
Page 28: Relay Minimum On Time
The default turn on delay is one minute and the maximum allowed value is fifteen minutes. The value is entered in two groups, 2 digits for the minutes and then 2 digits for the seconds. A leading zero must be entered for each group if applicable. 3.3.4.4 Relay Minimum On Time R e l a y... -
Page 29: Strobe Turn On Delay
Configure Zones Submenu The DVP-120 ventilation control can support up to three zones. The zone functionality makes the DVP-120 very flexible. For example, each zone can be configured to monitor a separate set of four sensors and control a single relay. -
Page 30: Zone Group Type
The digit controls are: Relay 1 added/removed from the zone’s control – Relay 2 added/removed from the zone’s control – Relay 3 added/removed from the zone’s control – Horn added/removed from the zone’s control – Strobe added/removed from the zone’s control –... -
Page 31: Start Time
3.3.7.4 Start Time G r o u p T i m e d S t a r t T i m E : 0 7 : 0 0 Figure 3-43 Start Time Selection The start time is entered in 24-hour format and the default value is 07:00 (7:00 AM). 3.3.7.5 Stop Time G r o u p... -
Page 32: Falling Trip Point
Configure Signals Submenu The DVP-120 can drive the buzzer, horn and strobe with different sound patterns to indicate the severity of the current conditions. These patterns are selectable by the installer using this group of submenus. Once again, the left and right keys will scroll through the signal types and the up and down keys will scroll to the signal sources. -
Page 33: Alarm Horn Signal
A l a r m S i g n a l s B u z z , H o r n , S t r o b E Figure 3-51 Alarm Signals This display example shows that alarms are signaled by the internal buzzer, the external horn and the strobe. 3.3.8.2 Alarm Buzzer Signal A l a r m... -
Page 34: Warning Buzzer Signal
This display example shows that warnings are signaled by the internal Buzzer only. 3.3.8.6 Warning Buzzer Signal W a r n i n g S i g n a l s B u z z : 5 O F F Figure 3-56 Buzzer Warning Signal This display example shows that the buzzer will not signal a warning condition. -
Page 35: 3.3.8.11 Trouble Horn Signal
Off, strobe will not flash (default) – 4 Troubleshooting The DVP-120 is tested at the factory for reliable operation. Most problems can be traced to the set-up of configurable features and modes, system wiring or trouble with the sensors. ! WARNING Do not disassemble unit or attempt to repair or modify any component of this instrument. -
Page 36: No Sensor
When using the timed ventilation mode, the system clock should be checked regularly (at least twice a year). The battery backed real time clock in the DVP-120 does not adjust for daylight saving time so the spring and fall switch over points are good choices to check the system clock. -
Page 37: Lcd Display Unreadable
REPLACE THE SAFETY COVER on F3 before re-applying power to the DVP-120. ! WARNING DVP-120 may not function effectively below 32°F (0°C). Using the instrument below this temperature may adversely affect product performance and result in sickness or death. - Page 38 Error Codes Solid RED - The MRS-485 detected an error and no MODBUS communications are in progress. RED with random bursts of AMBER - The MRS-485 detected an error and AMBER is displayed when data are received or transmitted over the RS-485 line. There are a number of conditions which are signalized in this way: - Current EEPROM Settings not initialized - Current EEPROM Settings have bad checksum...
-
Page 39: Macurco Gas Detection Products Limited Warranty
5 Macurco Gas Detection products limited warranty Macurco warrants the DVP-120 gas detector will be free from defective materials and workmanship for a period of two (2) years from date of manufacture (indicated on the inside cover of the DVP-120), provided it is maintained and used in accordance with Macurco instructions and/or recommendations. -
Page 40: Appendix A Quick Set-Up
Note: The Delay Time default is 1 minute. If the duration of a test procedure or gas exposure is less than 1 minute, the relays, horns and strobes may not engage even though the DVP-120 display and the sensors respond. When testing the system disable the delay (set Delay Time to zero minutes/seconds). - Page 41 (see the User Instructions of each sensor type for location and coverage details). Extra sensors may be needed near areas where people work, such as toll booths. Macurco provides only the control panels and sensors. Fans, relays, and other devices are provided by the contractor.
- Page 42 Setting the System Configuration The configuration menus can be entered from normal mode by pressing the MENU key. While in configuration mode, the user can review all configuration parameters to check the current operating conditions. S E N S O R S F O U N D R E L A Y S F O U N D...
- Page 43 T i m e : 2 2 : 5 5 D a y : T u e s d a y Figure A-5 Set Time of Day This display example shows that the time is 22:55 (10:55 PM). The underlined numerals indicate that the numeric keys can be used to set the current time of day.
- Page 44 SYS header. 3. Power up the DVP-120. The first display is the current password on the unit. 4. Remove the Jumper Shorting Connector from the SYS header and install back onto the two bottom pins of the EXT header.
- Page 45 Warning Level - set level if needed S e n s o r W a r n i n G : _ 5 0 p p m Figure A-15 Sensor Warning Level Sensor Range - default range is in system S e n s o r R a n g e : 2 0 0 p p m...
- Page 46 4. Configure Zones Submenu See section 3.3.7 Configure Zones Submenu for more detail Definitions: Zone – Defines Sensor Input & Relay / Alarm Output Group – Set of Sensors of same type and output within the same zone. Average – Activation based upon an average of sensors in a group Voting –...
- Page 47 Configure Group 2 - repeat for up to three groups When multiple sensors are being monitored as a Group, the DVP-120 output can be based on either sensor Voting (default) or the Average of all sensor readings in the Group.
- Page 48 A l a r m S i g n a l s B u z z , H o r n , S t r o b e Figure A-27 Alarm Signals Alarm Signal Buzzer (default 2 – Intermittent) ...
Need help?
Do you have a question about the DVP-120 and is the answer not in the manual?
Questions and answers