Table of Contents
Advertisement
Quick Links
Advertisement
Table of Contents

Related Manuals for 2N IP Handset


Summary of Contents for 2N IP Handset
- Page 1 User Manual ® IP Handset Software version: 1.5.0 Release date:February 1, 2021...
-
Page 2: Table Of Contents
Directory Directory ................................I 1 Picture ................................IV 2 Table ................................. V 3 Safety Instruction ............................. 1 4 Overview ................................2 4.1 Overview ............................... 2 4.2 Packing Contents........................... 3 5 Desktop Installation ............................4 5.1 PoE And the use of external power adapters..................4 5.2 Wall mounted installation method ...................... - Page 3 9.3 Message ............................... 19 9.3.1 MWI(Message Waiting Indicator) ..................19 10 Phone Settings .............................. 20 10.1 Basic Settings ............................ 20 10.1.1 Language ..........................20 10.2 Function Key ............................. 20 11 Web Configurations............................. 22 11.1 Web Page Authentication ........................22 11.2 System >> Information ........................22 11.3 System >>...
- Page 4 11.31 Security >> Firewall........................57 11.32 Device Log >> Device Log ......................59 12 Trouble Shooting ............................60 12.1 Get Device System Information ......................60 12.2 Reboot Device ........................... 60 12.3 Reset Device to Factory Default ....................... 60 12.4 Network Packets Capture ........................61 12.5 Get Log Information .........................
-
Page 5: Picture
1 Picture Picture 1 - Device installation ......................5 Picture 2 - Connecting to the Device ....................6 Picture 3 - Instruction of Keypad ....................... 8 Picture 4 - Web page to start auto-answering ................... 12 Picture 5 - Web call waiting tone setting ..................14 Picture 6 - Local conference setting .................... -
Page 6: Table
2 Table Table 1 - DSS KEY LED State ......................7 Table 2 - Instruction of Keypad ......................9 Table 3 - Intercom configure ......................18 Table 4 - Firmware upgrade ......................23 Table 5 - Service port ........................30 Table 6 - Line configuration on the web page .................. -
Page 7: Safety Instruction
3 Safety Instruction Please read the following safety notices before installing or using this unit. They are crucial for the safe and reliable operation of the device. ⚫ Before using the external power supply, please check the home power voltage. Inaccurate power voltage may cause fire and damage. -
Page 8: Overview
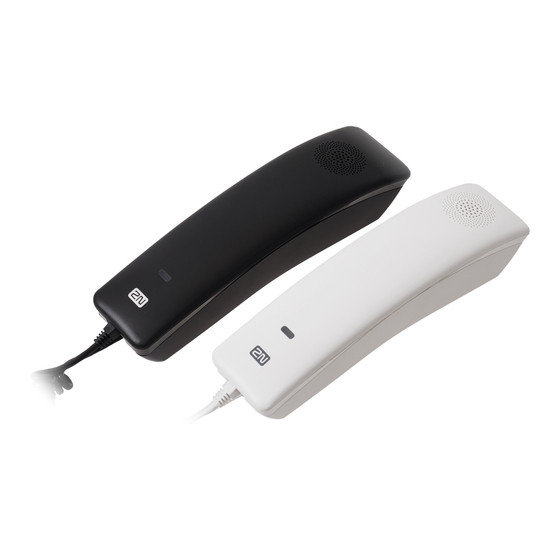
4 Overview 4.1 Overview ® IP Handset is a network telephone with simple design. For home users, the phone is a highly efficient communication device. Users can flexibly configure and define the functions of one DSS keys, saving space and cost. -
Page 9: Packing Contents
4.2 Packing Contents IP Phone Handset Handset Cord Quick Guide... -
Page 10: Desktop Installation
5 Desktop Installation 5.1 PoE and the use of external power adapters The device supports two power supply modes, power supply from external power adapter or over Ethernet (PoE) complied switch. PoE power supply saves the space and cost of providing the device additional power outlet. -
Page 11: Wall Mounted Installation Method
5.2 Wall mounted installation method The device supports wall mounting. Please follow the instructions in the picture below to install the phone: 1) Drill two holes in the wall with a vertical distance of 136.2 or 161.2mm. 2) Insert two rubber plugs and screws in turn. Note that 5mm is reserved between the nut and the wall, which is convenient for hanging the phone base. - Page 12 Connect the network cable, power adaptor and the handset corresponding ports as shown in the picture below. Picture 2 - Connecting to the Device...
-
Page 13: Appendix Table
6 Appendix Table 6.1 Appendix I –LED Definition Table 1 - DSS KEY LED State Type LED Light State default standby Green On standby Green slow flash mute Line error (Registration failure)/Network Red slow flash disconnection call calling/Pick up the handle Red On Orange slow flash mute Orange slow flash... -
Page 14: Introduction To The User
7 Introduction to the User 7.1 Instruction of Keypad Picture 3 - Instruction of Keypad The picture above shows the keypad layout of the phone. Each button provides its own specific function. Users can refer to the instructions for the keys in the illustration in this section to operate the phone. - Page 15 Table 2 - Instruction of Keypad Number The keypad Instruction names Hands-free ○ The hands-free channel plays sound Speaker Status ○ indicator Power indication/line status indication lamp Handle ○ The handle channel plays sound horn Hook ○ Hang up the handle and hang up the phone Function Key User-defined functionality ○...
-
Page 16: Using Handset / Hands-Free Speaker
7.2 Using Handset / Hands-free Speaker ◼ Using Handset About the use of the handle, the user can pick up the handle to dial the number, press the "#" button after pressing the number, the number will be dialed. Users can switch audio channels of the phone by pressing the hands-free button. -
Page 17: Basic Function
8 Basic Function 8.1 Making Phone Calls ◼ Default Line The device provides two line services (1 main line and 1 standby line). If both lines are configured simultaneously, the user uses line 1 to make or receive calls by default. ◼... -
Page 18: Redial
8.4 Redial ⚫ Redial the last outgoing number: When the phone is in standby mode, press the redial button and the phone will call out the last number dialed. ⚫ Call out any number with the redial key: Enter the number, press the redial key, and the phone will call out the number on the dial. -
Page 19: Mute
voice is not heard. Normally, mute mode is automatically turned off at the end of a call. You can also turn on mute on any screen (such as the free screen) and mute the ringtone automatically when there is an incoming call. Mute mode can be turned on in all call modes (handles or hands-free). -
Page 20: Conference
⚫ WEB interface: Enter [Phone Settings] >> [Features] >> [Basic Settings], enable/disable call waiting and call waiting tone. Picture 5 - Web call waiting tone setting 8.8 Conference Local Conference 8.8.1 To conduct local conference, the user needs to log in the webpage and enter [Line] >> [SIP] >>... -
Page 21: Network Conference
Picture 6 - Local conference setting Two ways to create a local conference: 1) The device has two channels of communication. Press the conference button on the call interface. When selecting the conference number, select the other number that already exists. 2)... -
Page 22: Hotline
Picture 7 - Network conference Method to join a network conference: ⚫ Multi-party call number of network conference room and enter the password then all enter the conference room. ⚫ The two phones have established common calls. Press the conference button to invite new members to the conference. - Page 23 Picture 8 - Hotline set up on webpage...
-
Page 24: Advance Function
9 Advance Function 9.1 Intercom When the Intercom is enabled, it can automatically receive calls from the intercom. Picture 9 - Web Intercom configure Table 3 - Intercom configure Parameter Description Enable Intercom When intercom is enabled, the device will accept the incoming call request with a SIP header of Alert-Info instruction to automatically answer the call after specific delay. -
Page 25: Message
user to send a Real Time Transport Protocol (RTP) stream to the pre-configured multicast address without involving SIP signaling. You can also configure the phone to receive an RTP stream from pre-configured multicast listening address without involving SIP signaling. You can specify up to 10 multicast listening addresses. 9.3 Message MWI(Message Waiting Indicator)... -
Page 26: Phone Settings
10 Phone Settings 10.1 Basic Settings Language 10.1.1 The user can set the phone language through the web interface. ⚫ Web interface: Log in to the phone webpage and set the language in the drop-down box at the top right corner of the page, as shown in the figure: Picture 11 - Language setting on Web page ⚫... - Page 27 ◆ Memory Key ◼ Speed Dial/Intercom/BLF/Presence/Call Park/Call Forward (to someone) ◆ DTMF ◆ Action URL ◆ MCAST Paging Webpage interface: [Function key] >> [Function key]. Moreover, user also can add the user-defined title for the DSS Keys, which is configured as Memory Key / Line / URL / Multicast / Prefix.
-
Page 28: Web Configurations
Modify button in the User Management section. Default access data: User: admin Password: 2N 11.2 System >> Information User can get the system information of the device in this page including, ◼... -
Page 29: System >> Configurations
11.4 System >> Configurations On this page, users with administrator privileges can view, export, or import the phone configuration, or restore the phone to factory Settings. ◼ Clear Configurations Select the module in the configuration file to clear. SIP: account configuration. AUTOPROVISION: automatically upgrades the configuration TR069:TR069 related configuration MMI: MMI module, including authentication user information, web access protocol, etc. - Page 30 Parameter Description Upgrade server Enable automatic upgrade, If there is a new version txt and new Enable Auto Upgrade software firmware on the server, phone will show a prompt upgrade message after Update Interval. Upgrade Server Address1 Set available upgrade server address. Upgrade Server Address2 Set available upgrade server address.
-
Page 31: System >> Auto Provision
Picture 13 - Auto Provision settings ® IP Handset support SIP PnP, DHCP options, Static provision, TR069. If all of the 4 methods are enabled, the priority from high to low as below: PNP>DHCP>TR069> Static Provisioning Transferring protocol: FTP, TFTP, HTTP, HTTPS ®... - Page 32 Download Fail Check If there download is failed, phone will retry with the configured times. Times Update Contact Interval Phone will update the phonebook with the configured interval time. If it is 0, the feature is disabled. Save Auto Provision Save the HTTP/HTTPS/FTP username and password.
-
Page 33: System >> Tools
1. Disabled. 2. Update after reboot. 3. Update after interval. TR069 Enable TR069 Enable TR069 after selection ACS Server Type There are 2 options Serve type, common and CTC. ACS Server URL ACS server address ACS User ACS server username (up to is 59 character) ACS Password ACS server password (up to is 59 character) Enable TR069 Warning... -
Page 34: System >> Reboot Phone
11.8 System >> Reboot Phone This page can restart the phone. 11.9 Network >> Basic The phone only supports wired network connections. The phone USES an IP network connection to provide services. Unlike traditional telephony based on circuit technology, IP telephony exchanges packets and data over a network based on the IP address of the telephony. -
Page 35: Network >> Service Port
In IPv4 mode, there are 3 connection mode options: DHCP, PPPoE and Static IP. When using DHCP mode, phone will get the IP address from DHCP server (router). ⚫ Use DHCP DNS: It is enabled as default. “Enable” means phone will get DNS address from DHCP server and “disable”... -
Page 36: Network >> Vpn
Picture 15 - Service Port Settings Table 5 - Service port Parameter Description Web Server Type Reboot to take effect after settings. Optionally, the web page login is HTTP/HTTPS. Web Logon Timeout Default as 15 minutes, the timeout will automatically exit the login page, need to login again. -
Page 37: Network >> Advanced
established before activate a line registration. The device supports two VPN modes, Layer 2 Transportation Protocol (L2TP) and OpenVPN. The VPN connection must be configured and started (or stopped) from the device web portal. ◼ L2TP NOTICE! The device only supports non-encrypted basic authentication and non-encrypted data tunneling. -
Page 38: Line >> Sip
network devices for advertising their identity, capabilities to neighbors on a LAN segment. Phone could use LLDP to find the VLAN switch or other VLAN devices and use LLDP learn feature to apply the VLAN ID from VLAN switch to phone its self. ◼... - Page 39 refresh the page manually. Activate Whether the service of the line is activated Username Enter the username of the service account. Authentication User Enter the authentication user of the service account Display Name Enter the display name to be sent in a call request.
- Page 40 automatically answered it Call Forward Unconditional Enable unconditional call forward, all incoming calls will be forwarded to the number specified in the next field Call Forward Number for Unconditional Set the number of unconditional call forward Call Forward on Busy Enable call forward on busy, when the phone is busy, any incoming call will be forwarded to the number specified in the next field.
- Page 41 Hotline Number Set the hotline dialing number Dial Without Registered Set call out by proxy without registration Enable Missed Call Log If enabled, the phone will save missed calls into the call history record. DTMF Type Set the DTMF type to be used for the line Set the SIP INFO mode to send ‘*’...
- Page 42 Enable Call Forward Unconditional Set the feature code to dial to the server Disable Call Forward Unconditional Set the feature code to dial to the server Enable Call Forward on Busy Set the feature code to dial to the server Disable Call Forward on Busy Set the feature code to dial to the server Enable Call Forward on No Answer...
- Page 43 IP address, not the address in via field. Convert URI Convert not digit and alphabet characters to %hh hex code Whether to add quote in display name, i.e. “2N” Use Quote in Display Name vs 2N Enable GRUU Support Globally Routable User-Agent URI...
-
Page 44: Line >> Sip Hotspot
Enable Feature Sync Feature Sync with server Enable SCA Enable/Disable SCA (Shared Call Appearance) CallPark Number Set the CallPark number. Server Expire Set the timeout to use the server. TLS Version Choose TLS Version. uaCSTA Number Set uaCSTA Number. Enable Click To Talk With the use of special server, click to call out directly after enabling. - Page 45 When any phone set answers the call, other phone sets stop ringing. The call can be answered by only one phone set. When B or C initiates a call, the SIP number registered by phone set A is the calling number. To set a SIP hotspot, register at least one SIP account.
- Page 46 Picture 17 - SIP hotspot server configuration Configure SIP hotspot client: To set as a SIP hotspot client, no SIP account needs to be set. The Phone set will automatically obtain and configure a SIP account. On the SIP Hotspot tab page, set Mode to Client.
-
Page 47: Line >> Dial Plan
11.15 Line >> Dial Plan Picture 19 - Dial plan settings Table 8 - Phone 7 dialing methods Parameters Description Press # to invoke dialing The user dials the other party's number and then adds the # number to dial out; Dial Fixed Length The number entered by the user is automatically dialed out when it reaches a fixed length... - Page 48 Add dialing rules: Picture 20 - Custom setting of dial - up rules Table 9 - Dial - up rule configuration table Parameters Description Dial rule There are two types of matching: Full Matching or Prefix Matching. In Full matching, the entire phone number is entered and then mapped per the Dial Peer rules.
- Page 49 ◼ add: xxx – xxx will be dialed before any phone number. ◼ del –The characters will be deleted from the phone number. ◼ rep: xxx – xxx will be substituted for the specified characters. Suffix Characters to be added at the end of the phone number.
-
Page 50: Line >> Basic Settings
x -- Matches any single digit that is dialed. [] -- Specifies a range of numbers to be matched. It may be a range, a list of ranges separated by commas, or a list of digits. 11.16 Line >> Basic Settings Set up the register global configuration. - Page 51 Auto Onhook Time Specify Auto Onhook time, the phone will hang up and return to the idle automatically after Auto Hand down time at hands-free mode, and play dial tone Auto Onhook time at handset mode Ring for Headset Enable Ring for Handset by selecting it, the phone plays ring tone from handset.
- Page 52 Caller Name Priority Change caller ID display priority. Emergency Call Number Search path Select the search path. LDAP Search Select from with one LDAP for search Configure the Emergency Call Number. Despite Emergency Call Number the keyboard is locked, you can dial the emergency call number Restrict Active URI Source IP Set the device to accept Active URI command...
- Page 53 enabled. DND Settings DND Option Select to take effect on the line or on the phone or close. Enable DND Timer Enable DND Timer, If enabled, the DND is automatically turned on from the start time to the off time. DND Start Time Set DND Start Time DND End Time...
-
Page 54: Phone Settings >> Media Settings
Password Dial Prefix the prefix of the password call Configure number Power LED Standby power lamp state, off when off, open is Common always bright red. Off by default. The status of power lamp when there is unread SMS/MWI short message/voice message, including... - Page 55 is set for the phone number, the default ringtone will be used. Speakerphone Volume Set the hands-free volume to 1-9. Headset Ring Volume Set the volume of the earphone ringtone to 1~9. Headset Volume Set the volume of the headset to 1~9. Speakerphone Ring Volume Set the volume of hands-free ringtone to 1~9.
-
Page 56: Phone Settings >> Mcast
11.19 Phone settings >> MCAST Using the multicast function, we can simply and conveniently send the announcement to each member of the multicast, and send the multicast RTP stream to the preconfigured multicast address by setting the multicast key on the phone. Listen for and play the RTP stream sent from the multicast address by configuring the listening multicast address on the phone. -
Page 57: Phone Settings >> Action
11.20 Phone settings >> Action Action URL Action urls are used for IPPBX systems to submit phone events. 11.21 Phone settings >> Time/Date The user can configure the time Settings of the phone on this page. Picture 24 - Time/Date Table 14 - Time&Date settings Parameters Description... -
Page 58: Phone Settings >> Tone
Resync Period Time of re-synchronization with time server 12-Hour Clock Set the time display in 12-hour mode Date Format Select the time/date display format Daylight Saving Time Settings Local Choose your local, phone will set daylight saving time automatically based on the local DST Set Type Choose DST Set Type, if Manual, you need to set the start time and end time. -
Page 59: Phonebook >> Call List
Picture 25 - Tone settings on the web 11.23 Phonebook >> Call List ◼ Restricted Incoming Calls: It is similar like a blacklist. Add the number to the blacklist, and the user will no longer receive calls from the stored number until the user removes it from the list. Users can add specific Numbers to the blacklist or add specific prefixes to the blacklist to block calls with all Numbers with this prefix. -
Page 60: Calllog
11.25 Call logs The phone can store up to 600 call records, the user can browse the complete call record in this page. The call record can be sorted by time, call number, contact name or line, and the call record can be screened by call record type (incoming call, outgoing call, missed call, forward call). -
Page 61: Security >> Web Filter
11.28 Security >> Web Filter The user can set up a configuration management phone that allows only machines with a certain network segment IP access. Picture 26 - Web Filter settings Picture 27 - Web Filter Table Add and remove IP segments that are accessible; Configure the starting IP address within the start IP, end the IP address within the end IP, and click [Add] to submit to take effect. -
Page 62: Security >> Trust Certificates
11.29 Security >> Trust Certificates Set whether to open license certificate and general name validation, select certificate module. You can upload and delete uploaded certificates. Picture 28 - Certificate of settings 11.30 Security >> Device Certificates Select the device certificate as the default and custom certificate. You can upload and delete uploaded certificates. -
Page 63: Security >> Firewall
11.31 Security >> Firewall Picture 30 - Network firewall Settings Through this page can set whether to enable the input, output firewall, at the same time can set the firewall input and output rules, using these Settings can prevent some malicious network access, or restrict internal users access to some resources of the external network, improve security. -
Page 64: Device Log >> Device Log
Src Port Range Filter port range Source address can be host address, network address, or Src Address all addresses 0.0.0.0; It can also be a network address similar to *.*.*.0, such as: 192.168.1.0. The destination address can be either the specific IP Dst Address address or the full address 0.0.0.0;... -
Page 65: Trouble Shooting
12 Trouble Shooting When the phone is not in normal use, the user can try the following methods to restore normal operation of the phone or collect relevant information and send a problem report to technical support mailbox. 12.1 Get Device System Information Users can get information by pressing the [Menu] >>... -
Page 66: Get Device System Information
Picture 31 - Reset 12.4 Network Packets Capture Sometimes it is helpful to dump the network packets of the device for issue identification. To get the packets dump of the device, user needs to log in the device web portal, open page [System] >>... -
Page 67: Network Packets Capture
User may examine the packets with a packet analyzer or send it to technical support mailbox. 12.5 Get Log Information Log information is helpful when encountering an exception problem. In order to get the log information of the phone, the user can log in the phone web page, open the page [Device log], click the [Start] button, follow the steps of the problem until the problem appears, and then click the [End] button, [Save] to local analysis or send the log to the technician to locate the problem. - Page 68 1. There are two Headphone wire sequence in the market. Please Headphone use the Headphone provided by 2N, or consult 2N the wire sequence if you wish to use a third-party headphone. 2. The network bandwidth and delay may be not suitable for audio call at the moment.
Need help?
Do you have a question about the IP Handset and is the answer not in the manual?
Questions and answers