Table of Contents
Advertisement
Quick Links
Advertisement
Table of Contents

Related Manuals for 2N StarPoint 500 Entry


Summary of Contents for 2N StarPoint 500 Entry
- Page 1 ® 2N StarPoint User Manual Version 3.1.0 www.2n.cz...
- Page 2 At present, we export our products into over 120 countries worldwide and have exclusive distributors on all continents. ® 2N is a registered trademark of 2N TELEKOMUNIKACE a.s.. Any product and/or other names mentioned herein are registered trademarks and/or trademarks or brands protected by law. 2N TELEKOMUNIKACE administers the FAQ database to help you quickly find information and to answer your questions about 2N products and services. On www.faq.2n.cz you can find information regarding products adjustment and instructions for optimum use and procedures...
-
Page 3: Table Of Contents
4.3 Programmable Buttons - Functions ........46 5. 2N® OptiSet Terminals ......50 6. -
Page 4: Basic Information
1. Basic Information Here is what you can find in this section: 1.1 Introduction 1.2 Getting Started 1.3 Accessories 1.4 Telephone Description... -
Page 5: Introduction
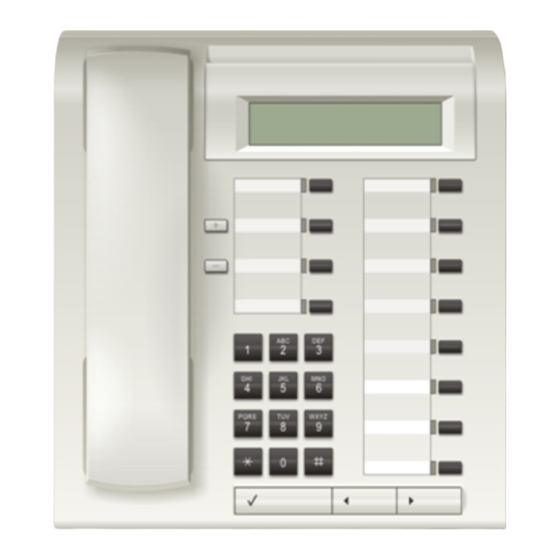
1.1 Introduction ® The StarPoint 500 telephone sets are digital key system phones designed for the ® ® NetStar system. All of them (except for the StarPoint 500 Entry phones) are equipped with a two–row display, programmable buttons, the HandsFree function, and other options and accessories. The telephones are available in the arctic or anthracite colour versions. ® StarPoint 500 Types: Figure: 2N® StarPoint 500 Entry, 2N® StarPoint 500 Economy/Standard, 2N® StarPoint 500 Advance ®... -
Page 6: Getting Started
1.2 Getting Started Putting in Operation 1. Unpack the telephone set. 2. Connect the handset to the telephone set using a twisted cable (from the bottom – see the figure below). 3. Connect the telephone set to the telephone socket using the cable included in the delivery. ® Be sure to connect the StarPoint 500 phone to a dedicated socket only. Button Tagnames ® Use the NetStar Assistant to create button tagnames automatically. Click on Prepare for printing on the button displaying screen to create a complete template in the PDF format automatically. -
Page 7: Accessories
1.3 Accessories ® Optional acccessories can be connected to the StarPoint 500 phone bottom for convenience: additional button modules or head sets. Button Modules ® A 16/90-button console can be added to the StarPoint 500 Standard and Advance phones to increase the count of available buttons. Connect multiple consoles serially to get an extremely high number of buttons. Program the console buttons like ® your telephone buttons. 18-button module is only available for the OpenStage and terminals. Every 90-button module needs a power supply of its own. Every other 16-button module needs a power supply of its own. Figure: Console, 16 buttons – 2N® StarPoint Figure: Console, 90 buttons – 2N® StarPoint... - Page 8 Figure: Console, 18 buttons – 2N® OpenStage Button Console Connection 1. Connect the console mechanically to the phone. 2. Interconnect the telephone and the console using a cable. 3. Connect the included mains adapter to the dedicated bottom socket for power supply.
-
Page 9: Telephone Description
1.4 Telephone Description Use the and buttons to browse through the phone menus and list items. Push the confirmation button to select a function. Use the and buttons to adjust the ringing and call volume (handset or HandsFree). Any volume change applies to the current call only, the next call will have a volume level as set in the ®... - Page 10 Current profile – this item depends on your PBX setting. ® To work more comfortably with your StarPoint telephone, adjust the display tilt in six steps: Programmable Buttons The 2N® StarPoint 500 telephones are equipped with programmable buttons. Use ® the NetStar Assistant to program the buttons. The system administrator defines the basic settings, the user may adjust the button settings as required. Refer to Programmable Buttons - Setting for more details.
-
Page 11: Basic Operation
2. Basic Operation Here is what you can find in this section: 2.1 Outgoing calls 2.2 Incoming calls 2.3 During a Call... -
Page 12: Outgoing Calls
2.1 Outgoing calls Outgoing Call Setup 1. Pick up the handset. You can hear the dialtone. 2. Dial a number. Having dialled the last digit, wait for automatic call setup. 3. If stored in your or group directory, the called subsriber's name is also displayed. 4. The call time will be displayed when the called subscriber answers. 5. If the called user is busy, you will get the busy tone and the Call end message gets displayed. Or, you can enter the called number on your phone diplay first and then pick up the handset to set up the call. Push the HandsFree button to use the HandsFree function instead of lifting the handset. The HandsFree button indicator signals activation. Push the HandsFree button again to terminate the current call. If the HandsFree button is not programmed on your phone, just press the confirmation button after dialling a number to activate HandsFree . -
Page 13: Speed Dialling
Use the outgoing call history for calling a previously called number. 1. Push the outgoing call accessing button if pre–programmed to enter the list. If the button is not programmed, push to enter the phone main menu, select Call register and then Dialled numbers 2. Use and to browse through the list items. 3. Pick up the handset, or press the HandsFree button to dial the selected number. Call to Previously Calling Number Situation: You want to make a call to a number from which you were successfully called before. Procedure: 1. Push the answered call accessing button if pre–programmed to enter the list. If the button is not programmed, push to enter the phone main menu, select Call register and then ... - Page 14 ® The function works with the StarPoint 500 telephones only. If a different telephone type is used, the call will not be answered automatically. How to use Intercom: 1. Press and keep pressed the Intercom pre–programmed button. 2. Start speaking when you hear a beep. 3. The called subscriber answers the call automatically switching into the HandsFree mode. The called subscriber is notified of the call with an acoustic signal. 4. Keep the button pressed during the whole call. 5. Release the button to terminate the call. Refer to Programmable Buttons - Setting for Intercom button programming.
-
Page 15: Incoming Calls
2.2 Incoming calls Answering Incoming Call An incoming call is signalled by displaying the calling station name and/or telephone number or the called number if possible. Names from your private phone directory or the system administrator directory are assigned to the numbers. Pick up the handset to answer the call. Press the confirmation or HandsFree button to answer the call in the HandsFree mode. Ringing Volume Control Suppose you do not want to answer or reject a call yet do not want to be disturbed by your telephone's loud ringing. In that case, either lower the volume or mute the call as follows. Push to adjust the ringing volume. Push the ... - Page 16 Do Not Disturb (DND) You can use the Do Not Disturb DND ( ) function to work without being disturbed by incoming calls. If this function is enabled, all incoming calls are rejected. Every rejection is followed by a missed call record on your display, allowing you to call the number later. Outgoing calls are set up without limitations.
-
Page 17: During A Call
2.3 During a Call Switching to HandsFree During a Call Suppose you are speaking with your handset picked–up, but suddenly you have to put the handset aside without ceasing to speak. Push the HandsFree button. The telephone transits into the HandsFree mode as signalled by the button LED. Now you can hang up and go on speaking. Push the HandsFree button with your handset hung–up to terminate the call. - Page 18 3. Having received the ringing tone, hang up (Call transfer with hang–up), or wait for answer and then hang up to complete the transfer (Call transfer without hang–up).
-
Page 19: Telephone Menu And Functions
3. Telephone Menu and Functions Here is what you can find in this section: 3.1 Main Menu 3.2 Call Register 3.3 Messages 3.4 Contacts 3.5 Profiles 3.6 Settings... -
Page 20: Main Menu
3.1 Main Menu Press the confirmation key when the telephone is at relax to enter the main menu. Use the and arow keys to browse through the menu items. Press to enter the submenus. You can program an button to accelerate your return to higher menu levels. If you press at relax, you will get directly to the List of called numbers If you press ... -
Page 21: Call Register
3.2 Call Register Menu Structure ® The StarPoint key system phone main menu includes lists of missed, incoming and outgoing calls. Each list contains up to 1,000 records on latest calls. You can access the call lists both from the main menu and by pressing a programmable button. ® The lists are also accessible in the – NetStar Assistant user interface. Missed Calls It is useful to program the call history access button particularly for missed calls. After programming the button, you will be notified of a missed call by a flashing LED and also on your phone display. - Page 22 Record Processing Options All call register items are displayed when you enter the appropriate list of calls. Use the and arrows to browse through the records. Push the confirmation button to display the submenus. Call – press the key to set up a call to the selected record. Send message – press the key to move to the SMS editing section where the addressee's number has already been entered. Details – display additional information on the selected call (name, number, type, date, time, duration). Delete – delete the record. Confirmation is required before deletion. Save to list – save a record number into the user telephone directory under a selected name. Received Calls and Dialled Numbers The way of control of these two menus is completely identical with that of the missed call ...
- Page 23 By deleting the telephone call history you also delete the same items ® displayed in the – NetStar Assistant interface. Settings The menu offers the following display options for your call history records: Name and time – the name and call date, time and duration are displayed. Number and time – the number and call date, time and duration are displayed. Name list – names are displayed only. Number list – numbers are displayed only.
-
Page 24: Messages
3.3 Messages Menu Structure ® You can send and receive text messages using the StarPoint telephones. Refer to Create Message for sending SMS and to Inbox for receiving SMS. The figure below shows the Messages menu structure. Push the following sequence to get into this menu at relax: ––> ––> ® You can also use the NetStar – Assistant web application for sending and receiving SMS. Refer to the Assistant manual 2N® NetStar (version 3.1.x) for more details. -
Page 25: Create Message
Create Message 1. Use the and arrows to select the Create message item in the Messages menu and press for confirmation. 2. Now type any text using your numerical keypad. Press the keys repeatedly to type different letters. Push the button to switch to digits or capital letters. To enter such special characters as *, # a + push the * button repeatedly. Punctuation and other special symbols are available under the ... - Page 26 Answer message – here you can easily send a reply to the number that sent the message. Type the reply and push to send the message. Resend message – here you can alter and forward the message to another user. Delete message – here you can delete the message. Confirmation is required before deletion.
-
Page 27: Message Settings
Use the and buttons to browse through these options. Push for confirmation. Delete all – delete all user messages. Confirmation is required before deletion. Delete all read – delete all user messages that have been read (those which are not marked New). Confirmation is required before deletion. Delete all unread – delete all user messages that have not been read (those which are marked New). Confirmation is required before deletion. Being deleted, the messages are completely removed from the system ® and cannot be recovered even using the NetStar – Assistant in terface. Therefore, be careful while using this function. Message Settings The menu offers several display options for received messages. They are as follows: Name and time – the name and receiving time are displayed in the list of received messages. -
Page 28: Contacts
3.4 Contacts Telephone Directory in General ® In the – NetStar system, you can be assigned telephone directories by the system administrator or create your own telephone directories using your telephone or ® the – NetStar Assistant web application enviroment. Subsequently, you can search the directories and make calls or send SMS to selected items. Access to Telephone Directory In general, you can access the telephone directory in your telephone as follows: 1. ... - Page 29 Push the programmable button repeatedly to terminate filtering. Record Processing Options Use and to browse through the phone directory items. Push to display the contact submenu. Call – press the key to set up a call to the selected record. Remember that phone directory email items cannot be called but can only be sent messages. Send message – press the key to enter the message editing section with the sender's number pre–defined. Details – display complete information on the contact (name, number, prefix, email). Edit – edit contact details sequentially. Push to move to the next contact detail. Delete– delete the phone directory items in singles. Confirmation is required before deletion.
-
Page 30: Menu Structure
By deleting a global contact from your telephone you delete the same from the list of all users and so be very careful while using this function. Menu Structure Browse Select this item to enter the telephone directory. Add Number and Email Add number – add an item to the phone directory to be called or sent messages. To add an item: 1. Enter the name and push for confirmation. 2. Enter the contact number or URL and push for confirmation. 3. Select a prefix from the menu using the and buttons or confirm None with 4. The record will be stored in your user directory. Add email – add an item to the phone directory to be sent only text messages, which are transformed into email messages. To add an item: 1. Enter the name and push for confirmation. 2. ... - Page 31 2. Enter the contact email address and push for confirmation. 3. The record will be stored in your user directory. Settings The menu offers two display options for the phone directory records. They are as follows: Name and number – the contact name and number are displayed in the directory. Name list – contact names are displayed only.
-
Page 32: Profiles
3.5 Profiles About Profiles ® A variety of properties can be assigned to stations or users (profiles) in the 2N NetStar system for convenience. Subsequently, you can switch the profiles depending on time or user selection in order to change station forwarding, pre–programmable buttons or telephone/HandsFree volume quickly and easily. All user changes are added to the curently active profile. Each user may create up to eight profiles, which, together with the basic user setting, represents nine unique configuration settings. ® The NetStar Assistant web application provides the user with... - Page 33 Profile Options Having selected a profile in the Profiles menu and confirmed it with , you get into a profile processing submenu. Use and to browse through the profile options. The figure below shows the profile processing structure.
- Page 34 Activate profile – enable the selected user profile. You can also assign user profile activation to a programmable button. Delete profile – delete the selected user profile. Confirmation is required before deletion. Rename profile – rename the selected profile. A profile name may not occur more than once for one user.
- Page 35 for confirmation. Automatic profile switching according to time conditions will be activated automatically. By activating a profile manually in the automatic profile switching mode you disable automatic switching. Create New Profile ® A profile may be created by the system administrator or a user using the 2N ® StarPoint terminal or the NetStar Assistant web application. Each user may create up to eight profiles. To create a new profile: 1. ...
-
Page 36: Settings
3.6 Settings Menu Structure Use the following sequence at relax to enter the Telephone settings menu: ––> 2x ––> . The figure below shows the main items of the menu. Use the and arrows to browse through the items. Push to confirm selections. All the settings included in this section can also be made from the 2N ® NetStar Assistant web application, which provides a higher user comfort. Refer to the NetStar - Assistant manual for more details. - Page 37 Volumes Use the and arrows to adjust the volume levels in all submenus. Push f or confirmation. Handset volume – set the handset volume level (i.e. how you can hear the opponent with your handset picked–up). HandsFree volume – set the HandsFree volume level (i.e. how you can hear the opponent in the HandsFree mode with your handset hung–up). Ringing volume – set the phone ringing volume (i.e. how loud the telephone should ring to announce an incoming call). Keys volume – set the phone button volume (i.e. how loud a keystroke should be signalled in the handset).
-
Page 39: Display Contrast
Display Contrast Use the Display contrast item to change the terminal display contrast. Push and to execute a change. You can currently check the effect of the changes. Confirm the selected level with Time Scheme Use the Time scheme item to change the time format to be displayed: twenty–four or twelve hours. Push and to execute the change and confirm the selection with Active Language Use the Active language item to change the terminal user language. Push and to select one of the PBX supported languages. English and Czech are supported by default. Confirm your selection with If you want to use a language that is currently not supported by your system, contact your PBX administrator. -
Page 40: System Information
Incoming View Use the Display incoming item to change the displayed information to signal an incoming call. Push and to select a new item and confirm the setting with . The following options are available: Called – the called number is displayed. Called, calling – the calling name (or number) and called number are displayed alternately. Called, calling list – the calling name (or number) and called name (or number) are displayed alternately. Key Timeout Use the Editing delay item to change the interval for entering subsequent characters ® in the StarPoint system. Push and to select one of seven pre–defined levels. Confirm your selection with ... -
Page 41: Button Functions
4. Button Functions Here is what you can find in this section: 4.1 Basic Terminal Buttons 4.2 Programmable Buttons - Setting 4.3 Programmable Buttons - Functions... -
Page 42: Basic Terminal Buttons
4.1 Basic Terminal Buttons Numerical Keypad Buttons ® The StarPoint numerical keypad is used for dialling numbers, typing text messages and entering contacts into the telephone directory. Therefore, multiple characters are assigned to each key. Press a key repeatedly to proceed to the next character. The table below gives a clear overview. -
Page 43: Volume Control
Menu Browsing Use the , and buttons to browse through the menu. The former two ones are used for browsing through menu items and often for selecting a level. They can also move the cursor through the text during editing text messages and other items. The last–named button is designed exclusively for confirmation of selections and settings. You are recommended to assign the function to a programmable button to easily quit the current configuration, delete characters and edit items. Volume Control ®... -
Page 44: Programmable Buttons - Setting
4.2 Programmable Buttons - Setting Button Function Assignment ® ® The system administrator or a NetStar Assistant user may program the StarPoint programmable buttons. To assign a function to a programmable button: ® 1. Log in to the NetStar Assistant web interface. 2. Select the Telephones menu in the upper toolbar. ® 3. Select the StarPoint type in the menu. 4. Click on the button to be programmed in the terminal figure to open the window as shown in the figure below. - Page 45 , (Flash), Call slots and HandsFree Therefore, you do not have to assign these functions any more. Button Tagnames ® The NetStar Assistant system is equipped with the automatic button tagname creating function. Procedure: 1. Click on the Prepare for printing item on the main telephone setting screen. 2. This creates and displays a complete template in the PDF format. The template ® consists of tagnames defined and displayed in the 2N NetStar Assistant environment. Pozn.: Make sure that a suitable PDF file browser has been installed for template viewing and printing (e.g.
-
Page 46: Programmable Buttons - Functions
4.3 Programmable Buttons - Functions Activate Profile Use the function to easily activate and deactivate a user profile. Use: Push the button with this function to activate the profile. The LED indicator of the respective button is shining while the profile is active. Re–push the same programmable button to deactivate the profile, or activate another profile, thus deactivating the current profile automatically. - Page 47 Push the function button during a call. The call will be put on hold and you will hear the dialtone and can dial another station number. The opponent will hear music. Having set up the other call, you can push the same button to switch the calls. HandsFree/Speakerphone Use this function to make HandsFree calls. Some terminals are not equipped with an external microphone and cannot make full use of this function. For such terminals the Speakerphone function is available. This function uses the standard handset microphone instead of an external microphone and the call quality is usually lower. Use: If you push the button during an incoming call, you will answer the call in the HandsFree ...
-
Page 48: Call Recording
Mute Use the function to temporarily mute the microphone during a call. Use: Push the function button during a call. The opponent cannot hear you. The muted state is signalled by a flashing button LED indicator. Re–push the button to re–activate the microphone. Call Recording Use the function to enable call recording. This function is based on the PBX administrators's permission to record. Use: Push the button with the recording function any time during a call. The active state is indicated by the button LED. Re–push the button to stop recording. Do Not Disturb (DND) Use the function to switch the terminal into the DND (Do Not Disturb) mode. In this mode, ... -
Page 49: Phone Directory
State/Speed Dialling The button with the State function only enables you to monitor the activity of a selected user, station or port. In that case, the button LED indicates the following states: Object at relax – the LED is off. Object ringing – the LED is flashing quickly. Object busy with call – the LED is shining continuously. You can also use the State button for ... -
Page 50: N® Optiset Terminals
5. 2N® OptiSet Terminals ® About 2N OptiSet Phones ® ® The OptiSet telephone sets are digital key system phones designed for the NetStar system. They represent an earlier type of telephones intended for common office operations. The phones are equipped with programmable buttons and, with the ® exception of OptiSet Entry , a two–row display. ® OptiSet Types Figure: 2N® OptiSet Entry, 2N® OptiSet Standard, 2N® OptiSet Advance Description of Types ®... - Page 51 The telephone: is equipped with a two–row display; is equipped with twelve programmable buttons; cannot be extended with an additional button module; supports HandsFree. The , and buttons are used for menu ® browsing and configuration. The terminal is controlled identically as the 2N StarPoint terminals. ® OptiSet Advance The telephone: is intended for demanding users, assistants and operators. is equipped with a two–row display; is equipped with twelve programmable buttons; can be extended with an additional button module; supports HandsFree.
-
Page 52: N® Openstage Terminals
6. 2N® OpenStage Terminals ® About 2N OpenStage Telephones ® The OpenStage telephone sets are digital key system phones designed for the ® NetStar system. They represent an innovative type of terminals, which can be widely used thanks to a variety of types. 2N® OpenStage Types Figure: 2N® OpenStage 10T, 2N® OpenStage 15T... - Page 53 Figure: 2N® OpenStage 20T, 2N® OpenStage 40T...
- Page 54 Description of Types ® OpenStage 10T The telephone: is intended for basic use by undemanding users; is not equipped with a display, which excludes telephone–based configuration and/or use of a telephone directory. Therefore, the phone is not provided with menu browsing buttons. is equipped with three programmable buttons; cannot be extended with an additional button module; has dedicated buttons for: – HandsFree activation; and – volume control. ® OpenStage 15T The telephone: is equipped with a display;...
- Page 55 has no programmable buttons; cannot be extended with an additional button module; has dedicated buttons for: – access to call history; – access to SMS messages (reading/viewing); – HandsFree activation; and – volume control; – call holding (Flash); – Redial; – Do Not Disturb (DND); – Mute function. Control: The cross buttons are used for menu browsing and configuration. corresponds to corresponds to corresponds to ® OpenStage 40T The telephone: is equipped with an adjustable six–row display; has six programmable buttons; can be extended with an additional button module; has dedicated buttons for: – access to call history; – access to SMS messages (reading/viewing); – HandsFree activation; and – volume control; – call holding (Flash);...
- Page 56 – Redial; – Do Not Disturb (DND); – Mute function; – head set activation. Control: The cross buttons are used for menu browsing and configuration. corresponds to the Back (Esc) button. It is used for rejecting calls, deleting texts or quitting menus. corresponds to and correspond to corresponds to ...
-
Page 57: Glossary
7. Glossary ® NetStar Assistant – a user web interface accessible via a web browser; helps the user view call history, program telephone buttons, set profiles, manage phone directories, and so on. Your PBX administrator will communicate the interface address and login data to you. BLF module – a large button module (operator's console) with 90 programmable buttons. CLIR – Calling Line Identification Restriction. DND (Do Not Disturb) – all incoming calls are rejected and outgoing calls are set up without limitations in the DND mode. Escape (Back) – return to a telephone menu. Flash (Call Holding) – used for accessing services during calls for call forwarding purposes, for example. -
Page 58: Important Warnings And Certifications
8. Important Warnings and Certifications The telephone may not be operated in explosive environments. Connect the telephone to dedicated sockets only. Keep the telephone away from aggressive substances and staining liquids (such as coffee, tea, wine, etc.). Never use petrol, solvents, alcohol containing detergents and similar substances for telephone cleaning. Use a soft cloth dampened with water or diluted washing-up detergents to clean the telephone. Microfibre cloth is recommended for display cleaning. Certificate of Compliance These devices meet all technical requirements concerning radio and telecommunications equipment pursuant to Act. No. 22/1997 Coll. in the latest wording and Governmental Decree No. 426/2000 Coll. and have been awarded a Certificate of Compliance. CE Marking The CE marking certifies compliance with EU Directive 1999/5/EG. - Page 59 The manufacturer reserves the right to modify the product in order to improve its qualities. Use the product for no purposes other than those specified in the User Manual. When the service life of the product or a part thereof is exhausted, dispose of it in accordance with applicable environmental regulations. ...
- Page 60 2N TELEKOMUNIKACE a.s. Modřanská 621, 143 01 Prague 4, Czech Republic Tel.: +420 261 301 500, Fax: +420 261 301 599 E-mail: sales@2n.cz Web: www.2n.cz 1963v3.1.0...
Need help?
Do you have a question about the StarPoint 500 Entry and is the answer not in the manual?
Questions and answers