BUSCH MINK MV 0040 C Control Instructions
Hide thumbs
Also See for MINK MV 0040 C:
- Instruction manual (32 pages) ,
- Instruction manual (32 pages)

Related Manuals for BUSCH MINK MV 0040 C


Summary of Contents for BUSCH MINK MV 0040 C
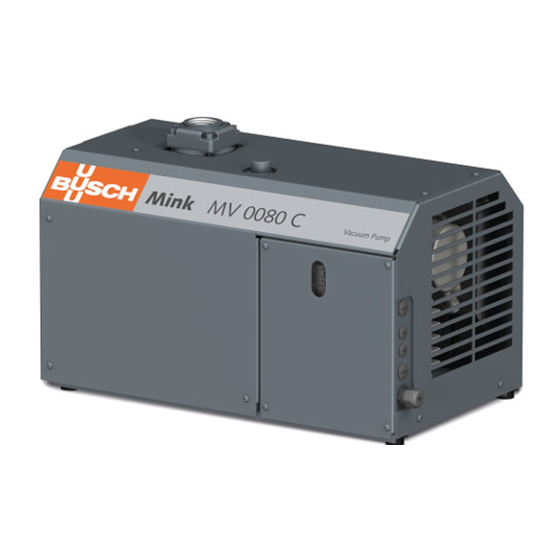
- Page 1 Pump Control Instructions MINK mit Frequenzumrichter MV 0040 C, MV 0060 C, MV 0080 C MV 0040 D, MV 0060 D, MV 0080 D 0870166596/A0004_de / Original instructions / Modifications reserved 22/06/2021...
-
Page 2: Table Of Contents
Table of Contents Table of Contents 1 Safety ............................4 2 Product Description "Keypad" .....................5 2.1 Scope of Delivery ......................5 2.2 Application........................5 3 Installation "Keypad"......................6 3.1 Wall Mounting ......................... 6 3.2 Connecting to the Vacuum Pump ................... 6 4 Commissioning "Keypad".....................8 4.1 Key Overview ........................ - Page 3 Table of Contents 8.9 Fieldbus........................... 39 8.10 PID Control........................40 9 Troubleshooting........................42 9.1 Fault Tracing ........................42 10 Basic Connection Examples ....................43 0870166596_MV0040-0080C-D_PCI_A0004_IM_de_MD...
-
Page 4: Safety
Safety Prior to handling the machine, this instruction manual should be read and understood. If anything needs to be clarified, please contact your Busch representative. Read this manual carefully before use and keep for future reference. This instruction manual remains valid as long as the customer does not change any- thing on the product. -
Page 5: Product Description "Keypad
– Parametrisation of the variable-frequency drive – Control (e.g. locking and releasing) – Display of various process values of the following machines: – MINK MV 0040 C/D – MINK MV 0060 C/D – MINK MV 0080 C/D 0870166596_MV0040-0080C-D_PCI_A0004_IM_de_MD 5 / 56... -
Page 6: Installation "Keypad
3 | Installation "Keypad" Installation "Keypad" The back side of the keypad is equipped with magnets to fix magnetically the manual control unit either on the vacuum pump or on another part. • Remove the bracket for wall mounting • Magnetically fix the keypad on desired place 3.1 Wall Mounting 6 / 56 0870166596_MV0040-0080C-D_PCI_A0004_IM_de_MD... -
Page 7: Connecting To The Vacuum Pump
Installation "Keypad" | 3 3.2 Connecting to the Vacuum Pump DANGER Live wires. Risk of electrical shock. • Electrical installation work must only be executed by qualified personnel. • Open the cover of the terminal box (TB). • Pull the cable of the keypad through the supplied cable feed through (CF). •... -
Page 8: Commissioning "Keypad
4 | Commissioning "Keypad" Commissioning "Keypad" 4.1 Key Overview Move backward in menu; Exit edit mode; Reset faults Scroll menu up; increase value Change control place Mover cursor left Move cursor right Stop key Start key Scroll menu down; decrease value Enter active level/item;... -
Page 9: Menu Structure
Commissioning "Keypad" | 4 4.3 Menu Structure The parameters on the keypad are arranged in menus. An arrow on the left of the dis- play shows the active menu. Initial press BACK/RESET key to activate the menu selection (arrow is blinking). Use the UP and DOWN arrows key to move between the menus. -
Page 10: Fault
4 | Commissioning "Keypad" 4.6 Fault When a fault appears, the display with the name of the fault starts to blink. Active faults are indicated in the submenus F5.0 to F5.9. The memory of active faults can store the maximum of 10 faults in the order of appearance. The 10 latest faults are stored in the order of appearance in the fault history F6.0 to F6.9. -
Page 11: Product Description "Parametrisation-Kit
• Parametrisation of the frequency inverter • Controlling • Indication of values • Saving of set of parameter of the following machines: – MINK MV 0040 C/D – MINK MV 0060 C/D – MINK MV 0080 C/D 0870166596_MV0040-0080C-D_PCI_A0004_IM_de_MD 11 / 56... -
Page 12: Installation "Parametrisation-Kit
6 | Installation "Parametrisation-Kit" Installation "Parametrisation-Kit" • Install the PC software on a Computer or a Notebook. • Connect the connection cable to the USB interface of the Computer or Notebook. 6.1 Connecting to the Vacuum Pump DANGER Live wires. Risk of electrical shock. -
Page 13: Parameter Overview
Digital In 5 freely available Digital In 4 Maintenance counter reset Digital Out Ground Ground Analogue In 2* Busch pressure transmitter 4 ... 20 mA 0 ..2 bar Digital In 3 Fault reset Digital In 2 open = speed control... -
Page 14: Monitoring Group: Menu Mon
7 | Parameter Overview 7.2 Monitoring Group: Menu MON Code Monitoring Value Unit Description V1.1 Output frequency Output frequency to motor V1.2 Frequency reference Frequency reference to motor control V1.3 Motor speed Motor speed in rpm V1.4 Motor current Motor current in A V1.5 Motor torque Calculated shaft torque... -
Page 15: Basic Parameters: Menu Par G1
Parameter Overview | 7 7.3 Basic Parameters: Menu PAR G1 Code Parameter Min. Max. Unit Default ID Description P1.1 Min. frequency P1.2 Minimum allowed frequency reference P1.2 Max. frequency P1.1 140* Maximum allowed frequency reference P1.3 Acceleration time 1 3000 Time from 0 to maximum frequency P1.4 Deceleration time 1... -
Page 16: Advanced Settings: Menu Par G2
7 | Parameter Overview 7.4 Advanced Settings: Menu PAR G2 Code Parameter Min. Max. Unit Default ID Description P2.1 Start/Stop logic Logic = 0: Start sgn 1 = Start forward Start sgn 2 = Start backward Logic = 1: Start sgn 1 = Start Start sgn 2 = Reverse Logic = 2: Start sgn 1 = Start pulse... -
Page 17: Analogue Inputs: Menu Par G3
P2.26 S ramp shape 2 Rounded speed profile 2 when acc/dec 2 is active P2.27 System Password 65535 1897 System Password (only for Busch) P2.28 Customer Password 65535 1898 Customer Password P2.29 Version set of parameter 0 65535 Current... -
Page 18: Digital Inputs: Menu Par G4
7 | Parameter Overview 7.6 Digital Inputs: Menu PAR G4 Code Parameter Min. Max. Unit Default ID Description P4.1 Start signal 1 Start signal 1 when control place is I/O 1 (FWD). See P2.1 for function. 0 = not used 1 = DIN1 2 = DIN2 3 = DIN3... -
Page 19: Digital Outputs: Menu Par G5
Parameter Overview | 7 Code Parameter Min. Max. Unit Default ID Description P4.18 Stop mode activation 1895 0 = Normal 1 = quick stop 2 = accurate stop (from start signal 1) Visibility of the group depends on P1.16 7.7 Digital Outputs: Menu PAR G5 Code Parameter Min. -
Page 20: Analogue Outputs: Menu Par G6
7 | Parameter Overview 7.8 Analogue Outputs: Menu PAR G6 Code Parameter Min. Max. Unit Default ID Description P6.1 Analogue output function 0 0 = Not used (fixed 100%) 1 = Frequency reference (0 – f 2 = Output frequency (0 – f 3 = Motor speed (0 –... -
Page 21: Motor Control: Menu Par G8
Parameter Overview | 7 Code Parameter Min. Max. Unit Default ID Description P7.12 Process max. value 3276.7 1034 Process display max value (depends on P7.11: with zero decimal digit the max. value is 32767; with 1 decimal digit the max. value is 3276.7) Visibility of the group depends on P1.16 7.10 Motor Control: Menu PAR G8 Code Parameter... -
Page 22: Protections: Menu Par G9
7 | Parameter Overview Code Parameter Min. Max. Unit Default ID Description P8.18 Disable overvoltage 0 = Enable regulator 1 = Disable P8.19 Disable undervoltage 0 = Enable regulator 1 = Disable P8.20 Motor type 0 = Asynchronous motor 1 = Synchronous motor P8.21 Torque boost Frequency of maximum torque boost *Depending on motor and machine sizes. -
Page 23: Autoreset: Menu Par G10
Parameter Overview | 7 Code Parameter Min. Max. Unit Default ID Description P9.15 Response to fieldbus See P9.3 fault P9.18 Response to STO dis- 1876 0 = No action able 1 = Warning 2 = Fault, not stored in history menu 3 = Fault, stored in history menu P9.19 Response to input phase 1877 See P9.3... - Page 24 7 | Parameter Overview Code Parameter Min. Max. Unit Default ID Description P11.1 ProcessDataOut 1 selec- Variable mapped on PD1: tion 0 = Output current 1 = Motor speed 2 = Motor current 3 = Motor voltage 4 = Motor torque 5 = Motor power 6 = DC-link voltage 7 = Active fault code...
-
Page 25: Pid-Controller: Menu Par G12
Parameter Overview | 7 7.14 PID-Controller: Menu PAR G12 Code Parameter Min. Max. Unit Default ID Description P12.1 Set point source 0 = PID set point 1/2 1 = AI1 2 = AI2 3 = Fieldbus P12.2 PID set point 1 Fixed set point 1 P12.3 PID set point 2 Fixed set point 2... -
Page 26: System Parameters, Fault And History Faults: Menu Flt
7 | Parameter Overview 7.15 System Parameters, Fault and History Faults: Menu FLT Code Parameter Min. Max. Unit Default ID Description V1.1 API system SW ID 2314 V1.2 API system SW version 2315 V1.3 Power SW ID 2315 V1.4 Power SW version V1.5 Application ID V1.6... -
Page 27: Parameter Description
Parameter Description | 8 Parameter Description In this chapter, you will find additional information on certain changeable most ad- vanced parameters. 8.1 Basic Parameter P1.3 Acceleration Time 1 Ramp time referred to variation from zero frequency to max frequency. A second acceleration time is available in P2.5. Minimum ramp time to assure the correct pump function: 1 s P1.4 Deceleration Time 1 Ramp time referred to variation from max frequency to zero frequency. -
Page 28: Advanced Settings
8 | Parameter Description 0: Not used 1: Automatic voltage boost (improves motor torque). P1.16 Show All Parameters 0: Only Basic group (and PI Control if function is used) 1: All parameters groups are visible. P1.17 Service Counter After 8000 operating hours the machine must be maintained. After maintenance, reset the service counter to 0. - Page 29 Parameter Description | 8 When value is greater than zero, acceleration and deceleration ramps have a S shape. The parameter is the time needed to reach full acc/dec. The start and end of acceleration and deceleration ramps can be smoothed with this parameter. Setting value 0 gives a linear ramp shape which causes acceleration and deceleration to act immediately to the changes in the reference signal.
- Page 30 8 | Parameter Description 2: Reset at power down P2.18 to P2.21 Skip Range 1 and 2 Two skip frequency regions are available, if it is needed to avoid certain frequencies because of mechanical resonance. P2.22 Stop Button Active 0: Active only in keypad control mode 1: Always active P2.23 Keypad Reverse Effective when control is from panel...
-
Page 31: Analogue Inputs
Parameter Description | 8 8.3 Analogue Inputs P3.1 and P3.5 AI1 and AI2 Signal Range Range of the electrical signal. 0: 0-100 %: 0 ... 10 V or 0 ... 20 mA 1: 20-100 %: 2 ... 10 V or 4 ... 20 mA P3.2 and P3.6 AI1 and AI2 Custom Min. - Page 32 8 | Parameter Description Example of Custom Range Use with Analogue Input: Max. Freq. Min. Freq. -100 Analogue input AI [%] Description of upper figure: Custom Min. and Custom Max. parameters configure the input range for analog input that will affect Frequency Reference. Blue line shows an example with Custom Min.
- Page 33 Parameter Description | 8 Max. Freq. Min. Freq. -100 Analogue input AI [%] Description of upper figure: Green line shows an example with Custom Min. = 100% and Custom Max = -100%. These settings provide a frequency range between Min. Frequency and (Max. Fre- quency –...
- Page 34 8 | Parameter Description Max. Freq. Min. Freq. -100 Analogue input AI [%] Description of upper figure: Blue line shows an example with Custom Min. = 0% and Custom Max = 200%. These settings provide a frequency range between Min. Frequency and (Max. Frequency – Min.
-
Page 35: Digital Inputs
Parameter Description | 8 8.4 Digital Inputs P4.1 and P4.2 Start Signal 1 and 2 Signals for start and direction. Logic is selected with P2.1. P4.3 Service Counter Reset Digital input to reset the service counter. P4.4 External Fault Close Fault is triggered by high digital input. -
Page 36: Digital Outputs
8 | Parameter Description - Main Run command is reset - Quick stop digital input is restored (or fieldbus command is cleared). - Alarm 63 is shown when quick stop is active. P4.18 Stop Mode Activation 0: Normal stop (is defined in P1.14) 1: Quick stop (A specific digital input (see P4.17) or command from fieldbus is defined to activate quick stop. -
Page 37: Analogue Outputs
Parameter Description | 8 P5.6 Relay Output 1 Inversion Inversion of relay state. P5.7 and P5.8 RO2 Relay Output 2 ON Delay and OFF Delay Adjustable delays for ON/OFF transitions. 8.6 Analogue Outputs P6.1 Analogue Output Function Signal coupled to analogue output. Selection Selection name Value corresponding to maximum output Not used... - Page 38 8 | Parameter Description Digital output (programmed as analogue input supervision) switches to "high", if AI is higher than this value. P7.6 Analog input supervision OFF level Digital output (programmed as analogue input supervision) switches to "low", if AI is lower than this value.
-
Page 39: Autoreset
Parameter Description | 8 8.8 Autoreset P10.1 Automatic Fault Reset 0: Disabled 1: Enabled The automatic reset function deletes fault state when the fault cause has been elimin- ated and the wait time P10.2 has elapsed. Parameter P10.4 determines the maximum number of automatic resets that can be effected during the trial time set by parameter P10.3. -
Page 40: Pid Control
8 | Parameter Description 1: PDI1 2: PDI2 3: PDI3 4: PDI4 5: PDI5 P11.10 FB PID Set Point Selection Parameter defines the input process data coupled to PID set point. Selections as P11.9. P11.11 FB PID Actual Selection Parameter defines the input process data coupled to PID actual value. Selections as P11.9. - Page 41 Parameter Description | 8 P12.5 and P12.6 Feedback Minimum and Maximum Minimum and maximum feedback values, corresponding to minimum and maximum of the signal. P12.7 PID Controller P Gain Proportional gain. If set to 100%, a variation of 10% on error causes a variation of 10% on regulator output.
-
Page 42: Troubleshooting
System fault Component fault, malfunc- Reset the fault and restart. tion Should the fault re-occur, contact your Busch repre- sentative Undervoltage DC-link voltage is under In case of temporary sup- the voltage limits defined. ply voltage break reset the fault and restart the AC drive. -
Page 43: Basic Connection Examples
Back EMF Protection of unit when Reset the fault and restart. starting with rotation motor Should the fault re-occur, contact your Busch repre- sentative Application error The application is not work- Contact your Busch repre- sentative IGBT tempera- IGBT temperature too high... - Page 44 10 | Basic Connection Examples 44 / 56 0870166596_MV0040-0080C-D_PCI_A0004_IM_de_MD...
- Page 45 Basic Connection Examples | 10 0870166596_MV0040-0080C-D_PCI_A0004_IM_de_MD 45 / 56...
- Page 46 10 | Basic Connection Examples 46 / 56 0870166596_MV0040-0080C-D_PCI_A0004_IM_de_MD...
- Page 47 Basic Connection Examples | 10 0870166596_MV0040-0080C-D_PCI_A0004_IM_de_MD 47 / 56...
- Page 48 10 | Basic Connection Examples 48 / 56 0870166596_MV0040-0080C-D_PCI_A0004_IM_de_MD...
- Page 49 Basic Connection Examples | 10 0870166596_MV0040-0080C-D_PCI_A0004_IM_de_MD 49 / 56...
- Page 50 10 | Basic Connection Examples 50 / 56 0870166596_MV0040-0080C-D_PCI_A0004_IM_de_MD...
- Page 51 Basic Connection Examples | 10 0870166596_MV0040-0080C-D_PCI_A0004_IM_de_MD 51 / 56...
- Page 52 10 | Basic Connection Examples 52 / 56 0870166596_MV0040-0080C-D_PCI_A0004_IM_de_MD...
- Page 53 Basic Connection Examples | 10 0870166596_MV0040-0080C-D_PCI_A0004_IM_de_MD 53 / 56...
- Page 54 10 | Basic Connection Examples 54 / 56 0870166596_MV0040-0080C-D_PCI_A0004_IM_de_MD...
- Page 55 Note...
- Page 56 Busch Vacuum Solutions We shape vacuum for you. Argentina Denmark Malaysia South Africa info@busch.com.ar info@busch.dk busch@busch.com.my info@busch.co.za Australia Finland Mexico Spain sales@busch.com.au info@busch.fi info@busch.com.mx contacto@buschiberica.es Austria France Netherlands Sweden busch@busch.at busch@busch.fr info@busch.nl info@busch.se Bangladesh Germany New Zealand Switzerland sales@busch.com.bd info@busch.de sales@busch.co.nz...
Need help?
Do you have a question about the MINK MV 0040 C and is the answer not in the manual?
Questions and answers