
Related Manuals for Life Fitness PFR-ROW-LCD


Summary of Contents for Life Fitness PFR-ROW-LCD
- Page 1 Heat Row PRF-ROW-LCD Owner's Manual• Bedienungsanleitung • Le manuel du propriétaire...
- Page 2 847.288.3300 • FAX: 847.288.3703 • Service phone number: 800.351.3737 (toll-free within U.S.A., Canada) Global Website: www.lifefitness.com AMERICAS Spain North America Life Fitness IBERIA Life Fitness, Inc. Columbia Centre III C/Frederic Mompou 5,1o1a 9525 West Bryn Mawr Avenue, Rosemont, IL 60018 U.S.A. 08960 Sant Just Desvern Barcelona Telephone: (847) 288 3300 SPAIN Service Email: customersupport@lifefitness.com...
- Page 3 User and Service Documents Link https://www.lftechsupport.com/web/document-library/documents Additional information is available online using the link above. تامولعم رفوتت إ لىع ةيفاضإ سبا تتر ن نلإ طبإرلإ مإدخت .هلاعأ 点击上面的链接可在线获取更多信息。 Flere oplysninger er tilgangelige online gennem linket ovenfor. Bijkomende informatie is online beschikbaar via bovenstaande link. Vous trouverez plus d‘informations en ligne a l‘aide du lien ci-dessus.¬...
-
Page 4: Table Of Contents
TABLE OF CONTENTS SAFETY ........................6 Safety Instructions ......................... 6 Disposing of Batteries ........................7 OVERVIEW ........................8 Heat Row ............................8 Specifications ..........................9 GETTING STARTED/ASSEMBLY/INSTALLATION/SPARE PARTS ........ 10 Parts ..............................10 Stabilizer Assembly ........................11 Positioning the Console ......................11 Inserting the Batteries ........................12 Warning Label Replacement .....................13 Settings Menu Access ........................14 OPERATION ...................... - Page 5 Our Pledge To You ........................23 Warranty Information........................23...
-
Page 6: Safety
SAFETY Safety Instructions WARNING: To reduce the risk of serious injury due to improper use of the training equipment, carefully read and adhere to the following important precautions and information before operating the rower. WARNING: Heart rate monitoring systems may be inaccurate. Over exercising may result in serious injury or death. If you feel faint, stop exercising immediately. -
Page 7: Disposing Of Batteries
WARNING: Do not position or store the rower vertically. WARNING: Danger of injury! Do not touch any moving parts such as the flywheel, chain or sprocket during operation. WARNING: Do not reach inside the shroud and touch the sprocket or chain.v WARNING: Read all precautions and instructions in this manual before you start using this equipment. -
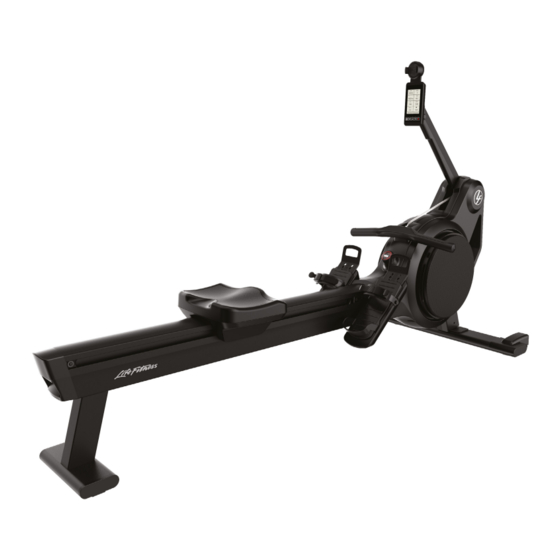
Page 8: Overview
OVERVIEW Heat Row ITEM DESCRIPTION Rower console Phone holder Chain Handle Foot length adjustment Quick release footstrap binding Resistance adjustment knob Rail Seat Transport wheels Transport handle... -
Page 9: Specifications
Specifications The Heat Row is not suitable for therapeutic purposes EN ISO 20957-1 / EN 957-7 / prEN ISO 20975-7, Specifications Product Class SB, adjustment by repeatable resistance steps Braking System Speed Independent Product Gross Weight Approx. 62kg Max User Weight 330 lb (150 kg) Length / Width / Height 84"... -
Page 10: Getting Started/Assembly/Installation/Spare Parts
GETTING STARTED/ASSEMBLY/INSTALLATION/SPARE PARTS Parts ITEM SPAR PART NUMBER DESCRIPTION Stabilizer 140-01-00014-01 (includes stabilizer and 4 bolts) Bolts Not available as spare part Rower REQUIRED TOOLS FOR ASSEMBLY Torque wrench 6 mm Hex Socket Phillips head screwdriver (No. 1) -
Page 11: Stabilizer Assembly
Stabilizer Assembly Stabilizer Assembly ITEM 37 FT-LBS (50 Nm) Positioning the Console 2.1 Raise the arm and snap into position... -
Page 12: Inserting The Batteries
Inserting the Batteries 1. Remove screw from the cover 2. Turn the cover clockwise 3. Pull the cover away from the rower 1. Please insert the supplied D-Cell batteries in the battery compartment. 1. Note the groove on the cover. It must be on the left side of the cover and aligned with the recess for the screw. -
Page 13: Warning Label Replacement
1. Fasten screw Warning Label Replacement 1. Replace the warning label with a label in your local language which can be found inside the box. -
Page 14: Settings Menu Access
Settings Menu Access Turn the console on by pulling the handle once. Press the Menu button on the console to access the Programs screen. Press the MENU button and the UP ARROW button simultaneously for 3 seconds to enter the settings menu SETTINGS DESCRIPTION System... -
Page 15: Operation
OPERATION Console Overview ITEM DATA READOUTS/BUTTONS DESCRIPTION Menu / Back Button. Menu / Back button. Down Arrow Push to move cursor down in the menus. Up Arrow Push to move cursor up in the menus. Right Arrow Confirmation button. Square Button Push to pause and stop workout. -
Page 16: Turning The Rower On And Off
Turning the Rower ON and OFF Turn on the rower by pulling the handle of the rower for one complete stroke. The rower will automatically shut off when no longer in use. Workout Screen Overview The workout screens consist of 4 - 8 mulitiple tiles or power curve which provide various metrics during your workout. ITEM DATA DESCRIPTION Resistance level... -
Page 17: Training Mode Tiles (Displayed In Information Overview)
Training Mode Tiles (displayed in information overview) QUICK TILE NAME DESCRIPTION START INTERVAL TARGET RACE Strokes per Minute 500m Current 500m pace Watt Current Power kCal Calorie Consumption Meters Distance Rowed Heart Rate (beats per minute) 500m Avg Average pace required to row 500m 500m Max Best pace in current workout Watt Avg... -
Page 18: Binding/Footplate
Binding/Footplate Adjusting the foot binding The slider footplate is designed to fit a wide range of foot sizes and is very simple to use. To adjust, lift the top sliding portion of the footplate and slide up or down. The numbers 1-8 marked on the footplate, represent a guideline from which the proper length can be determined. -
Page 19: How To Row
How to Row 1. Sit on the rower facing the console. 2. Position your feet in the foot bindings and fasten. WARNING: An open binding could interfere with your workout. 3. Begin the stroke comfortably forward and push strongly back with your legs while keeping your arms and back straight. - Page 20 MAINTENANCE/SERVICE SCHEDULES Please carefully observe the following instructions. The maintenance and care procedures must be performed as defined to ensure maximum operating safety and lifespan. Irregularly executed maintenance and care procedures will lead to increased wear to the product and will void the warranty. If you have any further questions on this topic, please contact our technical support.
- Page 21 MONTHLY MAINTENANCE Item Description Instructions Notes Check complete rower for Inspect the rower for loose nuts, loose nuts or bolts. bolts. Check that all connections are fitted firmly. Review the rower for damage and test function. Vacuum dust from inside the right cover.
-
Page 22: Warranty
Who Pays Transportation and Insurance for Service If the Product or any covered part must be returned to a service facility for repairs, We, Life Fitness, will pay all transportation and insurance charges for the first year. You are responsible for transportation and insurance charge after the first year. -
Page 23: Changes In Warranty Not Authorized
Changes in Warranty Not Authorized No one is authorized to change, modify or extend the terms of this limited warranty. Effects of State Laws This warranty gives you specific legal rights, and you may have other rights which vary from state to state and country by country. - Page 24 © Copyright 2020, Life Fitness, LLC. All Rights Reserved. Life Fitness, Hammer Strength, Cybex, ICG and SCIFIT are registered trademarks of Life Fitness, LLC and its affiliated companies and subsidiaries. Brunswick and related trademarks used under license from Brunswick Corporation.
Need help?
Do you have a question about the PFR-ROW-LCD and is the answer not in the manual?
Questions and answers
Мой тренажёр сам по себе включает и показывает букву E , уже один раз делали колибровку на нем и проблема вот вернулась. Подскажите в чем проблема? Спасибо
The letter "E" on the Life Fitness PFR-ROW-LCD machine refers to an error condition. For example:
- Error #0200 or EEPROM ERROR - SELECT FE TYPE: This means the Fitness Equipment (FE) type is incorrect.
Remedy: Perform a factory reset, select the correct FE type (e.g., Rower), then perform console brake calibration.
- Error #0300 or RADIO MODULE - MALFUNCTION: This means the radio module in the console is damaged or unresponsive.
Remedy: Replace the console.
Each "E" code corresponds to a specific issue, and the resolution depends on the exact error number.
This answer is automatically generated