Advertisement
Quick Links
Advertisement

Related Manuals for Life Fitness Heat Row


Summary of Contents for Life Fitness Heat Row
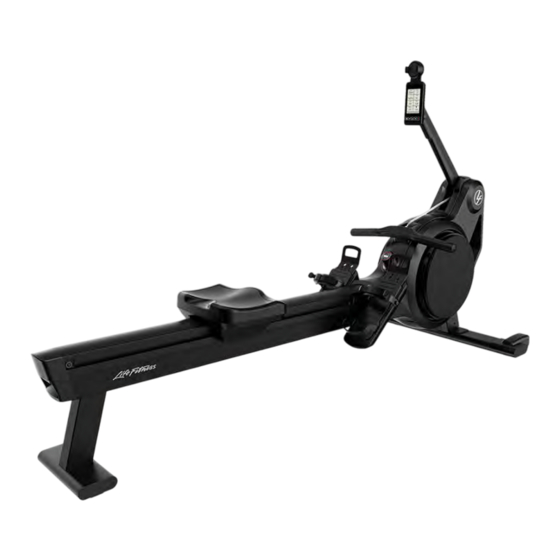
- Page 1 Heat Row LCD Console Service Manual REV July 5, 2022...
- Page 3 Latin America and Caribbean* Spain Hong Kong Life Fitness, LLC Life Fitness IBERIA Life Fitness Asia Pacific LTD 10601 W Belmont Ave C/Frederic Mompou 5,1º1ª 26/F, Global Trade Square Franklin Park, IL 60131 U.S.A. 08960 Sant Just Desvern Barcelona...
- Page 4 © Copyright , Life Fitness, LLC. All Rights Reserved. Life Fitness, Hammer Strength, Cybex, ICG and SCIFIT are registered trademarks of Life Fitness, LLC and its affiliated companies and subsidiaries. Disclaimer: Images and specifications are current as of the date of publication and are subject to change.
- Page 5 1. Safety Safety Instructions WARNING: To reduce the risk of serious injury due to improper use of the training equipment, carefully read and adhere to the following important precautions and information before operating the rower. WARNING: Heart rate monitoring systems may be inaccurate. Over exercising may result in serious injury or death.
- Page 6 • It is the responsibility of the owner to ensure that all users are informed of all warnings and precautions for proper use of the training equipment and it is only authorized for use in a supervised environment with qualified instructors.
- Page 7 Life Fitness, Hammer Strength, and ICG. • http://www.lifefitness.com/parts service parts ordering for Life Fitness, Cybex, SCIFIT, Hammer Strength, and ICG products along with warranty parts ordering and technician requests. • https://lfworld.lifefitness.com easy to find Knowledge Base articles with answers to frequently asked questions and product support documentation for Life Fitness, Cybex, SCIFIT, Hammer Strength, and ICG.
- Page 8 3. Maintenance Maintenance Schedule Please carefully observe the following instructions. The maintenance and care procedures must be performed as defined to ensure maximum operating safety and lifespan. Irregularly executed maintenance and care procedures will lead to increased wear to the product and will void the warranty. If you have any further questions on this topic, please contact our technical support.
- Page 9 Weekly Maintenance Item Description Instructions Notes Clean console and arm Clean with a lint free cloth and mild detergent / disinfectant after Clean shroud each workout. Clean stabilizers Clean foot straps Clean castors / tracks Perform a visual inspection of the castors and rails and clean with mild detergent and lint free cloth is needed.
- Page 10 Every 50 hours of use Maintenance Description Instructions Notes Carefully extend the handle and chain from the rower. Run the chain from back to front through a dry lint free cloth, to clean the chain. Lubricate the chain by applying a fine, non-resinous oil to a cloth and running the chain through it from back to front.
- Page 11 4. Theory of Operation Batteries The two D-cell batteries power the rower. They supply enough energy to maintain the system. Gear Module The gear module reads the position of the magnet installed on the magnetic brake system and sends the information to the harness adapter.
- Page 12 5. How To's Knowledge Base Knowledge Base for more detailed information. How To Procedure Videos Videos Procedures Video Link Batteries Video Link Brake Calibration - Console Video Link Brake Calibration - Mechanical Video Link Bungee Cord Tensioning Center Shroud Video Link - Remove Video Link - Install Video Link Chain and Cassette...
- Page 13 Batteries Tools Required: • #2 Phillips screwdriver • ESD (Electrostatic Discharge) grounding strap Time: 2 minutes Remove Service Access Cover Video Link - Remove The service access cover is located on left side of unit. 1. Remove screw securing service access cover using a #2 Phillips screwdriver. Item Description Service access cover...
- Page 14 Install Batteries Install both batteries into battery holder. NOTE: Install both batteries with correct orientation of positive (+) and negative (-) ends as shown. Item Description Battery, D cell Battery holder Install Service Access Cover Video Link - Install 1. Align tab on service access cover with groove in left shroud. Item Description Groove in left shroud...
- Page 15 3. Install screw securing service access cover using a #2 Phillips screwdriver. Item Description Service access cover Screw #2 Phillips screwdriver Complete Installation Operate unit at all levels to verify proper operation. Page 13 of 168...
- Page 16 Brake Calibration - Console If handle, computer, or handle battery were replaced, the handle and computer must be paired again. Tools Required: None Time: 2 minutes Video Link 1. Pull handle to turn on console. 2. Press Menu button to go to PROGRAMS menu. Item Description Menu / Back button...
- Page 17 Brake Calibration - Mechanical Tools Required: • #2 Phillips screwdriver • 3 mm Allen wrench • 4 mm Allen wrench • Needle nose pliers Time: 10 minutes Experience Level: Intermediate Remove Service Access Cover Video Link - Remove The service access cover is located on left side of unit. 1.
- Page 18 3. Rotate resistance dial to lowest setting. Item Description Resistance dial 4. Insert 4 mm Allen wrench into magnet casing. Item Description 4 mm Allen wrench Magnet casing 5. Loosen locknut on adjusting barrel using long nose pliers. Item Description Adjusting barrel Locknut 4 mm Allen wrench...
- Page 19 Install Service Access Cover Video Link - Install 1. Align tab on service access cover with groove in left shroud. Item Description Groove in left shroud Tab on service access cover 2. Rotate service access cover counter-clockwise to align notch in service access cover for screw. Item Description Service access cover...
- Page 20 Bungee Cord Tensioning Tools Required: • 2.5 mm Allen wrench • 4 mm Allen wrench • Side cutter • Clean cloth Time: 15 minutes Video: Video Link Move Handle Forward Lift handle from holder and move forward to front of chain access hole. Item Description Handle...
- Page 21 2. Lower cassette from seat rail to floor and place on clean cloth. Item Description Cassette Seat rail Adjust Bungee Cord Tension 1. Remove both bolts securing bungee cord bracket using a 2.5 mm Allen wrench. Item Description Bolt Bungee cord bracket 2.
- Page 22 3. Make note of how bungee cords are routed through bungee cord bracket at the three fixing points. Item Description First fixing point Second fixing point Third fixing point 4. Remove one bungee cord from three fixing points and pull out 0.75" (2 cm). Re-route bungee cord through the three fixing points.
- Page 23 8. Ensure chain is aligned on guide roller as cassette is lifted into seat rail. Item Description Guide roller Chain 9. Install one bolt to temporarily secure cassette to seat rail using a 4 mm Allen wrench. Item Description Bolt 10.
- Page 24 11. Move handle up and down with the same rhythm for about 10 seconds to test tension of bungee cord. Item Description Handle If the chain is banging during this test, repeat procedure to re-tension bungee cords 0.75" (2 cm) at a time until banging noise is no longer heard.
- Page 25 3. Install six bolts securing cassette to seat rail using a 4 mm Allen wrench. Item Description Front bolt Rear bolt Middle bolt Return Handle To Holder Pull handle back and return to holder. Item Description Handle Holder Complete Installation Operate unit at all levels to verify proper operation.
- Page 26 Center Shroud Tools Required: • Flat head screwdriver • #2 Phillips screwdriver • 3 mm Allen wrench, with ball end • Large elastic bands, (2) Time: 5 minutes NOTE: To remove center shroud completely, the Console would need to be removed first. Partially Remove Center Shroud Video Link - Remove 1.
- Page 27 3. Remove bolt securing resistance dial using a 3 mm Allen wrench. Item Description Resistance dial Bolt 4. Remove resistance dial by pulling upward. 5. Remove two screws securing lower section of center cover using a #2 Phillips screwdriver. Item Description Screw Lower section of center cover...
- Page 28 7. Loosen upper screw four to five full turns using a ball end 3 mm Allen wrench. Item Description 3 mm Allen wrench, ball end Upper screw Slot in center cover 8. Pivot center shroud around front of unit and unclip from lower shrouds. Item Description Clip at front of unit...
- Page 29 2. Insert front center shroud clip into slot at front of lower shrouds. Item Description Front center shroud clip Slot in lower shrouds 3. Lower center shroud into position and click two outer clips into place. Item Description Center shroud Side center shroud clip 4.
- Page 30 5. Lower center shroud and snap side clips into lower shrouds. Item Description Side clip Center shroud 6. Lower center shroud over resistance dial shaft. Item Description Resistance dial shaft Center shroud 7. Install two screws securing lower section of center cover using a #2 Phillips screwdriver. 8.
- Page 31 12. Install cap to resistance dial with the text reading upright. Item Description Resistance dial 13. Place handle into handle retainer. Complete Installation Operate unit at all levels to verify proper operation. Page 29 of 168...
- Page 32 Chain and Cassette Tools Required: • 4 mm Allen wrench • 10 mm Open end wrench • String, 20 feet (6 meters) • Side cutter • Clean cloth • Cable tie (2) • ESD (Electrostatic Discharge) grounding strap Time: 1 hour Video: Video Link Move Handle Forward...
- Page 33 2. Lower cassette from seat rail to floor and place on clean cloth. Item Description Cassette Seat rail Remove Chain from Cassette 1. Rotate chain securing mechanism out of cassette. Item Description Bolt Chain securing mechanism 2. Remove bolt and nut using a 4 mm Allen wrench and 10 mm open end wrench. 3.
- Page 34 4. Drop chain into cassette and remove chain by pulling through chain securing mechanism. Item Description Chain Chain securing mechanism 5. Tie a string to the end of the chain. String should be 20 feet (6 meters) long. Item Description Chain String 6.
- Page 35 8. Remove string from old chain and transfer to new chain. Item Description String Chain Remove Handle NOTICE: Component damage. Wear an ESD grounding strap during this procedure. Connect ESD grounding strap to frame bolts or unpainted metal of frame. If ESD grounding strap is not available, touch frame bolts or unpainted metal of frame before handling any electronics.
- Page 36 4. Push chain end stop out of handle. Item Description Chain end stop Handle Install Handle 1. Slide chain end stop into handle. Item Description Chain end stop Handle 2. Place cover in position on handle. Item Description Cover Screw 3.
- Page 37 Install Chain to Cassette 1. Lift the string and chain with one hand, then grab the handle with your other hand. Item Description Chain String 2. With tension on both the string and handle, pull string all the way out to install chain. NOTE: Keep the handle and string parallel to the seat rail for smooth guiding of chain.
- Page 38 5. Ensure chain is aligned under guide pulley. Item Description Chain Guide pulley 6. Remove string from end of chain. Item Description Chain String 7. Feed chain under first pulley. Item Description Chain First pulley Page 36 of 168...
- Page 39 8. Feed chain over second pulley. Item Description Chain Second pulley 9. Install both chain join rewind mechanism plates to chain. Item Description Chain join rewind mechanism plate Chain 10. Rotate chain securing mechanism out of cassette. 11. Install bolt and nut using a 4 mm Allen wrench and 10 mm open end wrench. Item Description Bolt...
- Page 40 12. Install two cable ties over the bolt to center chain securing mechanism. • The green arrow shows cable tie installed correctly against chain securing mechanism. • The red arrow shows cable tie installed incorrectly, too far away from chain securing mechanism. Install Cassette 1.
- Page 41 3. Install six bolts securing cassette to seat rail using a 4 mm Allen wrench. Item Description Front bolt Rear bolt Middle bolt Return Handle To Holder Pull handle back and return to holder. Item Description Handle Holder Complete Installation Operate unit at all levels to verify proper operation.
- Page 42 Chain Sprocket Tools Required: • Flat head screwdriver • #2 Phillips screwdriver • 3 mm Allen wrench, with ball end • 17 mm Open end wrench, (2) • 17 mm Socket wrench • Large elastic band, (2) • Gear puller •...
- Page 43 3. Remove bolt securing resistance dial using a 3 mm Allen wrench. Item Description Resistance dial Bolt 4. Remove resistance dial by pulling upward. 5. Remove two screws securing lower section of center cover using a #2 Phillips screwdriver. Item Description Screw Lower section of center cover...
- Page 44 7. Loosen upper screw four to five full turns using a ball end 3 mm Allen wrench. Item Description 3 mm Allen wrench, ball end Upper screw Slot in center cover 8. Pivot center shroud around front of unit and unclip from lower shrouds. Item Description Clip at front of unit...
- Page 45 Remove Right Shroud Video Link - Remove 1. Loosen three screws, 3-4 turns each, securing right shroud to frame using a #2 Phillips screwdriver. Item Description Lower screw Middle screw Upper screw 2. Remove seven screws securing right shroud using a 3 mm Allen wrench. Remove in the order shown. Item Description Screw...
- Page 46 Remove Chain Sprocket 1. Hold fan in position and remove lock nut using a 17 mm open end wrench. Item Description Lock nut 2. Remove chain from sprocket and secure on bracket. Item Description Bracket Chain 3. Remove chain sprocket using gear puller. Item Description Chain sprocket...
- Page 47 2. Slide chain sprocket onto pulley shaft. Item Description Pulley shaft Chain sprocket 3. Install nut to pulley shaft by hand. Item Description Pulley shaft 4. Tighten nut until resistance is felt using a 17 mm socket wrench. NOTE: Hold fan when installing or removing the nut to keep pulley shaft from turning. 5.
- Page 48 9. Install bearing into chain sprocket by hand, then tap in using a mallet. Item Description Chain sprocket Bearing 10. Re-install nut and tighten fully using a 17 mm socket wrench. NOTE: Do not over tighten. 11. Test chain sprocket for proper movement. 12.
- Page 49 2. Ensure foam sponge at front of rower is correctly seated. Item Description Right shroud Foam sponge 3. Press right shroud into left shroud and it will click into place. Item Description Right shroud Left shroud 4. Check resistance dial for proper positioning. Item Description Resistance dial...
- Page 50 5. Ensure right and left shrouds are correctly aligned. Item Description Right shroud Left shroud 6. Install first two screws securing right shroud using a 3 mm Allen wrench. Install in the order shown. Item Description Screw 7. Tighten three screws securing right shroud to frame using a #2 Phillips screwdriver. NOTE: Hold left and right shroud together when tightening upper screw.
- Page 51 8. Install last five screws securing the right shroud using a 3 mm Allen wrench. Install in the order shown. Item Description Screw Install Center Shroud Video Link - Install 1. Remove large elastic band from center shroud. 2. Insert front center shroud clip into slot at front of lower shrouds. Item Description Front center shroud clip...
- Page 52 4. Slide slot in center cover over upper screw. Item Description Slot in center cover Upper screw 5. Lower center shroud and snap side clips into lower shrouds. Item Description Side clip Center shroud 6. Lower center shroud over resistance dial shaft. Item Description Resistance dial shaft...
- Page 53 10. Install resistance dial by pushing onto shaft. Rotate counter clockwise all the way to set resistance to lowest position, then check orientation. NOTE: Make sure cut out in resistance dial is at the 7 o'clock position in relation to center line. Item Description Cut out in resistance dial...
- Page 54 Console Tools Required: • 3 mm Allen wrench • ESD (Electrostatic Discharge) grounding strap Time: 5 minutes Remove Console NOTICE: Component damage. Wear an ESD grounding strap during this procedure. Connect ESD grounding strap to frame bolts or unpainted metal of frame.
- Page 55 3. Remove upper screw securing cover to console arm using a 3 mm Allen wrench. Item Description Upper Screw Console arm 4. While holding console, slide cover up slowly from console arm to expose cable connections. NOTE: Stop when cable connections are exposed and make note of how they are stored in cover. Item Description Console...
- Page 56 6. Remove console cable through hole in console bracket, then remove USB cable. Item Description Console cable Hole in console bracket USB cable 7. Remove console from console arm. Install Console 1. Insert USB cable through hole in console bracket, then insert console cable. Item Description Console cable...
- Page 57 3. Tuck cables into console arm as they were previously stored. Item Description Console Cable connections Console arm 4. Slide cover down console arm slowly. NOTE: Do not pinch or damage cables. 5. Install upper screw securing cover to console arm using a 3 mm Allen wrench. Item Description Upper Screw...
- Page 58 7. Install lower screw securing cover to console arm using a 3 mm Allen wrench. Item Description Console arm Lower screw Cover 8. Adjust console forward and tighten knob. Complete Installation Operate unit at all levels to verify proper operation. Page 56 of 168...
- Page 59 Drive Belt Tools Required: • Flat head screwdriver • #2 Phillips screwdriver • 3 mm Allen wrench, with ball end • Torque wrench • 15 mm Socket • 15 mm Open end wrench • Large elastic band, (2) • Strap •...
- Page 60 3. Remove bolt securing resistance dial using a 3 mm Allen wrench. Item Description Resistance dial Bolt 4. Remove resistance dial by pulling upward. 5. Remove two screws securing lower section of center cover using a #2 Phillips screwdriver. Item Description Screw Lower section of center cover...
- Page 61 7. Loosen upper screw four to five full turns using a ball end 3 mm Allen wrench. Item Description 3 mm Allen wrench, ball end Upper screw Slot in center cover 8. Pivot center shroud around front of unit and unclip from lower shrouds. Item Description Clip at front of unit...
- Page 62 Remove Right Shroud Video Link - Remove 1. Loosen three screws, 3-4 turns each, securing right shroud to frame using a #2 Phillips screwdriver. Item Description Lower screw Middle screw Upper screw 2. Remove seven screws securing right shroud using a 3 mm Allen wrench. Remove in the order shown. Item Description Screw...
- Page 63 Remove Left Shroud Video Link 1. Loosen bolt securing resistance dial to left shroud. Item Description Resistance dial Bolt 2. Move resistance dial to the side. 3. The fan has holes to access bolts securing left shroud. Item Description Fan access hole Bolt 4.
- Page 64 5. Remove two bolts securing left shroud to frame using a 3 mm Allen wrench. Item Description Bolt Frame 6. Pull left shroud apart from frame at front of unit and pivot at back. Item Description Frame Pivot here Left shroud 7.
- Page 65 2. Remove drive belt by wrapping strap around belt and pulling up and away from upper pulley. Rotate fan to help guide belt off of pulley. Item Description Strap Drive belt Upper pulley Install Drive Belt 1. Install belt installation tool by threading onto upper pulley shaft. Item Description Belt installation tool...
- Page 66 3. Align drive belt on bottom of upper pulley and rotate upper pulley with belt installation tool or by turning fan. Item Description Belt installation tool Drive belt Check alignment of drive belt on upper and lower pulleys. 4. Remove belt installation tool. 5.
- Page 67 2. Install two bolts securing left shroud to frame using a 3 mm Allen wrench. Item Description Bolt Frame 3. Install bolts in these four locations using a 3 mm Allen wrench. Item Description Bolt location 4. Place resistance dial in position on left shroud. Item Description Resistance dial...
- Page 68 Install Right Shroud Video Link - Install 1. Install right shroud in place by sliding back in first and rotate front towards left shroud. Item Description Pivot here Right shroud 2. Ensure foam sponge at front of rower is correctly seated. Item Description Right shroud...
- Page 69 4. Check resistance dial for proper positioning. Item Description Resistance dial Right shroud 5. Ensure right and left shrouds are correctly aligned. Item Description Right shroud Left shroud 6. Install first two screws securing right shroud using a 3 mm Allen wrench. Install in the order shown. Item Description Screw...
- Page 70 7. Tighten three screws securing right shroud to frame using a #2 Phillips screwdriver. NOTE: Hold left and right shroud together when tightening upper screw. Item Description Lower screw Middle screw Upper screw 8. Install last five screws securing the right shroud using a 3 mm Allen wrench. Install in the order shown. Item Description Screw...
- Page 71 3. Lower center shroud into position and click two outer clips into place. Item Description Center shroud Side center shroud clip 4. Slide slot in center cover over upper screw. Item Description Slot in center cover Upper screw 5. Lower center shroud and snap side clips into lower shrouds. Item Description Side clip...
- Page 72 6. Lower center shroud over resistance dial shaft. Item Description Resistance dial shaft Center shroud 7. Install two screws securing lower section of center cover using a #2 Phillips screwdriver. 8. Install screw securing middle section of center cover using a #2 Phillips screwdriver. 9.
- Page 73 13. Place handle into handle retainer. Complete Installation Operate unit at all levels to verify proper operation. Page 71 of 168...
- Page 74 Fan Access Cover Tools Required: #2 Phillips screwdriver Time: 1 minute Remove Fan Access Cover Video Link The fan access cover is located on right side of unit. 1. Remove screw securing fan access cover using a #2 Phillips screwdriver. Item Description Fan access cover...
- Page 75 2. Rotate fan access cover clockwise to align notch in fan access cover for screw. Item Description Fan access cover Notch 3. Install screw securing fan access cover using a #2 Phillips screwdriver. Item Description Fan access cover Screw #2 Phillips screwdriver Complete Installation Operate unit at all levels to verify proper operation.
- Page 76 Footstrap Tools Required: • #2 Phillips screwdriver • Loctite ® #242 Time: 5 minutes Remove Footstrap Video Link 1. Loosen screw in front of seat bumper using a #2 Phillips screwdriver. Item Description Screw Seat bumper 2. Slide seat bumper back. Item Description Screw...
- Page 77 3. Remove footstrap from inside pin on footplate. Item Description Footstrap Inside pin on footplate 4. Remove outer screw securing footstrap using a #2 Phillips screwdriver. Item Description Outer screw Footstrap Install Footstrap 1. Apply Loctite ® #242 to outer screw. Item Description Outer screw...
- Page 78 3. Install footstrap to inside pin on footplate. Item Description Footstrap Inside pin on footplate 4. Slide seat bumper forward. Item Description Screw Seat bumper 5. Tighten screw in front of seat bumper using a #2 Phillips screwdriver. Item Description Screw Seat bumper Complete Installation...
- Page 79 Freewheel Shaft with Sprocket and Pulley Tools Required: • Flat head screwdriver • Rubber mallet • #2 Phillips screwdriver • Retaining ring pliers • 3 mm Allen wrench, with ball end • Strap • 17 mm Open end wrench, (2) •...
- Page 80 3. Remove bolt securing resistance dial using a 3 mm Allen wrench. Item Description Resistance dial Bolt 4. Remove resistance dial by pulling upward. 5. Remove two screws securing lower section of center cover using a #2 Phillips screwdriver. Item Description Screw Lower section of center cover...
- Page 81 7. Loosen upper screw four to five full turns using a ball end 3 mm Allen wrench. Item Description 3 mm Allen wrench, ball end Upper screw Slot in center cover 8. Pivot center shroud around front of unit and unclip from lower shrouds. Item Description Clip at front of unit...
- Page 82 Remove Right Shroud Video Link - Remove 1. Loosen three screws, 3-4 turns each, securing right shroud to frame using a #2 Phillips screwdriver. Item Description Lower screw Middle screw Upper screw 2. Remove seven screws securing right shroud using a 3 mm Allen wrench. Remove in the order shown. Item Description Screw...
- Page 83 Remove Chain Sprocket 1. Hold fan in position and remove lock nut using a 17 mm open end wrench. Item Description Lock nut 2. Remove chain from sprocket and secure on bracket. Item Description Bracket Chain 3. Remove chain sprocket using gear puller. Item Description Chain sprocket...
- Page 84 Remove Left Shroud Video Link 1. Loosen bolt securing resistance dial to left shroud. Item Description Resistance dial Bolt 2. Move resistance dial to the side. 3. The fan has holes to access bolts securing left shroud. Item Description Fan access hole Bolt 4.
- Page 85 5. Remove two bolts securing left shroud to frame using a 3 mm Allen wrench. Item Description Bolt Frame 6. Pull left shroud apart from frame at front of unit and pivot at back. Item Description Frame Pivot here Left shroud 7.
- Page 86 2. Install lock nut onto flywheel shaft until shaft almost protrudes from lock nut using a 17 mm socket wrench. Item Description Flywheel shaft Lock nut 3. Remove drive belt by wrapping strap around belt and pulling up and away from upper pulley. Rotate fan to help guide belt off of pulley.
- Page 87 6. Remove bearing by tapping out with a 17 mm socket. Item Description 17 mm socket Bearing Install Freewheel Shaft and Pulley 1. Apply oil to bearing and bearing housing. Item Description Bearing housing Bearing 2. Install freewheel shaft with sprocket into bearing housing. Page 85 of 168...
- Page 88 3. Place 17 mm socket wrench with extension bar onto flywheel nut and brace against frame. Item Description 17 mm socket wrench Extension bar 4. Clean bearing and bearing housing on other side of frame. 5. Apply oil to bearing and install until threads are exposed on flywheel shaft. Item Description Bearing...
- Page 89 6. Apply oil to threads of pulley. Item Description Pulley Pulley threads 7. Install pulley by threading counter clockwise on flywheel shaft to seat bearing into frame. Do not fully tighten. IMPORTANT: Pulley threads are left hand thread. Item Description Flywheel shaft Rubber mallet 8.
- Page 90 11. Add washer to flywheel shaft. Item Description Flywheel shaft Washer 12. Install belt installation tool by threading onto upper pulley shaft. Item Description Belt installation tool Upper pulley shaft 13. Remove 17 mm socket wrench and extension bar. 14. Install drive belt by wrapping around lower pulley first. Item Description Align drive belt here...
- Page 91 15. Align drive belt on bottom of upper pulley and rotate upper pulley with belt installation tool or by turning fan. Item Description Belt installation tool Drive belt Check alignment of drive belt on upper and lower pulleys. 16. Remove belt installation tool. 17.
- Page 92 21. Install lock nut using a 17 mm open end wrench. Item Description Flywheel shaft Lock nut 22. Install chain on chain sprocket. Item Description Chain Chain sprocket Install Left Shroud 1. Install left shroud in place by sliding back in first and rotate front towards frame. Item Description Frame...
- Page 93 2. Install two bolts securing left shroud to frame using a 3 mm Allen wrench. Item Description Bolt Frame 3. Install bolts in these four locations using a 3 mm Allen wrench. Item Description Bolt location 4. Place resistance dial in position on left shroud. Item Description Resistance dial...
- Page 94 Install Right Shroud Video Link - Install 1. Install right shroud in place by sliding back in first and rotate front towards left shroud. Item Description Pivot here Right shroud 2. Ensure foam sponge at front of rower is correctly seated. Item Description Right shroud...
- Page 95 4. Check resistance dial for proper positioning. Item Description Resistance dial Right shroud 5. Ensure right and left shrouds are correctly aligned. Item Description Right shroud Left shroud 6. Install first two screws securing right shroud using a 3 mm Allen wrench. Install in the order shown. Item Description Screw...
- Page 96 7. Tighten three screws securing right shroud to frame using a #2 Phillips screwdriver. NOTE: Hold left and right shroud together when tightening upper screw. Item Description Lower screw Middle screw Upper screw 8. Install last five screws securing the right shroud using a 3 mm Allen wrench. Install in the order shown. Item Description Screw...
- Page 97 3. Lower center shroud into position and click two outer clips into place. Item Description Center shroud Side center shroud clip 4. Slide slot in center cover over upper screw. Item Description Slot in center cover Upper screw 5. Lower center shroud and snap side clips into lower shrouds. Item Description Side clip...
- Page 98 6. Lower center shroud over resistance dial shaft. Item Description Resistance dial shaft Center shroud 7. Install two screws securing lower section of center cover using a #2 Phillips screwdriver. 8. Install screw securing middle section of center cover using a #2 Phillips screwdriver. 9.
- Page 99 13. Place handle into handle retainer. Complete Installation Operate unit at all levels to verify proper operation. Page 97 of 168...
- Page 100 Gear Module Tools Required: • #2 Phillips screwdriver • ESD (Electrostatic Discharge) grounding strap Time: 10 minutes Remove Service Access Cover Video Link - Remove The service access cover is located on left side of unit. 1. Remove screw securing service access cover using a #2 Phillips screwdriver. Item Description Service access cover...
- Page 101 Wear an ESD grounding strap during this procedure. Connect ESD grounding strap to frame bolts or unpainted metal of frame. If ESD grounding strap is not available, touch frame bolts or unpainted metal of frame before handling any electronics. Video Link 1.
- Page 102 Install Gear Module 1. Plug gear module cables into gear module. Item Description Gear module cable Gear module 2. Move junction board to the side and place gear module onto mounting posts. Item Description Gear module Mounting post Junction board 3.
- Page 103 Install Batteries Install both batteries into battery holder. NOTE: Install both batteries with correct orientation of positive (+) and negative (-) ends as shown. Item Description Battery, D cell Battery holder Install Service Access Cover Video Link - Install 1. Align tab on service access cover with groove in left shroud. Item Description Groove in left shroud...
- Page 104 3. Install screw securing service access cover using a #2 Phillips screwdriver. Item Description Service access cover Screw #2 Phillips screwdriver Complete Installation Operate unit at all levels to verify proper operation. Page 102 of 168...
- Page 105 Junction Board Tools Required: • #2 Phillips screwdriver • ESD (Electrostatic Discharge) grounding strap Time: 10 minutes Remove Service Access Cover Video Link - Remove The service access cover is located on left side of unit. 1. Remove screw securing service access cover using a #2 Phillips screwdriver. Item Description Service access cover...
- Page 106 Wear an ESD grounding strap during this procedure. Connect ESD grounding strap to frame bolts or unpainted metal of frame. If ESD grounding strap is not available, touch frame bolts or unpainted metal of frame before handling any electronics. Video Link 1.
- Page 107 Install Junction Board 1. Plug top cable into junction board. Item Description Top cable Bracket 2. Slide junction board into bracket. 3. Plug four cables into junction board. Item Description Junction board Cable 4. Install two screws securing junction board using a Phillips screwdriver. Item Description Screw...
- Page 108 Install Batteries Install both batteries into battery holder. NOTE: Install both batteries with correct orientation of positive (+) and negative (-) ends as shown. Item Description Battery, D cell Battery holder Install Service Access Cover Video Link - Install 1. Align tab on service access cover with groove in left shroud. Item Description Groove in left shroud...
- Page 109 3. Install screw securing service access cover using a #2 Phillips screwdriver. Item Description Service access cover Screw #2 Phillips screwdriver Complete Installation Operate unit at all levels to verify proper operation. Page 107 of 168...
- Page 110 Left Shroud Tools Required: • Flat head screwdriver • #2 Phillips screwdriver • 3 mm Allen wrench, with ball end • Large elastic bands, (2) Time: 15 minutes Partially Remove Center Shroud Video Link - Remove 1. Remove handle from handle retainer and place out of the way by securing to console knob using a larger elastic band.
- Page 111 3. Remove bolt securing resistance dial using a 3 mm Allen wrench. Item Description Resistance dial Bolt 4. Remove resistance dial by pulling upward. 5. Remove two screws securing lower section of center cover using a #2 Phillips screwdriver. Item Description Screw Lower section of center cover...
- Page 112 7. Loosen upper screw four to five full turns using a ball end 3 mm Allen wrench. Item Description 3 mm Allen wrench, ball end Upper screw Slot in center cover 8. Pivot center shroud around front of unit and unclip from lower shrouds. Item Description Clip at front of unit...
- Page 113 Remove Right Shroud Video Link - Remove 1. Loosen three screws, 3-4 turns each, securing right shroud to frame using a #2 Phillips screwdriver. Item Description Lower screw Middle screw Upper screw 2. Remove seven screws securing right shroud using a 3 mm Allen wrench. Remove in the order shown. Item Description Screw...
- Page 114 Remove Left Shroud Video Link 1. Loosen bolt securing resistance dial to left shroud. Item Description Resistance dial Bolt 2. Move resistance dial to the side. 3. The fan has holes to access bolts securing left shroud. Item Description Fan access hole Bolt 4.
- Page 115 5. Remove two bolts securing left shroud to frame using a 3 mm Allen wrench. Item Description Bolt Frame 6. Pull left shroud apart from frame at front of unit and pivot at back. Item Description Frame Pivot here Left shroud 7.
- Page 116 2. Install two bolts securing left shroud to frame using a 3 mm Allen wrench. Item Description Bolt Frame 3. Install bolts in these four locations using a 3 mm Allen wrench. Item Description Bolt location 4. Place resistance dial in position on left shroud. Item Description Resistance dial...
- Page 117 Install Right Shroud Video Link - Install 1. Install right shroud in place by sliding back in first and rotate front towards left shroud. Item Description Pivot here Right shroud 2. Ensure foam sponge at front of rower is correctly seated. Item Description Right shroud...
- Page 118 4. Check resistance dial for proper positioning. Item Description Resistance dial Right shroud 5. Ensure right and left shrouds are correctly aligned. Item Description Right shroud Left shroud 6. Install first two screws securing right shroud using a 3 mm Allen wrench. Install in the order shown. Item Description Screw...
- Page 119 7. Tighten three screws securing right shroud to frame using a #2 Phillips screwdriver. NOTE: Hold left and right shroud together when tightening upper screw. Item Description Lower screw Middle screw Upper screw 8. Install last five screws securing the right shroud using a 3 mm Allen wrench. Install in the order shown. Item Description Screw...
- Page 120 3. Lower center shroud into position and click two outer clips into place. Item Description Center shroud Side center shroud clip 4. Slide slot in center cover over upper screw. Item Description Slot in center cover Upper screw 5. Lower center shroud and snap side clips into lower shrouds. Item Description Side clip...
- Page 121 6. Lower center shroud over resistance dial shaft. Item Description Resistance dial shaft Center shroud 7. Install two screws securing lower section of center cover using a #2 Phillips screwdriver. 8. Install screw securing middle section of center cover using a #2 Phillips screwdriver. 9.
- Page 122 13. Place handle into handle retainer. Complete Installation Operate unit at all levels to verify proper operation. Page 120 of 168...
- Page 123 Reed Switch Tools Required: • 3 mm Allen wrench • Side cutter • Cable tie, (5) • ESD (Electrostatic Discharge) grounding strap Time: 15 minutes Remove Service Access Cover Video Link - Remove The service access cover is located on left side of unit. 1.
- Page 124 Remove Reed Switch NOTICE: Component damage. Wear an ESD grounding strap during this procedure. Connect ESD grounding strap to frame bolts or unpainted metal of frame. If ESD grounding strap is not available, touch frame bolts or unpainted metal of frame before handling any electronics.
- Page 125 4. Remove bolt securing reed switch using a 3 mm Allen wrench. Item Description Reed switch bolt Reed switch 5. Remove reed switch. Install Reed Switch 1. Install bolt securing reed switch using a 3 mm Allen wrench. Item Description Reed switch bolt Reed switch 2.
- Page 126 3. Plug reed switch cable into junction board. Item Description Junction board Reed switch cable 4. Secure reed switch cable with five cable ties as shown. WARNING: Start at the left side and ensure that reed switch cable does not rub on belt or other moving parts.
- Page 127 Install Service Access Cover Video Link - Install 1. Align tab on service access cover with groove in left shroud. Item Description Groove in left shroud Tab on service access cover 2. Rotate service access cover counter-clockwise to align notch in service access cover for screw. Item Description Service access cover...
- Page 128 Resistance Brake Cable Tools Required: • Flat head screwdriver • #2 Phillips screwdriver • 3 mm Allen wrench, with ball end • 4 mm Allen wrench • Large elastic band, (2) • Side cutter • Needle nose pliers • Cable tie, (2) Time: 30 minutes Partially Remove Center Shroud...
- Page 129 3. Remove bolt securing resistance dial using a 3 mm Allen wrench. Item Description Resistance dial Bolt 4. Remove resistance dial by pulling upward. 5. Remove two screws securing lower section of center cover using a #2 Phillips screwdriver. Item Description Screw Lower section of center cover...
- Page 130 7. Loosen upper screw four to five full turns using a ball end 3 mm Allen wrench. Item Description 3 mm Allen wrench, ball end Upper screw Slot in center cover 8. Pivot center shroud around front of unit and unclip from lower shrouds. Item Description Clip at front of unit...
- Page 131 Remove Right Shroud Video Link - Remove 1. Loosen three screws, 3-4 turns each, securing right shroud to frame using a #2 Phillips screwdriver. Item Description Lower screw Middle screw Upper screw 2. Remove seven screws securing right shroud using a 3 mm Allen wrench. Remove in the order shown. Item Description Screw...
- Page 132 Remove Left Shroud Video Link 1. Loosen bolt securing resistance dial to left shroud. Item Description Resistance dial Bolt 2. Move resistance dial to the side. 3. The fan has holes to access bolts securing left shroud. Item Description Fan access hole Bolt 4.
- Page 133 5. Remove two bolts securing left shroud to frame using a 3 mm Allen wrench. Item Description Bolt Frame 6. Pull left shroud apart from frame at front of unit and pivot at back. Item Description Frame Pivot here Left shroud 7.
- Page 134 2. Remove three P-clips using a 3 mm Allen wrench. Item Description Resistance brake cable P-clip 3. Loosen lock nut from adjusting barrel using needle nose pliers. Item Description Adjusting barrel Lock nut 4. Align slots in adjusting barrel, lock nut, and slot in frame. Item Description Adjusting barrel...
- Page 135 6. Remove resistance brake cable end from resistance mechanism. Item Description Resistance mechanism Resistance brake cable end 7. Remove resistance brake cable from rower. Install Resistance Brake Cable 1. Route resistance brake cable behind drive belt. Item Description Drive belt Resistance brake cable 2.
- Page 136 3. Wrap resistance brake cable around resistance mechanism and slide into aligned slots. Item Description Adjusting barrel Lock nut Slot in frame 4. Rotate adjusting barrel a half turn so resistance brake cable does not fall out. 5. Position each P-clip between white markings on resistance brake cable. Item Description White markings...
- Page 137 7. Secure upper section resistance brake cable to bracket using a cable tie. Item Description Bracket Cable tie Resistance brake cable 8. Cut excess cable tie using a side cutter. 9. Secure lower section of resistance brake cable to console cable using a cable tie. Item Description Cable tie...
- Page 138 2. Remove powerhub PCB cover. 3. Rotate resistance dial to lowest setting. Item Description Resistance dial 4. Insert 4 mm Allen wrench into magnet casing. Item Description 4 mm Allen wrench Magnet casing 5. Loosen locknut on adjusting barrel using long nose pliers. Item Description Adjusting barrel...
- Page 139 Install Left Shroud 1. Install left shroud in place by sliding back in first and rotate front towards frame. Item Description Frame Pivot here Left shroud 2. Install two bolts securing left shroud to frame using a 3 mm Allen wrench. Item Description Bolt...
- Page 140 4. Place resistance dial in position on left shroud. Item Description Resistance dial Bolt 5. Tighten bolt securing resistance dial to left shroud. Install Right Shroud Video Link - Install 1. Install right shroud in place by sliding back in first and rotate front towards left shroud. Item Description Pivot here...
- Page 141 3. Press right shroud into left shroud and it will click into place. Item Description Right shroud Left shroud 4. Check resistance dial for proper positioning. Item Description Resistance dial Right shroud 5. Ensure right and left shrouds are correctly aligned. Item Description Right shroud...
- Page 142 6. Install first two screws securing right shroud using a 3 mm Allen wrench. Install in the order shown. Item Description Screw 7. Tighten three screws securing right shroud to frame using a #2 Phillips screwdriver. NOTE: Hold left and right shroud together when tightening upper screw. Item Description Lower screw...
- Page 143 2. Insert front center shroud clip into slot at front of lower shrouds. Item Description Front center shroud clip Slot in lower shrouds 3. Lower center shroud into position and click two outer clips into place. Item Description Center shroud Side center shroud clip 4.
- Page 144 5. Lower center shroud and snap side clips into lower shrouds. Item Description Side clip Center shroud 6. Lower center shroud over resistance dial shaft. Item Description Resistance dial shaft Center shroud 7. Install two screws securing lower section of center cover using a #2 Phillips screwdriver. 8.
- Page 145 12. Install cap to resistance dial with the text reading upright. Item Description Resistance dial 13. Place handle into handle retainer. Complete Installation Operate unit at all levels to verify proper operation. Page 143 of 168...
- Page 146 Right Shroud Tools Required: • Flat head screwdriver • #2 Phillips screwdriver • 3 mm Allen wrench, with ball end • Large elastic bands, (2) Time: 10 minutes Partially Remove Center Shroud Video Link - Remove 1. Remove handle from handle retainer and place out of the way by securing to console knob using a larger elastic band.
- Page 147 3. Remove bolt securing resistance dial using a 3 mm Allen wrench. Item Description Resistance dial Bolt 4. Remove resistance dial by pulling upward. 5. Remove two screws securing lower section of center cover using a #2 Phillips screwdriver. Item Description Screw Lower section of center cover...
- Page 148 7. Loosen upper screw four to five full turns using a ball end 3 mm Allen wrench. Item Description 3 mm Allen wrench, ball end Upper screw Slot in center cover 8. Pivot center shroud around front of unit and unclip from lower shrouds. Item Description Clip at front of unit...
- Page 149 Remove Right Shroud Video Link - Remove 1. Loosen three screws, 3-4 turns each, securing right shroud to frame using a #2 Phillips screwdriver. Item Description Lower screw Middle screw Upper screw 2. Remove seven screws securing right shroud using a 3 mm Allen wrench. Remove in the order shown. Item Description Screw...
- Page 150 Install Right Shroud Video Link - Install 1. Install right shroud in place by sliding back in first and rotate front towards left shroud. Item Description Pivot here Right shroud 2. Ensure foam sponge at front of rower is correctly seated. Item Description Right shroud...
- Page 151 4. Check resistance dial for proper positioning. Item Description Resistance dial Right shroud 5. Ensure right and left shrouds are correctly aligned. Item Description Right shroud Left shroud 6. Install first two screws securing right shroud using a 3 mm Allen wrench. Install in the order shown. Item Description Screw...
- Page 152 7. Tighten three screws securing right shroud to frame using a #2 Phillips screwdriver. NOTE: Hold left and right shroud together when tightening upper screw. Item Description Lower screw Middle screw Upper screw 8. Install last five screws securing the right shroud using a 3 mm Allen wrench. Install in the order shown. Item Description Screw...
- Page 153 3. Lower center shroud into position and click two outer clips into place. Item Description Center shroud Side center shroud clip 4. Slide slot in center cover over upper screw. Item Description Slot in center cover Upper screw 5. Lower center shroud and snap side clips into lower shrouds. Item Description Side clip...
- Page 154 6. Lower center shroud over resistance dial shaft. Item Description Resistance dial shaft Center shroud 7. Install two screws securing lower section of center cover using a #2 Phillips screwdriver. 8. Install screw securing middle section of center cover using a #2 Phillips screwdriver. 9.
- Page 155 13. Place handle into handle retainer. Complete Installation Operate unit at all levels to verify proper operation. Page 153 of 168...
- Page 156 Seat Tools Required: 4 mm Allen wrench Time: 2 minutes Remove Seat Video Link 1. Remove three screws securing handle to seat rail using a 4 mm Allen wrench. Item Description Screw Handle 2. Slide seat back and off seat rail. Item Description Seat...
- Page 157 Install Seat Video Link 1. Slide seat onto seat rail. Item Description Seat Seat rail 2. Install three screws securing handle to seat rail using a 4 mm Allen wrench. Item Description Screw Handle Complete Installation Operate unit at all levels to verify proper operation. Page 155 of 168...
- Page 158 Service Access Cover Tools Required: #2 Phillips screwdriver Time: 1 minute Remove Service Access Cover Video Link - Remove The service access cover is located on left side of unit. 1. Remove screw securing service access cover using a #2 Phillips screwdriver. Item Description Service access cover...
- Page 159 2. Rotate service access cover counter-clockwise to align notch in service access cover for screw. Item Description Service access cover Notch 3. Install screw securing service access cover using a #2 Phillips screwdriver. Item Description Service access cover Screw #2 Phillips screwdriver Complete Installation Operate unit at all levels to verify proper operation.
- Page 160 6. Troubleshooting Knowledge Base Knowledge Base for more detailed information. Page 158 of 168...
- Page 161 7. Software Software Update via Bluetooth Prerequisites: • Smartphone / Device – Android or iOS • ICG Training APP installed – Software v.1.2.25 or higher • Bluetooth enabled, on smartphone and console, for pairing • ICG Training APP Service function must be enabled and visible NOTE: The option to use the ICG Raspberry Pie updater is not an available option, because the LCD console doesn't support Wi-Fi.
- Page 162 • The whole process takes approximately 5 minutes. • Once the download is nearly complete the console will display VERIFY and STARTING. • The LCD console quickly re-boots, ICG APP disconnects from the console. • Software update complete. Page 160 of 168...
- Page 163 8. Error code list Error codes notify user of a problem condition and are displayed on the console. Error codes can also help to indicate the part of the unit most likely to be causing the problem. • #0100, Gear Module - No Response •...
- Page 164 #0101, Gear Module - Wrong Software Version Error Message Displayed to user #0101 GEAR MODULE - WRONG SOFTWARE VERSION Condition Software is out of date. Cause Gear Module has incompatible software version. Remedy Replace gear module with newer software version >= 3.07 Page 162 of 168...
- Page 165 #0200, EEPROM Error - Select FE Type Error Message Displayed to user #0200 EEPROM ERROR - SELECT FE TYPE Condition Fitness Equipment (FE) type is incorrect. Cause Invalid value. Remedy Perform a Factory Reset. Select Fitness Equipment (FE) type, i.e. Rower, then perform console brake calibration. Page 163 of 168...
- Page 166 #0300, Radio Module - Malfunction Error Message Displayed to user #0300 RADIO MODULE - MALFUNCTION Condition Radio module in console is damaged. Cause Radio Module - not responding and no update possible. Remedy Replace console. Page 164 of 168...
- Page 167 Life Fitness, Hammer Strength, and ICG. • http://www.lifefitness.com/parts service parts ordering for Life Fitness, Cybex, SCIFIT, Hammer Strength, and ICG products along with warranty parts ordering and technician requests. • https://lfworld.lifefitness.com easy to find Knowledge Base articles with answers to frequently asked questions and product support documentation for Life Fitness, Cybex, SCIFIT, Hammer Strength, and ICG.
- Page 168 10. Glossary Cable Tie Plastic strap used to secure wiring. Connectors Electrical plugs used to connect wiring into electrical component. Electro Static Discharge - A release of static electricity. This can cause damage to electronics. Liquid Crystal Display - Thin, flat electronic visual display that uses the light modulating properties of liquid crystals. Light Emitting Diode - LED's provide display functionality and are commonly used for indicator lights.
- Page 169 Who Pays Transportation and Insurance For Service If the Product or any covered part must be returned to a service facility for repairs, We, Life Fitness, will pay all transportation and insurance charges for the first year. You are responsible for transportation and insurance charge after the first year.
- Page 170 PARTICULAR PURPOSE, AND ALL OTHER OBLIGATIONS OR LIABILITIES ON OUR PART. We neither assume nor authorize any person to assume for us any other obligation or liability concerning the sale of this Product. Under no circumstances shall we be liable under this warranty, or otherwise, of any damage to any person or property, including any lost profits or lost savings, for any special, indirect, secondary, incidental or consequential damages of any nature arising out of the use of or inability to use this Product.
Need help?
Do you have a question about the Heat Row and is the answer not in the manual?
Questions and answers