
Related Manuals for Erickson 07405


Summary of Contents for Erickson 07405
- Page 1 Bike Carrier Instructions Assembly Recommended Tools: Open Open Wrench Wrench (1pcs) (1pcs) #07405 Manual...
-
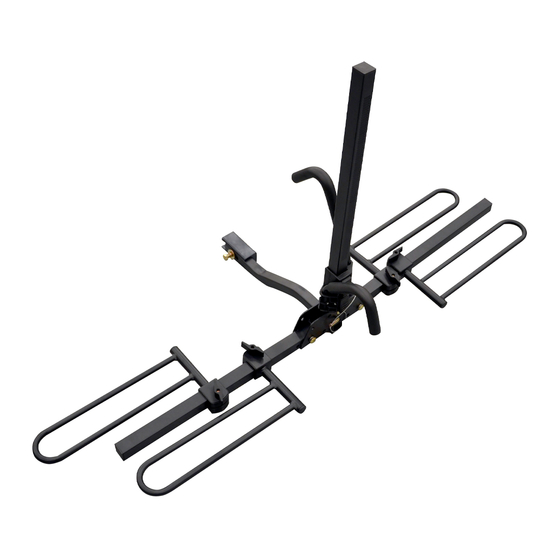
Page 2: Exploded View
Item no: 07405 Exploded View Diagram and Part List Item # Description Quantity Item # Description Quantity Support plate Left tire holder Wheel Support tube Short securing hook pin assembly Long securing hook M10×55 carriage bolt Anti-Wobble Hitch Pin M10 locknut 1/2”... - Page 3 Item no: 07405 Assembling the Bicycle Carrier: STEP 1. Attaching the Wheel Support Tubes Insert the Wheel Support Tubes (2) into the Support Plate (1) (Figure 1) Feed the M10x55 carriage bolts (4) through the end loop on the Pin Assembly (3) and insert the M10x55 carriage bolts into the bottom outside hole of the support plate.
- Page 4 Item no: 07405 STEP 4. Attaching the Tire Holders Slide the right and left tire holders (10 & 11) onto the wheel support tube (2) and tighten using the knob. (Figure 7) TIP: Notice they slide on opposite from one side to the other. Ex. On the right, slide the front holder on first, then the back.
- Page 5 Item no: 07405 Mounting the Bicycle on the Carrier: STEP 1. Prepare to mount bikes You will want to mount the bike closest to the vehicle first. Pull the pin assembly from the bottom hole in vertical support tube (6) so that it can lay down.
- Page 6 Item no: 07405 Remove The Bicycle Instruction: Remove the buckle tape on the wheels. Then press the release button on the securing hooks to slide the securing hook upward, and then remove the bicycle. (Figure 13) Fig. 13 Folding the Bike Carrier Instructions: STEP 1.
-
Page 7: Warranty
Repair/Replacement Warranty Erickson Manufacturing Ltd. warrants to the original purchaser that the mechanical components will be free of defect in material and workmanship for 90 days from the original date of purchase. Transportation charges on product submitted for repair or replacement under warranty are the sole responsibility of the purchaser.
Need help?
Do you have a question about the 07405 and is the answer not in the manual?
Questions and answers