Advertisement
Quick Links
CROCODILE
2
EN
Belay / rappel device
IT
Assicuratore / discensore
FR
Assureur / Descendeur
DE
Sicherungs / Abseilgerät
2.1 - leader
ES
Asegurador / Descensor
MADE IN ITALY
EN 15151-2:2012 TYPE 2
2.4 - hand
I 2
3
=
G
+
S
35 kN
NO!
6
OK!
NO!
7
1
TECHNICAL DATA
7.1
MODEL
CROCODILE
LOWERING WITH TWO ROPES
REF. No.
2D643
WEIGHT
65 g
EN 892
half / twin ropes Ø 7,7 ÷ 9 mm
ROPE
single rope Ø 8,5 ÷ 11 mm
EN 1891 Type A/B
static rope Ø 9 ÷ 12 mm
BREAKING
25 kN
LOAD
1.1
1.2
E
E
COMPATIBILITY
KARABINER
g
g
VVUU a.s.
TEST OF
NOTIFIED BODY "1019"
Install the device as shown. Make a Prusik
THIS DEVICE
Pikartska 1337/7 716 07
knot (E) as shown. Keeping a firm grip on
MADE BY
Ostrave - Radvanice
the free ends of the ropes, take action on
CZECH REPUBLIC
the Prusik knot in order to lower the load.
4
LEGEND
NOMENCLATURE / MARKING
2.2 - second
2.3 - lowering
g
BRAKE
BRAKE
BRAKE
2.5 - anchor
2.6 - load
2.7 - harness
DISCESA IN DOPPIA
WARNINGS
H2O
SOAP
BELAYING OF 1 OR 2 SECONDS
This mode allows the belaying of one or two seconds simultaneously and independently. Always hold the free end of the rope in your hand!
IN A SELF-LOCKING WAY
6.1
6.2
BELAYING 1 SECOND
BELAYING 1 SECOND
Use both hands to take up slack
When using half or twin ro-
at the climber end through the
pes, always hold both free
device. Hold the free end of
ends of the ropes firmly in
the rope taut in both hands.
your hands and taut!
LOWERING OF A LOADS
Always hold the free end of the rope in your hand!
7.2
LOWERING WITH ONE ROPE
E
E
E
g
g
g
Install the device as shown. Make a Prusik
knot (E) as shown. Keeping a firm grip on
the free ends of the ropes, take action on
the Prusik knot in order to lower the load.
5
5.1
1
2
3
4
5
6
SETUP
A
B
A
Insert the loops of rope
into the B hole of the
7
2 8
5
9 10 11
device as shown.
6.3
6.5
BELAYING 2 SECONDS
OK!
OK!
OK!
OK!
OK!
OK!
OK!
NO!
6.4
NO!
NO!
NO!
NO!
NO!
NO!
NO!
When using half or twin ropes,
always hold both free ends
of the ropes firmly in your
hands and taut!
ENGLISH
OK!
The instruction manual for this device consists of general and specific instructions,
both must be carefully read and understood before use. Attention! This leaflet
shows the specific instruction only.
SPECIFIC INSTRUCTIONS CROCODILE.
7.3
1) FIELD OF APPLICATION.
NO!
LOWERING OF HEAVY LOADS
Crocodile is a belay/ abseil device for mountaineering and rock climbing for use
with one or two ropes. It is a manual braking device particularly useful for multi-
pitch climbing, for belaying one or two second climbers and for abseiling and the
lowering of loads in rescue operations. Attention! Do not use for belaying the lead
climber (Fig. 5.6). This device complies with the regulations EN 15151-2:2012
type 2 and UIAA 129.
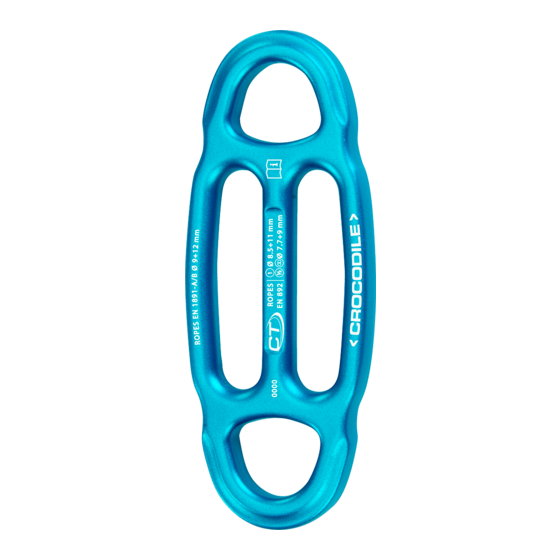
2) NOMENCLATURE (Fig. 4). A) Engagement hole; B) Insertion locations for the
loop of rope.
3) MARKING (Fig. 4). 1) Lot number (BBYY) consisting of the product batch (BB)
and the production year (YY). 2) Name of the manufacturer or the person respon-
sible for putting it on the market. 3) EN 892 compatible rope diameters and types.
4) EN 1891 compatible rope diameters and types. 5) Product name. 6) Logo
informing the user to read the attached user instructions carefully. 7) Breaking
load. 8) EN 15151-2:2012 type 2: a standard to which the device complies. 9)
Country of manufacturing. 10) Pictogram indicating the correct insertion of the
ropes. 11) UIAA logo.
4) CHECKS. Prior to each use, it is necessary to check that all parts of the device
NO!
are in excellent condition and do not show signs of excessive wear, cracks, burrs,
etc. Particularly check the insertion locations for the loop of rope (B) and generally,
all the points where the rope passes over. In addition, check there are no sharp
edges due to wear. Attention! Before the first use, it is advisable to test the device
in a safe environment. Attention! A buddy check between the climber and the
belayer is essential before start climbing.
E
5) COMPATABILITY.
Make sure the device is compatible with the other elements used.
5.1 - Ropes. The Crocodile can be used with EN 892 dynamic ropes (half and
twin ropes Ø 7.7÷9 mm; single ropes Ø 8.5÷11 mm) o EN 1891 ropes (type
g
g
A and B, Ø 9÷12 mm). Braking efficiency and ease of rope feed depend on the
diameter and smoothness of the rope. Attention! The use of wet or icy ropes can
affect the efficiency of the device. Attention! In case of use with two ropes, only
use ropes which have the same diameter and state of condition. Attention! It's
Install the device as shown. Make a Prusik
recommended to use gloves, especially when using thin ropes.
knot (E) as shown. Keeping a firm grip on
5.2 - Karabiners for engaging and for belaying.
the free ends of the ropes, take action on
Crocodile must be used with a oval shape karabiner or with a wide base HMS
karabiner, both equipped with a locking gate. Attention! The use of a karabiner
the Prusik knot in order to lower the load.
with different characteristics may compromise the function of the device.
BELAYING OF 1 OR 2 SECONDS
Installation and setup.
IN A SELF-LOCKING WAY
5.2
5.3
SETUP
TESTING
STOP!
STOP!
STOP!
STOP!
Clip the belay karabiner to
Pull on the rope on the climber's side to
the loops of the rope. Clo-
verify that the self-locking function stops
se the karabiner gate!
the rope on the climber's side.
6.6
WARNING!
D
C
C
C
C
C
C
C
C
C
OK!
OK!
NO!
NO!
NO!
NO!
NO!
NO!
E
OK!
OK!
OK!
NO!
NO!
NO!
NO!
NO!
NO!
NO!
Always hold both free ends of
Install a loop of rope or a sling (C) passing through a
the ropes firmly in your hands
locking gate carabiner (D) positioned at the anchor as
NO!
NO!
and taut!
shown. Make a Prusik knot (E) on the free end of the ropes
and connect it to the harness.
5.3 - Terminology. In this note, the term "rope" will be used to indicate the use of
one or two ropes. Where the use of a single rope involves the variation of this use,
D
C
C
it will be indicated specifically in the respective paragraph. When using half or twin
ropes each rope must pass through the correct location on the Crocodile. The term
C
"prusik" is defined as any self-locking knot in climbing.
6) BELAYING 1 OR 2 SECONDS FROM THE ANCHOR (Fig. 10).
During all stages of belaying it is required to: be personally and correctly made
safe; always keep firmly in hand and tense both free ends of the ropes.
6.1 - Installation. Connect the engaging karabiner to the top of the anchor and
insert it into one of the two engagement holes of the Crocodile. Insert the loops of
rope into the 'B' hole of the device (Fig. 5.1) as shown. Clip the belay karabiner
to the loops of rope coming out from the device (Fig. 5.2). Close the locking gate
of the karabiner. Attention! Make sure that the climber's ropes are on the side
above the ropes in your hand. Attention! In case of use with a single rope, the
belay karabiner will be connected to the engagement karabiner as shown (Fig.
E
6.1). Risk of death! Do not connect the device to the anchor using the insertion
holes for the ropes (Fig. 5.4).
6.2 - Function test (Fig. 5.3). Pull the rope down on the climber's side, to make
sure the self-locking system works.
6.3 - Belaying 1 or 2 seconds (Fig. 6.1-6.2). Use both hands to take in correctly
OK!
NO!
the rope of the seconds climbers (climber side) through the device. In case one or
two of the second climbers fall, the rope will automatically block in the device. At-
tention! Always keep firmly in hand and tense both free ends of the ropes. Risk of
death! In case of use with a single rope, make sure that the locking gate of the be-
lay carabiner doesn't get interlocked with the engagement karabiner. Attention! In
case the end of the route is in traverse, it is recommended to clip a few quickdraws
as close as possible to the anchor. In this way, the auto-locking system will guaran-
tee to work for both climbers, even if one of them hangs on the rope (Fig 6.3-6.4).
6.4 - Releasing and gradually lowering of a second. Using Crocodile it's
possible to release and lower a second in a progressive way, even under tension
E
and free hanging. Attach a loop of rope or a sling (C) to the lower engagement
E
hole of the device, pass it through a locking gate carabiner (D) positioned at the
anchor and then finally connect it to the harness as shown (Fig. 6.7). Make a Prusik
knot (E) on the free end of the ropes and connect it to the harness as shown (Fig.
6.7). Keeping a firm grip on the free end of the rope, slowly load the loop of rope
g
or sling to raise the Crocodile (Fig. 6.8, phase 1). Finally take action on the Prusik
knot in order to slide the ropes through the device and lower the second (Fig. 6.8,
phase 2). Attention! Do not completely raise the Crocodile. Attention! Check
the correct position of the ropes coming out from the device: in case of incorrect
position the ropes may get blocked preventing the lowering of the second.
7) DESCENT OF A LOAD (Fig. 7).
During all stages of belaying it is required to: be personally and correctly made
safe; always keep firmly in hand and tense both free ends of the ropes.
5.4
5.5
WARNING!
WARNING!
NO!
NO!
NO!
NO!
NO!
NO!
NO!
NO!
NO!
NO!
NO!
NO!
Do not connect the device to the anchor
Do not use for belaying the lead
using the insertion holes for the ropes.
climber!
Danger of death!
6.7
SETUP
RELEASING AND LOWERING
D
D
D
D
D
D
C
C
C
C
C
C
C
C
C
C
C
C
C
C
C
C
NO!
NO!
1
E
E
E
E
E
E
OK!
OK!
OK!
OK!
OK!
OK!
2
2
2
NO!
NO!
1
2
Keeping a firm grip on the free end of the rope, slowly load the
loop of rope or sling to raise the device (1). Take action on the
Prusik knot in order to lower the second (2).
7.1 - Installation. Attach the device to the anchor and insert the ropes as
shown. Make a Prusik knot (E) on the free ends of the ropes and connect it to the
harness as shown (Fig. 7.1). Keeping a firm grip on the free ends of the ropes,
take action on the Prusik knot in order to slide the ropes through the device and
lower the load (Fig. 7.1). The drawings represent three ways of lowering: lowe-
ring with two ropes (Fig. 7.1); lowering with a single rope (Fig. 7.2); lowering
with two Crocodiles (greater braking force, ideal for heavy loads - Fig. 7.3).
8) ABSEILING.
Before abseiling you must: attach yourself to the anchor with a lanyard that is
attached to your harness in a safe way; prepare the rope for the abseil making
sure it is not tangled and there is a knot in the end of the ropes; make a prusik
6.8
D
D
C
C
1
1
1
1
1
1
E
E
2
2
2
2
Advertisement

Related Manuals for Climbing Technology CROCODILE


Summary of Contents for Climbing Technology CROCODILE
- Page 1 REF. No. 2D643 insert it into one of the two engagement holes of the Crocodile. Insert the loops of pitch climbing, for belaying one or two second climbers and for abseiling and the rope into the ‘B’ hole of the device (Fig. 5.1) as shown. Clip the belay karabiner lowering of loads in rescue operations.
- Page 2 Crocodile (maggiore forza frenante, ideale per alti carichi - Fig. 7.3). d’elles doit passer dans son propre siège du Crocodile. Avec le mot « prusik » on (Abb. 8.4), um sich ins Seil zu hängen. Mit einer Hand gut das freie Seilende como indicado en la imagen y conectarlo al harnés (Fig.
Need help?
Do you have a question about the CROCODILE and is the answer not in the manual?
Questions and answers