Table of Contents
Advertisement
Available languages
Available languages
Quick Links
Advertisement
Table of Contents

Subscribe to Our Youtube Channel
Related Manuals for TMC Aquarium AQUARAY GroBeam 1500 Ultima CP ColourPlus UK


Summary of Contents for TMC Aquarium AQUARAY GroBeam 1500 Ultima CP ColourPlus UK
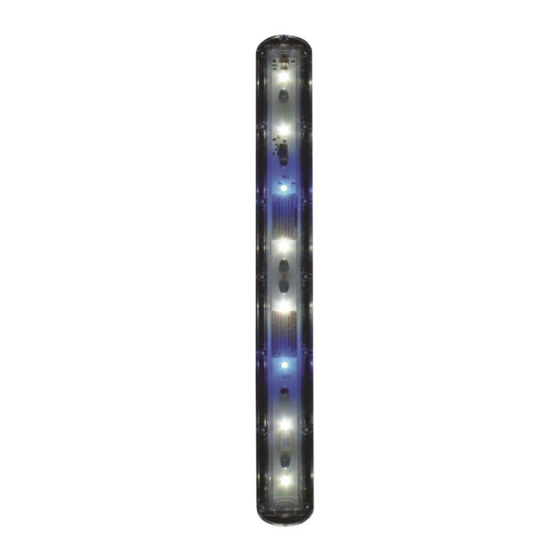
- Page 1 AQUARAY ® Solid State Lighting Systems...
- Page 2 ENGLISH ................1 FR NÇ IS ..............5 DEUTSCH ..............10 NEDERL NDS ............15 ESP ÑOL..............20 PORTUGUÊS .............25 IT LI NO..............30 УССК Й ..............35 5 YE R GU R NTEE REGISTR TION To benefit from our extended 5 year guarantee you must register the product(s) you have purchased from us.
-
Page 3: Typical Installation
® AQUARAY Solid State Lighting Systems INSTRUCTIONS FOR INST LL TION ND USE Important Safety Information - Please Read Carefully - AquaRay Solid State Lighting systems comprise an AquaRay lamp unit with a separate mains power supply unit (PSU) which supplies a constant DC (low voltage) power supply to the lamp unit. - Page 4 QU BE M/GROBE M LIGHTING STRIP P RTS LIST/DIMENSIONS 1. Power supply unit (PSU) - with single or twin DC barrel or USB outlets. Please note: This is NOT a USB charger. NEVER plug any equipment other than your Aquaray lights into these power supply units. Doing so will invalidate your warranty and could damage the equipment.
- Page 5 B. Without any fixtures, by resting the quaBeam/GroBeam lamp unit on the specially designed front lens face for installation ON TOP of a transparent cover glass or plastic condensation tray. QU BE M/GROBE M LIGHTING TILE . Using the quaBeam/GroBeam brackets (supplied) for more permanent attachment with six screws (stainless steel self tap, or nylon nut and bolt –...
-
Page 6: Troubleshooting
M INTEN NCE Caution: To avoid possible electric shock, special care should be taken when using this electrical appliance near water. Caution: Always isolate the PSU from mains electricity before installing or carrying out any maintenance to the AquaRay lamp unit. Caution: Do not attempt to open the plastic case of the PSU. - Page 7 Systèmes d’Eclairage Transistorisés ® AQUARAY NOTICE D’INST LL TION ET MODE D’EMPLOI Notice de sécurité importante – lire attentivement - Les systèmes AquaRay d’éclairage à semi-conducteurs contiennent une lampe AquaRay et un bloc d’alimentation indépendant qui alimente la lampe en courant continu (basse tension).
-
Page 8: Installation Type
Tube d’Éclairage Transistorisé quaBeam/GroBeam Aquarium Boucle Installation type d’égouttement Tuile d’Éclairage Transistorisé quaBeam/GroBeam Aquarium Boucle Installation type d’égouttement NOMENCL TURE / DIMENSIONS DU TUBE D’ÉCL IR GE TR NSISTORISÉ QU BE M/GROBE M 1. Unité d'alimentation électrique - avec barillet CC simple ou double ou sorties USB. - Page 9 3. Lampe AquaBeam/GroBeam 1000 – avec câble de 3 m et connecteur correspondant à la fiche CC du bloc d’alimentation. Remarque : ne branchez pas votre unité d'éclairage AquaRay sur une prise autre que celle d'une alimentation électrique ou d'un contrôleur AquaRay authentique. D'une part cela annulerait votre garantie et d'autre part cela risquerait d'endommager l'unité...
- Page 10 2. TUILE D’ÉCL IR GE TR NSISTORISÉ QU BE M/GROBE M . Utilisation des supports quaBeam/GroBeam (fournis) pour une fixation plus permanente avec six vis (auto-taraudeuses en inox, ou écrou et boulon en nylon – tous fournis) à l’INTERIEUR ou sur le DESSOUS d’un couvercle en bois ou métal ou d’un autre boîtier.
-
Page 11: Entretien
ENTRETIEN ttention : Pour éviter les chocs électriques éventuels, faites attention lors de l’utilisation de cet appareil électrique à proximité d’eau. ttention : Veillez à toujours débrancher le bloc d’alimentation du courant avant d’installer une lampe AquaRay ou de procéder à un entretien. ttention : N’essayez pas d’ouvrir le boîtier en plastique du bloc d’alimentation. - Page 12 ® AQUARAY LED-Beleuchtungssysteme INST LL TIONS- UND GEBR UCHS NLEITUNG Wichtige Sicherheitshinweise – Bitte sorgfältig durchlesen! - Festkörper-Beleuchtungssysteme von AquaRay bestehen aus einer AquaRay-Lampeneinheit mit einem separaten Netzteil (Power Supply Unit, PSU) zur Niederspannungs-Gleichstromversorgung der Lampeneinheit. Netzteil für AquaBeam/GroBeam Leuchtstreifen Single: EINGANG 100-240 V WS, 50-60 Hz, 0,15 A AUSGANG 19,5 V GS, 0,7 A Netzteil für AquaBeam/GroBeam Leuchtstreifen Twin: EINGANG 100-240 V WS, 50-60 Hz, 0,3 A AUSGANG 1-19,5 V GS, 0,7 A...
- Page 13 quaBeam/GroBeam Leuchtstreifen Aquarium Tropfschleife Typische Installation quaBeam/GroBeam Leuchtplatte Aquarium Tropfschleife Typische Installation QU BE M/GROBE M LEUCHTSTREIFENTEILLISTE/ BMESSUNGEN 1. Netzteil (PSU) - mit Einfach- oder Doppel-DC-Trommel oder USB- Anschlüssen. Wichtiger Hinweis: Dieses Gerät ist kein USB-Ladegerät. Stecken Sie NIE andere Ausrüstung außer Ihrer AquaRay-Beleuchtung in die Netzteile.
- Page 14 198 mm 40 mm Tiefe = 198 mm MONT GE Die AquaRay-Lampeneinheiten werden fertig montiert und gebrauchsfertig geliefert. Wichtiger Hinweis: Registrieren Sie Ihr Produkt unter www.tropicalmarinecentre.co.uk, um Ihre 5 Jahre Garantie auf diese Beleuchtungseinheit sicherzustellen. Weitere Informationen über die Registrierung Ihres Produkts finden Sie auf Seite 40. INST LL TION Bitte beachten: Diese Lampeneinheiten sind NICHT zum Betrieb im teilweise oder vollständig in Wasser eingetauchten Zustand ausgelegt.
-
Page 15: Bedienung
chtung: Vor Anbringung der Halter an Holz- oder Metallhauben oder andere Gehäuse mit allen sechs Schrauben sicherstellen, dass diese vollständig auf die Metallschiene der Kühlkörpereinrichtung stoßen. chtung: Zur sicheren Befestigung der Halterung an der hölzernen oder metallenen Haube oder anderen Umkleidung müssen alle sechs Schrauben verwendet werden. -
Page 16: Fehlersuche
FEHLERSUCHE Problem: Die quaRay-Lampeneinheit lässt sich nicht einschalten. Lösung: Prüfen Sie die Kabelverbindung zwischen Lampeneinheit und Netzteil. Lösung: Prüfen Sie, dass das Netzkabel fest im Netzteil eingesteckt ist. Lösung: Prüfen Sie die Sicherung im Netzstecker des Netzteil und wechseln Sie sie bei Bedarf aus (gilt nur für Großbritannien). Falls die Lampeneinheit immer noch nicht eingeschaltet werden kann, geben Sie Netzteil und Lampeneinheit Ihrem Händler zu weiteren Tests zurück. - Page 17 ® AQUARAY Solid State Lighting-Systemen NWIJZINGEN VOOR INST LL TIE EN GEBRUIK Belangrijke veiligheidsinformatie – Lees dit aandachtig - AquaRay Solid State Lighting-systemen bestaan uit een AquaRay-lamp met een afzonderlijke voedingseenheid die een constante gelijkstroom (laagspanning) aan de lamp levert. Stroomtoevoer voor AquaBeam/GroBeam enkelvoudige verlichtingsstrip: INVOER-100-240 VAC 50-60Hz 0,15A UITVOER-19,5 VDC 0,7A Stroomtoevoer voor AquaBeam/GroBeam dubbele verlichtingsstrip:...
- Page 18 quaBeam/GroBeam verlichtingsstrip Aquarium Gebruikelijke installatie Druiplus quaBeam/GroBeam verlichtingstegel Aquarium Gebruikelijke installatie Druiplus QU BE M/GROBE M VERLICHTINGSSTRIP ONDERDELENLIJST/ FMETINGEN 1. Voedingseenheid – met enkele of dubbele gelijkstroomstekker of USB- aansluiting. ttentie: Dit is geen USB-lader. Sluit NOOIT andere apparatuur dan uw AquaRay-verlichtingsarmaturen aan op deze voedingseenheden. Indien u dit toch doet, vervalt uw garantie en kan uw apparatuur beschadigd raken.
- Page 19 MONT GE AquaRay lampen worden volledig geassembleerd en gebruiksklaar geleverd. ttentie: Ga naar www.tropicalmarinecentre.co.uk en registreer uw appaarat om uw 5-jarige garantie op de verlichtingsarmatuur te activeren. Zie pagina 40 voor nadere informatie m.b.t. de registratie. INST LL TIE Let op: deze lampen mogen NIET gebruikt worden als deze gedeeltelijk of volledig ondergedompeld zijn.
- Page 20 B. Zonder schroeven, door de quaBeam/GroBeam lampeenheid te laten rusten op de speciaal hiertoe ontworpen lensplaat, zodat deze BOVENOP een doorzichtig dekglas of plastic condensatiebakje is geïnstalleerd. Er zijn nog meer montage-opties beschikbaar. Raadpleeg de folder over het AquaRay modulaire montagesysteem dat bij deze eenheid werd meegeleverd. Ga naar:- www.tropicalmarinecentre.co.uk voor andere tips en antwoorden op veelgestelde vragen.
- Page 21 PROBLEEMOPLOSSING Probleem: De quaRay lamp gaat niet aan. Oplossing: Controleer het snoer tussen de lampeenheid en de voedingseenheid. Oplossing: Controleer of het netsnoer stevig is aangesloten op de voedingseenheid. Oplossing: Controleer (en vervang indien nodig) de zekering in de netsnoerstekker (uitsluitend in het VK). Indien de lampeenheid nog steeds niet inschakelt, bezorgt u de voedingseenheid en lampeenheid terug aan uw plaatselijke verdeler voor verdere tests en eventuele vervanging.
- Page 22 Sistemas de Iluminación de Estado Sólido ® AQUARAY INSTRUCCIONES DE INST L CIÓN Y USO Importante información sobre seguridad – Lea detenidamente - Los sistemas de iluminación de estado sólido AquaRay se componen de una unidad de lámparas AquaRay con una unidad independiente de suministro eléctrico (PSU) que suministra una corriente constante CC (de bajo voltaje) a la unidad de lámparas.
- Page 23 Tira de iluminación quaBeam/GroBeam Acuario Instalación típica Bucle anti goteo Baldosa de iluminación quaBeam/GroBeam Acuario Instalación típica Bucle anti goteo DE ILUMIN CIÓN QU BE M/GROBE M: LIST DE PIEZ S / DIMENSIONES 1. Unidad de alimentación (PSU), con conector CC simple o doble o con conector USB.
- Page 24 198 mm 40 mm Profundidad = 198 mm MONT JE Las unidades de lámparas AquaRay vienen completamente montadas y listas para usar. Tenga en cuenta lo siguiente: Para activar su garantía de cinco años sobre esta unidad de alumbrado, debe registrar sus productos en www.tropicalmarinecentre.co.uk. Si precisa más información sobre el registro de sus productos consulte la página 40.
- Page 25 B. Sin ningún dispositivo, colocando la unidad de lámparas quaBeam/GroBeam sobre la cara de la lente frontal especialmente diseñada para su instalación SOBRE una bandeja de condensación de plástico o cristal con tapa transparente. Existen otras opciones de montaje adicionales. Consulte el folleto del Sistema de montaje modular AquaRay que se adjunta a esta unidad.
-
Page 26: Resolución De Problem S
RESOLUCIÓN DE PROBLEM S Problema: La unidad de lámparas quaRay no se enciende. Solución: Compruebe el cable de conexión entre la lámpara y la PSU. Solución: Compruebe que el cable eléctrico está correctamente conectado a la PSU. Solución: Compruebe (y cambie si es necesario) el fusible del enchufe del cable (en el Reino Unido solamente). - Page 27 Sistemas de Iluminação "Solid State" ® AQUARAY INSTRUÇÕES DE INST L ÇÃO E UTILIZ ÇÃO Informações importantes sobre segurança – Por favor leia com atenção - Os sistemas de iluminação AquaRay Solid State são constituídos por uma unidade de iluminação AquaRay com uma unidade (fonte) de alimentação separada que fornece corrente contínua constante (de baixa voltagem) à...
- Page 28 Tira de Luz quaBeam/GroBeam Aquário Instalação típica Cabo pendurado em arco zulejo de Luz quaBeam/GroBeam Aquário Instalação típica Cabo pendurado em arco LIST DE PEÇ S / DIMENSÕES DO TIR DE LUZ QU BE M/GROBE M 1. Unidade de alimentação (PSU) - com cilindro CC ou saídas USB simples ou duplas.
- Page 29 3. Unidade de iluminação AquaBeam/GroBeam – com cabo de 3 m, incluindo os respectivos conectores para ligar às saídas de CC da unidade (fonte) de alimentação. Nota: não ligue a sua unidade da luz AquaRay a outras tomadas, exceto a uma tomada de um controlador ou PSU AquaRay autêntico.
- Page 30 ZULEJO DE LUZ QU BE M/GROBE M . Utilização do suporte do quaBeam/GroBeam (incluído) para uma fixação mais permanente com seis parafusos self-tap ou porca e parafuso de nylon – todos eles incluídos) ao INTERIOR ou L DO INFERIOR de uma tampa em madeira ou metálica, ou de outra cobertura.
- Page 31 Assim, recomenda-se que: - a. A face da lente da unidade de iluminação AquaRay seja limpa periodicamente com um pano humedecido e morno. b. O dissipador de calor na parte de trás da unidade tem de estar livre de grandes partículas de sal e de outras películas ou depósitos que possam obstruir a livre circulação do ar em volta das palhetas do dissipador de calor.
- Page 32 Sistemi di Illuminazione a Stato Solido ® AQUARAY ISTRUZIONI PER L’INST LL ZIONE E L’USO Informazioni importanti per la sicurezza – Leggere attentamente - I sistemi di illuminazione a stato solido AquaRay constano di una lampada AquaRay e di un alimentatore (PSU) da rete elettrica separato che fornisce un’alimentazione continua (bassa tensione) alla lampada.
-
Page 33: Installazione Tipica
Striscia di illuminazione quaBeam/GroBeam Acquario Installazione tipica “Drip-loop” Piastrella di illuminazione quaBeam/GroBeam Acquario Installazione tipica “Drip-loop” COMPONENTI/DIMENSIONI STRISCI DI ILLUMIN ZIONE QU BE M/GROBE M 1. Alimentatore (PSU) – con uscita singola/doppia in c.c. o porta USB. Nota: USB NON previsto per ricarica. NON inserire sull’alimentatore altre utenze al di fuori delle lampade AquaRay. - Page 34 198 mm 40 mm Profondità = 198 mm SSEMBL GGIO Le lampade AquaRay vengono fornite completamente assemblate e pronte all’uso. Nota: per attivare la garanzia di 5 anni della lampada registrarsi su www.tropicalmarinecentre.co.uk. Per ulteriori informazioni al riguardo vedi pag. 41. INST LL ZIONE Nota: queste lampade NON sono concepite per essere parzialmente o totalmente immerse in acqua.
- Page 35 ttenzione: Prima che le staffe siano state fissate al coperchio di metallo o di legno o ad altro contenitore utilizzando tutte le sei viti, assicurarsi che siano state spinte completamente contro la barra di metallo del dissipatore di calore. ttenzione: Per fissare la staffa al coperchio di legno/metallo o altro alloggiamento, usare tutte e sei le viti.
- Page 36 INDIVIDU ZIONE E RISOLUZIONE DEI PROBLEMI Problema: la lampada quaRay non si accende. Soluzione: Controllare il collegamento del cavo tra la lampada e l’alimentatore. Soluzione: Verificare che il cavo di alimentazione sia saldamente collegato all’alimentatore. Soluzione: Controllare (e sostituire, se necessario) il fusibile della presa del cavo di alimentazione (solo Regno Unito).
- Page 37 Системы твердотельного освещения ® AQUARAY РУКОВОДСТВО ПО УСТАНОВКЕ И ЭКСПЛУАТАЦИИ Важная информация по безопасности. Просьба прочитать внимательно - Системы твердотельного освещения - AquaRay состоят из лампового блока AquaRay с отдельным блоком питания от сети, который подает напряжение постоянного (низковольтного) тока на светильник. Блок...
- Page 38 Осветительная полоса AquaBeam/GroBeam Аквариум Провисание Пример типичной установки провода Осветительная пластинка AquaBeam/GroBeam Аквариум Провисание Пример типичной установки провода ПЕРЕЧЕНЬ/РАЗМЕРЫ ЧАСТЕЙ ОСВЕТИТЕЛЬНАЯ ПОЛОСА AquABeAm/GRoBeAm 1. Блок питания (PSU) с одним или двумя гнездами постоянного тока или разъемами USB. Обратите внимание: это не зарядное устройство USB. НИ В КОЕМ...
- Page 39 3. Светильник AquaBeam/GroBeam с проводом длиной 3 м (10 футов) в комплекте с соответствующими штепсельными разъемами для выхода блока питания постоянного тока.Обратите внимание: не подключайте блок лампы AquaRay к каким-либо устройствам, отличным от оригинального блока питания и контроллера AquaRay. Это приведет...
- Page 40 2. ОСВЕТИТЕЛЬНАЯ ПЛАСТИНКА AquABeAm/GRoBeAm A. Использование реек AquaBeam/GroBeam (в комплекте) для более прочного прикрепления шестью винтами (шурупами из нержавеющей стали или нейлоновыми болтами и гайками – все входят в комплект) к ВНУТРЕННЕЙ или НИЖНЕЙ стороне деревянного или металлического кожуха, или другого корпуса. Осторожно: Прежде...
-
Page 41: Устранение Неисправностей
Светильник AquaRay и прилагающийся к нему блок питания являются герметизированными устройствами и не предназначены для самостоятельного обслуживания пользователем. Набор ламп внутри светильника также не предназначен для самостоятельного обслуживания пользователем. Светильник подлежит полной утилизации по окончании срока своей эксплуатации (>50 тыс. часов). После... - Page 42 ENREGISTREMENT DE L G R NTIE DE 5 NS Pour bénéficier de notre garantie étendue de 5 ans, vous devez enregistrer les produits que vous avez achetés chez nous. Vous pouvez le faire de deux façons : 1. En ligne, en vous connectant sur le site : www.tropicalmarinecentre.co.uk et en suivant les instructions données par le site.
- Page 43 Esta garantía es de tipo "Reparación o sustitución" y cualquier reclamación está sujeta a la inspección de un técnico autorizado por TMC. Bajo ninguna circunstancia aceptaremos la sustitución de ningún producto sin antes llevar a cabo una inspección. Usted debe entregar cualquier unidad defectuosa a un distribuidor autorizado, que nos enviará...
- Page 44 * 2 year guarantee on PSU and 5 year guarantee on lamp unit if unit is registered with us (see inside for guarantee registration details). If not registered, a statutory 2 year guarantee applies on both lamp unit and PSU (proof of purchase required).
Need help?
Do you have a question about the AQUARAY GroBeam 1500 Ultima CP ColourPlus UK and is the answer not in the manual?
Questions and answers