Dino-Power DP-X Series Operating Instruction
Hide thumbs
Also See for DP-X Series:
- Operating instruction (50 pages) ,
- Operating instruction (37 pages)
Advertisement
Operating Instruction
DP- X series
X20
X24 X28
X45 X52
Please read and keep this manual, Read carefully before attempting to assemble, install, operate or maintain the
product described. Protect yourself and others by observing all safety information. Failure to comply with instructions
could result in personal injury and/or property damage! Retain instruction for future reference.
Advertisement
Table of Contents

Related Manuals for Dino-Power DP-X Series


Summary of Contents for Dino-Power DP-X Series
- Page 1 Operating Instruction DP- X series X24 X28 X45 X52 Please read and keep this manual, Read carefully before attempting to assemble, install, operate or maintain the product described. Protect yourself and others by observing all safety information. Failure to comply with instructions could result in personal injury and/or property damage! Retain instruction for future reference.
- Page 2 All parts of the spray system, including the pump, hose assembly, spray gun, and objects in and around the spray area shall be properly grounded to protect against static discharge and sparks. Use DINO-POWER conductive or grounded high-pressure airless paint sprayer hoses.
- Page 3 WARNING PRESSURIZED ALUMINUM PARTS HAZARD Use of fluids that are incompatible with aluminum in pressurized equipment can cause serious chemical reaction and equipment rupture. Failure to follow this warning can result in death, serious injury, or property damage. ●Do not use 1,1,1-trichloroethane, methylene chloride, other halogenated hydrocarbon solvents or fluids containing such solvents.
- Page 4 WARNING Maintenance Tips: 1.There are two sides for the ball seat, both are chamfered, for one side worn, change to another side. 2.While changing the V-packings(both the upper and lower ones) for piston rod, please note that the convexity side shall be towards the piston rod, ...
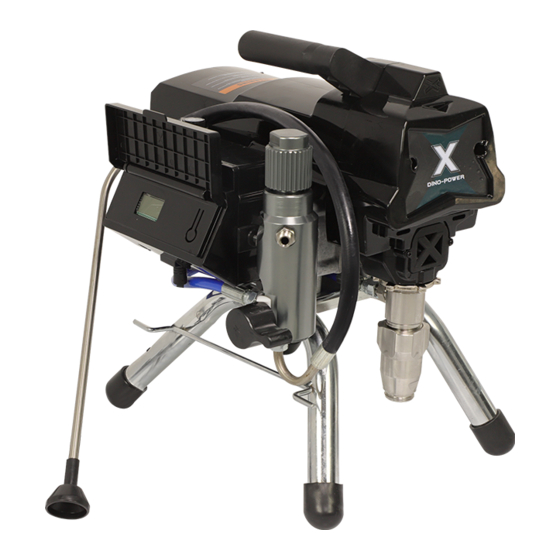
- Page 5 Component Identification FOR X52L...
-
Page 6: Technical Data
Cart/ Hose with wrap rack Carry machine and Stows paint hose. (DP637H) Filter Housing Manifold filter will reduce the tip clogs and ensure you nice finish. (Manifold filter inside**) Digital pressure display X20 With Pressure Gauge Only (Under the cover) X24 X28 X45 X52 With digital pressure display Pressure regulator Adjust the pressure for different applications. -
Page 7: Trigger Lock
Trigger Lock Always engage the trigger lock when you stop spraying to prevent the gun from being triggered accidentally by 3. Hold gun firmly to side of pail. hand or if dropped or bumped. Trigger the gun to relieve pressure. Pressure Relief Procedure Follow this Pressure Relief Procedure whenever you Engage trigger lock. - Page 8 Setup 1. Prepare the paint according to the manufacturer’s recommendations This is probably one of the most important steps 6. Oiling toward trouble-free spraying! Remove any skin that may have formed on the top of Fill throat packing nut with lubricating oil(3~5 drops) to the paint.
- Page 9 Startup 1. First be sure the ON/OFF switch is OFF. 2. Adjust Pressure Control counter clockwise to 8. Turn power switch OFF. lowest pressure. 3. Place the suction hose into the coating barrel. 9. Transfer suction tube to paint pail and 4.
- Page 10 SPRAYING SPRAYING TECHNIQUE 1. The key to a good paint job is an even coating over the entire surface. With spray painting, this is done by using even strokes, with your arm moving at a constant speed and keeping the spray gun a constant distance from the surface.
-
Page 11: Install Tip & Guard On Spray Gun
before triggering the gun on. 7. When taking a short break from painting (up to 1 hr.), lock the spray gun trigger OFF, reduce pressure to its minimum (zero) setting and set the unit to Prime position . Turn sprayer off and unplug. Refer to Pressure Relief Procedure. -
Page 12: Tip Selection
Tip Selection Selecting Tip Hole Size Tips come in a variety of hole sizes for spraying a range of fluids. Your sprayer includes an 0.017 in (0.43 mm) tip or maybe 0.019” (0.48mm) for use in most spraying applications. For narrow or smaller surfaces(cabinet,fence,railings), pattern width of 6 inches is the best choice, it will provide sharper definition and more control;... -
Page 13: Understanding Tip Number
Understanding Tip Number The last three digits of tip number contain information about hole size and fan width on surface when gun is held 12 in. (30.5 cm) from surface being sprayed. Last two digits = tip hole size in thousands of an inch Reversible Tip Selection Chart Orifice Size Fan Width - Inches... - Page 14 CLEAN UP As with all spray equipment, your sprayer must be cleaned properly or it will not operate properly. Clogged are the most common causes of problems. If followed, these guidelines will insure trouble free performance from your sprayer. 1. Do pressure relief procedure. Remove siphon tube set from paint and place in flushing fluid.
- Page 15 10. If flushing with water, flush again with mineral spirits, or pump armor, to leave a protective coating prevent freezing corrosion. 7. Turn up prime valve up to close drain valve, Trigger gun into flushing pail to purge fluid from hose, Turn Power OFF.
-
Page 16: Troubleshooting
Troubleshooting Problem Cause Solution Power switch is on and Pressure is set at Turn pressure control knob clockwise sprayer is plugged in, but zero pressure. to increase pressure setting. motor does not run, and Motor or control is damaged. Please contact with your supplier or pump does not cycle. - Page 17 Problem Cause Solution Sprayer starts up but does Unit will not prime or has lost Replace prime Unit not draw in paint. prime No paint. Suction tube Immerse suction tube in paint not totally immersed in paint Suction set filter clogged. Clean filter.
- Page 18 Problem Cause Solution Worn spray tip Replace with new tip. Sprayer draws up paint but drops away when gun is Suction set filter clogged Clean filter. opened Gun or spray tip filter plugged. Clean or replace filter. Keep extra filters on hand Paint too heavy or coarse.
- Page 19 Display error code E06 IPM alarm Display error code E07 High pressure in Reduce the pressure when cleaning cleaning mode Display error code E08 Low line voltage Check the power supply Paint leaks down outside of Pump packings are worn Replace pump packings.
-
Page 20: Parts List
Parts List X20 Motor&Pressure control assembly Serial No. Description Serial No. Description X20301 Carbon Brush X20515 Stem X20302 Baffle X20516 Spring X20303 Carbon Brush X20517 Pressure Regulating Knob X20304 Brush Holder X20518 Wire X20305 Washer X20519 Circuit Board X20506 Capacitor X20520 Bridge X20507... - Page 21 Parts List X20 Fluid pump Series No. Description Series No. Description x20101 Lower housing x20111 Gland, piston x20102 O-ring x20112 Piston rod x20103 Carbide seat x20113 O-ring x20104 Ball guide x20114 Cylinder x20105 Piston valve x20115 Outlet connector x20106 Spacer x20116 Gland, piston x20107...
- Page 22 Parts List X20 Gear Box Series No. Description Series No. Description x20201 X20213 Bearing x20202 Washer X20214 Bearing x20203 Washer, rubber X20215 O-ring x20204 Connecting rod X20216 Washer x20205 Needle bearing, connecting rod X20217 Washer x20206 Bearing X20218 Gear, crankshaft X20207 Drive housing X20219...
- Page 23 Parts List X20 Filter Housing Series NO. Description Series NO. Description X20401 Manifold cap X20409 Prime/spray valve stem X20402 Pump filter X20410 Prime/spray valve housing X20403 Prime/spray valve handle X20411 Hose X20404 Prime/spray valve groove pin X20412 Gasket X20405 Manifold X20413 Screw X20406...
- Page 24 Parts List X20 Motor Cover &Cart Series NO. Description Series NO. Description X20701 Screw X20606 Screw X20702 Frame X20607 Motor cover X20703 Suction/drain cup X20608 Front cover X20704 Screw X20609 Screw X20605 Power wire...
- Page 25 Parts List X24 Motor Assembly Serial No. Description X24301 Stator X24302 Rotor X24303 Baffle X24304 X24305 Washer X24506 Long Screw X24 Electric Pressure Control Board...
- Page 26 Parts List Series No. Description Series No. Description X24501 Transducer X24510 Plastic Cover X24502 Fuse X24511 Circuit for Digital Pressure Display X24503 Fuse Holder X24512 Screw X24504 Switch X24613 Screw X24505 Washer X24614 Screw Pin X24506 Screw X24515 Base X24507 Bridge X24516 Circuit Board...
- Page 27 Parts List x24207 Drive housing x24219 Washer x24208 Bearing x24220 Washer x24209 Bearing x24221 Gear, reducer x24210 Screw x24222 Washer x24211 Handle x24223 Washer x24212 Cover, drive housing X24 Fluid pump Series No. Description Series No. Description x24101 Lower housing x24111 Gland, piston x24102...
- Page 28 Parts List X24 Filter Housing Series NO. Description Series NO. Description x24401 Manifold cap x24409 Prime/spray valve stem x24402 Pump filter x24410 Prime/spray valve housing x24403 Prime/spray valve handle x24411 Hose x24404 Prime/spray valve groove pin x24412 Gasket x24405 Manifold x24413 Screw x24406...
- Page 29 Parts List X24 Cart&Motor Cover Assembly Series NO. Description Series NO. Description x24701 Screw x24606 Screw x24702 Frame x24607 Motor cover x24703 Suction/drain cup x24608 Front cover x24704 Screw x24609 Screw x24605 Power wire...
- Page 30 Parts List X45 Motor&Gear Box Assembly Series No. Description Series No. Description x45201 Cover, gear box x45210 Bearing housing x45202 Bearing x45211 Washer x45203 Bearing x45212 Washer x45204 Rotor x45213 Gear, crankshaft x45205 Gear box x45214 Washer Needle bearing, connecting x45206 x45215 Washer...
- Page 31 Parts List X45 Electric Pressure Control Board&Filter housing assembly Series No. Description Series No. Description X45501 Power Cord X45521 Washer X45502 Pressure Regulator X45522 O-ring X45503 Fuse Holder X45523 Prime/Spray Valve Housing X45504 Fuse X45524 Spring X45505 Fuse Cap X45525 Prime/Spray Valve Stem X45506 Frame...
- Page 32 Parts List X45515 Plastic Cover X45535 Screw X45516 X45536 Base X45517 X45537 Bridge X45518 Prime Valve Knob X45538 Screw X45519 Cam Base X45539 Washer X45520 Washer X45540 Flange X45 Fluid pump Series No. Description Series No. Description x45101 Nut, packing x45113 Valve, piston x45102...
- Page 33 Parts List X24 Cart assembly Series NO. Description Series NO. Description X45701 Cart X45705 X45702 Tubing plug X45706 Gasket X45703 Screw X45707 Tire connecting rod X45704 Handle assembly X45708 Wheel...
- Page 34 Parts List X45 Motor Cover& accessories Series NO. Description Series NO. Description X45801 Drain hose X45707 Drain line clip X45602 Motor cover X45608 Screw X45803 Screw X45609 Gasket X45804 Hose X45610 Front cover X45805 Suction tube X45611 Pump rod cover X45806 Suction filter X45612...
Need help?
Do you have a question about the DP-X Series and is the answer not in the manual?
Questions and answers