MIR MIR200 User Manual
Hide thumbs
Also See for MIR200:
- User manual (46 pages) ,
- Quick start manual (40 pages) ,
- Operating manual (47 pages)
Table of Contents
Advertisement
Quick Links
Advertisement
Table of Contents

Related Manuals for MIR MIR200


Summary of Contents for MIR MIR200
- Page 1 User Guide April 2017 v.1.0...
- Page 2 In addition, the contents of the document is subject to change without prior notice. Every precaution has been taken in the preparation of this manual. Nevertheless, MiR assumes no responsibility for errors or omissions or any damages resulting from the use of the information contained.
-
Page 3: Table Of Contents
4.2 Identification label.....................19 4.3 MiR200™ Outer parts ....................20 4.4 MiR200™ Inner parts ....................21 4.5 Sensor systems ......................22 4.6 Light indicators ......................22 4.7 Main features of the MiR200™..................22 5 Accessories ........................24 5.1 Overview........................24 5.2 Placing the top module....................24 6 Technical specifications ....................25 6.1 Main specifications ....................25... - Page 4 8 Troubleshooting ......................30 9 Repacking for transport....................31 9.1 Preparations ......................31 9.2 Packing the robot for transportation.................31 Appendices A Payload specifications ......................32 B Declaration of conformity ....................36 C Neutrik connector......................38...
-
Page 5: About This Manual
• • • • • • 1.1 Overview This User Guide contains all essential information about how to start up and operate a MiR200™ robot. It also includes necessary information about safe handling of the robot, technical specifications, troubleshooting and guidelines for proper maintenance of the robot. The User Guide is intended for Mobile Industrial Robots’... -
Page 6: Safety
Indicates a situation that could result in minor personal injury or damage to the equipment if proper precautions are not taken. Indicates a situation that could result in property damage if proper precautions are not taken. • • • MiR200 User Guide, v.1.0 • • •... -
Page 7: General Safety Instructions
Make sure to update maps to avoid driving in hazardous zones such as close to stairways. • Do not drive vehicle irresponsibly Danger of personal injury and/or damage to the robot. The robot should not be driven over edges or in other ways operated irresponsibly. • • • MiR200 User Guide, v.1.0 • • •... -
Page 8: Caution Notes
• Turn off the main power immediately after removal of the top cover Risk of personal injury and/or damage to the robot. Turn off main power relay to avoid short circuit. See Product presentation on page 19 • • • MiR200 User Guide, v.1.0 • • •... -
Page 9: Notices
If left untreated, the battery fluid could cause damage to the eye. • Use only the original charger and always follow the instructions from the battery manufacturer. • • • MiR200 User Guide, v.1.0 • • •... -
Page 10: Safety Circuit
When the person or object is out of the safety zone again, the robot will automatically reset the emergency stop. MiR200™ is designed with total redundant electrical safety circuit including Sick Safety components. If any internal errors in the safety circuit occur, the robot will immediately go into emergency stop which means that all moving parts will be voltage free by mechanical disconnection. -
Page 11: Getting Started
4. Printed documents: Quick start, CE declaration of conformity, mounting instructions for emergency stop 5. USB flash drive: Getting started video, MiR200™ User Guide, CE declaration of conformity, other manuals 6. ESD cable kit with mounting instructions (to mount if ESD protection is required) •... -
Page 12: Unpacking The Mir200
Getting started 3.2 Unpacking the MiR200™ 3.2.1 Unboxing Follow these steps to unbox the MiR200™: Step Action Remove pallet lid and take out folder with printed documents, USB flash and ESD cable kit Remove the top foam, foam blocks on the sides and the pallet frames. - Page 13 Grab the two rounded corners and carefully lift off the cover. Remove charging cable, emergency stop box and antenna from inside the robot. Emergency stop cable and antenna are stripped together. • • • MiR200 User Guide, v.1.0 • • •...
-
Page 14: Power Up
Getting started 3.2.2 Powering up Follow these steps to power up the MiR200™ Step Action Connect the battery cable to the plug on top of the Switch on the four relays placed in the corner by the front battery box. - Page 15 The robot light now switches to yellow constant light, indicating that the robot is paused and ready to operate. • • • MiR200 User Guide, v.1.0 • • •...
-
Page 16: Mounting The Esd Cable
The ESD cable is necessary only if ESD protection is required. Step Action The ESD cable kit is found in the MiR folder that comes with the robot. Long cable 166: place cable eye over the screw inside Short cable 165: secure the cable to the bracket next to the the robot cover;... -
Page 17: Getting Connected
Getting started 3.3 Getting connected Follow these steps to connect to the MiR200™ web interface: Step Action On a PC or tablet, go to the WiFi menu, find the name of your robot and connect to it. Open a browser and go to mir.com. -
Page 18: Charging The Robot
Disconnect the charging cable from the power socket first, then remove it from the robot by turning it slightly to the left and pulling. Slide the rear corner cover back on • • • MiR200 User Guide, v.1.0 • • •... -
Page 19: Testing The Robot
Before using the robot, you are recommended to check that all components and processes inside the robot work as intended. 1. Log on to the MiR user interface, see Getting connected on page 15. 2. Go to Service > Status > Diagnostics. -
Page 20: Shutting Down The Robot
Press the red emergency stop button. This will turn off the power to the motors Wait for the light on the robot to turn off. This Turn off the power switch. means that there is no more power going to the robot. • • • MiR200 User Guide, v.1.0 • • •... -
Page 21: Product Presentation
The user provides the destination of product delivery via a web-based user interface. MiR200™ can be set up to run a fixed route, be called on demand or perform more complex operations (missions). It can also operate as part of a fleet of MiR robots, centrally controlled from a single web based user interface. -
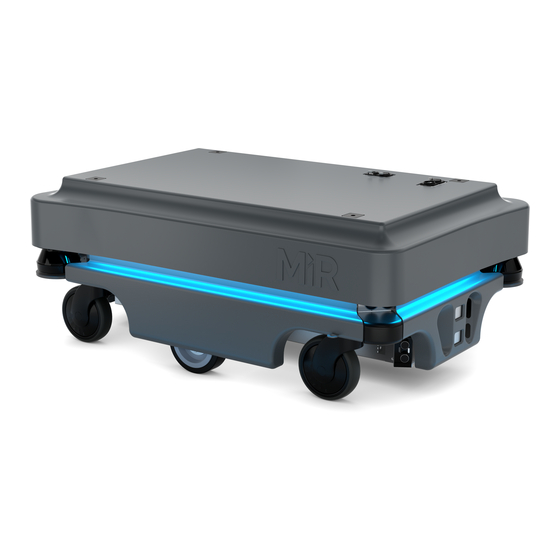
Page 22: Mir200™ Outer Parts
Product presentation 4.3 MiR200™ Outer parts Figure 4.2. MiR200™ Outer parts 1. Top cover 11. Emergency stop connector 2. Caster wheel - all four corner wheels 12. USB port - connects to the robot’s PC 3. Drive wheel - differential control 13. -
Page 23: Mir200™ Inner Parts
12. 24/24 V switch mode power supply - provides power outage safety components. Ensures stable voltage 5. Redundant drive - relays controlled by SICK modules 13. 5V power supply - power to the MiR board supplying the motor controller 6. Router - local network 14. Loud speaker 7. -
Page 24: Sensor Systems
Product presentation 4.5 Sensor systems The MiR200™ has a number of internal and external safety sensors to secure safe operation among people and equipment. External sensors Internal sensors (see MiR200™ Outer parts on page 20) (see MiR200™ Outer parts on page 20 •... - Page 25 After creation of the map, positions and other features can be added in the map editor. • MiRHook A hook may be mounted on the MiR200™ enabling it to tow carts with a payload of up to 500 kg. • •...
-
Page 26: Accessories
• • • • • • 5.1 Overview The MiR200™ can be equipped with a range of applications to suit the specific purpose the robot will be used for. Some are user-provided and others are purchased directly from Mobile Industrial Robots. -
Page 27: Technical Specifications
Backwards: 0.3 m/s (1 km/h) Turning radius 520 mm around center of robot Positioning accuracy +/- 50 mm of position, +/- 10 mm to docking marker Traversable gap and sill tolerance 20 mm • • • MiR200 User Guide, v.1.0 • • •... - Page 28 EN 1525, PLd cat. 3, ESD approved and CE certified Top module Max height from floor to top 1800 mm Center of gravity Lower than 900 mm above the floor • • • MiR200 User Guide, v.1.0 • • •...
-
Page 29: Dimension Drawing
Technical specifications 6.2 Dimension drawing Figure 6.1. Dimensions of the MIR200 • • • MiR200 User Guide, v.1.0 • • •... -
Page 30: Maintenance
•Remove the shield and unplug the ESD cable if applied, see Mounting the ESD cable on page 14 •Turn off relays and unplug the battery, see Power up on page 12 • • • MiR200 User Guide, v.1.0 • • •... - Page 31 3-4 months / according to EN/ works, push down the red button and ISO 13850 Safety of machinery - check that the emergency reset button Emergency stop function lights up. • • • MiR200 User Guide, v.1.0 • • •...
-
Page 32: Troubleshooting
• Check that the wheels are unobstructed and not tangled up in anything. • Check that the status is OK: in the MiR user interface, go to Service > Status > Diagnostics. Tap to open the group Sensors and check that 3D Camera (Floor) is on. -
Page 33: Repacking For Transport
Contact your distributor for more information. 9.2 Packing the robot for transportation To pack the robot, reverse the steps of the unpacking procedure, see “Unpacking the MiR200™” on page 10. The robot must always be packed and transported in an upright position. Packing and transporting the robot in any other position will void the warranty. -
Page 34: A Payload Specifications
• 50 kg • 75 kg • 100 kg • 125 kg • 150 kg • 175 kg • 200 kg 1400 1400 1200 1200 1000 1000 Units: mm 50kg payload • • • MiR200 User Guide, v.1.0 • • •... - Page 35 Payload specifications 1400 1400 1200 1200 1000 1000 Units: mm 75kg payload 1400 1400 1200 1200 1000 1000 Units: mm 100 kg payload • • • MiR200 User Guide, v.1.0 • • •...
- Page 36 Payload specifications 1400 1400 1200 1200 1000 1000 Units: mm 125kg payload 1400 1400 1200 1200 1000 1000 Units: mm 150kg payload • • • MiR200 User Guide, v.1.0 • • •...
- Page 37 Payload specifications 1400 1400 1200 1200 1000 1000 Units: mm 175kg payload 1400 1400 1200 1200 1000 1000 Units: mm 200kg payload • • • MiR200 User Guide, v.1.0 • • •...
-
Page 38: B Declaration Of Conformity
B Declaration of conformity • • • • • • • • • MiR200 User Guide, v.1.0 • • •... - Page 39 Declaration of conformity • • • MiR200 User Guide, v.1.0 • • •...
-
Page 40: C Neutrik Connector
• • • • • • PIN number Signal name Max. current Remarks Battery voltage Always on Battery voltage Starts with the robot Battery voltage Stops by emergency stop Ground Figure C.1. Neutrik FC4 FDL1-B • • • MiR200 User Guide, v.1.0 • • •... - Page 41 Neutrik connector • • • MiR200 User Guide, v.1.0 • • •...
Need help?
Do you have a question about the MIR200 and is the answer not in the manual?
Questions and answers