Table of Contents
Advertisement
Available languages
Available languages
Operator's Manual
Manual del Operario
020263
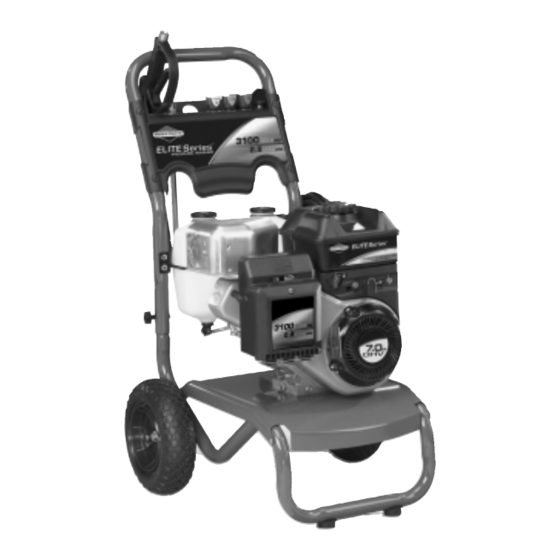
(3100 PSI)
Questions? Help is just a moment away!
Preguntas? La ayuda es justa un momento lejos!
Call: Pressure Washer Helpline
Llame: Línea Directa del Lavadora a Presión
1-800-743-4115 M-F 8-5 CT
web: www.briggsandstratton.com
WARNING
ADVERTENCIA
Before using this product, read this manual and follow all
Antes de utilizar el producto, lea este manual y siga todas las
Safety Rules and Operating Instructions.
Reglas de Seguridad e Instrucciones de Uso.
BRIGGS & STRATTON POWER PRODUCTS GROUP, LLC
Manual No. 199097GS
JEFFERSON,WISCONSIN, U.S.A.
Revision 0 (12/14/2005)
Advertisement
Chapters
Table of Contents

Related Manuals for Briggs & Stratton 20263


Summary of Contents for Briggs & Stratton 20263
- Page 1 Manual del Operario 020263 (3100 PSI) Questions? Help is just a moment away! Preguntas? La ayuda es justa un momento lejos! Call: Pressure Washer Helpline Llame: Línea Directa del Lavadora a Presión 1-800-743-4115 M-F 8-5 CT web: www.briggsandstratton.com WARNING ADVERTENCIA...
-
Page 2: Table Of Contents
Know its applications, its limitations and any hazards involved. This manual contains information for a pressure washer that operates up to a maximum of 3,100 PSI and at a maximum flow rate of 2.8 gallons per minute.This high quality residential system features NeverFlat™... -
Page 3: Section 1: Safety Rules
Fire or explosion can cause severe burns or death. WHEN ADDING FUEL • Turn pressure washer OFF and let it cool at least 2 minutes before removing gas cap. • Fill fuel tank outdoors. • DO NOT overfill tank. Allow space for fuel expansion. - Page 4 • Always wear safety goggles when using this equipment or in vicinity of where equipment is in use. • Before starting the pressure washer, be sure you are wearing adequate safety goggles. WARNING Unintentional sparking can result in fire or electric shock.
- Page 5 • DO NOT by–pass any safety device on this machine. • Before starting pressure washer in cold weather, check all parts of the equipment to be sure ice has not formed there. • NEVER move machine by pulling on hoses. Use handle provided on unit.
-
Page 6: Section 2 - Features And Controls
KNOW YOUR PRESSURE WASHER Read this Operator’s Manual and safety rules before operating your pressure washer. Compare the illustrations with your pressure washer to familiarize yourself with the locations of various controls and adjustments. Save this manual for future reference. -
Page 7: Section 3 - Assembly
PREPARING PRESSURE WASHER FOR USE If you have any problems with the assembly of your pressure washer or if parts are missing or damaged, call the pressure washer helpline at 1-800-743-4115. To prepare your pressure washer for operation, you will need to perform these tasks: Fill out and send in registration card. -
Page 8: Add Engine Oil And Fuel
Figure 5 — Attach Chemical Hose to Chemical Injection Fitting on Pump Add Engine Oil and Fuel • Place pressure washer on a level surface. CAUTION Any attempt to crank or start the engine before it has been properly filled with the recommended oil will result in equipment failure. -
Page 9: Section 3 - Assembly
• Always wear safety goggles when using this equipment or in vicinity of where equipment is in use. • Before starting the pressure washer, be sure you are wearing adequate safety goggles. Checklist Before Starting Engine Review the unit’s assembly to confirm you have performed... -
Page 10: Section 4 - Operation
To Start Your Pressure Washer To start your pressure washer for the first time, follow these instructions step-by-step.This starting information also applies if you have let the pressure washer sit idle for at least a day. Make sure unit is in a level position. -
Page 11: How To Stop Your Pressure Washer
When starting engine, position yourself as recommended in Figure 13 and start engine according to instructions given in engine operator’s manual.Also see operating instructions tag located on the pressure washer. Figure 13 - Recommended Starting Position WARNING Rapid retraction of starter cord (kickback) will pull hand and arm toward engine faster than you can let go. -
Page 12: How To Use Accessory Tray
NOTE: The extra hole in the tray is for storing a utility brush.The extra clip in the tray is for storing a turbo nozzle.The brush and turbo nozzle are NOT included with your pressure washer.You can buy these items as optional accessories. Place nozzle extension through hole on accessory tray, as shown in Figure 14. - Page 13 Select desired ProjectPro™ nozzle: • For delicate rinse (lower pressure and higher flow), for gentle cleaning of cars/trucks, boats, RV’s, patio furniture, lawn equipment, etc., select yellow Delicate ProjectPro™ nozzle (Figure 16). Figure 16 — Delicate Nozzle • For general rinsing (medium pressure and medium flow), ideal for most all purpose cleaning such as home siding, brick patios, wood decks, driveways and sidewalks, garage floors, etc., select orange...
-
Page 14: Section 4 - Operation
• Operate this unit on a stable surface. • Be extremely careful if you must use the pressure washer from a ladder, scaffolding or any other relatively unstable location. • Firmly grasp spray gun with both hands when using high pressure spray to avoid injury when gun kicks back. -
Page 15: Specifications
Shipping Weight ......90 lbs. GENERAL MAINTENANCE RECOMMENDATIONS The pressure washer warranty does not cover items that have been subjected to operator abuse or negligence.To receive full value from the warranty, the operator must maintain the pressure washer as instructed in this manual. -
Page 16: Section 5 - Maintenance
Shut off engine and turn off water supply. -
Page 17: Section 6 - Storage
Flush chemical system by selecting one tank, turning its chemical shut-off valve to “On” position and run pressure washer with black nozzle. Flush until first tank is empty.Turn its chemical shut-off valve to “Off” position. Flush other tank the same way. -
Page 18: Section 7 - Troubleshooting
Section Troubleshooting TROUBLESHOOTING Problem Pump has following problems: failure to produce pressure, erratic pressure, chattering, loss of pressure, low water volume. Detergent fails to mix with spray. Engine runs good at no-load but "bogs" when load is added. Engine shuts down during operation. -
Page 19: Notes
Notes... - Page 20 Notes...
-
Page 21: Warranty Period
Effective December 1, 2005 replaces all undated Warranties and all Warranties dated before December 1, 2005 Briggs & Stratton Power Products Group, LLC will repair or replace, free of charge, any part(s) of the pressure washer that is defective in material or workmanship or both. Transportation charges on product submitted for repair or replacement under this warranty must be borne by purchaser. -
Page 22: Reglas De Seguridad
Sección Reglas de Seguridad CONSERVE ESTAS INSTRUCCIONES TABLA DE CONTENIDOS Sección 1 - Reglas De Seguridad ..... . 22-25 Sección 2 - Características y Controles ....26 Sección 3 - Montaje . -
Page 23: Sección 1: Reglas De Seguridad
ADVERTENCIA Al motor funcionar, se produce monóxido de carbono, un gas inodoro y venenoso. El respirar el monóxido de carbono, producirá náusea, desmayo o la muerte. Algunas sustancias químicas o los detergentes pueden ser perjudiciales si inhalados o ingeridos, causando la náusea severa, desmayando o para envenenar. - Page 24 Sección 1: Reglas de Seguridad ADVERTENCIA El rápido repliegue del cable del arrancador (retroceso) impedirá que el usuario suelte el cable a tiempo y tirará de su mano y brazo hacia el motor. Como resultado, podrían producirse fracturas, contusiones o esguinces. •...
- Page 25 PRECAUCIÓN Hacer funcionar el motor a velocidades excesivas aumenta el riesgo de lesiones personales. • NO juegue con partes que puedan aumentar o disminuir la velocidad de mando. • NO opere la máquina lavadora a presión con un valor de presión superior a su clasificación de presión.
-
Page 26: Características Y Controles
Sección Características y Controles CONOZCA SU MAQUINA LAVADORA A PRESION Lea el manual del operario y las reglas de seguridad antes de poner en marcha su máquina lavadora a presión. Compare las ilustraciones con su máquina lavadora a presión para familiarizarse con las ubicaciones de los diferentes controles y ajustes. -
Page 27: Conecte El Manubrio Y Bandeja Accesoria
MONTAJE IMPORTANTE: Lea totalmente el manual del operario antes que intente ensamblar u operar su lavadora a presión. Desembalaje del Lavador a Presión • Remueva la bolsa con las piezas, incluidas con el lavadora a presión. • Corte dos esquinas en los extremos del cartón desde la parte superior hasta la parte inferior, de tal manera que el pánel pueda ser doblado en forma plana, luego quite todo el material de embalaje. -
Page 28: Sección 3: Montaje
Sección 3: Montaje Inserte el perno del soporte a través de los orificios desde interior de la unidad y sujete una perilla de plástico desde el fuera de la misma unidad.Apriete manualmente (Figura 25). Figura 25 - Sujetar el Manubrio Coloque la bandeja de accesorios sobre los orificios del asa (vista desde la parte delantera de la unidad). -
Page 29: Conecte La Manguera Y El Suministro De Agua A La Bomba
Conecte la Manguera y el Suministro de Agua a la Bomba IMPORTANTE: Usted deberá armar la extensión para boquillas y conectar todas las mangueras antes de darle arranque al motor. La bomba resultará dañada si arranca el motor sin tener todas las mangueras conectadas y el suministro agua abierto. -
Page 30: Operación
Sección Operación CÓMO USAR SU LAVADORA A PRESIÓN Si tiene problemas operando su máquina lavadora a presión, por favor llame a la línea de ayuda para máquinas lavadoras a presión al 1-800-743-4115. Ubicación del Lavadora a Presión Espacio Libre Alrededor del Lavadora a Presión ADVERTENCIA Los gases y el calor de escape pueden inflamar los materiales combustibles y las estructuras o dañar el... -
Page 31: Sección 4: Operación
Coloque el pasador de seguridad al gatillo de la pistola rociadora (Figura 35). Figura 35 - La Pistola Rociadora con el Pasador de Seguridad en su Posición Cuando arranque el motor, colóquese en la posición recomendada en la Figura 36 y siga las instrucciones del manual del operario del motor. -
Page 32: Utilización De La Bandeja De Accesorios
Sección 4: Operación Utilización de la Bandeja de Accesorios La unidad está equipada con una bandeja de accesorios con habitáculos para guardar la pistola rociadora, el prolongador de la boquilla y las boquillas ProjectPro™. La parte delantera de la bandeja también incluye un gancho para sujetar la manguera de alta presión. - Page 33 Desplace hacia atrás el anillo del conector rápido y tire de las boquillas ProjectPro™. Guarde las boquillas ProjectPro™ en el soporte de la bandeja de accesorios. Elija la boquilla ProjectPro™ que desee: • Para un enjuagado suave (baja presión y mayor caudal), para una limpieza suave de coches/camiones, barcos, RVs, muebles de jardín, cortacéspedes, etc., seleccione la boquilla ProjectPro™...
-
Page 34: Sistema De Enfriamiento Automático (Alivio Térmico)
Sección 4: Operación Limpieza y Aplicación del Químico IMPORTANTE: Utilice químicos diseñados específicamente para máquinas lavadoras a presión. Los detergentes caseros podrían dañar la bomba. PRECAUCIÓN Usted deberá conectar todas las mangueras antes de darle arranque al motor. • Arrancar el motor sin tener todas las mangueras conectadas y sin el suministro de agua ABIERTO (ON) causará... -
Page 35: Recomendaciones Generales
ESPECIFICACIONES Presión de Salida Máxima ..... 3100 PSI Caudal Máximo ....2.8 galones por minuto (gpm) Detergente Use el detergente adecuado para lavadores a presión Temperatura del Suministro de Agua . -
Page 36: Mantenimiento Del Motor
Sección 5: Mantenimiento Coloque el anillo 'o' en la ranura respectiva. Empuje el anillo 'o' hasta que quede ajustado contra el colador del filtro en línea. Conecte la extensión para boquillas a la pistola de rociado de la manera descrita anteriormente en este manual. Mantenimiento de la Boquilla Si siente una sensación pulsante al momento de apretar el gatillo de la pistola rociadora, puede que sea causada por la presión excesiva... -
Page 37: Sección 6: Almacenamiento
PREPARANDO LA UNIDAD PARA SU ALMACENAMIENTO El agua no debe permanecer en la unidad por un largo periodo de tiempo. Los sedimentos o minerales se pueden depositar en las piezas de la bomba y "congelar" la acción de la bomba. Si usted no piensa usar el lavador a presión por mas de 30 días, siga este procedimiento: Vacíe los dos depósitos de productos químicos como se indica a continuación:... -
Page 38: Diagnosticos De Averías
Sección Diagnosticos de Averías REPARACION DE DAÑOS Problema La bomba presenta los siguientes problemas: no produce presión, produce una presión errada, traqueteo, pérdida de presión, bajo volumen de agua. El detergente no se mezcla con el rociado. El motor funciona bien cuando no tiene cargas, pero funciona "mal"... -
Page 39: Notas
Notas... -
Page 40: Garantia
POLÍTICA DE GARANTÍA PARA EL PROPIETARIO DE UNA LAVADORA A PRESIÓN BRIGGS & STRATTON POWER PRODUCTS GROUP, LLC Fecha de entrada en vigor:1 de Diciembre de 2005. Sustituye a todas las garantías sin fecha y a las de fecha anterior al 1 Diciembre de 2005. Briggs &...
Need help?
Do you have a question about the 20263 and is the answer not in the manual?
Questions and answers