Table of Contents
Advertisement
Advertisement
Table of Contents

Related Manuals for STONEX S70G


Summary of Contents for STONEX S70G
- Page 1 STONEX S70G Handheld User Manual www.stonex.it Jul 2020 - Ver.1.0...
-
Page 2: Table Of Contents
Surveying with SW Maps ................36 Phace center offsets ................40 S70G with SA15 ......................40 S70G with SA15 mounted on the pole ..............41 S70G with SA45 mounted on the pole ..............42 Configurations & accessories ............43 Standard configuration ....................43 Operating configuration .................... - Page 3 SA45 Pole Solution ...................... 47 Appendix ......................48 Copyrights and trademarks ....................... 48 Release Notice ..........................48 Notice ............................... 48 Battery Instructions ........................49 Standards and Directives ......................50 Environmental recycling ......................52 Stonex S70G GNSS Handheld – User Manual v1.0...
-
Page 4: Introduction
Introduction This document is user guide for S70G and it is intended to introduce how to use the controller correctly. The S70G is a controller with a dedicated F9P GNSS sensor. The device is thinked for RTK projects and much more. - Page 5 GNSS receiver. Key Features: Rugged housing Support full constellation satellites RTK and Post Processing solutions 4G LTE and Bluetooth / WLAN datalink support High quality display IP67 Stonex S70G GNSS Handheld – User Manual v1.0...
-
Page 6: Controller Appearance
1. Controller appearance 1.1. Front view Figure 1.1: Controller front view Stonex S70G GNSS Handheld – User Manual v1.0... -
Page 7: Back View
On the right there is the Power On/Off button and the return button to go back in the option/windows. 1.2. Back view Figure 1.2: Controller Back view Stonex S70G GNSS Handheld – User Manual v1.0... -
Page 8: Upper And Lower View
On the right there is the speacker, on the left there is the camera. In the middle there is the port for the GNSS sensor. 1.3. Upper and lower view On the lower view there is the Type C port to charge the controller Stonex S70G GNSS Handheld – User Manual v1.0... -
Page 9: Working Mode
GNSS sensor is possible perform also Static session on the control points. In the next paragraphs it will be explained how use the S70G with the Stonex field Application Cube-a and also with the SW Map, the GIS application. - Page 10 Select Connected devices Select Connection preferences Stonex S70G GNSS Handheld – User Manual v1.0...
- Page 11 Inside the connection preferences select Accessories. As default the S70G doesn’t recognize the GNSS sensor. As you can see in the picture here below, there are not accessories recognized. Stonex S70G GNSS Handheld – User Manual v1.0...
- Page 12 If you have the same configuration inside the previous picture press Start Detect. The process of the detection will start automatically. Stonex S70G GNSS Handheld – User Manual v1.0...
- Page 13 After a few seconds, the S70G automatically detect the GNSS sensor, confirm the option that appears. During the procedure, the device will restart. Stonex S70G GNSS Handheld – User Manual v1.0...
- Page 14 If the detection is done correctly, the device will appear. If during the 1st initialization, the device is already detected, the procedure of the pairing is not necessary. Stonex S70G GNSS Handheld – User Manual v1.0...
-
Page 15: Cube-A
2.2 Cube-a To use the Stonex Cube-a on the S70G, please install the software and insert the license. Then enable the GNSS location option inside the settings of Android. 2.1.1 Connection As firs open the Cube-a and complete the registration. - Page 16 As Device Type select Stonex S70G – Internal GPS Confirm the selection with Connect After the connection you will have this window. Stonex S70G GNSS Handheld – User Manual v1.0...
-
Page 17: Choose Antenna Type
2.2.2 Choose Antenna Type After established the connection to the GNSS sensor, inside Device menu, select Antenna Type in base of the configuration of S70G you are using. There are 3 standar possible configuration. S70G used with SA15 antenna without pole ... - Page 18 S70G used with SA45 antenna mounted on the top of the pole In base of the configuration used, select the antenna profile. Don’t forget to insert the correct pole height. Stonex S70G GNSS Handheld – User Manual v1.0...
-
Page 19: Rtk
2.2.3 RTK To perform an RTK project, after having set the info of the project and established the connection to the GNSS sensor go in Device menu and select Rover. Stonex S70G GNSS Handheld – User Manual v1.0... - Page 20 Select Rover and fill in the parameters asked by the software as the type of connection, User, Password, Mountpoints etc.. Stonex S70G GNSS Handheld – User Manual v1.0...
- Page 21 As Datalink, select Phone Network to get the RTK connection via internet. Stonex S70G GNSS Handheld – User Manual v1.0...
- Page 22 After having set correctly, the RTK profile wait the change of the status of the controller’s position. When is FLOAT or better FIXED, start to work. To work go inside Survey menu. Stonex S70G GNSS Handheld – User Manual v1.0...
-
Page 23: Stop&Go
2.2.4 Stop&Go With the S70G is possible perform jobs also in Stop&Go. To do that inside the Survey working area open the list of the measurement options. Stonex S70G GNSS Handheld – User Manual v1.0... - Page 24 After the selection a popup window will appear. Inside this window turn on the record of the raw data. The download is explained after. The other 2 settings required are the number of the epochs and the collection interval. Stonex S70G GNSS Handheld – User Manual v1.0...
-
Page 25: Static
2.2.5 Static With the S70G is possible also perform a static session, then post process the observations and calculate a control point with accuracy. For the Static it is recommended the use of the pole and the external A45 antenna. - Page 26 Here it is fundamental enable the feature Record Raw Data. Also select the interval of the data collection and the name to recognize the raw data inside the folder during the download. Stonex S70G GNSS Handheld – User Manual v1.0...
-
Page 27: Download The Raw Data
2.2.6 Download the Raw Data To download the raw data of the controller and then perform the Post process of the measure go out of Cube-a. Then open the file manager of the S70G. Stonex S70G GNSS Handheld – User Manual v1.0... - Page 28 Go inside the Stonex Cube-a folder. Stonex S70G GNSS Handheld – User Manual v1.0...
- Page 29 Inside it, it will be present the .log file of the static session. Modify the extension of the .log in .dat to obtain the dat file. Then use the .dat with the Stonex Cube-manager-p software for the post process. Stonex S70G GNSS Handheld – User Manual v1.0...
-
Page 30: Sw Maps
2.3 SW Maps With Stonex S70G is possible to use the free GIS field software SW Maps. SW Maps is a GIS app for collecting, presenting and sharing geographic information, for phones and tablets. SW Maps is currently available for devices running Android 4.0.3 and above. - Page 31 Inside Communication Settings window select “Stonex S70G - Internal GPS” in the Device Type then click on “Connect”. Stonex S70G GNSS Handheld – User Manual v1.0...
- Page 32 In the Device menu, click on “Working Mode” then on “Rover” to set the antenna parameters and the satellite systems, then click on “Apply”. Stonex S70G GNSS Handheld – User Manual v1.0...
- Page 33 Stonex S70G GNSS Handheld – User Manual v1.0...
- Page 34 Stonex S70G GNSS Handheld – User Manual v1.0...
- Page 35 In the Device menu, click on “Data Link Settings” to set the Rover working mode and the communication mode. Stonex S70G GNSS Handheld – User Manual v1.0...
- Page 36 It you want to send differential corrections from controller for example, you should choose “Phone Network”, then click on blue bar Phone Network to set the CORS parameters. Stonex S70G GNSS Handheld – User Manual v1.0...
-
Page 37: Surveying With Sw Maps
SW Maps. In the main menu of SW Maps, click on “GPS Status” to see some info about the GPS status, such as the current coordinates, the type of solution, PDOP, used satellites. Stonex S70G GNSS Handheld – User Manual v1.0... - Page 38 Stonex S70G GNSS Handheld – User Manual v1.0...
- Page 39 You can also see the skyplot: in the main menu click on “Skyplot” to see the current geographic coordinates, some info about the GPS signal and the skyplot. Stonex S70G GNSS Handheld – User Manual v1.0...
- Page 40 Stonex S70G GNSS Handheld – User Manual v1.0...
-
Page 41: Phace Center Offsets
RTK. SA15 - Mounted on tablet S70G - Offset 6.5 cm (bottom of antenna to ARP) Stonex S70G GNSS Handheld – User Manual v1.0... -
Page 42: S70G With Sa15 Mounted On The Pole
3.2 S70G with SA15 mounted on the pole This configuration is thinked for the accurate GIS application and much more. With this, it’s possible make accurate surveys store and staking points using the pole. SA15 - Mounted Pole with the adapter–- Offset 13.0 cm (bottom of adapter to ARP) Stonex S70G GNSS Handheld –... -
Page 43: S70G With Sa45 Mounted On The Pole
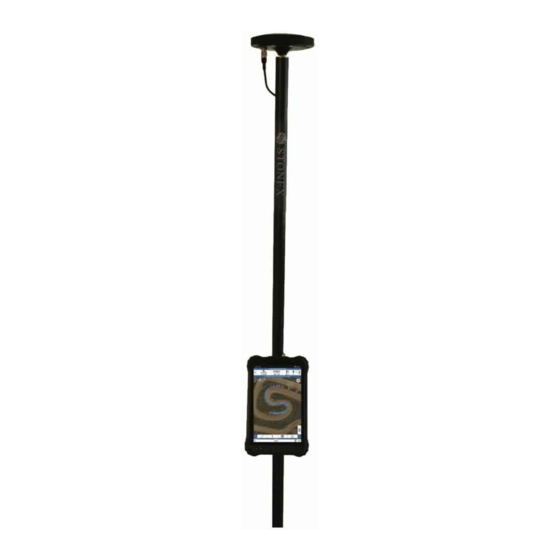
3.3 S70G with SA45 mounted on the pole And here the latest configuration to get the best operation in terms of accuracy, positioning and signal reception. This configuration is thinked for the survey application. SA45 – Mounted on the Pole – L1=46 mm, L2=41 mm... -
Page 44: Configurations & Accessories
4. Configurations & accessories 4.1 Standard configuration Description 50-550728 STONEX S70G GNSS, 184 Ch, 4G, Wi-Fi, BT, Bundle S70G Antenna SA15 S70G Strap S70G Battery S70G Charger Carton Box SW Cube-link Pen Drive set 8Gb with Manual Stonex S70G GNSS Handheld – User Manual v1.0... -
Page 45: Operating Configuration
4.2 Operating configuration Description 50-550728 STONEX S70G GNSS, 184 Ch, 4G, Wi-Fi, BT, Bundle S70G Antenna SA15 S70G Strap S70G Battery S70G Charger Carton Box SW Cube-link Pen Drive set 8Gb with Manual 30-350089 Soft bag for GPS and controller (SB-100) 40-450514 Software Stonex Cube-a GPS Vers 4.x... - Page 46 30-350352 S70G External battery charger 30-350272 Cradle for UT20 Tablet 30-350222 RAM Tough Claw with ball 30-350223 RAM short double socket Stonex S70G GNSS Handheld – User Manual v1.0...
-
Page 47: Sa15 Pole Solution
4.4 SA15 Pole Solution Description 50-550728 STONEX S70G GNSS, 184 Ch, 4G, Wi-Fi, BT, Bundle S70G Antenna SA15 S70G Strap S70G Battery S70G Charger Carton Box SW Cube-link Pen Drive set 8Gb with Manual 30-350089 Soft bag for GPS and controller (SB-100) 40-450514 Software Stonex Cube-a GPS Vers 4.x... -
Page 48: Sa45 Pole Solution
4.5 SA45 Pole Solution Description 50-550728 STONEX S70G GNSS, 184 Ch, 4G, Wi-Fi, BT, Bundle S70G Antenna SA15 S70G Strap S70G Battery S70G Charger Carton Box SW Cube-link Pen Drive set 8Gb with Manual 30-350089 Soft bag for GPS and controller (SB-100) 40-450514 Software Stonex Cube-a GPS Vers 4.x... -
Page 49: Appendix
Navigation Limited. All other trademarks are the property of their respective owners. Release Notice This is the July 2020 release of the STONEX® S70G new model handheld user guide. The following limited warranties give you specific legal rights. You may have others, which vary from state/jurisdiction to state/jurisdiction. -
Page 50: Battery Instructions
4. Please use the battery for its original intended purpose to prevent short- circuiting the battery. A short circuit will occur when a conductive material connects the battery’s positive and negative terminals. 5. Do not use a battery that is damaged. Stonex S70G GNSS Handheld – User Manual v1.0... -
Page 51: Standards And Directives
Please dispose waste batteries in accordance with local laws and regulations. 8. The battery life of the S70G controller varies according to the brightness level of the screen set. The battery life of the controller can reach up to10 hours in energy saving mode. - Page 52 Changes or modifications made to this equipment not expressly approved by Stonex s.r.l. may void the FCC authorization to operate this equipment. NOTE: This equipment has been tested and found to comply with the limits for a Class B digital device, pursuant to Part 15 of the FCC Rules.
-
Page 53: Environmental Recycling
Country in question. Modulation Mode GMSK for GSM/GPRS WCDMA QPSK; HSDPA:QPSK/16QAM; HSUPA:BPSK QPSK/16QAM WLAN 2.4GHz:802.11b(DSSS):CCK, DQPSK,DBPSK 802.11g(OFDM):BPSK,QPSK,16- QAM,64-QAM 802.11n(OFDM):BPSK,QPSK,16-QAM,64- SRD:DBPSK/DAPSK/16QAM/64QAM/256QAM Bluetooth BT(1Mbps): GFSK BT EDR(2Mbps): π/4-DQPSK BT EDR(3Mbps): 8DPSK GFSK Stonex S70G GNSS Handheld – User Manual v1.0... - Page 54 IEEE 802.11a20/n20/n40/ac20/ac40/ac80: 5150 MHz to 5250 MHz; 5250 MHz to 5350 MHz; 5470-5725MHz SRD: 5745MHz to 5825MHzBluetooth: 2402 MHz to 2480 MHzGPS: 1575.42MHz; NFC: 13.56 MHz Network GSM:850/900/1800/1900EVDO: BC0WCDMA:B1/B2/B5/B8TD-SCDMA: B34/B39TDDLTE:Band38/Band39/Band40/Band41FDDLTE: Band1/Band2/Band3/band4/band5/Band7/Band8/Band17 /Band20/Band28 Stonex S70G GNSS Handheld – User Manual v1.0...
- Page 55 STONEX® SRL Viale dell’Industria, 53 - 20037 Paderno Dugnano (MI) Tel: +390278619201 Stonex S70G GNSS Handheld – User Manual v1.0 www.stonex.it | info@stonex.it...
Need help?
Do you have a question about the S70G and is the answer not in the manual?
Questions and answers