Table of Contents
Advertisement
Quick Links
Advertisement
Table of Contents

Related Manuals for STONEX S980A


Summary of Contents for STONEX S980A
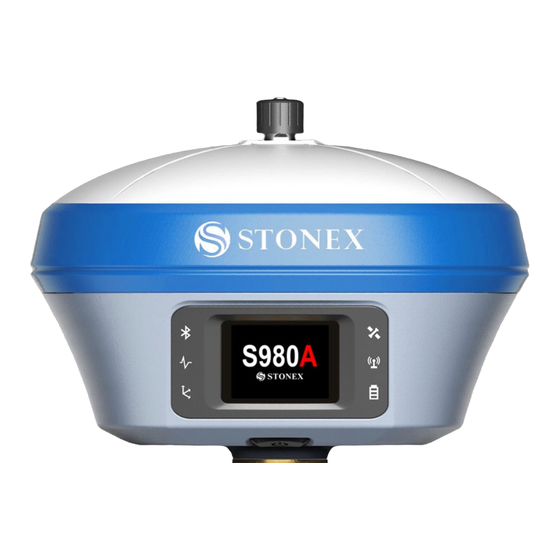
- Page 1 STONEX S980A GNSS Receiver User Manual www.stonex.it October 2020 - Ver.1.0...
-
Page 2: Table Of Contents
Management ......................... 23 2.10.1 Install new firmware ..................23 2.10.2 Device registration ................... 24 2.11 Set the language ......................24 Basic operation ................... 25 Power on receiver......................25 Power off receiver ......................25 Stonex S980A GNSS Receiver – User Manual v1.0... - Page 3 Appendix 1: Default Radio configuration ..........52 Appendix 2: Copyrights, warranty and environmental recycling ... 54 Copyrights and trademarks ....................... 54 Release Notice ..........................54 Standard Limited Warranty ....................... 54 Shipping policy ..........................55 Stonex S980A GNSS Receiver – User Manual v1.0...
- Page 4 Environmental recycling ......................58 Appendix 3: Safety Recommendations ............59 Warnings and Cautions ......................59 Wireless Module Approval ......................59 Instrument Approval........................60 UHF 410-470 MHz Data transceiver ..................60 Bluetooth/WiFi radio Module ....................62 Stonex S980A GNSS Receiver – User Manual v1.0...
-
Page 5: Introduction
Introduction This document is the user guide for the Stonex S980A and it is intended to introduce how to use the receiver correctly. The Stonex S980A GNSS receiver is a multiple-frequency receiver and designed for GNSS surveying applications. It is available as a base station, or... - Page 6 The Stonex S980A is also equipped with a colored display full touch where the user can check the status of the receiver, position, quality of the solution and other important information. The user through the display touch can also start a base using the radio technology or start a base in communication with an external device like a radio.
-
Page 7: Receiver Appearance
Off: no satellites tracked • Flashing red: satellites tracked but not positioned • Flashing green: satellites positioned but not fixed • Green: fixed solution • Flashing green and red alternately: GNSS board abnormal Stonex S980A GNSS Receiver – User Manual v1.0... - Page 8 7. LCD Display touch 1.45 inches touch LCD screen for interface display and operation settings • 8. Power button Switch ON/OFF the receiver. • Short press to broadcast the current operation mode and status Stonex S980A GNSS Receiver – User Manual v1.0...
-
Page 9: Bottom View
To Connect external power and/or the external radio • 3. Type-C Receiver Power Supply • Data transfer • 4. GNSS To connect the GNSS external antenna • 5. SIM Nano SIM card slot Stonex S980A GNSS Receiver – User Manual v1.0... -
Page 10: Top View
1.3 Top View 1.4 Back-side view Stonex S980A GNSS Receiver – User Manual v1.0... -
Page 11: Web Interface
2. Web Interface The Stonex S980A receiver has Web UI functionality. By getting access to its internal hotspot, you can easily manage it on the Web UI. As long as you have a smart phone, PC or handheld with WIFI functionality, you can easily connect to the S980A receiver to view status, download data and configure the receiver. -
Page 12: Dashboard
PERMANENT, if not it will appear the expiration date. *The position showed in map “show in map” is available only if the device used to access to the web UI is connected to internet. Stonex S980A GNSS Receiver – User Manual v1.0... -
Page 13: Satellites
2.2 Satellites In this page, you can view satellites Sky plot and satellites table. Always in this page you can set the cutoff angle (in DEG) up to 45°. Stonex S980A GNSS Receiver – User Manual v1.0... -
Page 14: Static Survey
The following picture shows the type of heights well detailed. At last, there are two record options. If you activate auto record, it will collect data automaticly when you power on the receiver. Stonex S980A GNSS Receiver – User Manual v1.0... -
Page 15: Download Raw Data
It is possible to convert directly raw data into RINEX, select Convert. For every raw data file is shown the start time and the end time, the name, the size of the file and the Antenna height set. Stonex S980A GNSS Receiver – User Manual v1.0... -
Page 16: Working Mode
All channels frequencies are editable. Obviously, the channel frequency inserted must respect the frequency range 410-470Mhz and the frequency range of the UHF antenna used. The interface is as shown: Stonex S980A GNSS Receiver – User Manual v1.0... - Page 17 If the user uses a SIM card is necessary type the APN and eventually user and password. If the user wants to use SIM card inside the receiver, it is suggested to disable the PIN code before the application. Stonex S980A GNSS Receiver – User Manual v1.0...
- Page 18 If you select External, it can be connected an external radio. The external serial port baud rate should be the same of the external radio used. If the user uses a controller, and establishes a Bluetooth connection, it appears Bluetooth. Stonex S980A GNSS Receiver – User Manual v1.0...
-
Page 19: Base
ID, base position and record raw data, APN account, APN user and password, connect mode, caster address and port. Furthermore, the parameters of the coordinates of the base can be set. Stonex S980A GNSS Receiver – User Manual v1.0... -
Page 20: Satellite Settings
In satellite settings, it is possible to set the RTK mode between NORMAL or SureFix. Normal mode for normal survey, SureFix to enable the algorithm that provides more control checks in the calculation of the position. Stonex S980A GNSS Receiver – User Manual v1.0... -
Page 21: Device Settings
WIFI hotspot share network, and the NMEA configurations. The user can set the NMEA output rate message of every NMEA message. Example, GGA message can be set to 1 Hz and GSA to 5 Hz. Stonex S980A GNSS Receiver – User Manual v1.0... -
Page 22: Save Backup & Logs
2.8 Save Backup & Logs In this page, you can download the backup data and logs. Stonex S980A GNSS Receiver – User Manual v1.0... -
Page 23: Information
GNSS board info, Network module and the UHF module information. The most important information are the firmware versions. It is necessary to check them in the case new versions are available. Stonex S980A GNSS Receiver – User Manual v1.0... -
Page 24: Management
“browse”, select the file to upgrade the firmware, then click submit, the system will restart to upgrade. After the upgrade, you can view the current “firmware version” in the “instrument information” page. Stonex S980A GNSS Receiver – User Manual v1.0... -
Page 25: Device Registration
2.11 Set the language In the right-up side of WebUI, there is the language selection option. S980A has 8 languages to set up. They are Italian, Chinese, English, Korean, Portuguese, Russian, Turkish and Japanese. -
Page 26: Basic Operation
3.4 Receiver Selfcheck Self-check functionality is an option to check whether every module works normally. When S980A receiver has indicators off or a module doesn’t work normally, you can use self-check option to inspect the receiver. S980A self- check consists of six parts, namely GNSS, radio, network, WIFI, Bluetooth and... -
Page 27: Receiver Selfcheck With Display Touch
“OK” (such as “GPS self-check. OK.”), it means they work normally. Receiver starts to work after the whole self-check is completed. 3.4.1 Receiver Selfcheck with Display touch With the new Stonex S980A, through the display the user can perform the self- check procedure To start the selfcheck follow these steps: From the Status window scroll to the left to open the Working Mode menu. - Page 28 Inside the Setting menu click SelfCheck to start the procedure. The selfcheck will start automatically. Wait until the procedure is complete, then it will be possible to continue working with the device. Stonex S980A GNSS Receiver – User Manual v1.0...
-
Page 29: Insert Sim Card
Insert the SIM card as shown on the cover slot Close the SIM card slot and move it to the right to lock it. Once it is locked, close the cover slot Turn on the receiver Stonex S980A GNSS Receiver – User Manual v1.0... -
Page 30: Display Touch Menu
7. Display Touch Menu The Stonex S980A is equipped with a Display touch. Through the touch screen the user can check the status of the receiver, start a static session, start a base via UHF and start a base using an external device (e.g an external radio). -
Page 31: Working Mode
The user can access to the menu Static. Tap Static to configure it. Inside it is possible to set the Interval sample and the cut off angle. To start/stop the session tap Start/Stop Rec. Stonex S980A GNSS Receiver – User Manual v1.0... -
Page 32: Base
7.4 Base Inside the working mode menu, the user can start a base. Tap Base to configure it. Inside there will be 2 options, Radio and External (Ext) Stonex S980A GNSS Receiver – User Manual v1.0... -
Page 33: Radio Base
Power level of the radio module • Protocol type When the user has set all the parameters, to start the base it is necessary to press Start. To Stop it, tap Stop Stonex S980A GNSS Receiver – User Manual v1.0... -
Page 34: Base External
Inside menu Settings, the user can change the light time of the screen, start a self-check, start a Restore Factory Settings or change the Display touch language. After every change, to confirm it, it is necessary to press OK. Stonex S980A GNSS Receiver – User Manual v1.0... -
Page 35: New Imu Technology
• The initialization process is much simpler. You can use Stonex Cube-a field software to calibrate the sensor; Cube- a will ask to initialize the IMU when need it and it will show how to do it. The process is very fast, usually a few seconds for IMU initialization. -
Page 36: Imu With Stonex Cube-A
8.1 IMU with Stonex Cube-a 8.1.1 Sensor Activation and Configuration To use the S980A with new IMU technology it’s necessary to enable the feature in the specific options menu. Before using the receiver to collect points with the pole tilted, check if the pole tilt correction functionality has been enabled. - Page 37 It means, the maximum value of the (sensor) tilt angle that the software shall accept when checking for the pole verticality. The value is in decimal degrees. Example: 0.3 means +/- 0.3° from true (local) verticality. Stonex S980A GNSS Receiver – User Manual v1.0...
- Page 38 Finally, there is also the possibility of collect points automatically when the pole is considered vertical. Stonex S980A GNSS Receiver – User Manual v1.0...
-
Page 39: Initialization
Just rotate the pole with the device as shown in the picture below. The second screen lets the sensor adjust the calibration parameters based on the local GNSS position and accuracy. Stonex S980A GNSS Receiver – User Manual v1.0... - Page 40 It could happen that during the survey, the screens show up: this means that the IMU accuracy has degraded and it’s necessary to adjust it: shake the receiver for a few seconds and it will be ready to continue working. Stonex S980A GNSS Receiver – User Manual v1.0...
-
Page 41: Rms Study And Sensor Calibration
(keep the pole tip at the same exact position on the ground). How to use it? Open the Calibrate menu, then select the RMS Study command. When inside the RMS Study screen, click Start to collect the measures. Stonex S980A GNSS Receiver – User Manual v1.0... - Page 42 This operation is also suggested when the user changes the pole height and/or the pole type (there could be a change in the straightness of the pole). Stonex S980A GNSS Receiver – User Manual v1.0...
- Page 43 To calibrate the sensor, select the Calibrate page and then click on the Calibrate Sensor command. Stonex S980A GNSS Receiver – User Manual v1.0...
- Page 44 A Fixed GNSS solution is mandatory. Check the antenna height: a wrong antenna height will make the calibration not accurate. Wait for the message Ready To Go, start the calibration by clicking on the Start button. Stonex S980A GNSS Receiver – User Manual v1.0...
- Page 45 (direction A), then start to move the receiver back and forth along that direction and until a message asking to change the direction appears. Stonex S980A GNSS Receiver – User Manual v1.0...
- Page 46 Rotate the receiver 90 degrees clockwise, reaching the direction A+90° = B, and continue to move back and forth the device. Stonex S980A GNSS Receiver – User Manual v1.0...
- Page 47 After moving the device back and forth along the direction D, the message Calibration Terminated will appear. If the calibration fails, an error message will be shown. In this case, repeat the calibration procedure. Stonex S980A GNSS Receiver – User Manual v1.0...
-
Page 48: Accessories
The external appearance of the transport container is shown in the picture here below. 9.2 Standard accessories Description B10+150208 S980A GNSS, 800Ch, 4G, UHF 2/5W, WiFi, BT, - Bundle 30-350292 Power adapter with 4 plugs 30-350293 Charging Cable USB type C... -
Page 49: Technical Specification
Signal Reacquisition < 1 s RTK Signal Initialization Typically < 10 s Hot Start Typically < 15 s Initialization Reliability > 99.9 % Internal Memory 32 GB E-Bubble Tilt sensor IMU (optional) Stonex S980A GNSS Receiver – User Manual v1.0... - Page 50 INTERNAL RADIO 2-5 WATT Type Tx - Rx 410 – 470 MHz Frequency range Channel Spacing 12.5 KHz / 25 KHz 5 Km in urban environment Range Up to 15 Km with optimal conditions Stonex S980A GNSS Receiver – User Manual v1.0...
- Page 51 Battery 7.2 V – 13.600 mAh 9 to 28 V DC external power input with over-voltage Voltage protection (5 pins Lemo) Working Time Up to 10 hours Charge Time Typically 4 hours Stonex S980A GNSS Receiver – User Manual v1.0...
- Page 52 3. Network RTK precision depends on the network performances and are referenced to the closest physical base station. 4. Varies with the operating environment and with electromagnetic pollution. 5. Optional, it can be activated via activation code. Stonex S980A GNSS Receiver – User Manual v1.0...
-
Page 53: Appendix 1: Default Radio Configuration
WEB interface. The default frequencies of each channel are shown in the following table. Channel Frequency 438.125 MHz 440.125 MHz 441.125 MHz 442.125 MHz 443.125 MHz 444.125 MHz 446.125 MHz 447.125 MHz Stonex S980A GNSS Receiver – User Manual v1.0... - Page 54 Modulation GMSK The S980A can be ordered with radio power limited of low (2 W) or with both power output options (Low 2W. and High 5W). Please check before to make the order using the specific part numbers, in respect of the local legislation.
-
Page 55: Appendix 2: Copyrights, Warranty And Environmental Recycling
Copyrights and trademarks ® © 2020, STONEX Limited. All rights reserved. ® ® STONEX , the STONEX logo, and S980A GNSS receiver are trademarks of ® STONEX Limited. ® ® ® Cube-a and Stonex Cube Link are trademarks of STONEX Limited. -
Page 56: Shipping Policy
® fault parts or instruments to STONEX representative office and STONEX ® providing the shipping for return. Dealers need to follow STONEX repair/service procedure to achieve a better and prompt service result. Return policy Dead On Arrival instruments ® All returned products have to be shipped to STONEX representative office. -
Page 57: Firmware/Software Warranty
Firmware/Software will operate to meet your requirements. Stonex will forward the Software/Firmware Fix to the dealer or customer. Firmware/software Fix means an error correction or other update created to fix a previous firmware version that substantially doesn’t conform to the... -
Page 58: Instruments
• Stonex S980A GNSS receiver: 2 years Accessories Accessories and specific parts warranty For accessories provided by Stonex with the instruments S980A GNSS the following general warranty time is for reference: • Accessories: 1 year. Stonex S980A GNSS Receiver – User Manual v1.0... -
Page 59: Environmental Recycling
· For countries outside European Union (EU) The treatment, recycling, collection and disposal of electric and electronic devices may vary in accordance with the laws in force in the Country in question. Stonex S980A GNSS Receiver – User Manual v1.0... -
Page 60: Appendix 3: Safety Recommendations
Before using this instrument, check if authorization to operate the receiver is required in your country. It is the responsibility of the importer to verify if it is necessary a certification or license for the equipment in the country of use. Stonex S980A GNSS Receiver – User Manual v1.0... -
Page 61: Instrument Approval
Approval is granted by the manufacturer of the equipment. Some countries have unique technical requirements for operation in particular frequency bands. To comply with those requirements, Stonex srl may modified the equipment to be subjected to grant. Unauthorized modification of the units voids already got approvals, the warranty time and the operational licenses of the instrument. - Page 62 All the relevant information’s are available on the European Community website: https://ec.europa.eu/growth/sectors/electrical-engineering/ From this link you can download the Directive 2014/53 / UE RED relating to telecommunication equipment, the LVD Low voltage directive and the EMC directive for electromagnetic compatibility. Stonex S980A GNSS Receiver – User Manual v1.0...
-
Page 63: Bluetooth/Wifi Radio Module
Scientific organizations. Stonex srl therefore believes the internal wireless radio is safe for use by end users. The level of energy emitted is far less than the electromagnetic energy emitted by wireless devices such as UMTS phones. However, the use of Bluetooth/WiFi may be restricted in some special situations or place, like aircraft , hospital ,etc. - Page 64 Do not switch on the GSM or UHF module without the antenna mounted to the external connector. UHF Antennas having a gain greater than 5 dBi, are strictly prohibited for use with this device. The required antenna impedance must be 50 ohms. Stonex S980A GNSS Receiver – User Manual v1.0...
- Page 65 – Do not use or store the battery in very hot ambient. – Do not drop or puncture the battery. – Do not open the battery and do not put in short-circuit its electrical contacts. Stonex S980A GNSS Receiver – User Manual v1.0...
- Page 66 STONEX® SRL Viale dell’Industria, 53 - 20037 Paderno Dugnano (MI) Tel: +390278619201 Stonex S980A GNSS Receiver – User Manual v1.0 www.stonex.it | info@stonex.it...
Need help?
Do you have a question about the S980A and is the answer not in the manual?
Questions and answers