
Related Manuals for STONEX S9i


Summary of Contents for STONEX S9i
-
Page 1: Gnss Receiver
STONEX S9i GNSS Receiver User Manual RC (13/12/2016)-Ver.1-Rev.0 www.stonexpositioning.com... -
Page 2: Table Of Contents
Contents 1. Introduction to Stonex S9i GNSS ................2 2. Key features ........................... 3 3. S9i mainframe ........................5 3.1. Front side of the mainframe .................. 5 3.2 Back side of the mainframe ..................8 3.3 The bottom of mainframe ..................10 4. -
Page 3: Introduction To Stonex S9I Gnss
This chapter is mainly used to introduce the key features and the appearance of S9i. S9i brings several technical news, like the new electronic bubble for levelling or the double battery system for battery hot swap without powering off the receiver . -
Page 4: Key Features
(2) WIFI wireless connection When WIFI function is active, S9i can be used like hotspot. You can connect your phone to the receiver via WIFI. Using the WEB UI is possible to change... - Page 5 (1) Compact and lightweight design. The dimensions of S9i are: diameter 15.9cm × height 8.9cm. Weight is just 1.2kg. The compact and light weight design allow easy transport of it. (2) Advanced datalink The UHF radio module is compatible with the main RTK products in the market and allow usage with other brand of RTK products.
-
Page 6: S9I Mainframe
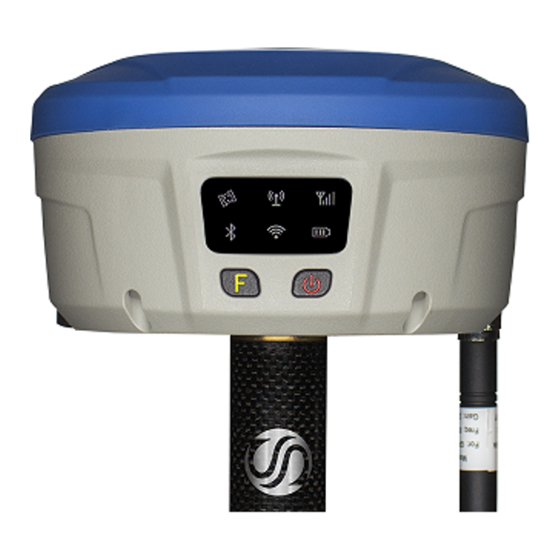
3. S9i mainframe The mainframe of S9i is a flat cylindrical, 89mm in height, 159mm in diameter. The front side has 2 functional buttons and 6 indicators. The back side house the battery compartment. Here there are two slots, the first for SIM card and the second for Micro SD card. - Page 7 WIFI led light when the S9i is connected with WIFI. Function key Selection key Power key Power on/off the receiver. Satellite led (green) It shows the amount of locked satellites; when the receiver links one or more satellites signals it will start to blink every 30 seconds for a number of times equal to the number of locked satellites.
- Page 8 Figure 3 - 5 Bluetooth led WIFI led (green) This led will on when you turn on the WIFI function. When you turn off the WIFI function, this led does not shine. Figure 3 - 6 WIFI led Stonex S9i GNSS Receiver – User Manual...
-
Page 9: Back Side Of The Mainframe
Internal power led (green and red) When you power on the S9i, the power led will be on. According to the remaining quantity of power in the battery, it monitor three kinds of status: Green: power supply in good condition. - Page 10 To install the battery, push the compartment locker, insert the battery into the battery compartment, then lock the compartment locker. To remove the battery, push the compartment locker and then take out the battery. Figure 3 - 9 Installing/uninstalling the battery Stonex S9i GNSS Receiver – User Manual...
-
Page 11: The Bottom Of Mainframe
Connect to radio antenna 5 pin interface Connect to external radio and external battery 7 pin interface USB port, also can connect to the controller via the multi-function cable Beeper Broadcast voice message Stonex S9i GNSS Receiver – User Manual... -
Page 12: Basic Operations Of S9I
4. Basic operations of S9i In this section, we highlight the basic operations of S9i like setting for base and rover, the operation of functional key , how to change the work mode and datalink, how to start self-test procedure. -
Page 13: The Operation Of Keys
3 beeps and an audio feedback (if enabled) reporting the current receiver status . - Power off: when the S9i mainframe is in the ON status (power supply light ON), press and hold power key for few seconds until all lights blink, then release the power key. -
Page 14: Self-Checking
If the module checking fails, voice broadcast “self-checking fails”, the led will continue blink and the buzzer beeps until you restart S9i. Self-checking procedure require about 1 minute. 3. If all module leds are ON (not blinking) and voice broadcast that the self- checking success (for example “self-checking GPS success”), it means the... -
Page 15: Measure The Antenna Height
= the height from ground to bottom of mainframe + antenna phase center to the bottom of mainframe. (3) Slant height, measure from ground to the altimetry line of the mainframe. Select slant height in the software, then input the height you measured. Stonex S9i GNSS Receiver – User Manual... -
Page 16: Web Ui Function
5. Web UI function S9I has WIFI function that works as a hotspot with Phone, controller, PC and other devices The default WIFI name is device number, there is no password for WIFI. Before using this function, you should make sure the WIFI function is available. -
Page 17: Status
Then it’s the “Information”, this menu shows the information inside the receiver, such as firmware version of the receiver, GNSS firmware version, GSM mode information, sensor version, battery information and so on. Figure 5 - 1 Information Stonex S9i GNSS Receiver – User Manual... -
Page 18: Download
“Download” is for downloading raw or rinex data files. The format of raw data is “.dat”. Figure 5 - 2 Download 5.4 Management “Manage” includes many useful functions like upgrade firmware, register the receiver, start self-checking, change the log password and restart the receiver. Stonex S9i GNSS Receiver – User Manual... - Page 19 Figure 5 - 3 Management Stonex S9i GNSS Receiver – User Manual...
-
Page 20: Device Register
Figure 5 - 5 Registration You could also register device via controller with surpad software if installed on your controller . Connect S9i with the surpad software . Click “About”, you will see “Register instrument”, then click it. The last step is inputting code, then finish registration. -
Page 21: Working Mode
It is possible to set cutoff angle, select satellites system, input the point name, antenna height, PDOP threshold and the collect time interval. If enable the auto record, s9i will collect data automatic when you power on the receiver. Stonex S9i GNSS Receiver – User Manual... - Page 22 UHF mode: select radio channel and radio protocol like your choice. You also can enable storage of raw data and enable the satellite constellation. The interface is as follow: Figure 5 - 7 Rover mode (UHF datalink) Stonex S9i GNSS Receiver – User Manual...
- Page 23 Network: the most important setting here are CORS information, such as IP, port, userID, password and mount points . Stonex S9i GNSS Receiver – User Manual...
- Page 24 Figure 5 - 9 Rover mode (External datalink) Bluetooth: to set datalink to Bluetooth. You can configure, the cutoff angle, satellites system and enable record of raw data. Stonex S9i GNSS Receiver – User Manual...
- Page 25 Most of the parameters are same as Rover mode. The only difference is the base mode has some more options (base coordinates) that can be edited. A base can be automatically activated after power on if the option is enable. Stonex S9i GNSS Receiver – User Manual...
-
Page 26: Device Configuration
Here are available the basic configurations via WEB UI function, such as changing language, select time zone ,enable electronic bubble and speaker, definition of storage locations and other options reserved to developer and service engineers . Figure 5 - 12 Device configuration Stonex S9i GNSS Receiver – User Manual... -
Page 27: Nmea Message
Control NMEA message, turn on/off them. If you need them out, select the update frequency. The NMEA contains GGA, GSA, GST, RMC, ZDA, GSV, VTG, GLL, GEDOP, GEREF, GESNR and GEVCV strings. Figure 5- 13 NMEA message Stonex S9i GNSS Receiver – User Manual... -
Page 28: S9I Standard Accessories
(named “charger” ) and an adaptor. The battery is “lithium-ion” battery (7.4 V - 3400 mAh): a technology which has a higher energy-to- weight ratio respect to NiCd or NiMh batteries, no memory effect, and slow self-discharge when not in use. Stonex S9i GNSS Receiver – User Manual... -
Page 29: Charger
(green light FULL). Red light POWER shows if the charger is powered on and there is also a light which turns on in case of too high temperature (red light TEMP). Figure 6 – 3 S9i charger and adaptor 6.2.3 The antennas S9i uses UHF transmitting and receiving antenna. - Page 30 40, 37,5 and 34 cm. The antenna gain is 2.15 dBi. Figure 6 - 4 built-in radio antenna (not in scale) S9i adopts a GPRS/GSM all-direction transmitting and receiving antenna . The length is about 21.5 cm, the gain is around 1.8-2.2/2.1-3 dBi in accord to the used frequency band.
-
Page 31: Cables
External power supply cables (LM.GK185.ABL+ LM.GK224.AAZ) can be ordered and used to connect an external battery (red and black clips) to the receiver (small 5-pin LEMO): Figure 6 - 8 External power supply cables Stonex S9i GNSS Receiver – User Manual... -
Page 32: Other Accessories
Table 6 - 9 Other accessories Name Figure(not in scale) 2.45m retractable pole 40cm support pole Bracket Tribrach with optical plummet and adapter Connector between tribrach and receiver Measuring tape Stonex S9i GNSS Receiver – User Manual... -
Page 33: Appendixes
Table 5- 1 Default frequency and protocol of internal radio Channel Frequency Protocol 438.125MHz Trimtalk 450S 440.125MHz Trimtalk 450S 441.125MHz Trimtalk 450S 442.125MHz Trimtalk 450S 443.125MHz Trimtalk 450S 444.125MHz Trimtalk 450S 446.125MHz Trimtalk 450S 447.125MHz Trimtalk 450S Stonex S9i GNSS Receiver – User Manual... -
Page 34: Appendix 2: Specification
TrimTalk-TrimMark-SOUTH-PCC EOT UHF radio internal radio receiver and transmitter:0.5W/1W (adjustable) Frequency:410-470MHz GNSS antenna characteristics GNSS antenna Integrated four feed and micro-point internal, zero phase center, built-in multi-path mitigation board, imported high-end ceramic material Stonex S9i GNSS Receiver – User Manual... - Page 35 Soak in the 1 meter water (30 minutes) Humility 100% non-condensing Physical and Electrical Battery life Over hours Double battery works, and support hot swap Dimensions Φ159mm×89mm Wight 1.2kg Battery 3400mAh (Standard configuration: 2 batteries) Button Stonex S9i GNSS Receiver – User Manual...
-
Page 36: Appendix 3: Copyrights, Warranty And Environmental Recycling
STONEX® agrees to repair or replace the defected instrument within thirty (30) days only if STONEX® recognizes that the defects of the instrument are Stonex S9i GNSS Receiver – User Manual... - Page 37 STONEX® warrants any new replaced parts or products are warranted to be free from defects in materials and workmanship for thirty (30) days or for the remainder of the Limited Warranty Period of the Product in which they are installed, whichever is longer.
- Page 38 Above terms and policies shall apply as for hardware. Dealers need to follow STONEX® repair/service procedure (see appendix 4) to achieve a better and prompt service result. Firmware/Software warranty Stonex® doesn’t warrant that operation of Firmware/Software on any instruments will be uninterrupted or error-free, or that functions contained in Firmware/Software will operate to meet your requirements.
- Page 39 In no event will Stonex®, its affiliates or suppliers be liable to customer or any third party for any damage in excess of the purchase price of the product.
- Page 40 1) If dealers don’t have the part in stock they have to send an official order to STONEX® and pay for it and so STONEX® will send the new part to them so they can repair the instrument. 2) When the repair is over, the dealer has to fill the “Spare Part Refund”...
- Page 41 However, there is no guarantee that interference will not occur in a particular installation. If this equipment does cause harmful interference to radio or television reception, which can be determined by turning the equipment off and on, Stonex S9i GNSS Receiver – User Manual...
- Page 42 Increase the separation between the equipment and receiver. Connect the equipment into an outlet on a circuit different from that to which the receiver is connected. Consult the dealer or an experienced radio/TV technician for help. Stonex S9i GNSS Receiver – User Manual...
-
Page 43: Appendix 4: Safety Recommendations
(note like emc compatibility) or generate not correct functionalities of the instrument itself. Approval is granted by the manufacturer of the equipment. Some countries have unique technical requirements for operation in Stonex S9i GNSS Receiver – User Manual... - Page 44 To comply with those requirements, Stonex srl may modified the equipment to be subjected to grant. Unauthorized modification of the units voids already got approvals, the warranty time and the operational licenses of the instrument. UHF 410-470 MHz Data transceiver General Antenna Installation Warning 1.
- Page 45 Every module has to be equipped with a proper antenna with specific characteristics. The antenna has to be installed with care in order to avoid any interference with other electronic devices and has to guarantee a minimum distance from the body (20 cm). Stonex S9i GNSS Receiver – User Manual...
- Page 46 “safety standards and recommendations “published by Scientific organizations. Stonex srl therefore believes the internal wireless radio is safe for use by end users. The level of energy emitted is far less than the electromagnetic energy emitted by wireless devices such as UMTS phones. However, the use of Bluetooth/WiFi may be restricted in some special situations or place , like aircraft , hospital ,etc.
- Page 47 To reduce potential radio interference to other users, the antenna type and its gain should be so chosen that the equivalent isotropical radiated power (e.i.r.p.) is not more than the one necessary to get successful connection. Stonex S9i GNSS Receiver – User Manual...
- Page 48 – If battery fluid gets into your eyes, immediately rinse your eyes with clean water and seek medical attention. Do not rub your eyes! – If battery fluid gets onto your skin or clothing, immediately use clean water to wash off the battery fluid. Stonex S9i GNSS Receiver – User Manual...
- Page 49 STONEX® SRL Via Cimabue, 39 - 20851 Lissone (MB) Tel : +390392783008 ; +390392785575 | Fax :+390392789576 Stonex S9i GNSS Receiver – User Manual www.stonexpositioning.com | info@stonexpositioning.com...
Need help?
Do you have a question about the S9i and is the answer not in the manual?
Questions and answers