
Subscribe to Our Youtube Channel
Related Manuals for STONEX S10A


Summary of Contents for STONEX S10A
- Page 1 STONEX S10A GNSS Receiver User Manual RC/GQ (06/04/2017) -Ver.1 www.stonexpositioning.com...
-
Page 2: Table Of Contents
....................32 5.4.3. Option External” 5.5. Device configuration ......................32 5.6 NMEA Settings ........................33 6. Appendix ............................34 Appendix 1: STONEX S10A/S10AN electronic bubble and tilt sensor Calibration procedure ............................34 ................... 38 6.1.1 E-bubble calibration ..................... 38 6.1.2 Azimuth calibration .............. -
Page 3: Introduction To Stonex S10A Gnss
QZSS) and Atlas signals: no troubles or extra costs for new constellations hardware upgrades. One new features inside S10A is Atlas reception : Atlas is a differential corrections systems broadcasted on L-Band, allowing increase in position accuracy in area not covered by conventional Cors working under Ntrip Technology ( lack of reference stations, lack of GPRS signals, etc ) .Atlas is... -
Page 4: S10A Panel Description
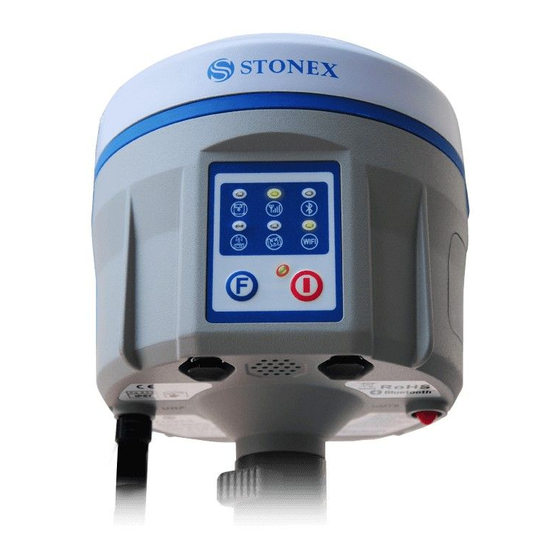
2. S10A panel description STONEX S10A is a light 14 x 14 cm GNSS unit; It is equipped with a high accuracy triple frequency receiving antenna, Bluetooth© and Wi-Fi, UHF transceiver radio modem (option). - Page 5 UHF data link. It blinks when transmitting data in base mode or receiving data in rover mode. The led is red if the current data link is external. Fig 2.4 - S10 internal radio led Stonex S10A GNSS Receiver – User Manual...
- Page 6 (download in rover mode and upload in base mode). Fig. 2.6 - S10 Network led 5: BLUETOOTH led (blue): Once S10A is connected with the controller this led will switch on. Fig 2.7 - S10 Bluetooth led Stonex S10A GNSS Receiver – User Manual...
- Page 7 When external power is used, the led indicates external power level. When the power is below 10%, the red led will flash according to sampling interval (default is 1 seconds) and you also hear three beep every 60s. Stonex S10A GNSS Receiver – User Manual...
-
Page 8: Communications & Antennas Ports
2.2. Communications & antennas ports The S10A communications ports are shown in the following figures 2.11 and 2.12: the left port (5-pins LEMO) is used for external power supply and external radio, the right port (7-pins LEMO) is used for data transferring between receiver and computer or between receiver and the Controller. -
Page 9: The Back Of The Receiver
Figure 2.14. SIM card and SD card slots: Follow the figure to install SIM card and SD card in the slot. Reset key: Press the reset key to restart S10A receiver as the following figure shows. SIM card slot Reset button SD card slot Fig. -
Page 10: S10A Standard Accessories
(green light FULL). Red light POWER shows if the charger is powered on and there is also a light which turns on in case of too high temperature (red light TEMP). Fig. 3.2 - S10A charger and adaptor Stonex S10A GNSS Receiver – User Manual... -
Page 11: The Antennas
20 cm, the gain is around 2 dBi. Fig. 3.4 – GSM/WCDMA/EVDO antenna For S10A, it is possible to use like additional accessory (not included in the standard configuration) a high-gain UHF all-directional transmitting antenna for base setup. The antenna is around 1 meter long and can be mounted on a retractable pole or a tripod for better performance. -
Page 12: Cables
(wood or aluminum, with quick or twist clamps), connector between receiver and tribrach, and measuring tape, quick release and mini rotary table, used for the tilt sensor calibration procedures. Stonex S10A GNSS Receiver – User Manual... - Page 13 Fig. 3.8 – 2.45m retractable pole Fig. 3.9 – 25cm supporting pole Fig. 3.10 – Bracket B1 for STONEX S4C/H Fig. 3.11 – Tribrach and adapter with optical plummet (P/N 30-010010 + 30-30-020005) Stonex S10A GNSS Receiver – User Manual...
- Page 14 Fig. 3.12 – Connector between tribrach and receiver Fig. 3.13 - Measuring tape Fig. 3.14 - Quick release (currently NOT available) Stonex S10A GNSS Receiver – User Manual...
-
Page 15: Controller Stonex S4C/H
Fig. 3.15 - Mini rotary table (P/N 30-350178) 3.5. Controller STONEX S4C/H The STONEX controller standard configuration includes only the adaptor, the battery and the USB cable. The controller is not included within the S10A accessories, it must be ordered separately. Fig. 3.16 - STONEX S4 controller... -
Page 16: S10A Operations
4. S10A Operations 4.1. The installation of base and rover Stonex S10A GNSS Receiver – User Manual... -
Page 17: Working Mode Settings
Installation of Rover 1) Mount the controller bracket on the telescopic pole and mount the controller into the bracket; screw the second S10A on the pole and mount receiving antenna into the port “UHF”. 2) Power on the receiver and select the rover working mode. - Page 18 Changing the working mode and data link When Stonex S10A is switched on, press F key and very quickly the Power key, if the speaker is enabled S10A broadcasts “change working” and all the leds start to blink at the same time. Then release both keys.
-
Page 19: How To Download Static Data
Fig. 4.3 - Taskbar of windows including the receiver The PC considers the receiver as a “media disk”, so open the “media disk”, and then you can get the data files in the memory. Stonex S10A GNSS Receiver – User Manual... - Page 20 Stonex S10A GNSS Receiver – User Manual...
-
Page 21: Stonex® Web Ui Applications
5. STONEX® Web UI Applications Users can manage S10A through a web interface called WebUI, it is not necessary to install software, drivers or other kinds of programs; the web interface program is built inside the receiver. From WebUI, users can set the most common operations such as working mode, UHF connection, GPRS connection, etc. - Page 22 Figure 5.2 The user can login STONEX S10A Web UI by itself, then start for the relevant settings on the web page of S10A, it can support multiple users at the same time. After a successful connection, you will see the main page as shown in the following figure: Figure 5.3...
- Page 23 S10A. Figure 5.4 You can obtain information about model, firmware version, GNSS serial, etc. You can also check for example, free memory space and battery level at any time. On Download window: Stonex S10A GNSS Receiver – User Manual...
- Page 24 Figure 5.5 You will see all the files inside memory of S10A; from this menu, it is possible to download data and convert files into RINEX format. Finally, on Management, users can upgrade the firmware in an easy manner. Figure 5.6...
- Page 25 On Log section, it is possible to look or download some internal log of the receiver: APP log, OS log and kernel log. It is also possible to perform a self-check or a reset of the instrument, by clicking on the two final options of the page. Stonex S10A GNSS Receiver – User Manual...
-
Page 26: Working Modes And Device Configuration
On the right upper part of the window, you can access to the menu Settings: Figure 5.8 - Working mode and device configuration Two other menu composes it: Working mode and Device configuration. Working mode: Stonex S10A GNSS Receiver – User Manual... - Page 27 From this window, you can change the system modem to Static, Rover or Base. On Static mode, as Figure 5.9 shows, you can enter all data required to perform a static survey: cut off angle, enable or disable some constellations, antenna height, auto record, etc. Stonex S10A GNSS Receiver – User Manual...
-
Page 28: Rover Mode
From this menu is it possible to check the settings of frequencies of radio channels, together with the type of communication protocol to use (we recommend TRIMTALK® route to connect two S10A) and the bandwidth of the radio channel. There are also commands to enable automatically recording the raw data, the minimum angle allowed for satellite reception, satellite constellations to be enabled. -
Page 29: Option Network
Mount Point, user ID and password of the provider of differential corrections. CSD option allows to enter the phone number of the SIM card inserted in the receiver used as a "base", which will connect to the rover (direct call function base-rover). Stonex S10A GNSS Receiver – User Manual... -
Page 30: Option "External
In addition to the Options “CUToff angle”, the User can enable the desired satellite constellations and the automatic recording of raw data. The baud rate of transmission between the receiver and radio is selected from the relevant box. Stonex S10A GNSS Receiver – User Manual... -
Page 31: Base Mode
5.4. Base Mode Used to set the receiver S10A in ‘BASE’ mode. The Base can be connected to the rover through different data link. 5.4.1. Option UHF For connections through UHF radio channel. It is possible to set the automatic start of the Base (S10A Base automatically broadcasts the differential corrections without any action by the operator ), select the type of differential correction (RTCM3.x, RTCM2.x, CMR, etc). -
Page 32: Option Network
The CSD option in "Connect Mode" enables the operation of the base in direct call with the rover. In this case it must also be selected the box that enables the automatic start of the base, when completed the start-up phase. Stonex S10A GNSS Receiver – User Manual... -
Page 33: Option External
To connect external radio. It is possible to select the baud rate of the connection between the instrument and the UHF radio. The other options were discussed previously. The SAVE button allows you to save the setting. 5.5. Device configuration Fig 5.10 Configuration Stonex S10A GNSS Receiver – User Manual... -
Page 34: Nmea Settings
Here you can activate the NMEA sentences that you want to carry out on lemo 7. You can select the refresh rate of each string on 'output lemo. There are also proprietary string where are encoded data signal to noise ratio. Stonex S10A GNSS Receiver – User Manual... -
Page 35: Appendix
Appendix 1: STONEX S10A/S10AN electronic bubble and tilt sensor Calibration procedure. One of the most innovative features of Stonex S10A GNSS is the high sensitivity tilt sensor, embedded in the receiver. This feature dramatically increase the speed of the field works and the accuracy of any measurement. - Page 36 Save time configuring S10A to get automatic FIX position before to go to the calibration location; this can be set from the WebUI, by selecting the option Auto connect: (Set yes). The Auto connection will be effective as the unit will be switched ON.
- Page 37 (normally 2 units) Starting the Calibration procedure: If Stonex Cube is present on the Controller, the icon S10A Calibration is already available on the desktop of the controller; click on it to run the calibration procedure.
- Page 38 All the options of the main Select the correct serial of the receiver has been menu will be enable. number from the drop found, click on Close down menu and click on Connect for establishing the connection. Stonex S10A GNSS Receiver – User Manual...
-
Page 39: E-Bubble Calibration
Remove S10 from the pole and mount it Click on Magnetic Step-by- on the mini rotary table. Step and then on Vertical. We suggest to high the pole at 1.80 m. As alternative, mount it on the tribrach. Stonex S10A GNSS Receiver – User Manual... - Page 40 Slowly rotate the S10A (the rotation would be last from 1 to 2 minutes) as shown on the display; check at any time that pole bubble is centered. A green circle shows the quality of the rotation. After the rotation is completed (360°) a beep indicates that this operation is finished.
-
Page 41: Declination (Compass) Calibration
Check the FIXED status of the receiver if not previously activated; Mount the S10A on the pole (tripod cannot be used for this step of the calibration) at a minimum height of 2 m Position MUST BE FIXED! ... - Page 42 The message “Incline point collection done!” is displayed. Next step is necessary to measure and store ten points for each geographic direction, starting from EAST, then SOUTH, WEST and NORTH. Stonex S10A GNSS Receiver – User Manual...
- Page 43 South: 180°. When both tilt angle and azimuth are correct S10 starts saving 10 point automatically. To keep the angle as much as possible close to 180° is strongly suggested. A beep is heard when finished. Stonex S10A GNSS Receiver – User Manual...
- Page 44 North: 360°. When both tilt angle and azimuth are correct S10 starts saving 10 point automatically. To keep the angle as much as possible close to 360° is strongly suggested. A beep is heard when finished. Stonex S10A GNSS Receiver – User Manual...
-
Page 45: Appendix 2: Default Radio Settings
Appendix 2: Default Radio Settings S10A uses a single UHF radio to cover the different whole band 410-470 MHZ. Default values are set directly from STONEX® in according to the following tables:... -
Page 46: Appendix 3: Frequently Asked Questions
2. The external and built-in power lights are blinking but no corrections is received. Solution: The activation code of the GPS expired; please contact STONEX® for a new code. 3. No success connecting the controller and the GPS via Bluetooth. -
Page 47: Appendix 4: Technical Specifications
Appendix 4: Technical Specifications Stonex S10A GNSS Receiver – User Manual... -
Page 48: Appendix 5: Copyrights, Warranty And Environmental Recycling
Appendix 5: Copyrights, warranty and environmental recycling Copyrights and trademarks ©2017, STONEX® Limited. All rights reserved. STONEX®, the STONEX® logo, and S10A GNSS receiver are trademarks of STONEX® Limited. STONEX® Assistant, STONEX® GPS Processor and STONEX® Surpad are trademarks of STONEX® Limited. - Page 49 STONEX® agrees to repair or replace the defected instrument within thirty (30) days only if STONEX® recognizes that the defects of the instrument are not caused by human factors or no obvious damage to its surface is visible. STONEX® warrants any new replaced parts or products are warranted to be...
- Page 50 Above terms and policies shall apply as for hardware. Dealers need to follow STONEX® repair/service procedure (see appendix 4) to achieve a better and prompt service result. Firmware/Software warranty Stonex® doesn’t warrant that operation of Firmware/Software on any instruments will be uninterrupted or error-free, or that functions contained in Firmware/Software will operate to meet your requirements.
- Page 51 In no event will Stonex®, its affiliates or suppliers be liable to customer or any third party for any damage in excess of the purchase price of the product.
- Page 52 1) If dealers don’t have the part in stock they have to send an official order to STONEX® and pay for it and so STONEX® will send the new part to them so they can repair the instrument. 2) When the repair is over, the dealer has to fill the “Spare Part Refund”...
- Page 53 However, there is no guarantee that interference will not occur in a particular installation. If this equipment does cause harmful interference to radio or television reception, which can be determined by turning the equipment off and on, Stonex S10A GNSS Receiver – User Manual...
- Page 54 Increase the separation between the equipment and receiver. Connect the equipment into an outlet on a circuit different from that to which the receiver is connected. Consult the dealer or an experienced radio/TV technician for help. Stonex S10A GNSS Receiver – User Manual...
-
Page 55: Appendix 6: Safety Recommendations
(note like emc compatibility) or generate not correct functionalities of the instrument itself. Approval is granted by the manufacturer of the equipment. Some countries have unique technical requirements for operation in Stonex S10A GNSS Receiver – User Manual... - Page 56 To comply with those requirements, Stonex srl may modified the equipment to be subjected to grant. Unauthorized modification of the units voids already got approvals, the warranty time and the operational licenses of the instrument. UHF 410-470 MHz Data transceiver General Antenna Installation Warning 1.
- Page 57 Every module has to be equipped with a proper antenna with specific characteristics. The antenna has to be installed with care in order to avoid any interference with other electronic devices and has to guarantee a minimum distance from the body (20 cm). Stonex S10A GNSS Receiver – User Manual...
- Page 58 “safety standards and recommendations “published by Scientific organizations. Stonex srl therefore believes the internal wireless radio is safe for use by end users. The level of energy emitted is far less than the electromagnetic energy emitted by wireless devices such as UMTS phones. However, the use of Bluetooth/WiFi may be restricted in some special situations or place , like aircraft , hospital ,etc.
- Page 59 To reduce potential radio interference to other users, the antenna type and its gain should be so chosen that the equivalent isotropical radiated power (e.i.r.p.) is not more than the one necessary to get successful connection. Stonex S10A GNSS Receiver – User Manual...
- Page 60 – If battery fluid gets into your eyes, immediately rinse your eyes with clean water and seek medical attention. Do not rub your eyes! – If battery fluid gets onto your skin or clothing, immediately use clean water to wash off the battery fluid. Stonex S10A GNSS Receiver – User Manual...
- Page 61 STONEX® SRL Via Cimabue, 39 - 20851 Lissone (MB) Tel : +390392783008 ; +390392785575 | Fax :+390392789576 Stonex S10A GNSS Receiver – User Manual www.stonexpositioning.com | info@stonexpositioning.com...
Need help?
Do you have a question about the S10A and is the answer not in the manual?
Questions and answers