Rohde & Schwarz SMU200A Service Manual
Vector signal generator
Hide thumbs
Also See for SMU200A:
- Manual (1929 pages) ,
- Operating manual (888 pages) ,
- Quick start manual (144 pages)

Related Manuals for Rohde & Schwarz SMU200A


Summary of Contents for Rohde & Schwarz SMU200A
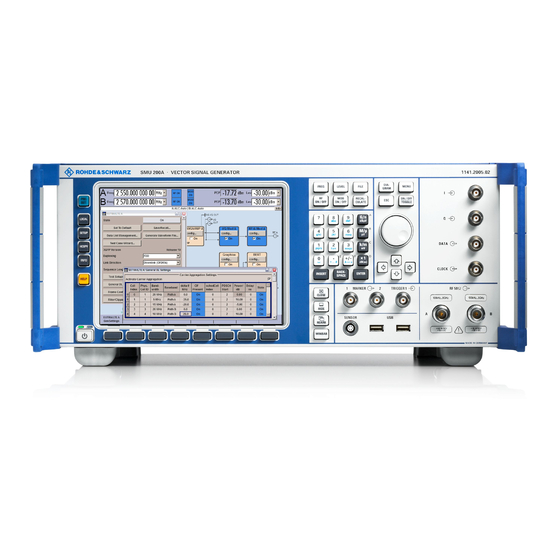
- Page 1 Service Manual Vector Signal Generator R&S SMU200A 1141.2005.02 Test & Measurement 1007.9845.82-09-...
- Page 2 Dear Customer, throughout this manual, the Vector Signal Generator R&S® SMU 200A is abbreviated as R&S SMU. R&S® is a registered trademark of Rohde & Schwarz GmbH & Co. KG. Trade names are trademarks of the owners. 1007.9845.82-09-...
- Page 3 Basic Safety Instructions Always read through and comply with the following safety instructions! All plants and locations of the Rohde & Schwarz group of companies make every effort to keep the safety standards of our products up to date and to offer our customers the highest possible degree of safety. Our products and the auxiliary equipment they require are designed, built and tested in accordance with the safety standards that apply in each case.
- Page 4 Basic Safety Instructions Symbol Meaning Symbol Meaning Caution ! Hot surface Alternating current (AC) Protective conductor terminal Direct/alternating current (DC/AC) To identify any terminal which is intended for connection to an external conductor for protection against electric shock in case of a fault, or the terminal of a protective earth Earth (Ground) Class II Equipment...
- Page 5 Basic Safety Instructions Operating states and operating positions The product may be operated only under the operating conditions and in the positions specified by the manufacturer, without the product's ventilation being obstructed. If the manufacturer's specifications are not observed, this can result in electric shock, fire and/or serious personal injury or death. Applicable local or national safety regulations and rules for the prevention of accidents must be observed in all work performed.
- Page 6 Basic Safety Instructions 6. The product may be operated only from TN/TT supply networks fuse-protected with max. 16 A (higher fuse only after consulting with the Rohde & Schwarz group of companies). 7. Do not insert the plug into sockets that are dusty or dirty. Insert the plug firmly and all the way into the socket provided for this purpose.
- Page 7 Basic Safety Instructions 2. Before you move or transport the product, read and observe the section titled "Transport". 3. As with all industrially manufactured goods, the use of substances that induce an allergic reaction (allergens) such as nickel cannot be generally excluded. If you develop an allergic reaction (such as a skin rash, frequent sneezing, red eyes or respiratory difficulties) when using a Rohde &...
- Page 8 Basic Safety Instructions 2. Adjustments, replacement of parts, maintenance and repair may be performed only by electrical experts authorized by Rohde & Schwarz. Only original parts may be used for replacing parts relevant to safety (e.g. power switches, power transformers, fuses). A safety test must always be performed after parts relevant to safety have been replaced (visual inspection, protective conductor test, insulation resistance measurement, leakage current measurement, functional test).
- Page 9 Instrucciones de seguridad elementales Waste disposal/Environmental protection 1. Specially marked equipment has a battery or accumulator that must not be disposed of with unsorted municipal waste, but must be collected separately. It may only be disposed of at a suitable collection point or via a Rohde &...
- Page 10 Instrucciones de seguridad elementales Se parte del uso correcto del producto para los fines definidos si el producto es utilizado conforme a las indicaciones de la correspondiente documentación del producto y dentro del margen de rendimiento definido (ver hoja de datos, documentación, informaciones de seguridad que siguen). El uso del producto hace necesarios conocimientos técnicos y ciertos conocimientos del idioma inglés.
- Page 11 Instrucciones de seguridad elementales Símbolo Significado Símbolo Significado Aviso: Cuidado en el manejo de dispositivos Distintivo de la UE para la eliminación por sensibles a la electrostática (ESD) separado de dispositivos eléctricos y electrónicos Más información en la sección "Eliminación/protección del medio ambiente", punto 2.
- Page 12 Instrucciones de seguridad elementales 1. Si no se convino de otra manera, es para los productos Rohde & Schwarz válido lo que sigue: como posición de funcionamiento se define por principio la posición con el suelo de la caja para abajo, modo de protección IP 2X, uso solamente en estancias interiores, utilización hasta 2000 m sobre el nivel del mar, transporte hasta 4500 m sobre el nivel del mar.
- Page 13 Instrucciones de seguridad elementales 6. Solamente está permitido el funcionamiento en redes de alimentación TN/TT aseguradas con fusibles de 16 A como máximo (utilización de fusibles de mayor amperaje solo previa consulta con el grupo de empresas Rohde & Schwarz). 7.
- Page 14 Instrucciones de seguridad elementales Funcionamiento 1. El uso del producto requiere instrucciones especiales y una alta concentración durante el manejo. Debe asegurarse que las personas que manejen el producto estén a la altura de los requerimientos necesarios en cuanto a aptitudes físicas, psíquicas y emocionales, ya que de otra manera no se pueden excluir lesiones o daños de objetos.
- Page 15 Instrucciones de seguridad elementales Reparación y mantenimiento 1. El producto solamente debe ser abierto por personal especializado con autorización para ello. Antes de manipular el producto o abrirlo, es obligatorio desconectarlo de la tensión de alimentación, para evitar toda posibilidad de choque eléctrico. 2.
- Page 16 Instrucciones de seguridad elementales 2. Las asas instaladas en los productos sirven solamente de ayuda para el transporte del producto por personas. Por eso no está permitido utilizar las asas para la sujeción en o sobre medios de transporte como p. ej. grúas, carretillas elevadoras de horquilla, carros etc. Es responsabilidad suya fijar los productos de manera segura a los medios de transporte o elevación.
- Page 17 Instructions - Instrucciones Instructions for Electrostatic Discharge Protection Risk of damaging electronic components To avoid damage of electronic components, the operational site must be protected against electrostatic discharge (ESD). Wrist strap with cord Floor mat Heel strap Ground connection of operational site The following two methods of ESD protection may be used together or separately: , Wrist strap with cord to ground connection...
- Page 18 Instructions - Instrucciones Instrucciones para la protección contra descargas electroestáticas Riesgo de avería de los componentes electrónicos Para evitar averías en los componentes electrónicos, el área de trabajo tiene que estar protegido contra descargas electroestáticas ESD (elec- trostatic discharge). Muñequera con cordón Estera Talonera Conexión a tierra del...
- Page 19 Safety Instructions - Informaciones de seguridad Safety Instructions for Units with Removable Cabinet Danger of injuries When removing the rear feet, the unit can slip out of the cabinet. Put the unit onto the front handles, before removing the rear feet and taking off the cabinet.
- Page 20 Safety Instructions - Informaciones de seguridad Informaciones de seguridad para aparatos con tubo de quita y pon Peligro de heridas Al sacar los piés de la pared posterior puede deslizarse el aparato fue- ra de la caja. Posicionar el aparato de manera segura sobre las asas delanteras, antes de sacar los piés de la pared posterior y entonces sacar la caja.
- Page 21 Procedure in Case of Service and Ordering of Spare Parts This section contains information on shipping an instrument to your service center and ordering spare parts. Please contact your local Rohde & Schwarz service center if you need service or repair work of your equipment or to order spare parts.
- Page 22 Ordering Spare Parts To deliver spare parts promptly and correctly, we need the following information: ● Stock number (see list of spare parts in chapter "Documents") ● Designation ● Component number according to list of spare parts ● Number of pieces ●...
- Page 23 R&S SMU200A Service and Repairs Contents of the Manuals for the R&S SMU200A Service manual - instrument This service manual for the instrument contains information on checking specs, instrument align- ment, repairs and troubleshooting. The service manual – instrument contains all the information you will need to repair the instrument by means of board replacement.
- Page 24 R&S SMU200A Tabbed Divider Overview Tabbed Divider Overview Procedure in Case of Service and Ordering of Spare Parts Contents of the Service Manual for the Vector Signal Generator R&S SMU200A Tabbed Divider Index Chapter 1: Performance Test Chapter 2: Adjustment...
- Page 25 R&S SMU200A Index Index FADER ................. 3.12 Adjustments ..............2.1 Fading Simulator............3.12 Fan does not work ............3.17 Troubleshooting ............3.29 Faulty RF Output Signal..........3.26 adjustment error.............3.41 Firmware update ............. 4.1 Amplitude modulation Test procedure ....1.30, 1.33 Frequency Test procedure ........1.10, 1.82 Attenuator 3 GHz.............3.8...
- Page 26 Index R&S SMU200A no baseband signal ............3.31 SATT3 3GHz ............3.7, 3.8 No output level for Analog Wideband I/Q In....3.29 SATT6C 6GHz............3.7, 3.8 No output level for Internal Baseband I/Q In....3.28 Setup IQOP3 CAL DAC voltages........3.41 No signal or faulty signal at the RF output .....3.26 Short-circuit of one or more operating voltages.....
-
Page 27: Table Of Contents
R&S SMU200A Contents Chapter 1 Contents - Chapter 1 "Performance Test" 1 Checking the Rated Characteristics..............1.1 Measuring Equipment and Accessories ..................1.1 Test Assemblies ..........................1.3 Standard Test Assembly for Analog Modulations ..............1.3 Test Assembly for Residual AM ....................1.3 Test Assembly for I/Q Modulation ....................1.4 Test Assembly for SSB Phase Noise..................1.4... -
Page 28: Checking The Rated Characteristics
R&S SMU200A Measuring Equipment and Accessories 1 Checking the Rated Characteristics This performance test describes the steps for testing the R&S SMU Signal Generator family and the installed options with respect to function and compliance with specifications. The R&S SMU Signal Generator family comprises the following instruments:... - Page 29 Measuring Equipment and Accessories R&S SMU200A Item Type of Instrument Required Characteristics Suitable Instrument R&S Order No. VSWR bridge 100 MHz to RF Agilent 773D directivity > 30 dB DC voltage source Setting range 0 to 10 V R&S NGMD35 0117.7127.02...
-
Page 30: Test Assemblies
R&S SMU200A Test Assemblies Test Assemblies Standard Test Assembly for Analog Modulations Test equipment RF analyzer (Table 1-1, item 7) Signal generator (Table 1-1, item 5) Test setup The RF analyzer is used as a modulation analyzer. The signal generator is used as modulation source in case of external modulation. -
Page 31: Test Assembly For I/Q Modulation
Test Assemblies R&S SMU200A Test Assembly for I/Q Modulation Test equipment - Demodulator for digital modulation (Table 1-2, item 23) - Arbitrary waveform generator (Table 1-1, item 24) - Program for simulation of digital modulations (Table 1-1, item 25) - Controller to industry standard (Table 1-1, item 4) -
Page 32: Test Assembly For Output Impedance (Vswr)
R&S SMU200A Test Assemblies Test Assembly for Output Impedance (VSWR) Test equipment VSWR bridge (Table 1-2, item 26), Second signal generator (Table 1-1, item 5) Spectrum analyzer (Table 1-1, item 24) Test setup RF Generator Directional coupler Ref. 2nd RF... -
Page 33: Test Assembly For Settling Time With Fast Hopp Bus
Test Assemblies R&S SMU200A Test Assembly for Settling Time with Fast Hopp Bus Note: R&S SMATE only Test equipment Spectrum analyzer (Table 1-2, item 24) Pulse generator (Table 1-2, item 17) FHOP-Bus generator (Table 1-2, item 29) Test setup Trigger pulse Fast hop bus 10 MHz ref. - Page 34 R&S SMU200A Test Assemblies Table 1-3 Function of data bits of FHOP bus (fhop_data line, see following figure) and their function for controlling fast frequency hopping Data bit name (bit number) Function path (39) Selects RF path: 0 = RF path A;...
-
Page 35: Preparation, Recommended Test Frequencies And Levels
Preparation, Recommended Test Frequencies and Levels R&S SMU200A Preparation, Recommended Test Frequencies and Levels To ensure proper conditions for the performance test and prevent setting errors, the instrument must be prepared as follows: • Allow for a minimum warm-up time of 30 minutes at ambient temperature. -
Page 36: Test Procedures
R&S SMU200A Test Procedures Test Procedures Reference Frequency Output of Internal Reference Important: Allow the DUT to warm up for at least 2 hours before the measurement. Test equipment RF power meter (Table 1-2, item 8) Frequency counter (Table 1-1, item 1) Test setup Connect an RF power meter to the REF OUT output (on rear panel). -
Page 37: Frequency
Test Procedures R&S SMU200A Frequency Frequency Setting Test equipment Frequency counter (Table 1-2, item 1) Test method The frequency setting is checked using a frequency counter whose reference frequency is in sync with that of the DUT. Measurement Setting on DUT:... - Page 38 R&S SMU200A Test Procedures Measurements in List mode Connect pulse generator as trigger source to the INSTR TRIG connector of DUT, analyzer and oscilloscope. External triggering at 1.4 V, positive edge. Settings on DUT: In the List mode, generate a list containing the two test frequencies F1 and F2 with a level of 0 dBm each.
-
Page 39: Spectral Purity
Test Procedures R&S SMU200A Spectral Purity Harmonics Test equipment Spectrum analyzer (Table 1-2, item 24) Test setup Connect the spectrum analyzer to the RF output of the DUT. Synchronize reference frequencies of analyzer and DUT. Recommended settings on the Reference level = test level + 3 dB, 10 dB/div. - Page 40 R&S SMU200A Test Procedures Nonharmonics Test equipment Same as for harmonics Test setup Same as for harmonics Measurement Setting on analyzer: AMPT/MIXER/MIXER LVL MANUAL –5 dBm First the level is measured at the test frequency as reference, then a signal is searched for at the analyzer frequency.
- Page 41 Test Procedures R&S SMU200A Setting on DUT Analyzer search frequency in MHz Frequency in MHz 200.0 40.00 200.0 160.00 200.0 360.00 172.0 180.00 172.0 8.00 172.0 164.00 152.0 128.00 152.0 24.00 200.0 1040.00 at P Nonharmonics of output mixer with option R&S B22, test level P...
- Page 42 R&S SMU200A Test Procedures Setting on DUT Analyzer search frequency in MHz Frequency in MHz 1990.39112151 1990.48938151 1924.53660942 1924.75680942 2040.13419274 2039.79070274 2043.92934349 2044.11700349 2104.44390554 2106.01121554 2110.663972 2111.026712 2163.630319 2163.796569 2167.27616036 2168.19042036 2210.14856183 2210.25761183 2356.00000 2356.54075 2684.95121340 2684.61542340 2985.158823 2985.300303 1.00 1201.00...
- Page 43 Test Procedures R&S SMU200A Non-systematic nonharmonics Measurement Settings on DUT: Test frequencies 93, 520, 749, 751, 1499, 1501, 2500, 3000, 3001, 4399, 4400, 5499, 6000 MHz Test levels P unmodulated and P with I/Q modulation, dc input at max. level...
- Page 44 R&S SMU200A Test Procedures Wideband Noise Test assembly Connect spectrum analyzer to RF socket of the DUT. Test method Operate the spectrum analyzer in the CHANNEL POWER mode. Set SPAN to 400 kHz, channel bandwidth to 350 kHz, detector to RMS and MIXER LVL MANUAL to –5 dBm.
- Page 45 Test Procedures R&S SMU200A SSB Phase Noise Test assembly Test Assembly for SSB Phase Noise See section " ", page 1.4. Test method The two generators are set to the test frequency and synchronized with a phase offset of 90° (phase quadrature). Mixing to 0 Hz suppresses the RF carrier, and due to the phase quadrature the mixer supplies a voltage corresponding to the phase difference between the input signals.
- Page 46 R&S SMU200A Test Procedures Residual FM Test assembly Test Assembly for SSB Phase Noise See section " ", page 1.4. Test Method The Residual FM is calculated from the phase noise measurement data. The measurement setup and procedure is identical to the phase noise measurement.
- Page 47 Test Procedures R&S SMU200A Residual AM Test assembly Test Assembly for Residual AM See section " ”, page 1.3. Test method The signal is AM-demodulated with a zero Bias Schottky Detector. Measurement Settings on DUT: - Frequency 1 GHz - Level according to the mixer specification in linear range...
-
Page 48: Level Data
R&S SMU200A Test Procedures Level Data Level Uncertainty Test method The level uncertainty is measured in two steps. First, the frequency response is measured at a fixed level with high frequency resolution. Then the level dependant uncertainty is measured at fixed frequencies over the specified range. - Page 49 Test Procedures R&S SMU200A Measurement Settings on DUT Frequency: test frequency Leve: (P –40) dBm, unmodulated Setting on the analyzer Test frequency SPAN 0 Hz RES BW 10 Hz SWEEP TIME 500 ms Read out marker as rms summary Reference level (P –40) dBm...
- Page 50 R&S SMU200A Test Procedures Output Impedance Test assembly Test Assembly for Output Impedance (VSWR) See section " ", page 1.5. Test method Since the VSWR of a source must be measured, a purely passive measurement using the VSWR bridge is only possible with levels where the VSWR is determined by the output impedance of the attenuator only.
- Page 51 Test Procedures R&S SMU200A Measurement with high levels Settings on DUT: - Level: test level - Frequency: test frequency, unmodulated Settings on spectrum analyzer: - Test frequency, span 0 Hz, test level - Resolution and video bandwidth 10 kHz - Linear level scale...
- Page 52 R&S SMU200A Test Procedures Settling Time Test assembly Connect the spectrum analyzer (Table 1-2, item 24) to the RF connector of the DUT. Test method The spectrum analyzer is operated as a fast level meter with a span of 0 Hz.
- Page 53 R&S SMU200A Test Procedures Overvoltage Protection (only R&S SMU) Test equipment Signal generator (Table 1-1, item 5) Power amplifier (Table 1-1, item 13) Test setup Connect a signal generator with a subsequent power amplifier with a power output of more than 33 dBm.
-
Page 54: Internal Modulation Generator
Test Procedures R&S SMU200A Internal Modulation Generator Test equipment Spectrum analyzer (Table 1-2, item 24) AC/DC voltmeter (Table 1-1, item 19) Test setup Connect the spectrum analyzer to the LF socket of the DUT. For level measurement connect the AC/DC Voltmeter to the LF socket of the DUT. - Page 55 R&S SMU200A Test Procedures Frequency response Test equipment AC voltmeter (Table 1-2, item 19) Test setup Connect the AC voltmeter to the LF socket of the DUT. Measurement Settings on DUT: LF Output menu: Vary LF Gen Frequency from 10 Hz to 1 MHz.
-
Page 56: Amplitude Modulation
Test Procedures R&S SMU200A Amplitude Modulation Uncertainties Test assembly Standard Test Assembly for Analog Modulations See section " ", page 1.3. Measurement Settings on DUT: RF On Level 0 dBm: Amplitude Modulation menu: Source Internal Test Method Spectrum Measure the carrier power... - Page 57 R&S SMU200A Test Procedures AM Distortion Test assembly Standard Test Assembly for Analog Modulations See section " ", page 1.3. Measurement Settings on DUT: RF On Level P Amplitude Modulation menu: LF Gen Frequency 1 kHz Source Internal AM depth 30%.
- Page 58 Test Procedures R&S SMU200A AM Frequency Response Test assembly Standard Test Assembly for Analog Modulations See section " ", page 1.3. Measurement Settings on DUT: RF On Level P +3 dBm Amplitude Modulation menu: Source External External Coupling DC AM depth 60%.
-
Page 59: Frequency Modulation (Option R&S B20/B22)
R&S SMU200A Test Procedures Frequency Modulation (Option R&S B20/B22) Test Methodes Test assembly Standard Test Assembly for Analog Modulations See section " ", page 1.3. Test Method "Spectrum • The FM/PhiM deviation is determined by a spectrum measurement. Measurement" All relevant spectral components of the modulation spectrum are measured and modulation index m is computed via Bessel functions. - Page 60 Test Procedures R&S SMU200A Test Method "FFT Demodulation • The FM deviation and distortion are determined by digital signal (Option FS-K7)" processing in the spectrum analyzer. • Restrictions: At large deviations and low modulation rates the settable measuring time maybe insufficient to determine deviation (1 period minimum needed) or distortion.
- Page 61 R&S SMU200A Test Procedures FM Distortion Test Method Test Methodes FFT Demodulation (see chapter " ") Measurement Settings on DUT: RF On Level 0 dBm Frequency Modulation menu: LF Gen Frequency 10 kHz Source Internal FM deviation 1 MHz. Settings on R&S FSQ:...
- Page 62 Test Procedures R&S SMU200A FM Frequency Response Test Method FFT Demodulation Test Methodes Spectrum Measurement (see chapter " ") Measurement Settings on DUT: RF On Level 0 dBm Frequency Modulation menu: Source External FM deviation 100 kHz. Setting on the signal generator: for frequencies up to 300 kHz the internal LF generator of the signal generator is used, >300 kHz the RF output.
- Page 63 R&S SMU200A Test Procedures Synchronous AM with FM Test assembly Standard Test Assembly for Analog Modulations See section " ", page 1.3. Measurement Settings on DUT: RF On Level 0 dBm Frequency Modulation menu: LF Gen Frequency 1 kHz Source Internal FM deviation 40 kHz.
- Page 64 Test Procedures R&S SMU200A Carrier Frequency Offset with FM Test assembly Standard Test Assembly for Analog Modulations See section " ", page 1.3. Measurement Settings on DUT: RF On Level 0 dBm Frequency 1 GHz Frequency Modulation menu: LF Gen Frequency 1 MHz Source Internal FM deviation 1 MHz.
-
Page 65: Phase Modulation (Option R&S B20/B22)
R&S SMU200A Test Procedures Phase Modulation (Option R&S B20/B22) PhiM Setting Uncertainty Test Method Test Methodes Spectrum Measurement (see chapter " "). Measurement Settings on DUT: RF On Level 0 dBm: Phase Modulation menu: Source Internal State on Settings on spectrum analyzer: Test Methodes"... - Page 66 Test Procedures R&S SMU200A PhiM Frequency Response Test method Test Methodes Spectrum measurement (see chapter " "). Measurement Settings on DUT: RF On Level 0 dBm Frequency Modulation menu: Source External PhiM deviation 1 rad. Setting on the signal generator: for frequencies up to 300 kHz the internal LF generator of the signal generator is used, >300 kHz the RF output.
-
Page 67: Pulse Modulation
R&S SMU200A Test Procedures Pulse Modulation ON/OFF Ratio Test equipment Spectrum analyzer (Table 1-2, item 24) Pulse generator (Table 1-1, item 17) Test setup To determine the ON/OFF ratio, connect the spectrum analyzer to the RF output socket of the DUT and the pulse generator to the EXT MOD socket on the rear of the DUT. - Page 68 Test Procedures R&S SMU200A Video Crosstalk Test assembly As above for ON/OFF Ratio Measurement Setting on pulse generator: Squarewave pulse sequence with a frequency of 100 kHz, TTL level Setting on DUT: RF On Frequency: 1 GHz Level: 0 dBm...
-
Page 69: I/Q Modulation
R&S SMU200A Test Procedures I/Q modulation Input Impedance (VSWR) Test equipment Test Assembly for Output Impedance (VSWR) See section " ", page 1.5. Test setup Connect the test port to the I or Q input instead of the RF output. - Page 70 Test Procedures R&S SMU200A Error Vector Test assembly Test Assembly for I/Q Modulation See section " ", page 1.4. Instead of a static measurement, an equivalent dynamic measurement Measurement with a low symbol rate is carried out. Settings on DUT:...
- Page 71 R&S SMU200A Test Procedures Measurement Settings on DUT: RF On Frequency 100 MHz Level 0 dBm I/Q Settings menu: Source Analog Wideband I/Q Input Crest Factor 3 dB State On Setting on signal generator: Level 0.5 V (Vpeak) corresponding to 4 dBm...
- Page 72 Test Procedures R&S SMU200A Measurement on path B Since path B has no wideband I/Q Input, measurement has to be done using the internal baseband generator. The measurement is done as described in chapter “Image Rejection over the Complete Unit” (see below). Use offset frequency 10 kHz.
- Page 73 R&S SMU200A Test Procedures Measurement of quadrature error Test Assembly for I/Q Modulation Test assembly See section " ", page 1.4. Measurement Settings on DUT: RF On Frequency 900 MHz Level 0 dBm I/Q Settings menu: Source Analog Wideband I/Q Input...
-
Page 74: Broadband Amplitude Modulation
Test Procedures R&S SMU200A Broadband Amplitude Modulation Test equipment Spectrum analyzer (Table 1-2, item 24) Signal generator (Table 1-1, item 5) Test setup Connect the RF output of the DUT to the spectrum analyzer, connect the signal generator to the I input of the DUT. -
Page 75: Baseband Input (Option R&S B17)
R&S SMU200A Test Procedures Baseband Input (Option R&S B17) Input Impedance (VSWR) Test equipment Test Assembly for Output Impedance (VSWR) See section " ", page 1.5. Test setup Connect the test port to the I or Q input instead of the RF output. - Page 76 Test Procedures R&S SMU200A Aliasing Filter Bandwidth Test equipment Power meter (Table 1-2, item 8) Signal generator (Table 1-1, item 5) Test setup Connect the I output of the DUT to the power meter, and connect RF-output of the signal generator to the I input of the DUT.
- Page 77 R&S SMU200A Test Procedures Residual Carrier Test equipment Spectrum analyzer (Table 1-2, item 24) Test setup Connect the spectrum analyzer to the RF output of the DUT. Measurement Settings on DUT: Frequency 1 GHz Level 0 dBm, ALC State OFF (S&H)
- Page 78 Test Procedures R&S SMU200A Image Rejection over the Complete Unit The equipment layout for generating multicarrier signals includes the options R&S B13 (baseband main module), R&S B10 (baseband generator) and R&S K61 (multicarrier CW). Test equipment Spectrum Analyzer (Table 1-2, item 24)
- Page 79 R&S SMU200A Test Procedures Adjacent Channel Power for 3GPP FDD The equipment layout for 3GPP FDD signal generation includes the options R&S B13 (Baseband Main Module), R&S B10 (Baseband Generator) and R&S K42 (Digital Standard 3GPP FDD). Test equipment Signal analyzer R&S FSQ including option R&S FSQ-K70 (Vector Signal Analysis) (table 1-1, pos.
-
Page 80: Differential I/Q Output (Option R&S B16)
Test Procedures R&S SMU200A Differential I/Q Output (Option R&S B16) Important: Before the measurement, Signal Analyzer R&S FSQ must be calibrated as follows by means of a reference measurement at the measurement frequency in question: Connect the RF output of the DUT to the power meter and measure the output level. - Page 81 R&S SMU200A Test Procedures Output voltage Test equipment AC/DC Voltmeter R&S URE 3 (table 1-1, pos. 19). Test setup Connect the voltmeter to the I/(and Q)-output of the DUT. Test method A single sideband signal is generated using the Custom Digital Modulation functionality by selecting only one carrier (DC-Signal), the offset is set with the Frequency Offset function in the Baseband menu.
- Page 82 Test Procedures R&S SMU200A Offset voltage Test equipment AC/DC Voltmeter R&S URE 3 (table 1-1, pos. 19). Test setup Connect the multimeter to the I and I Bar (Q and Q Bar)-output of the DUT. Test method The I and I Bar (or Q and Q Bar) voltage are measured for different offset values.
-
Page 83: Baseband Digital Iq-Output (Option R&S -B18)
R&S SMU200A Test Procedures Baseband Digital IQ-Output (Option R&S -B18) Test equipment Signal generator (Table 1-2, item 5), equiped with Digital Input (B17) Cable for Digital-Baseband IO (Table 1-2, item 30), Test setup Connect signal generator’s Digital Input to the Digital Output of the DUT with the Mini D Ribbon cable. -
Page 84: Internal Baseband Generator
Test Procedures R&S SMU200A Internal Baseband Generator Modulated RF Frequency Response over the Complete Unit The equipment layout for generating multicarrier signals includes the options R&S B13 (baseband main module), R&S B10 (baseband generator) and R&S K61 (multicarrier CW). RF Frequency Response due to Modulation (also see section “... - Page 85 R&S SMU200A Test Procedures Image Rejection over the Complete Unit The equipment layout for generating multicarrier signals includes the options R&S B13 (baseband main module), R&S B10 (baseband generator) and R&S K61 (multicarrier CW). Test equipment Signal analyzer R&S FSQ (table 1-1, pos. 24).
- Page 86 Test Procedures R&S SMU200A IQ Output, Frequency Response and Imbalance Important: Before the measurement, Signal Analyzer R&S FSQ must be calibrated as follows by means of a reference measurement at the measurement frequency in question: Connect the RF output of the DUT to the power meter and measure the output level.
- Page 87 R&S SMU200A Test Procedures IQ Output, Offset, Wideband Noise Test equipment Signal analyzer R&S FSQ (table 1-1, pos. 24), Multimeter (table 1-1, pos. 19) Test setup Connect the signal analyzer to the I-output of the DUT. Test method First a reference measurement is performed in the menu (Multicarrier CW) with one carrier at 10 MHz (other carriers at zero).
- Page 88 Test Procedures R&S SMU200A IQ Output, Spurious Free Dynamic Range (SFDR) Note: Make sure that the measured spurious signal does not come from the analyzer. The following tests can be performed for this purpose: - Switch off the signal from the DUT and repeat the measurement; if the signal remains, it may come from the analyzer.
- Page 89 R&S SMU200A Test Procedures Aliasing Filter – D/A Converter, Interpolation Spectra Note: Make sure that the measured spurious signal does not come from the analyzer. The following tests can be performed for this purpose: - Switch off the signal from the DUT and repeat the measurement; if the signal remains, it may come from the analyzer.
- Page 90 Test Procedures R&S SMU200A Function Trigger and Marker The equipment layout for generating the digital modulation signals includes the options R&S B13 (Baseband Main Module) and R&S B10 (Baseband Generator). Test equipment Oscilloscope (table 1-1, pos 7) Trigger source Test setup Connect trigger source to trigger input of DUT.
- Page 91 R&S SMU200A Test Procedures Function External Clock The equipment layout for generating the digital modulation signals includes the options R&S B13 (Baseband Main Module) and R&S B10 (Baseband Generator). Test equipment Vector Signal Generator DUT (table 1-1, pos. Pos. 5) , Signal Analyzer R&S FSQ with option R&S FSQ-K70...
- Page 92 Test Procedures R&S SMU200A Function External Data The equipment layout for generating the digital modulation signals includes the options R&S B13 (Baseband Main Module) and R&S B10 (Baseband Generator). Test equipment Vector signal generator DUT (table 1-1, pos. 5) , Signal Analyzer R&S FSQ with option R&S FSQ-K70 (Vector Signal Analysis) (table 1-1,...
- Page 93 R&S SMU200A Test Procedures Function Level Attenuation The equipment layout for generating GSM/EDGE signals includes the options R&S B13 (Baseband Main Module), R&S B10 (Baseband Generator) and R&S K40 (Digital Standard GSM/EDGE). Test equipment Signal analyzer (table 1-1, pos. 24) with options R&S FSQ-K70 (Vector Signal Analysis) and FS-K5 (GSM/EDGE Measurements).
- Page 94 Test Procedures R&S SMU200A AUX I/O and BNC Connectors Test equipment Adapter R&S Z5 (AUX I/O to BNC) (table 5-1, Pos. 27); several BNC cable Test setup Plug adapter into AUX I/O interface Make the following BNC connections on the adapter:...
- Page 95 R&S SMU200A Test Procedures GSM and GSM Normal Burst The equipment layout for generating GSM/EDGE signals includes the options R&S B13 (Baseband Main Module), R&S B10 (Baseband Generator) and R&S K40 (Digital Standard GSM/EDGE). Test equipment Signal analyzer R&S FSQ including options R&S FSQ-K70 (Vector Signal Analysis) and R&S FS-K5 (GSM/EDGE) (table 1-1, pos.
- Page 96 Test Procedures R&S SMU200A Measurement 2 Settings on DUT: Level: max. level, refer to data sheet (depending on options) Frequencies: 910 MHz, 1850 MHz (and 5 GHz for R&S B106) GSM/EDGE: State ON Settings on analyzer GSM/EDGE FREQ CENTER 910 MHz, 1850 MHz (and 5 GHz)
- Page 97 R&S SMU200A Test Procedures GSM Edge and GSM Edge Burst The equipment layout for generating GSM/EDGE signals includes the options R&S B13 (Baseband Main Module), R&S B10 (Baseband Generator) and R&S K40 (Digital Standard GSM/EDGE). Test equipment Signal analyzer R&S FSQ including options R&S FSQ-K70 (Vector Signal Analysis) and R&S FS-K5 (GSM/EDGE) (table 1-1, pos.
- Page 98 Test Procedures R&S SMU200A Measurement 2 Settings on DUT: Level: max. level, refer to data sheet (depending on options) Frequencies: 910 MHz, 1850 MHz (and 5 GHz for R&S B106) GSM/EDGE: State ON Slot 0 Burst Type Edge Settings on analyzer...
- Page 99 R&S SMU200A Test Procedures Modulation error for WCDMA - 3GPP The equipment layout for generating the digital modulation signals includes the options R&S B13 (Baseband Main Module) and R&S B10 (Baseband Generator). Test equipment Signal analyzer R&S FSQ including option R&S FSQ-K70 (Vector Signal Analysis) (table 1-1, pos.
- Page 100 Test Procedures R&S SMU200A Adjacent Channel Power for 3GPP FDD The equipment layout for 3GPP FDD signal generation includes the options R&S B13 (Baseband Main Module), R&S B10 (Baseband Generator) and R&S K42 (Digital Standard 3GPP FDD). Test equipment Signal analyzer R&S FSQ including option R&S FSQ-K70 (Vector Signal Analysis) (table 1-1, pos.
-
Page 101: Digital Standard Gps (R&S K44)
R&S SMU200A Test Procedures Digital Standard GPS (R&S K44) There is no testing required for the GPS (R&S K44) software personality. The functions required for this Internal Baseband Generator ”. personality are already verified performing the tests defined in chapter “... -
Page 102: Fader And Fader Extension (R&S B14 / B15)
Test Procedures R&S SMU200A Fader and Fader Extension (R&S B14 / B15) The equipment layout for fading includes the options R&S B13 (Baseband Main Module), R&S B10 (Baseband Generator) and R&S B14/B15. A first test is performed by internal means. - Page 103 R&S SMU200A Test Procedures Measurement As a reference perform the measurement 1 of chapter “GSM and GSM Normal Burst” at RF = 910 MHz. Denote results of phase error and EVM. Now the Baseband has to shift its output in frequency.
-
Page 104: Additive White Gaussian Noise (R&S K62)
Test Procedures R&S SMU200A Additive White Gaussian Noise (R&S K62) Test equipment Signal analyzer R&S FSQ (table 1-1, pos. 24) Test setup Connect signal analyzer to RF output of DUT. Test method A digital modulated signal is generated and noise is added. Using the channel power measurement facility of the spectrum analyzer, the carrier power and the power of a section of the noise spectrum is determined. -
Page 105: Bit Error Rate Tester (Ber, Option R&S K80)
R&S SMU200A Test Procedures Bit Error Rate Tester (BER, Option R&S K80) The Bit Error Rate Tester is a firmware option, realized in a FPGA. The functionality of this FPGA is tested in chapte “” on page 1.68. Performing these tests successfully implements Option R&S K80 to be functional. -
Page 106: Testing With Option B90 (Mimo) Enabled
Testing with Option B90 (Mimo) enabled R&S SMU200A Testing with Option B90 (Mimo) enabled If the DUT is equipped with Option B90 the function of the LO_in_ext and LF_out_ext have to be verified. Also some of the tests which are always conducted have to be performed additionally in the coupled mode of the local oscillator. - Page 107 R&S SMU200A Testing with Option B90 (Mimo) enabled LO_in_ext Test equipment RF analyzer (Table 1-1, item 7) Signal generator (Table 1-1, item 5) Test setup The signal generator is used as RF source for the LO_in_ext. Signal Generator LO_in_ext 10 MHz Ref erence...
-
Page 108: Tests Extended For B90
Testing with Option B90 (Mimo) enabled R&S SMU200A Tests extended for B90 Frequency Setting Test equipment Frequency counter (Table 1-2, item 1) Test method The frequency setting is checked using a frequency counter whose reference frequency is in sync with that of the DUT. - Page 109 R&S SMU200A Testing with Option B90 (Mimo) enabled Nonharmonics Test equipment Same as for harmonics Test setup Same as for harmonics Preparation for B90 Single carrier MCCW has to be applied to IQ Modulator The upper frequency is determined by the lower maximum frequency of both paths (i.e.
- Page 110 Testing with Option B90 (Mimo) enabled R&S SMU200A RF Frequency Response due to Modulation Test method This measurement to be performed as without B90 but with the LOSC coupling switched on Residual Carrier and Leakage Test method This measurement to be performed as without B90 but with the LOSC...
-
Page 111: Baseband Digital Iq-Output (Option R&S Smu/Smj-B18)
R&S SMU200A Baseband Digital IQ-Output (Option R&S SMU/SMJ-B18) Baseband Digital IQ-Output (Option R&S SMU/SMJ-B18) The number of necessary measurement depends on the number of installed R&S -B18, see following table: 1 x BB 2 x BB Installed paths I/Q output: frequency response and amplitude-equality... -
Page 112: Internal Baseband Generator
Baseband Digital IQ-Output (Option R&S SMU/SMJ-B18) R&S SMU200A Internal Baseband Generator Function Trigger and Marker The equipment layout for generating the digital modulation signals includes the options R&S SMU -B13 (Baseband Main Module) and R&S SMU -B10 (Baseband Generator). Test equipment... - Page 113 R&S SMU200A Baseband Digital IQ-Output (Option R&S SMU/SMJ-B18) Function External Clock The equipment layout for generating the digital modulation signals includes the options R&S SMU -B13 (Baseband Main Module) and R&S SMU -B10 (Baseband Generator). Test equipment - See section “Test Assembly for Measurement realized by RF Evulation on...
- Page 114 Baseband Digital IQ-Output (Option R&S SMU/SMJ-B18) R&S SMU200A Measurement Settings on DUT Custom Digital Mod: State ON Data Source Pattern 010101010101 Modulation Type 8PSK Symbol Rate 20 MHz Filter RRC (Root-Raised-Cosine) Roll off 0.22 Clock Source: External Mode: Multiple Symbol...
- Page 115 R&S SMU200A Baseband Digital IQ-Output (Option R&S SMU/SMJ-B18) Function External Data The equipment layout for generating the digital modulation signals includes the options R&S SMU -B13 (Baseband Main Module) and R&S SMU -B10 (Baseband Generator). Test equipment - Vector signal generator DUT (table 1-1, pos. 4), Signal Analyzer R&S FSQ with option R&S FSQ-K70 (Vector Signal Analysis)
- Page 116 Baseband Digital IQ-Output (Option R&S SMU/SMJ-B18) R&S SMU200A Measurement Settings on test DUT Custom Digital Mod: State ON Data Source External Serial Modulation Type 8PSK Symbol Rate 20MHz Filter RRC (Root-Raised-Cosine) Roll off 0.22 Clock Source: External Global Settings Threshold Data Input 1.5 V...
- Page 117 R&S SMU200A Baseband Digital IQ-Output (Option R&S SMU/SMJ-B18) AUX I/O and BNC Connectors Test equipment - Adapter R&S SMU-Z5 (AUX I/O to BNC) (table 1-1, Pos. 13); several BNC cable Test setup Plug adapter into AUX I/O interface Make the following BNC connections on the adapter:...
- Page 118 Baseband Digital IQ-Output (Option R&S SMU/SMJ-B18) R&S SMU200A Modulation error for WCDMA - 3GPP The equipment layout for generating the digital modulation signals includes the options R&S SMU -B13 (Baseband Main Module) and R&S SMU -B9/10/11 (Baseband Generator). Test equipment See section „Test Assembly for Measurement realized...
- Page 119 R&S SMU200A Baseband Digital IQ-Output (Option R&S SMU/SMJ-B18) Adjacent Channel Power for 3GPP FDD The equipment layout for 3GPP FDD signal generation includes the options R&S SMU -B13 (Baseband Main Module), R&S SMU -B9/10/11 (Baseband Generator) and R&S SMU -K42 (Digital Standard 3GPP FDD).
- Page 120 Baseband Digital IQ-Output (Option R&S SMU/SMJ-B18) R&S SMU200A The number of necessary measurement depends on the number of installed RF- and baseband paths, see following table: Installed paths 1 x RF 2 x RF 2 x RF 1 x RF...
- Page 121 R&S SMU200A Contents - Adjustments Contents - Chapter 2 "Adjustments" 2 Adjustments......................2.1 Internal Adjustments ........................2.1 External Adjustments Requiring Measurement Equipment............2.1 External Level Correction ......................2.1 I/Q Skew Correction, Modulation Frequency Response Correction.........2.1 Adjustments of the Complete Unit....................2.1 Adjustments after Module Replacement ..................2.2 Procedures after Replacing the Front Module Controller or the Lithium Battery......2.3...
- Page 122 R&S SMU200A Adjustments 2 Adjustments This chapter describes all necessary measures to restore the performance of the R&S SMU after module replacement. There are no manual adjustments to be performed. Internal and external adjustment routines are implemented for this purpose.
- Page 123 Adjustments R&S SMU200A Adjustments after Module Replacement Changed module Required adjustment/correction Calibration necessary (refer to chapter "Checking the rated characteristics") Front Module Controller See below, "Procedures after Replacing the None Front Module Controller or the Lithium Battery" Harddisk Drive Setup/Internal Adjustments/Adjust All...
- Page 124 R&S SMU200A Adjustments Procedures after Replacing the Front Module Controller or the Lithium Battery 1. Before switching on, connect an USB keyboard to the R&S SMU. 2. After switching on, immediately press the "Delete" key to enter CMOS Setup Utility.
- Page 125 R&S SMU200A Contents – Repair Contents – Chapter 3 "Repair" 3 Repair ........................3.1 Instrument Design and Function Description ................3.1 RF-Section ..........................3.1 Standard Synthesis Module SSYN ................3.1 Synthesis Extension Module SYNEX ................3.3 IQ Output Module 3GHz IQOP3 ..................3.4 IQ Output Module 6GHz IQOP6 ..................3.6 Attenuators 3 GHz SATT3 and 6 GHz SATT6 ..............3.7...
- Page 126 Contents – Repair R&S SMU200A Troubleshooting - Module IQOP3 ..................3.38 Internal adjustments “Adjust Level”, “Adjust I/Q Modulator” ........3.38 Input and Output Signals .....................3.38 Error messages concerning the module IQOP3 ............3.39 Tests on Submodule IOQOP3 LCM ................3.40 Troubleshooting - Module IQOP6 ..................3.43 Internal adjustments , Adjust I/Q Modulator ..............3.43...
- Page 127 R&S SMU200A Contents – Repair Replacing the Labelling Panel ....................3.58 Replacing the Fans E1 and E2 ....................3.59 Removing the Fans E1 and E2..................3.59 Installing the New Fans....................3.59 Removing the Fan E3 ....................3.59 Installing the New Fan ....................3.60 Replacing the BNC Board Rear A120..................3.60 Removing the BNC Board Rear...................3.60...
-
Page 128: Repair
R&S SMU200A Instrument Design and Function Description 3 Repair This chapter describes the design of the R&S SMU, measures for tracing errors down to module level and, in particular, the replacement of modules. Options are denominated without headers, so option B102 means R&S SMU-B102. - Page 129 Instrument Design and Function Description R&S SMU200A Fractional-N Loop The Fractional-N Loop submodule handles fine resolution for the entire synthesizer. It contains a PLL in which a tuneable oscillator in the range from 652.689 MHz to 676 MHz is synchronized to a reference frequency (43.51 MHz to 45.06 MHz) obtained via fractional-N division.
-
Page 130: Synthesis Extension Module Synex
R&S SMU200A Instrument Design and Function Description Output Unit Frequency Doubler Module By using frequency doubling, the Frequency Doubler module expands the frequency range of the synthesizer upward to 3025 MHz. Tunable highpasses and lowpasses connected in series ensure sufficient suppression of subharmonic spurious. -
Page 131: Iq Output Module 3Ghz Iqop3
Instrument Design and Function Description R&S SMU200A Option Low Phase Noise The option B22 provides two high quality quartz reference oscillators, working on 10 MHz and 100 MHz. The 100 MHz oscillator is synchronised to the 10 MHz oscillator or, with reference set to external, to a 40 MHz signal from the SSYN module. - Page 132 R&S SMU200A Instrument Design and Function Description LF AM Two modulation inputs of narrow bandwidth are available as the LF AM source. They can be selected via a switching matrix. Either DC or AC coupling is possible. The modulation depth can be set from 0 to 100% using a DAC.
-
Page 133: Iq Output Module 6Ghz Iqop6
Instrument Design and Function Description R&S SMU200A IQ Output Module 6GHz IQOP6 IQ Output Module 6 GHz doubles the output frequency of module Standard Synthesis and provides the output power in the frequency range 3 to 6 GHz. Doubler, Filter Bank, CW Path The RF signal provided by module Standard Synthesis is either connected through to output SYNRFE or is feed into the doubler and then into a switchable filter assembly. -
Page 134: Attenuators 3 Ghz Satt3 And 6 Ghz Satt6
R&S SMU200A Instrument Design and Function Description Attenuators 3 GHz SATT3 and 6 GHz SATT6 The attenuation switchover is performed by solid state switches to increase the life cycle of the module. The switches are arranged in a matrix designed to minimize the minimal attenuation. -
Page 135: Overvoltage Protection (Option For Satt3)
Instrument Design and Function Description R&S SMU200A Overvoltage Protection (Option for SATT3) By disconnecting the instrument output with a relay, the overvoltage protection prevents damage to the instrument as a result of an impermissible external voltage being supplied at the output. The disconnect threshold depends on the attenuator configuration. -
Page 136: Dac Interface Dacif
R&S SMU200A Instrument Design and Function Description DAC Interface DACIF The DAC Interface (DACIF) module is a central module of the signal generator. It must always be present in the instrument. The following functions are provided. Thermal monitoring of the instrument, control of the instrument fans. The ON check of the power supply unit (overtemperature protection) is also linked logically to these functions. -
Page 137: Dac Board
Instrument Design and Function Description R&S SMU200A DAC Board One or two DAC Board modules are mounted on the DAC Interface motherboard, depending on the instrument configuration. If only one path is fitted, the DAC A slot (on the right-hand side when viewed from the front) must be mounted. -
Page 138: Universal Coder Unicod
R&S SMU200A Instrument Design and Function Description Universal Coder UNICOD A maximum of two of these modules can be fitted in the instrument, depending on the instrument configuration. If no Fading Simulator (option B14) is installed, the Universal Coder modules must be inserted directly next to the DAC Interface (slot 5 and 4, X150 and X140). -
Page 139: Fading Simulator (Fader) And Fading Simulator Extension (Fadex)
Instrument Design and Function Description R&S SMU200A Fading Simulator (FADER) and Fading Simulator Extension (FADEX) Depending on the configuration, the Fading Simulator module can be installed with or without Path Extension. Fading Simulator module without Fading Simulator Extension: The module must be installed in the signal flow downstream of the Universal Coder and upstream of the DAC Interface. -
Page 140: Power Supply Module
R&S SMU200A Instrument Design and Function Description Power Supply Module The power supply module provides all currents necessary for the operation of the Vector Signal Generator. It can be switched off and on by means of the power switch on the rear panel. After switching on the instrument is either ready for operation (STANDBY) or in operating mode, depending on the position of the standby switch on the instrument front panel. -
Page 141: Troubleshooting
Troubleshooting R&S SMU200A Troubleshooting The purpose of these troubleshooting instructions is to help to trace down malfunctions to board level. The instrument so can be made ready for use again by means of board replacement. If error tracing doesn’t show clear results, we recommend that you ship the instrument to our experts in the service centers (see address list) for module replacement and further error elimination. -
Page 142: Switch-On Problems
R&S SMU200A Troubleshooting Switch-On Problems • Error: Unit cannot be switched on. Action Possible error causes and further steps Check power-on switch on the rear Power switch OFF: Switch on power supply. Check fuses on the rear Check yellow LED (standby). - Page 143 Troubleshooting R&S SMU200A Action Possible error causes and further steps Switch on instrument. Check green LED LED remains unlit, power supply doesn’t start: Check signal PS_ONOFF at test point on underside of mainboard (near to rear panel): Rated value: < 1 V for ON.
- Page 144 R&S SMU200A Troubleshooting • Error: Short-circuit of one or more operating voltages Action Possible error causes and further steps Check on the bottom of the motherboard Since all operating voltages are fed to the modules via which of the voltages is short-circuited: fuses, no voltage / insufficient voltage here indicates that the power supply is defective.
-
Page 145: Problems With Booting
Troubleshooting R&S SMU200A Problems with Booting • Error: Unit does not start the application. Following switch-on, the Vector Signal Generator first boots the computer BIOS. After successful initialization of the computer the Windows XP operating system starts up. Subsequently, the application is loaded as a start-up program. - Page 146 R&S SMU200A Troubleshooting Normal action Error and error cause If this hard disk entry is missing, This procedure can be interrupted using the "PAUSE" key on the the hard disk may be faulty. connected external keyboard; pressing any other key continues execution of the program.
- Page 147 Troubleshooting R&S SMU200A Normal action Error and error cause A Boot Manager window now briefly appears. The If the instrument crashes during booting, you window contains the following options: can try to perform a Windows XP repair routine by pressing the F8 key. Pressing F8 displays...
- Page 148 R&S SMU200A Troubleshooting Normal action Error and error cause Graphical boot screen of Windows XP Embedded, If the instrument has started correctly so far, there is most probably no fault in the computer. a flashing light bar indicates that loading is in progress.
-
Page 149: Keyboard And Rotary Knob Test
Troubleshooting R&S SMU200A Subsequent to starting the operation system, the application for the Vector Signal Generator is Note: When the software is started, information on loaded in a start-up program. The program start is instrument configuration initiated automatically and generates a window,... -
Page 150: A Baseband Module Can Not Be Operated
R&S SMU200A Troubleshooting A Baseband Module can not be operated Malfunction Reason and remedy A baseband module can not be operated, The operating system may have disabled the although it is visible in the front panel block device. diagram. To check for this, you need an external keyboard and a mouse. -
Page 151: Troubleshooting With Internal Adjustments
Troubleshooting R&S SMU200A Normal action Error and error cause It is recommended, to begin with checking the test definitely the DACIF board that is defective. points on the DACIF board, since the diagnostic converter is placed there. Note: Temperatures are not always output directly in °C. - Page 152 R&S SMU200A Troubleshooting Normal action Error and error cause Adjust Level Baseband adjustment is performed. Abort during baseband adjustment: Progress bar at <= 0%: Note error message in the INFO line: DACIF board probably defective, LO signal at IQOP3, X273 may be...
-
Page 153: Faulty Rf Output Signal
Troubleshooting R&S SMU200A Faulty RF Output Signal • Error: Vector Signal Generator supplies no signal or faulty signal at the RF output. Normal action Error and error cause RF output is switched on; No RF signal or a signal with insufficient level is output at the RF output. -
Page 154: Level Errors
R&S SMU200A Troubleshooting Level Errors Error Error correction Output unlevelled at frequencies up Switch over to CW mode. to 3 GHz, I/Q modulation on: The following, more precise error Error message “Output unlevelled” disappears: descriptions may appear: Continue troubleshooting on LCM module... -
Page 155: Faulty I/Q Modulation
Troubleshooting R&S SMU200A Error Error correction Always maximum output level Check voltage of RF RMS detectors. Freq < 3 GHz: DIAG_IQOP3_LCM_D_UDET < 0.1 V -> IQOP3/RFM is defective, otherwise IQOP3/LCM defective. Freq > 3 GHz: DIAG_IQOP3_LCM_D_UDET < 0.1 V and DIAG_IQOP6_UDET6 <... -
Page 156: Faulty
R&S SMU200A Troubleshooting Error Error correction No output level for Analog Wideband Check output level for CW. I/Q In If not OK: Perform Troubleshooting -"Level Errors. Setting on Vector Signal Generator: RF ON Analog Wideband I/Q In = On 0.35 V DC applied at I and Q Measurement of Test Points: DIAG_IQOP3_D_LCM_IX = -1.05 V to -0.85 V... -
Page 157: Faulty Pulse Modulation
Troubleshooting R&S SMU200A Faulty Pulse Modulation The pulse logic is on the IQOP3/LCM and the pulse switches on the IQOP3/RFM and IQOP6. The status of the line to the pulse modulators can be read out on the level hardware debug page using the DSP. -
Page 158: Faulty Signal Generation In The Baseband
R&S SMU200A Troubleshooting Faulty Signal Generation in the Baseband • Error: Vector Signal Generator does not supply correct baseband signal (at I+Q output sockets on rear panel and/or digital modulation disturbed). Normal action Test Baseband signal is generated on the Universal... - Page 159 Troubleshooting R&S SMU200A Normal action Error and error cause On booting the instrument all calibration data required must be written to the RAM of the computer. The calibration data of a module is either read from the EEPROM (in case of a cold start from EEPROM only) or from the associated binary file.
-
Page 160: Troubleshooting - Module Ssyn
R&S SMU200A Troubleshooting Troubleshooting - Module SSYN The tests listed below ensure that a supposed error on the synthesis module SSYN is not caused by a defective or incorrectly connected cable, incorrect adjustment or another module. Two-path instruments have two synthesis modules. The Synthesis module of Path A contains the reference quartz oscillator or is synchronised to an external reference. -
Page 161: Error Messages Concerning The Module Ssyn
Troubleshooting R&S SMU200A Error messages concerning the module SSYN Error message Error correction "Synthesis OCXO 10 MHz oven cold" If this message doesn’t vanish after 10 minutes, OCXO is defective, change the module. "Synchronization error external Check for correct External Reference Frequency reference"... -
Page 162: Error Message - Dacif: Pll Unlocked (100 Mhz)
R&S SMU200A Troubleshooting Error Message - DACIF: PLL unlocked (100 MHz) Error Error correction This error message indicates that the Connect spectrum analyzer to SSYN A X248. 100 MHz PLL on the DACIF board Check that frequency is 12.8 MHz and level is > 6 dBm. -
Page 163: Troubleshooting - Module Synex
Troubleshooting R&S SMU200A Troubleshooting - Module SYNEX Internal adjustment “Adjust Synthesis” A comprehensive test of the module is to run the internal adjustment. Error Error correction Internal adjustment “Adjust Synthesis” Check performance and cabling of REF100 signal aborts at SSYN Adjustments. -
Page 164: Error Message - Dacif: Pll Unlocked (100 Mhz)
R&S SMU200A Troubleshooting Error message Error correction "Synthesis-extension: modulation input If this message doesn’t vanish after reducing or level out of range" removing input signal, change the module. " Synthesis-extension: fm-offset adjustment Try to execute Internal Adjustment “Adjust FM” failed"... -
Page 165: Troubleshooting - Module Iqop3
Troubleshooting R&S SMU200A Troubleshooting - Module IQOP3 This module consist of two submodules in one housing. Internal digital modulation signals are fed from DACIF module via motherboard over connectors X172for path A and X182 for path B. The submodule RFM, Radio Frequency Module contains the RF path including the wideband I/Q-modulator. The... -
Page 166: Error Messages Concerning The Module Iqop3
R&S SMU200A Troubleshooting Error messages concerning the module IQOP3 Error Error correction "Output unleveled, RMS detector cold" The temperature control of the detector is unable to maintain the desired temperature of 70 °C. RF Level is out of specification. This can be checked using diagnostic... -
Page 167: Tests On Submodule Ioqop3 Lcm
Troubleshooting R&S SMU200A Tests on Submodule IOQOP3 LCM The LCM module is probably defective if one of the following error messages appears. The tests listed below can be performed with the IQOP3 to localize an error on the LCM. The LCM regulates the gain and the output level of the RF signal paths on the IQOP3 and IQOP6. - Page 168 R&S SMU200A Troubleshooting Error Message CAL DAC… and DSP cal Error Error correction The following, more precise error Test diagnostic converter using a test point of a different descriptions may appear: module. Checking CAL DAC voltages If converter is OK:...
- Page 169 Troubleshooting R&S SMU200A Error Message I/Q Offset out of hardware setting range - reduce baseband gain Error Error correction Setting range of the offset DA With gain of +0 dB, it must be possible to set values from -10% converters is not sufficient for the to 10%.
-
Page 170: Troubleshooting - Module Iqop6
R&S SMU200A Troubleshooting Troubleshooting - Module IQOP6 Internal adjustments , Adjust I/Q Modulator A comprehensive test of the module is to run this internal adjustment. Error Error correction Internal adjustment “Adjust I/Q Check for correct input signals, if incorrect, first replace Modulator”... -
Page 171: Error Messages Concerning The Module Iqop6
Troubleshooting R&S SMU200A Error messages concerning the module IQOP6 Error message Error correction Error messages concerning IQOP3/RFM and /LCM These errors have to be cured first, because of interaction. Levelling circuitry for IQOP6 is placed on IQOP3 and RF signals are interchanged between the modules. -
Page 172: Troubleshooting - Module Dacif
R&S SMU200A Troubleshooting Troubleshooting – Module DACIF Error messages concerning the module DACIF Error message Error correction "Dacif error, ..Check for correct power supply, check fuses on the ”Dacboard... motherboard. If correct, change module Troubleshooting – Module UNICOD Error messages concerning the module UNICOD... -
Page 173: Module Replacement
Module Replacement R&S SMU200A Module Replacement This section describes in detail the replacement of modules. Chapter 5 provides information on how to order spare parts; it contains the list of mechanical parts with order numbers and the illustrations for module replacement. -
Page 174: Safety Instruction, Dismounting The Case
R&S SMU200A Module Replacement Note: The words “left” and “right” in the manual always refer to the front view of the instrument. Safety Instruction, Dismounting the Case • Please note the safety instructions at the beginning of this manual. Caution! •... -
Page 175: Replacing Fuses
Module Replacement R&S SMU200A Replacing Fuses Caution! Ensure that the power supply cord is disconnected. If you are not using the supplied spares, be sure to use fuses of the same type and rating. The spare fuses come in a small plastic bag included in the Quick Start Guide binder. -
Page 176: Removing And Replacing The Front Panel
R&S SMU200A Module Replacement Removing and Replacing the Front Panel Removing the Front Panel (See chapter 5, parts list and drawing 1141.2005.01 Switch off the instrument and pull the mains plug. Unscrew the four screws of the front handles (1096.1480) on both sides and take off the front handles. -
Page 177: Installing The Front Panel
Module Replacement R&S SMU200A Installing the Front Panel Place the front panel with the keys on top of the instrument so that the cables can be connected to the front module controller. Reconnect the cables to the color TFT display, DC/AC illumination converter, switch board, rotary pulse generator and network connector at the front module controller. -
Page 178: Installing A New Rf Module
R&S SMU200A Module Replacement Installing a New RF Module Plug the new board into the instrument and reconnect the RF cables. Reinstall instrument cover 1. Perform internal adjustments after replacement according to chapter 2, “Adjustments”. Replacing a Digital Board (See chapter 5, spare parts list 1141.2057.01, parts list and drawing 1141.2005.01 and 1161.0066.01) Table 3-3 Replacing digital boards –... -
Page 179: Removing A Digital Board
Module Replacement R&S SMU200A Table 3-4 Position of digital boards in R&S SMU200A In other devices of the family the relative positions of the boards are the same, only slot numbers differ. Slot 6D Interface Interface Interface Interface Interface Interface... -
Page 180: Replacing The Power Supply A400
R&S SMU200A Module Replacement Installing the New Module Carefully mount the DAC board A580 onto A340 in the reverse order and install it again. Perform internal and external adjustments according to chapter 2, “Adjustments”. Replacing the Power Supply A400 (See chapter 5, spare parts list 1141.2057.01, parts list and drawing 1141.2005.01) Note: If Pos. -
Page 181: Replacing The Front Module Controller A201
Module Replacement R&S SMU200A Replacing the Front Module Controller A201 (See chapter 5, spare parts list 1141.2057.01, parts list and drawing 1141.2005.01) The front module controller is mounted behind the front panel. Removing the Front Module Controller Remove the front panel. -
Page 182: Replacing The Lithium Battery 0858.2049 On The Front Module Controller
R&S SMU200A Module Replacement Replacing the Lithium Battery 0858.2049 on the Front Module Controller (See chapter 5, parts list and drawing1141.2005.01) The lithium battery is accommodated on the front module controller board behind the front panel. Caution! Lithium batteries must not be exposed to high temperatures or fire. -
Page 183: Replacing The Hard Disk A202
Module Replacement R&S SMU200A Replacing the Hard Disk A202 (See chapter 5, spare parts list 1141.2057.01, A202, parts list and drawing1141.2005.01) The hard disk is located between the processor trough and the boards. The spare part contains the preinstalled software. -
Page 184: Installing The New Tft Display And/Or Dc/Ac Converter And Putting Into Operation
R&S SMU200A Module Replacement Installing the New TFT Display and/or DC/AC Converter and Putting into Operation To insert the new TFT display and/or the DC/AC converter, proceed in the reverse order, connect all cables in the correct position and tighten all screws (drawing 1141.2405.01). -
Page 185: Installing The Modules
Module Replacement R&S SMU200A Installing the Modules Insert the new flex. switch board (1141.2528) into the keyboard frame from the back. Note: The pins of the flex. switch board must be inserted into the holes at the keyboard frame. Position the new switch board (1141.2511) on the back of the flex. switch board (1141.2528). -
Page 186: Replacing The Fans E1 And E2
R&S SMU200A Module Replacement Replacing the Fans E1 and E2 (See chapter 5, spare parts list 1141.2057.01 E1, E2, parts list and drawing 1141.2105.01 The fans are fitted at the right side of the frame. Removing the Fans E1 and E2 Remove instrument cover 1. -
Page 187: Installing The New Fan
Module Replacement R&S SMU200A Installing the New Fan Mount the new fan. Connect the fan cable at the motherboard. Note: Please note the direction of the airflow printed on the fan. The fan must blow the cold air into the instrument. -
Page 188: Installing The New Fan
R&S SMU200A Module Replacement Installing the New Fan Mount the new fan. Connect the fan cable at the motherboard. Note: Please note the direction of the airflow printed on the fan. The fan must blow the cold air into the instrument. -
Page 189: Replacing The Motherboard (A100)
Module Replacement R&S SMU200A Replacing the Motherboard (A100) (See chapter 5, spare parts list 1141.2057.01, A100, parts list and drawing 1141.2005.01) The motherboard is fitted at the bottom side and establishes all connections between the modules. Caution! The motherboard contains an EEPROM with all the specific data like serial number, software options and correction data of the instrument. -
Page 190: Replacing The Rf Attenuators A1300, 1320 And A2300
R&S SMU200A Module Replacement Replacing the RF Attenuators A1300, 1320 and A2300 (See chapter 5, spare parts list 1141.2057.01, AA1300, A1320 and A2300, parts list and drawing 1141.2005.01) The attenuator(s) is (are) fitted in the side chamber with the fans. -
Page 191: Replacing The Options Overvoltage Protection (B30, B35), High Power (B31, B36), And Overvoltage Protection And High Power (B32, B37)
Module Replacement R&S SMU200A Replacing the Options Overvoltage Protection (B30, B35), High Power (B31, B36), and Overvoltage Protection and High Power (B32, B37) Related Parts are Relay Control A1815, A2815 Relay K1820, K2820, K1825, K2825. (See chapter 5, spare parts 1141.2057.01 list A1815, A2815, drawings 1141.2005.01, 1159.7444.01 (B30), 1159.8011.01 (B31), 1160.0256 (B32), 1160.0256.01 (B33), 1160.0633.01 (B35), 1160.1000... - Page 192 R&S SMU200A Contents - Software Update/Installing Options Contents - Chapter 4 "Firmware Update/Installing Options" 4 Firmware Update / Installing Options..............4.1 Installation of New R&S Firmware ....................4.1 Windows XP Recovery and Backup Partition................4.2 Call the Windows XP Recovery and Backup Partition Menu ...........4.2 Backup Current System Partition .....................4.3...
-
Page 193: Firmware Update / Installing Options
Release Notes describing the improvements and modifications are provided on the Internet at the down load site of the Rohde & Schwarz SMU home page ( (www.smu200a.rohde-schwarz.com). This home page always offers the latest information on your vector signal generator, e.g. also on changes of the firmware update procedure. -
Page 194: Windows Xp Recovery And Backup Partition
Windows XP Recovery and Backup Partition R&S SMU200A Operation with mouse Wait until R&S SMU firmware boot window with the progress bars appears. Click the Abort button in the boot window. Booting of the R&S SMU firmware is aborted and the Windows XP Embedded desktop is displayed. -
Page 195: Backup Current System Partition
R&S SMU200A Windows XP Recovery and Backup Partition Note: If already several backups are stored on the disk the remaining space might not be sufficient for an additional bachup. In this case a warning is indicated in the Windows XP Recovery and Backup Partition menu and the user is requested to remove an old backup before making a new one. -
Page 196: Recover Selected Version Of System Partition
Windows XP Recovery and Backup Partition R&S SMU200A 3. Select the Make Backup button with the rotary knob 4. Start the backup with the ENTER After the backup the Windows XP Recovery and Backup Partition menu appears again. 5. Select the Exit and Shutdown button with the rotary knob 6. -
Page 197: Recover Factory Default
R&S SMU200A Windows XP Recovery and Backup Partition 5. Select the Restore button with the rotary knob 6. Start the recovery with the ENTER The script which is performed during recovery is displayed. After the recovery the instrument is shut down and switched off. -
Page 198: Installing The Options
Installing the Options R&S SMU200A 3. Select the Select Backup window with the rotary knob. 4. Select the backup to be deleted with the up/down cursor keys and the key. ENTER 5. Select the Remove button with the rotary knob 6. -
Page 199: Software Options
R&S SMU200A Installing the Options Software Options All available software options are already included in the latest firmware. They are ready to operate after they are enabled by means of a key code supplied with the option. Only if the R&S SMU is equipped with an older firmware version, a firmware update prior to enabling the software option may be required. - Page 200 R&S SMU200A Contents - Documents Contents - Chapter 5 "Documents" 5 Documents......................5.1 Spare Parts............................5.1 Available Power Cables......................5.1 Figures Tables Table 5-1 List of power cables available ...................5.1 1007.9845.82 I-5.1...
- Page 201 R&S SMU200A Spare Parts Documents Spare Parts The stock numbers necessary for ordering replacement parts and modules can be found in the compo- nent lists further down. Risk of shock hazard and instrument damage CAUTION When replacing a module please note the safety instructions and the repair...
- Page 202 Spare Part List...
- Page 210 Mechanical Drawings...
- Page 246 Pos.-Nr. Menge El.Kennz Benennung / Bezeichnung Sachnummer Ersatzteil ItemNo Quantity Unit Ref.Des. Designation Stock No. Subst.part ACHTUNG EGB/ATTENTION ESD *VARIANTENERKLAERUNG *EXPLANATION OF MODELS VAR02=GRUNDVARIANTE MOD02=BASIC MODEL ZS ERSATZTEILLISTE VORHANDEN 0999.9684.00 SPARE PARTS LIST AVAILABLE BEACHTE / NOTE: 1400.7040.01 ST ERSATZTEIL-LISTE SMATE / SPARE PARTS LIST SMATE 20 1 A800...
- Page 247 Block Diagrams...
- Page 251 Circuit Diagrams...
Need help?
Do you have a question about the SMU200A and is the answer not in the manual?
Questions and answers