Table of Contents
Advertisement
Advertisement
Table of Contents

Subscribe to Our Youtube Channel
Related Manuals for Colorlight Z6 PRO


Summary of Contents for Colorlight Z6 PRO
- Page 1 Z6 PRO Super Controller...
-
Page 2: Table Of Contents
Content 1. Safety Precautions ............................... 3 2. Overview ................................4 3. Appearance ................................5 The Front Panel ..............................5 The Back Panel ..............................5 Optional 4K input boards ..........................6 4. Connection Diagram ............................7 5. Operating Software .............................. 8 5.1 Device Information ............................. -
Page 3: Safety Precautions
Copyright © 2019 Colorlight (Shenzhen) cloud Tech Co., Ltd. All Right Reserved. 1. Safety Precautions Please read all instructions before installing and using the device. 1.1 Never disassemble or modify this product in any way. To avoid potential hazards, please use this equipment according to the regulations. -
Page 4: Overview
2. Overview Colorlight Z6 PRO is the newest generation all-in-one super controller, which including the excellent video processing capabilities and sending card function,and it is designed for high-end rental display and high-resolution LED displays, and it is the most competitive in the market. -
Page 5: Appearance
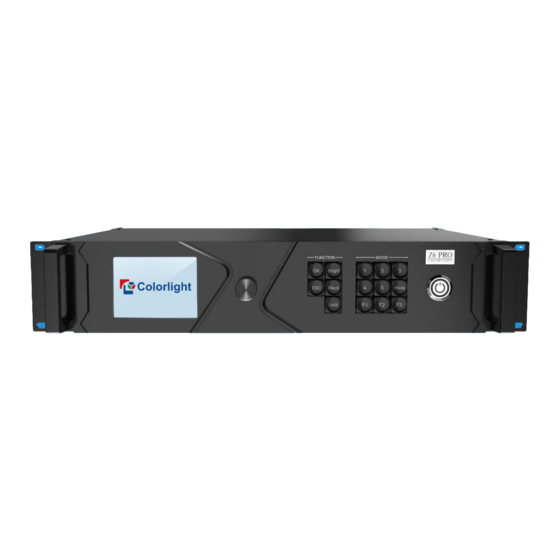
3. Hardware The Front Panel The Back Panel... -
Page 6: Optional 4K Input Boards
Input signal 3G-SDI × Video source format Compatible with 3G-SDI, HD-SDI, SD-SDI Input resolution 1080p, 1080i, 720p, 480i, 576i Transmission distance 1080p≤100 meters The 4 input boards of Z6 Pro can be combined in any combination of above 3 input boards. -
Page 7: Connection Diagram
4. Connection Diagram Using Z6 PRO with H10FN... -
Page 8: Operating Software
5. Operating Software Please make sure the correctness of the hardware connection before setting, then use iSet to detect senders and all receiver cards. (Download url: www.colorlightinside.com) Device Information Click [Device Information] to enter the [Devices Information] page. 1. Click [Detect Senders] in [Device Information]. The software will automatically acquire the sender index, name, and type. -
Page 9: Video Source Setting
5.2 Video Source Setting Click the [Video Source Setting] and enter the video source setting page. Once the input sources working, the software will automatically acquire the signal information and display on the bottom right corner. HDMI/DP Exchange First, please switch the signal to HDMI or DP, then right-click in the image view area, once the list showing up, make a selection. - Page 10 Cropping In the [video format] area, chose the signal and click “ ” to enter the setting. In the cropping interface, check [Cropping], select the image that needs to scale, set X (Horizontal), Y (Vertical), width, and height.
- Page 11 The Z6 PRO supports up to 10freely placable windows, each PIP window can be set individually.
- Page 12 Click “ ”to add a new PIP window, select PIP window and right-click on it to select the signal, meanwhile, cropping and scaling can be set as before. EDID EDID: Set sender resolution, the first one is the default as the current resolution. In the [Signal Selection] area, and select the correct video format, and click “...
- Page 13 In the EDID Setting window, it will show the current computer resolution. Click the resolution will show the list of all resolution options, and customs resolution allows to set the height and width. The [Color Depth] and [Stand choose] are allowed to choose by users.
- Page 14 Preset In [Video Source Setting], the user may set up to 16 preset models. All the preset models support renaming, and setting information such as cropping, PIP, EDID, Brightness, color setting information. When the user finished setting in [Video Source Setting], click [save] to save preset and need to set a name for it, click [ok] to finish.
- Page 15 Screen Adjustment In [Screen Adjustment], user can change information which includes Hue, Saturation, Brightness Compensation, and Contract. Video Genlock The Z6 PRO supports Genlock for every signal. Genlock will default to the main signal when no setting on it.
- Page 16 Low Latency In the [Sender Setting], user can enable the [Low Latency], and HDMI/DP could achieve 0 latency if they are the unique input signal. Direct Output This is the fast way to enable low latency,after selected [Direct Output] mode,all the signal processing will turned off automatically, like PIP/scale/cropping, output mode would be 1:1.
- Page 17 The [Color Depth] output of 8 bit up to 4096x216 and 10 bit up to 3820x2160. Loop Use two H10FN to connect the Z6 PRO optical fiber output port 1 and 2. Make the port 1 as the main output, and port 2 as reduentant output. Then, use network cables to connect start of cabinets form the first H10FN and end connect to the second H10FN.
- Page 18 Screen Color and Brightness In [Screen Color and Brightness] setting, make [Unknown] disable to change the information or make the selection in [Color Space Setting].
-
Page 19: Design
Restore Factory Settings Click [Video Source Settings] to enter the setting, and right-click the sender, then click [Reset Factory Settings]. 5.3 Design Click [Design] to enter setting. - Page 20 1. Add Cabinets Select the right sender output port, and click [Add Cabinets], click [Custom], fill out in the [Cabinets Size] box, and click [OK]. Moving a box with mouse to the right place and click, the cabinets will be added. More boxes can be created by dragging the circle at the bottom right corner or setting at [Seleted Information] on the right.
- Page 21 ② Fast Mapping Using mouse to select the cabinets, then choose the right type of mapping Tips: Since the cabinets may not be the same size, each of them can be set individually. 3. Save Mapping Once the cabinets connection mapping is finished, click [Save], the cabinets connection mapping will be sent to sender and saved.
- Page 22 4. Readback Connected Cabinets Click [Read Readback Connected Cabinets], the saved mapping will be readback from receiver. 5. Configure IP Address Click [Design] to enter Setting, and right-click on the [Sender]. Click the [IP Settings] on the list, and make the selection on [Obtain an IP Address Automatically], the sender will automatically obtain an IP address.
-
Page 23: Control
5.4 Control Click [Control] to enter sender setting. Making a selection in [All Sender] to set the brightness, color temperature, test patterns, screen freeze, and screen black. -
Page 24: Lcd Operate Instruction
6. LCD Operate Instruction Operational Instruction Knob/OK: Press the knob/OK under the main interface to enter the operation interface of the menu. ⚫ Rotate the knob to select the menu or press the knob/OK under the operation interface ⚫ of the menu to select current menu or enter submenu. Rotate the knob to adjust parameters after selecting the menu with parameter;... -
Page 25: Starter
F3:Press “F3” will direct to signal exchange. 6.2 Starter When powering on the Z6 PRO, it will show the picture until Z6 PRO ready. -
Page 26: Main Interface
Third/Fourth row: Connection status of the signal sources and genlock, 10bit mode on/off. Fifth row: Connection status of the network ports. Sixth row: Product type, the IP Address of Z6 PRO. 6.4 Operation Instruction Press the knob/OK to enter the operation interface of the menu, and it includes 11... -
Page 27: Display Setting
6.4.1 Display Setting Rotate the knob to select display setting, then press the knob/OK to enter submenu of “Display Setting”. Broadcast Press “OK” to turn on and turn off broadcast, the broadcast is allowed to set in one Z6 PRO to control all Z6 PROs. Brightness In the option of “Brightness”, rotate the knob to change the brightness, and it will be auto-saved if there is no following operation. - Page 28 to default values, hue and brightness default to 0, saturation and contrast default to 100. Freeze Press the knob/OK to switch on/off LED screen freeze. Black Press the knob/OK to switch on/off LED screen. Low Latency Press the knob/OK to switch on/off “Low Latency”. Test mode Enter the interface of “Test Mode”, rotate the knob to select test mode, press ESC back to normal mode.
- Page 29 Press the knob/OK to enter “HDR menu”, and press knob/OK to enable “HDR”. In “HDR Video Color Space” to choose the screen space. Screen Color and Brightness Rotate the knob/OK to select “Color and Brightness’” setting, make it as “Know”, and color and bright need could be changed.
-
Page 30: Edid Setting
6.4.2 EDID Setting Rotate the knob/ok to select EDID setting, then press the knob/OK to enter submenu of “EDID Setting”. The list may differ due to the different input boards. Here is the example of the HDMI setting. Press “OK” to HDMI setting, and select the correct resolution and press “OK”... -
Page 31: Preset Setting
Enter the clip interface of “HDMI” or “DVI×4” or “SDI1” or “SDI2”, press the knob/OK to turn on/off cropping. Set X, Y, width, and height of the input signal by knob then save the data. 6.4.4 Preset Setting Rotate the knob to select the preset setting, then press the knob/OK to enter submenu of “Preset Setting”. -
Page 32: Lock To Input
6.4.5 Lock To Input When several controllers were cascaded with each other, “Lock To Input” is necessary to ensure the synchronization of the video display. Rotate the knob to select “Lock To Input”, then press the knob/OK to enter submenu of it, in the submenu, you can select Genlock synchronous signal source by the Knob/OK. -
Page 33: Hdmi/Dp Exchange
Output shift includes two ways: “Whole” and “By Port”. In the setting interface of “Whole”, you can rotate the knob to set X and Y of the whole image and save it, in the setting interface of “By Port”, you can set X and Y of the image of each net port respectively, then save it. 6.4.8 HDMI/DP exchange Rotate the knob to select “HDMI/DP”... -
Page 34: Network Setting
6.4.9 Network Setting Users can automatically obtain an IP address or set manually. Enter the setting of “Network Setting”, press the knob/OK to turn on/off DHCP. Or press the knob/OK to enter manual IP setting, you can set up the IP address, subnet mask, and gateway respectively via the knob.
Need help?
Do you have a question about the Z6 PRO and is the answer not in the manual?
Questions and answers