Bresser NATIONAL GEOGRAPHIC Instruction Manual
Hide thumbs
Also See for NATIONAL GEOGRAPHIC:
- Operating instructions manual (49 pages) ,
- Operating instructions manual (48 pages)

Related Manuals for Bresser NATIONAL GEOGRAPHIC


Summary of Contents for Bresser NATIONAL GEOGRAPHIC
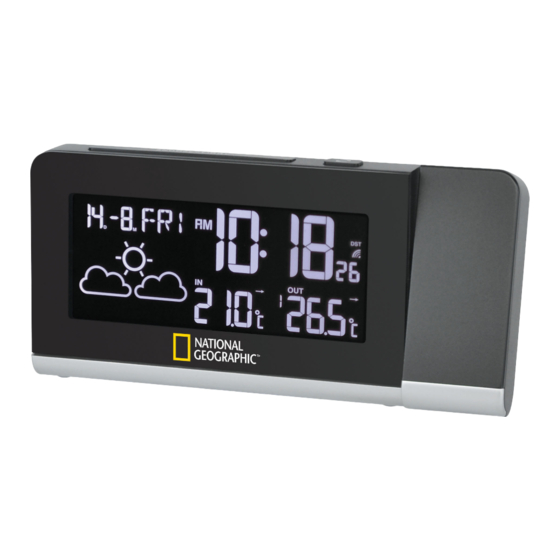
- Page 1 RC W E AT H E R S TAT I O N Bedienungsanleitung Instruction Manual Instrucciones de uso Art.No. 9070400...
- Page 2 QR o el enlace web, para buscar más información sobre este producto o versiones disponibles del presente manual de instrucciones en diferentes idiomas. MANUAL DOWNLOAD: www.bresser.de/P9070400 Fig. 1 BEDIENUNGSANLEITUNG ...5 INSTRUCTION MANUAL ... 13 INSTRUCCIONES DE USO ..21 ....
- Page 3 Fig. 2 DC 4.5V 300mA 14 15 16...
- Page 4 Fig. 3 Fig. 4 Fig. 5 maximum minimum Fig. 6 Fig. 7...
- Page 5 Zu dieser Anleitung VERÄTZUNGSGEFAHR! Diese Bedienungsanleitung ist als Teil des Gerätes zu be- Ausgelaufene Batteriesäure kann zu Verätzungen führen! Ver- trachten. Lesen Sie vor der Benutzung des Geräts aufmerk- meiden Sie den Kontakt von Batteriesäure mit Haut, Augen und sam die Sicherheitshinweise und die Bedienungsanleitung. Be- Schleimhäuten.
- Page 6 Benutzen Sie nur die empfohlenen Batterien. Ersetzen Sie 7. UP (CHANNEL)-Taste schwache oder verbrauchte Batterien immer durch einen kom- 8. DOWN (12/24)-Taste plett neuen Satz Batterien mit voller Kapazität. Verwenden Sie 9. LOOP-Taste keine Batterien unterschiedlicher Marken, Typen oder unter- 10.
- Page 7 VOR DER INBETRIEBNAHME Obwohl der Außensensor wetterfest ist, sollte er nicht an Orten mit Einfall von direkter Sonneneinstrahlung, Regen oder Schnee WICHTIG! platziert werden. 1. Legen Sie die Batterien zuerst in die Basisstation ein bevor Sie den Außensensor in Betrieb nehmen. SPANNUNGSVERSORGUNG 2.
- Page 8 ter Stufe, Projektion und Farbwechsel-Funktionen sind im Bat- Signalstärke ist in vier Arten unterteilt: teriebetrieb nicht möglich! Symbol Außensensor Sig- kein schwaches normales hervorragendes 1. Öffnen Sie vorsichtig den Deckel des Batteriefachs. nalstärke Signal Signal Signal Signal 2. Setzen Sie 2 Batterien (Typ AA/LR6, 1.5V) den angegebenen HINWEIS! Polaritäten entsprechend ein.
- Page 9 3. Drücken Sie die [ TIME ]-Taste erneut. Die Monatsanzeige HINWEIS! blinkt. Drücken Sie die [ UP ]- oder [ DOWN ]-Taste um den 1. Der Weckalarm ertönt automatisch, sobald der Alarm mit dem gewünschten Monat einzustellen. Symbol oder angezeigt wird. 4.
- Page 10 SCHLUMMERFUNKTION (SNOOZE) 2. Drücken Sie die [ LOOP ]-Taste erneut, um den Farbwechsel zu deaktivieren. Drücken Sie die [ RAINBOW ]-Taste mehrfach, 1. Wird während des Weckalarms keine Taste gedrückt, so um eine Farbe aus den folgenden zu wählen und dauerhaft schaltet sich der Weckalarm nach etwa 2 Minuten automa- anzuzeigen: tisch aus.
- Page 11 KANALANZEIGE 2. Verbessern Sie die Schärfe der Projektion durch drehen des Fokusrades. Werkseitig ist Kanal 1 als Standard eingestellt. 1. Drücken Sie im normalen Zeitmodus die [ UP ]-Taste mehr- TEMPERATURTREND-ANZEGE fach, um nacheinander die Kanäle 1 bis 3 anzuzeigen. Die Temperaturtrend-Anzeige informiert über mögliche Verände- 2.
- Page 12 TECHNISCHE DATEN REINGUNG UND WARTUNG Trennen Sie das Gerät vor der Reinigung von der Stromquelle (Netzstecker ziehen und Batterien entfernen)! BASISSTATION Reinigen Sie das Gerät nur äußerlich mit einem trockenen Tuch. Temperaturmessbere- -5° C bis 50° C (23° F bis 122° F) Benutzen Sie keine Reinigungsflüssigkeit, um Schäden an der ich: Elektronik zu vermeiden.
- Page 13 This product is intended only for private use. It was developed as an electronic medium for the use of multimedia services. EG-KONFORMITÄTSERKLÄRUNG General Warnings Hiermit erklärt Bresser GmbH, dass der Funkanlagen- typ mit Artikelnummer: 9070400 der Richtlinie RISK OF CHOKING! 2014/53/EU entspricht. Der vollständige Text der EU-Konformi- Keep packaging material, like plastic bags and rubber bands, tätserklärung ist unter der folgenden Internetadresse verfügbar:...
- Page 14 event of contact, rinse the affected region immediately with a The manufacturer is not liable for damage related to improperly plenty of water and seek medical attention. installed batteries! SCOPE OF DELIVERY RISK OF FIRE/EXPLOSION! (Fig. 1) Use only the recommended batteries. Do not short-circuit the Main unit (A), remote sensor (B), power adapter (C), button cell device or batteries, or throw them into a fire.
- Page 15 correct order, so the remote connection can be re-established. 13. MAX/MIN button 14. RCC button If batteries are exchanged in only one of the devices (i.e. the 15. °C/°F button remote sensor) the signal can’t be received or can’t be received 16.
- Page 16 RECEPTION OF RADIO CONTROLLED TIME SIGNAL NOTE! 1. If no signals are received or the transmission is interfered, ‚---‘ The time and date are radio-controlled. The current time and will appear on the LCD. date are automatically synchronized with the time signal 2.
- Page 17 is not recommended. NOTE! 5. Do not start reception on a moving article such as vehicle 1. The alarm will be automatically turned on when you set the or train. alarm time with the icon displayed. 2. The dual-alarm (AL 1 and AL 2) design of this unit will provide MANUAL TIME SETTING you with more convenience, and you can set two-alarm time 1.
- Page 18 SNOOZE FUNCTION > purple 3. Press [ LOOP ] key again to disable color change function. 1. If no key is pressed during the alarm period, the alarm will Press and hold [ TUNE ] key to run through the complete turn off automatically.Alarm beeping lasts for 2 minutes.
- Page 19 tone sounds and to activate automatic channel display Arrow symbol change for 3 channels. Temperature rising steady falling trend NOTE! The main station can display the temperature records of maximum 3 remote sensors of the same type. In this ease LOW BATTERY INDICATOR different channels (1, 2 or 3) must be set for each remote If the low battery indicator...
- Page 20 Only use a dry cloth to clean the exterior of the device. To avoid EC DECLARATION OF CONFORMITY damaging the electronics, do not use any cleaning fluid. Hereby, Bresser GmbH declares that the equipment type Protect the device from dust and moisture. The batteries should with part number: 9070400 is in compliance with be removed from the unit if it has not been used for a long time.
- Page 21 Sobre este manual ¡PELIGRO DE ABRASIÓN! El presente manual de instrucciones se debe considerar Si se derrama el ácido de las pilas, este puede provocar abra- parte integrante del aparato. siones Evite el contacto del ácido de las baterías con la piel, los Antes de utilizar el aparato, lea detenidamente las indicaciones ojos y las mucosas.
- Page 22 Utilice exclusivamente las pilas recomendadas. Recambie siem- 6. Botón- ALARM pre las pilas agotadas o muy usadas por un juego completo de 7. Botón- UP (CHANNEL) pilas nuevas con plena capacidad. No utilice pilas de marcas 8. Botón- DOWN (12/24) o modelos distintos ni de distinto nivel de capacidad.
- Page 23 ANTES DE PONER EL DISPOSITIVO EN Aunque el sensor es impermeable y resistente a la intemperie, FUNCIONAMIENTO no lo posicione en un lugar donde esté expuesto a los rayos solares directos, lluvia o nieve. ¡NOTA! ALIMENTACIÓN DE LOS DISPOSITIVOS 1. Introduzca las pilas primero en la estación base antes de po- ner en marcha el sensor exterior.
- Page 24 baja su rendimiento funcionando a un bajo nivel. La proyec- dos. Si el símbolo de las ondas de radio parpadea, se recibe la ción y la función de cambio de color no están disponibles señal. La intensidad de la señal se divide en 4 clases: cuando el dispositivo funciona con pilas.
- Page 25 3. Presione de nuevo el botón-[ TIME ]. El indicador del mes par- ¡NOTA! padea. Presione los botones [ UP ] o [ DOWN ] para introducir 1. El despertador suena automáticamente, si la alarma se mues- el valor del mes deseado. tra con el símbolo 4.
- Page 26 FUNCIÓN DE REPETICIÓN (SNOOZE) CAMBIO DE COLOR DE LA PANTALLA 1. Para activar el cambio de color automático, pulse el botón- 1. Si cuando suena la alarma no se aprieta ningún botón, el des- [ LOOP ]. La pantalla cambiará de forma continuada entre pertador se desconecta de manera automática tras unos 2 256 colores.
- Page 27 4. Mantenga presionado el botón-[ MAX/MIN ] durante unos 3 ¡NOTA! segundos para borrar todos los valores máximos y mínimos 1. Pulse el botón para girar la proyección 180°. guardados. Oirá un pitido. 2. Para mejorar la nitidez de la proyección, gire la rueda del foco. CANAL PREVISIÓN DE LOS VALORES DE TEMPERATURA El canal 1 está...
- Page 28 DATOS TÉCNICOS LIMPIEZA Y MANTENIMIENTO Antes de limpiar el aparato, desconéctelo de la fuente de electri- ESTACIÓN BASE cidad (desenchúfelo y quite las pilas). Rango de medición de Limpie solamente el exterior del aparato con un paño seco. No las temperaturas -5°...
- Page 29 “Cd”= cadmio, “Hg”= mercurio, “Pb” = plomo DECLARACIÓN CE DE CONFORMIDAD Le soussigné, Bresser GmbH, déclare que l’équipement radioélectrique du type 9070400 est conforme a la di- rective; 2014/30/EU. Le texte complet de la déclaration UE de conformité...
- Page 30 (QR code) for available versions. Alternatively you can also sionen. Alternativ können Sie uns auch eine E-Mail an die Adresse send an email to manuals@bresser.de or leave a message on manuals@bresser.de schicken oder eine Nachricht unter +49 +49 (0) 28 72 – 80 74-220*. Please always state your name, (0) 2872 - 8074-220* hinterlassen.
- Page 31 (código QR) para ver las versiones disponibles. O envíenos un mensaje a la dirección de correo manuals@bresser.de o déjenos un mensaje telefónico en el siguiente número +49 (0) 28 72 – 80 74-220*. Asegúrese de dejar su nombre, dirección, teléfono válido, una dirección de correo electrónico así...
- Page 32 Visit our website: www.nationalgeographic.com © 2020 National Geographic Partners LLC. All rights reserved. NATIONAL GEOGRAPHIC and Yellow Border Design are trademarks of the National Geographic Society, used under license. Bresser GmbH Gutenbergstr. 2 DE-46414 Rhede Irrtümer und technische Änderungen vorbehalten.
Need help?
Do you have a question about the NATIONAL GEOGRAPHIC and is the answer not in the manual?
Questions and answers