Watson Marlow Pumps 500 Series Installation, Operating And Maintenance Manual
Hide thumbs
Also See for 500 Series:
- Installation, operating and maintenance manual (98 pages) ,
- Installation, operating and maintenance manual (157 pages) ,
- User manual (19 pages)

Related Manuals for Watson Marlow Pumps 500 Series


Summary of Contents for Watson Marlow Pumps 500 Series
-
Page 1: Table Of Contents
530 U/UN Installation, operating, and maintenance manual Contents 1 Declaration of conformity 2 Declaration of incorporation 3 When you unpack your pump 3.1 Unpacking your pump 3.2 Packaging disposal 3.3 Inspection 3.4 Components supplied 3.5 Storage 4 Information for returning pumps 5 Peristaltic pumps - an overview 6 Warranty 7 Safety notes... - Page 2 11.2 Wiring the US NEMA module 11.3 Earth screening of control cables on NEMA module 12 Start-up check list 13 Control wiring 13.1 Upper D-connector 13.2 Lower D-connector 13.3 Standard - 25 way D: Inputs and Outputs 13.4 Standard - 25 way D: power supply limits 13.5 N - Modules Standard and SCADA 13.6 Standard N - Module 13.7 SCADA N-Module...
- Page 3 20.3 Resume interrupted doses 20.4 Master dose 20.5 Manual dosing 21 Main menu 21.1 Security settings 21.2 General settings 21.3 Control settings 21.4 Configure outputs 21.5 Configure inputs 22 Troubleshooting 22.1 Leak detection 22.2 Error codes 22.3 Technical support 23 Drive maintenance 24 Drive spares 25 Pumphead replacement 25.1 Pumphead replacement...
- Page 4 Original instructions The original instructions for this manual have been written in English. Other language versions of this manual are a translation of the original instructions m-530un-en-08...
-
Page 5: Declaration Of Conformity
Declaration of conformity EC Declaration of Conformity Watson-Marlow Limited Falmouth Cornwall TR11 4RU England 1. 530 Cased pumps (Models: S, SN, U, UN, Du, DuN, Bp, BpN, En, EnN) 630 Cased pumps (Models: S, SN, U, UN, Du, DuN, Bp, BpN, En, EnN) 730 Cased pumps (Models: SN, UN, DuN, BpN, En, EnN) 2. -
Page 6: Declaration Of Incorporation
Declaration of incorporation Declaration of Incorporation Watson-Marlow Ltd Falmouth Cornwall TR11 4RU England In accordance with the Machinery Directive 2006/42/EC that if this unit is to be installed into a machine or is to be assembled with other machines for installations, it shall not be put into service until the relevant machinery has been declared in conformity. -
Page 7: When You Unpack Your Pump
When you unpack your pump Unpacking your pump Unpack all parts carefully, retaining the packaging until you are sure all components are present and in good order. Check against the components supplied list, below. Packaging disposal Dispose of packaging materials safely, and in accordance with regulations in your area. The outer carton is made of corrugated cardboard and can be recycled. -
Page 8: Information For Returning Pumps
Information for returning pumps Before returning products, they must be thoroughly cleaned/decontaminated. The declaration confirming this should be completed and returned to us in advance of the item being shipped. You are required to complete and return a decontamination declaration stating all fluids that have been in contact with the equipment being returned to us. -
Page 9: Warranty
Warranty Watson-Marlow Ltd ("Watson-Marlow") warrants this product to be free from defects in materials and workmanship for five years from the date of shipment, under normal use and service. Watson-Marlow's sole responsibility and the customer's exclusive remedy for any claim arising out of the purchase of any product from Watson-Marlow is, at Watson-Marlow's option: repair, replacement or credit, where applicable. -
Page 10: Safety Notes
Safety notes This safety information should be used in conjunction with the rest of this operating manual. In the interests of safety, this pump and pumphead should only be used by competent, suitably trained personnel after they have read and understood the manual and considered any hazard involved. If the pump is used in a manner not specified by Watson-Marlow Ltd, the protection provided by the pump may be impaired. - Page 11 Fundamental work with regard to lifting, transportation, installation, starting-up, maintenance and repair should be performed by qualified personnel only. The unit must be isolated from mains power while work is being carried out. The motor must be secured against accidental start-up. Some pumps weigh more than 18kg (the exact weight depends on the model and pumphead - see on the pump).
- Page 12 If hazardous fluids are to be pumped, safety procedures specific to the particular fluid and application must be put in place to protect against injury to persons. This product does not comply with the ATEX directive and must not be used in explosive atmospheres.
-
Page 13: Pump Specifications
Pump specifications Specification ratings Operating temperature 5C to 40C (41F to 104F) Storage temperature 530: -40C to 70C (-40F to 158F) Humidity (non-condensing) 80% up to 31C (88F) decreasing linearly to 50% at 40C (104F) Maximum altitude 2000m (6560ft) Power Rating 530: 135VA Supply voltage 100-120V/200-240V 50/60Hz 1pH (Subject to regional cord sets and... -
Page 14: Pumphead Options
Some pumps weigh more than 18kg (the exact weight depends on the model and pumphead - see on the pump). Lifting should be performed according to standard Health and Safety guidelines. Finger recesses are built into the sides of the lower shell for convenience in lifting; in addition, the pump can conveniently be lifted by grasping the pumphead and (where fitted) the module at the rear of the pump. -
Page 15: Good Pump Installation Practice
Good pump installation practice General recommendations It is recommended that the pump is sited on a flat, horizontal, rigid surface, free from excessive vibration, to ensure the correct lubrication of the gearbox and correct pumphead operation. Allow a free flow of air around the pump to ensure that heat can be dissipated. Ensure that the ambient temperature around the pump does not exceed the recommended maximum operating temperature. -
Page 16: Dos And Don'ts
Peristaltic pumps are self-priming and self-sealing against backflow. No valves are required in inlet or discharge line, except those specified as below. Users must fit a non-return valve between the pump and the discharge pipework to avoid the sudden release of pressurised fluid in the event of a pumphead or tube failure. -
Page 17: Pump Operation
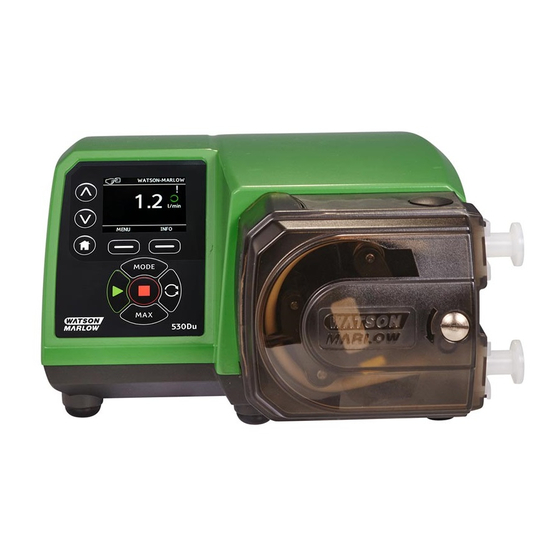
Pump operation 10.1 Keypad Layout and Key IDs Colour TFT display Change value / move selection bar Function keys Home Mode Stop Direction of flow Start HOME key When the HOME key is pressed it will return the user to the last known operating mode. If modifying pump settings when the HOME key is pressed, it will disregard any setting changes and return you to the last known operating mode. -
Page 18: Starting And Stopping
10.2 Starting and stopping 10.3 Using up and down keys 10.4 Maximum speed 10.5 Change rotation direction m-530un-en-08... -
Page 19: Connecting To A Power Supply
Connecting to a power supply A well regulated electrical mains supply is required along with cable connections conforming to the best practice of noise immunity. It is not recommended to site these drives alongside electrical devices that may generate mains-borne noise, for example 3-phase contactors and inductive heaters. Set the voltage selector to 115V for 100-120V 50/60Hz supplies or 230V for 200- 240V 50/60Hz supplies. -
Page 20: Conductor Colour Coding
11.1 Conductor colour coding Conductor type European colour North American colour Line Brown Black Neutral Blue White Ground Green/Yellow Green 11.2 Wiring the US NEMA module The NEMA 4X modules fitted to 530, 630 and 730 Du, S, U and PROFIBUS cased pumps with part numbers ending with an A (xxx.xxxx.xxA) have two pairs of wiring ports. -
Page 21: Start-Up Check List
Start-up check list Note: See also "Tube replacement " on page 110. Ensure that proper connections are achieved between the pump and suction and discharge piping. Ensure proper connection has been made to a suitable power supply. Ensure that the recommendations in the section "Good pump installation practice " on page 15 are followed. -
Page 22: Control Wiring
Control wiring Never apply mains power to the D-connectors. Apply the correct signals to the pins shown. Limit signals to the maximum values shown. Do not apply voltage across other pins. Permanent damage, not covered by warranty, may result. Keep 4-20mA and low voltage signals separate from mains power. Use separate glanded input cables. - Page 23 Note: Not all functions may be available, those available will depend on your pump model. Key to symbols DRY (NO LEAK) INPUT WET (LEAK DETECTED) OUTPUT STOP CLOCKWISE ROTATION KEYPAD DIRECTION CHANGE MANUAL (KEYPAD) CONTROL REMOTE DIRECTION CHANGE ANALOGUE (4-20mA/0-10V) CONTROL ANTI-CLOCKWISE ROTATION ALARM PULL UP START DOSE ON RISING EDGE...
- Page 24 Input or Signal Name Configurable Signal response output AUTO/MAN AUTOMAN AUTOMAN LOGIC OUT 1 LOGIC OUT 1 Output 1 LOGIC OUT 2 LOGIC OUT 2 Output 2 m-530un-en-08...
- Page 25 Input or Signal Name Configurable Signal response output LOGIC OUT 3 LOGIC OUT 3 Output 3 LOGIC OUT 4 logic_out4.pdf LOGIC OUT 4 Output 4 COMMON Commoning terminals, used for voltage supply for logic outputs m-530un-en-08...
- Page 26 Wiring the lower D connector Input Function Configurable Signal response output TACHO FREQUENCY TACHO F Hz TACHO 4-20mA TACHO mA TACHO 0-10V 0-10V m-530un-en-08...
- Page 27 Input Function Configurable Signal response output TTL 1 Output 1 TTL OUT 1 TTL 2 Output 2 TTL OUT 2 DIRECTION DIRECTION DIRECTION m-530un-en-08...
- Page 28 Input Function Configurable Signal response output START/STOP START/STOP Stop = high Stop = low START/STOP DIRECTION ENABLE DIRECTION ENABLE DIRECTION ENABLE m-530un-en-08...
- Page 29 Input Function Configurable Signal response output DOSE DOSE DOSE ANALOG 1 Either 0-10V or 4-20mA ANALOG 1 0-10V 10V REF ANALOGUE 1 m-530un-en-08...
-
Page 30: Standard - 25 Way D: Power Supply Limits
Input Function Configurable Signal response output ANALOG 2 ANALOG 2 13.4 Standard - 25 way D: power supply limits Signal Connector Pin numbers Voltage Load 5V Ref Upper 18, 19 5V @ no load Total of all pins 10mA max Lower 9, 19, 23 12V Ref... -
Page 31: Standard N - Module
13.6 Standard N - Module Note: Not all functions may be available, those available will depend on your pump model. Tacho o/p RS485 Relay 4 Relay 3 Relay 2 Relay 1 Spare supplies Commoning Freq -12V +12V (maximum +24VDC) (Planned) (planned) +12V +10V... - Page 32 Key to symbols DRY (NO LEAK) INPUT WET (LEAK DETECTED) OUTPUT STOP MANUAL (KEYPAD) CONTROL CLOCKWISE ROTATION KEYPAD DIRECTION CHANGE ANTI-CLOCKWISE ROTATION ANALOGUE (4-20mA/0-10V) CONTROL REMOTE DIRECTION CHANGE EXTERNAL VOLTAGE INPUT START DOSE ON RISING EDGE Standard N Module: Input/output Connectors Connector No.
- Page 33 Connector No. Function Input or Configurable Signal response output DOSE DOSE STOP HIGH Stop = high RUN /STOP STOP LOW RUN /STOP Stop = low RUN /STOP ANALOGUE 1 DIRECTION EN m-530un-en-08...
- Page 34 Connector No. Function Input or Configurable Signal response output 10V 10mA Max REMOTE POT ANALOGUE 2 Leak = high LEAK DETECT HIGH LEAK DETECT LEAK DETECT LOW LEAK DETECT Leak = low LEAK DETECT R S 4 8 5 0 V A B J 1 0 Hz=5V TTL V=0-10V...
- Page 35 Connector No. Function Input or Configurable Signal response output Sum of all 12V currents = 10mA SPARE SUPPLIES DC Max COMMONING J14,15,16,17 LOW=N/C HIGH=N/O RELAY 1-4 24V DC MAX Switches in or out a 124R termination resistor - May be required for long cable lengths Switches in or out a filter capacitor for optional use when...
-
Page 36: Scada N-Module
13.7 SCADA N-Module Note: Not all functions may be available, those available will depend on your pump model. RS485 Tacho o/p Relay 4 Relay 3 Relay 2 Relay 1 +12V +10V Direction Auto/man i/p Tube monitor Analog 2 Rem pot Direction i/p enable link Analog 1 Run/stop i/p Dose i/p... - Page 37 Key to symbols INPUT DRY (NO LEAK) WET (LEAK DETECTED) OUTPUT STOP CLOCKWISE ROTATION KEYPAD DIRECTION CHANGE MANUAL (KEYPAD) CONTROL ANALOGUE (4-20mA/0-10V) CONTROL REMOTE DIRECTION CHANGE ANTI-CLOCKWISE ROTATION AC (ALTERNATING CURRENT) INPUT START DOSE ON RISING EDGE SCADA N Module: Input/output Connectors Connector No.
- Page 38 Connector No. Function Input or Configurable Signal Response Output ANALOGUE 1 DIRECTION EN 10V 10mA Max REMOTE POT ANALOGUE 2 Leak = high LEAK DETECT LEAK DETECT Leak = low 0-10V 4-20mA TACHO O/P m-530un-en-08...
- Page 39 Connector No. Function Input or Configurable Signal Response Output img_scada_mod_j12-15.pdf J12,J13,J14,J15 LOW=N/C HIGH=N/O RELAY 1-4 110VAC MAX Switches in or out a 124R termination resistor - May be required for long cable lengths Switches in or out a filter capacitor for optional use when internal terminal is selected.
- Page 40 8 bit Byte 3 Min speed (high byte of 16-bit unsigned) 8 bit Byte 4 Min speed (low byte of 16-bit unsigned) 8 bit Byte 5 Max speed (high byte of 16-bit unsigned) 8 bit Byte 6 Max speed (low byte of 16-bit unsigned) 8 bit Byte 7 Fail safe mode configuration...
- Page 41 Pumphead type Value Pumphead 0x01— Pre-assigned 0x—00 520R 0x—01 520R2 0x—02 520 Sanitary Tri-clamp elements (for 520REL, 520REM and 520REH pumpheads) 0x—03 520 Industrial quick release elements (for 520REL, 520REM and 520REH pumpheads) 0x—04 505L (continuous tube) 0x—05 313D 0x—06 313D2 0x—07 505L (double-Y element)
- Page 42 Fail-safe The fail-safe user parameter is used to set the correct course of action to take in the event of a PROFIBUS communications failure. The fail-safe byte is configured as shown in the following table. If no bits are set or an invalid bit pattern is set the default fail safe behaviour shall be to stop the pump.
- Page 43 Control word Reserved Enable fieldbus min/max speeds (1 = enabled) Enable fieldbus flow calibration (1 = enabled) Ignore leak detection sensor Fluid level reset Head and tube 9-15 Reserved Cyclic data read (from pump to master) 16 bit Byte 1 Status word (high byte) Byte 2 Status word (low byte)
- Page 44 *Note – ‘Pumphead speed setpoint (unsigned)’, reports the speed that the pump is running in Profibus mode. This is reported as an integer in units of ‘rpm’ and will always be the same as the Profibus ‘pumphead speed setpoint’ received by the pump. Customers who wish to verify the flow rate of the pump should use the tacho counter, (which reports pumphead revolutions where 10 increments = 1 revolution) and the µl per revolutions value (Byte 11,12) to calculate flow.
- Page 45 Device Related Diagnostic Data Byte 1, 2, 3, 4, 5, 6* Mandatory Slave Bytes 8 bit Byte 7 Header byte 8 bit Byte 8 Pump model 8 bit Byte 9 Pump head 8 bit Byte 10 Tube size (high byte) 8 bit Byte 11 Tube size (low byte)
- Page 46 Channel related diagnostic data Byte 3 Global error =0xA9 (General error) Over current =0xA1 (Short circuit) Under voltage =0xA2 (Under voltage) Over voltage =0xA3 (Over voltage) Over temp =0xA5 (Over temp) Motor stall =0xA4 (Overload) Tacho fault =0xB1 (Device related 0x11) Leak detected =0xB2 (Device related 0x12) Setpoint out of range - low...
- Page 47 Avoid sharp bends in PROFIBUS communication cables. Please follow PROFIBUS wiring standards. m-530un-en-08...
-
Page 48: Switching The Pump On For The First Time
Switching the pump on for the first time Power up the pump. The pump displays the start-up screen with the Watson-Marlow Pumps logo for three seconds. 14.1 Selecting the display language 1. Use the ∧/∨ keys to select your chosen language, and press SELECT. m-530un-en-08... - Page 49 2. Your selected language will now be displayed on screen. Choose CONFIRM to continue. All text will now appear in your chosen language. 3. Choose REJECT to return to the language choice screen. This then proceeds to the home screen. m-530un-en-08...
-
Page 50: First-Time Start-Up Defaults
14.2 First-time start-up defaults The pump is preset with operational parameters as shown in table below. Parameter 530 default Language Not set Default mode Manual Default manual speed 220rpm Pump status Stopped Max speed 220rpm Direction Pumphead 520R2 Tube size 9.6mm Tube material Bioprene... - Page 51 Parameter 530 default Output 2 - status High = CW Output 3 Auto/man Output 3 - status High = auto Output 4 General alarm Output 4 - status High = alarm The pump is now ready to operate according to the defaults listed above. Note: The display background colour changes according to running state as follows: White background indicates pump stopped Grey background indicates pump running...
-
Page 52: Switching The Pump On In Subsequent Power Cycles
Switching the pump on in subsequent power cycles Subsequent power-up sequences will jump from the start-up screen to the home screen. The pump runs a power-on test to confirm proper functioning of the memory and hardware. If a fault is found, an error code is displayed. The pump displays the start- up screen with the Watson- Marlow Pumps logo for three seconds followed by the home screen Start-up defaults are those in place when the pump was switched off last... -
Page 53: Mode Menu
Mode menu Press MODE to display the Change mode menu. Use the ∧ and ∨ keys to scroll through the available modes. The following table summarises the available mode menu options for each pump model Manual (default) ● ● Flow calibration ●... - Page 54 Use SELECT to choose mode. Use the right hand function key to alter mode settings. m-530un-en-08...
-
Page 55: Manual
Manual All settings and functions of the pump in manual mode are set and controlled by means of key-presses. Immediately after the start-up display sequence detailed in: "Switching the pump on in subsequent power cycles " on page 52, the manual mode home screen will be displayed unless auto restart is enabled. -
Page 56: Stop
17.2 STOP Stops the pump. The display background changes to white. If the pump is not running pressing this has no effect. 17.3 INCREASING AND DECREASING FLOW RATE Using the ∧ and ∨ keys will increase or decrease the flow rate. Decreasing flow rate A single key press will decrease flow rate by the least significant digit of the chosen flow rate unit. -
Page 57: Max Function (Manual Mode Only)
17.4 MAX FUNCTION (Manual mode only) Press and hold the MAX key to run at maximum flow. Release the key to stop the pump. The volume dispensed and time elapsed are displayed while the MAX key is pressed and held. m-530un-en-08... -
Page 58: Flow Calibration
Flow calibration This pump displays flow rate in ml/min. 18.1 Setting the flow calibration Using the ∧ /∨ keys, scroll to Flow calibration and press CALIBRATE. Using the ∧ /∨ keys, enter the maximum flow rate limit and press ENTER. m-530un-en-08... - Page 59 Press START to begin pumping a volume of fluid for calibration. Press STOP to stop pumping fluid for the calibration. m-530un-en-08...
- Page 60 Use the ∧ /∨ keys to enter the actual volume of fluid pumped. To accept the new calibration press ACCEPT or RE-CALIBRATE to repeat the procedure. Press HOME or MODE to abort. The pump is now calibrated. m-530un-en-08...
-
Page 61: Analog Mode
Analog mode In this remote operating mode the flow rate will be proportional to the external milliamp or voltage signal input received by the pump. The relationship between the external analog signal and the flow rate is determined by configuring the two points A and B as shown in the graph below. The rate of flow can be proportional or inversely proportional to the analog input. -
Page 62: Analog Calibration
19.1 Analog calibration The pump must be stopped before attempting to calibrate the values. High and low signals must be within range. If the signal sent is out of range you will not be able to set the signal input value and progress to the next step in the process. Select MENU, then select MODE menu. -
Page 63: Calibrate Input
19.2 Calibrate Input 1 Using the ∧ /∨ keys, scroll to Analog Input and press SELECT. Select the input signal type using the ∧ /∨ keys and press SELECT. The pump gives the option to enter the high and low mA or V signals manually or via the analog input. Entering mA values is described here, however the process for entering V signals is identical. -
Page 64: Setting A High Signal
Choose whether to enter the current values manually via the keypad, or whether to apply the current signals electrically to the analog input. 19.3 Setting a high signal Send the high signal input to the pump, or enter the current value using the ∧ / ∨ keys. m-530un-en-08... -
Page 65: Setting High Flow Calibration
ACCEPT appears when high mA signal is within tolerance limits. Press ACCEPT to accept the high signal input or CANCEL to return to the previous screen. 19.4 Setting high flow calibration Using the ∧ / ∨ keys, scroll to the desired flow rate. Select SET FLOW or press BACK to return to the previous screen. -
Page 66: Setting A Low Signal
19.5 Setting a low signal Send the low signal input to the pump, or enter the current value using the ∧ / ∨ keys. If the range between the low and high signal is less than 1.5mA, the following error message will be displayed. -
Page 67: Setting Low Flow Calibration
ACCEPT appears when low mA signal is within tolerance limits. Press ACCEPT to accept the low signal input or CANCEL to return to the previous screen. 19.6 Setting low flow calibration Using the ∧ / ∨ keys, scroll to the desired scale factor. Select SET FLOW. m-530un-en-08... - Page 68 This proceeds to the screen confirming calibration is complete. Select ANALOG to start in analog mode or MANUAL to continue in manual mode. m-530un-en-08...
-
Page 69: Memodose Mode
MemoDose mode Each time the pump is started by pressing START, it records the number of pumphead revolutions which occur until STOP is pressed. The number of revolutions is proportional to the volume of fluid which has been dispensed: the dose. MemoDose mode allows the user to repeat-dose a precise volume of fluid. This can be achieved by dispensing a master dose, or entering a dose volume manually using the keypad. -
Page 70: Resume Interrupted Doses
Using the ∧ /∨ keys, enter the dose flow rate and press SELECT. 20.3 Resume interrupted doses MemoDose Mode gives you the opportunity to resume interrupted doses following a power cycle (Note: Auto-restart must be on for this to function). Alternatively interrupted doses can be discarded and a new dose started when power is resumed. -
Page 71: Master Dose
20.4 Master dose Using the ∧ /∨ keys, scroll to Master dose and press SELECT. The following screen is displayed; press MANUAL to enter a dose via the keypad or DOSE to dispense a master dose. m-530un-en-08... - Page 72 Dispensing a master dose Press START to begin dispensing the Master Dose. Press STOP to finish dispensing the Master Dose. m-530un-en-08...
- Page 73 Manual dose entry Press MANUAL on the master dose screen. Using the ∧ /∨ keys enter the required dose volume and press SELECT to record the master dose or CANCEL to return to MemoDose Settings. Save dose volume Press SAVE to record the Master Dose or CANCEL to return to MemoDose settings. m-530un-en-08...
-
Page 74: Manual Dosing
When MemoDose SETTINGS are complete the following screen is displayed; press MEMODOSE to start in MemoDose Mode or BACK to return to MemoDose settings. 20.5 Manual dosing From the MemoDose Home screen, press START to deliver a dose. The screen displays the dose flow rate and the dose remaining counting down from 100% to 0%. - Page 75 If the delivered dose differs from the volume required, the percentage may be adjusted within the limits 50% to 150% of the master dose. Use the ∧ /∨ keys to alter the percentage. The new dose size is displayed as a percentage on the home screen. 107% If STOP is pressed during dosing, the pump stops.
-
Page 76: Main Menu
Main menu To access the main menu press the MENU button from one of the HOME screens or INFO screens. This will display the main menu as shown below. Use the ∧ /∨ keys to move the selection bar between the available options. -
Page 77: Security Settings
21.1 Security settings Security settings can be changed by selecting SECURITY SETTINGS from the Main menu. Auto keypad lock Press ENABLE/DISABLE to switch on/off the Auto keypad lock. When active the keypad will 'lock' after 20 seconds of inactivity. Once locked it will display the screen below when any key is pressed. To unlock the keypad press the two UNLOCK keys together. - Page 78 The padlock icon will appear on the operating mode home screen to show that keypad lock is activated. Note that the STOP key will always work whether the keypad is locked or not. PIN protection Using the ∧ / ∨ keys select PIN protection from the SECURITY SETTINGS menu and press ENABLE/DISABLE to switch on/off the PIN protection.
- Page 79 Now press CONFIRM to check that the number entered is the PIN you require. Press CHANGE to return to PIN entry. m-530un-en-08...
- Page 80 The following screen will be displayed to indicate that the Master PIN has been applied to access all functionality. Press NEXT to selectively enable functionality access for User 1 and User 2. Configure User 1 security settings The PIN PROTECTION level screen will be displayed with User 1 highlighted, press ENABLE to configure User 1 security settings or scroll to configure an alternative User.
- Page 81 ENABLE user 1 security settings displays the PIN entry screen for User 1. To define a four digit User 1 PIN, use the ∧ /∨ keys to select each digit from 0-9. Once you have the required digit press the NEXT DIGIT key.
- Page 82 To define the allowed functionality, use the ∧ /∨ keys to select the functionality and press ENABLE. User 1 PIN will allow access to only the enabled functionality, to disable functionality, highlight the enabled functionality and press DISABLE. When all the required functionality has been enabled, press FINISH. Configure User 2 security settings The PIN PROTECTION level screen will be displayed with User 2 highlighted, press ENABLE to configure User 2 security settings or scroll to configure an alternative User.
- Page 83 ENABLE user 2 security settings displays the PIN entry screen for User 2. To define a four digit User 2 PIN, use the ∧ /∨ keys to select each digit from 0-9. Once you have the required digit press the NEXT DIGIT key.
- Page 84 Note: Once Security Settings for User 1 and User 2 have been set by the Master, only the Master PIN will allow access to Security Settings. The HOME screen will be displayed. A PIN is now required to access all functionality. The Master PIN accesses all pump functionality and the User 1 and User 2 PINs access only the defined functionality.
- Page 85 If the PIN entered does not allow access to the functionality the following screen will be displayed. Keypad beep From SECURITY settings scroll to Keypad beep using the ∧ /∨ keys and select ENABLE. The pump will now beep at every key press. m-530un-en-08...
-
Page 86: General Settings
PIN entry on start-up The setting PIN entry during start-up can be used to configure the software to choose if PIN entry is required during start up. This feature also means that auto-restart capability is now independent of PIN code entry after start up. If this setting is enabled ü... - Page 87 Press ENABLE/DISABLE to turn the auto restart feature on/off (Manual mode, network mode and memodose feature only). Do not use auto restart for more than 20 mains power starts per hour. We recommend remote control where a high number of starts is required. If the Auto restart feature is enabled it may cause the pump to start as soon as power is turned on.
- Page 88 The ! symbol is a warning that the pump could remotely activate at any time. It will always be displayed when the pump is in any remote control mode (analog and network mode). It will also be displayed when auto restart has been enabled as the pump could activate after a power cycle, (auto-restart applies to manual mode, network mode and memodose).
- Page 89 If a mass flow unit is selected, the specific gravity of the fluid must be entered. The following screen is displayed. Use the ∧ /∨ keys to enter the value of the specific gravity, and press SELECT. Pump label The pump label is a user defined 20 digit alphanumeric label which is displayed in the header bar of the home screen.
- Page 90 Use the ∧ /∨ keys to scroll through the available characters for each digit. The available characters are 0-9, A-Z and SPACE. Press NEXT to move onto the next character, or PREVIOUS to move back to the previous character. Press FINISH to save the entry and return to the general settings menu. m-530un-en-08...
- Page 91 Pumphead type Select GENERAL SETTINGS from the main menu. Use the ∧ /∨ keys to move the selection bar over Pumphead type and press SELECT. The following screen will be displayed. Use the ∧ /∨ keys to move the selection bar over Pumphead and press SELECT. m-530un-en-08...
- Page 92 Use the ∧ /∨ keys to move the selection bar over the required pumphead type and press SELECT. Tube size and tube material Select Tube size from GENERAL SETTINGS, then use the ∧ /∨ keys to move the selection bar over Bore size and press SELECT.
- Page 93 Use the ∧ /∨ keys to move the selection bar over the tube size to be used and press SELECT. If a LoadSure element has been selected then the tube size is displayed as pressure and bore. m-530un-en-08...
- Page 94 This screen also allows you to select the tube material used. Use the ∧ /∨ keys to move the selection bar over Tube material and press SELECT. Use the ∧ /∨ keys to move the selection bar over the tube material to be used and press SELECT. m-530un-en-08...
- Page 95 The PUMPHEAD MODEL screen allows the tube Lot Number to be recorded for future reference. Use the ∧ /∨ keys to move the selection bar over Tube lot number and press SELECT. Use the ∧ /∨ keys to scroll through the available characters for each digit. The available characters are 0-9, A-Z, and SPACE.
- Page 96 Language Select language from the general settings menu to choose an alternative display language for the pump. The pump must be stopped before changing the language. Use the ∧ /∨ keys to move the selection bar to your required language. Press SELECT to confirm. Your selected language will now be displayed on screen.
-
Page 97: Control Settings
21.3 Control settings Select CONTROL SETTINGS from the main menu to access the sub menu shown below. Use the ∧ /∨ keys to move the selection bar. Press SELECT to choose the required function. Speed limit The maximum speed the pump is capable of running at is 220rpm. Select Speed limit from the control settings menu to define a lower maximum speed limit for the pump. -
Page 98: Configure Outputs
Reset run hours Select Reset run hours from the control settings menu. Select RESET to zero the run hours counter. The run hours counter can be viewed by pressing INFO from your home screen. The following screen will be displayed. Press RESET to reset the run hours or CANCEL to return to the CONTROL SETTINGS menu. - Page 99 Use the ∧ /∨ keys and press SELECT to choose which pump status you require for the chosen output. The tick symbol indicates the current setting. Use the ∧ /∨ keys and press SELECT to choose the logic state of the chosen output. Press SELECT to program the output or BACK to cancel.
-
Page 100: Configure Inputs
21.5 Configure inputs Select Configure inputs from the CONTROL SETTINGS menu. Use the ∧ /∨ keys and press SELECT to choose which input to configure. Use the ∧ /∨ keys and press SELECT to choose the logic state of the chosen input. Press SELECT to program the output or BACK to cancel. - Page 101 Disable remote stop in manual mode Users can disable/enable the remote stop input when the pump is in manual mode by using the following sequence to configure the 'start/stop' settings. The default is û. The start/stop input is not disabled in manual mode. Press SELECT to change the setting to ü.
- Page 102 Enable remote stop in manual mode The setting isü. The start/stop input is disabled. Press SELECT to open the logic state menu. m-530un-en-08...
- Page 103 Use the ∧ /∨ keys and press SELECT to choose the logic state of the chosen input for your connected control hardware. Press HOME to return and store the setting. The input is now enabled in manual mode. m-530un-en-08...
-
Page 104: Troubleshooting
Troubleshooting If the pump display remains blank when the pump is switched on, make the following checks: • Check that the mains power is available to the pump. • Check the fuse in the wall plug if one is present. •... -
Page 105: Leak Detection
22.1 Leak detection If a Watson-Marlow leak detector has been fitted to the pumphead, and a leak is detected; the pump will display the following message: Follow the instructions in "Tube replacement " on page 110 to replace your tube or tubing element. If this message is repeated when power is returned to the pump check that the leak detector is clean and free of debris and cycle the power to the pump. -
Page 106: Technical Support
Error code Error condition Suggested action Stop pump immediately. Er14 Speed error Power OFF/ON may reset. Or seek support. Stop pump immediately. Er15 Over current Power OFF/ON may reset. Or seek support. Stop pump immediately. Check supply. Er16 Over voltage Power OFF/ON may reset. -
Page 107: Drive Maintenance
Drive maintenance There are no user serviceable parts inside the pump. Please contact your local Watson-Marlow representative to arrange repair. m-530un-en-08... -
Page 108: Drive Spares
Drive spares Description Part No. Replaceable main fuse, type T2, 2.5A H 250V 20mm (Pack of 5) MNA2107A Foot (Pack of 5) MNA2101A Module seal MN2516B Module switch cover MN2505M Glands (STD) GR0056 Glands (EMC) GR0075 Blanking plugs GR0057 Sealing washer for blanking plug and gland GR0058 Snap-fit vent MN2513B... -
Page 109: Pumphead Replacement
Pumphead replacement Always isolate the pump from the mains power supply before opening any guard or track, or performing any positioning, removal or maintenance operation. 25.1 Pumphead replacement 520R m-530un-en-08... -
Page 110: Tube Replacement
Tube replacement Always isolate the pump from the mains power supply before opening any guard or track, or performing any positioning, removal or maintenance operation. 26.1 Continuous tubing 520R and 520R2 505L ≤8.0mm=145mm , 9.6mm=150mm m-530un-en-08... -
Page 111: Tube Elements
26.2 Tube elements Grey Beige Blue >4 bar (60psi) >7 bar (100psi) >2 bar (30psi) 520REL, 520REM and 520REH 530 Sanitary connectors 530 Industrial connectors m-530un-en-08... - Page 112 505L General guide to cleaning with solvents Chemical Cleaning precautions Aliphatic hydrocarbons Remove guard. Minimize rotor cap and clutch boot exposure to less than one minute (risk of attack). Aromatic hydrocarbons Remove guard. Minimize rotor cap and clutch boot exposure to less than one minute (risk of attack). Ketone solvents Remove guard.
-
Page 113: Ordering Information
Ordering information 27.1 Pump part numbers • • • • • • Plug options Configuration Model U: UK mains plug 0: Pump 3: S E: EU mains plug 6: Drive only 4: U A: American mains plug 5: Du K: Australia mains plug Pumphead 6: Bp R: Argentina mains plug... -
Page 114: Tubing And Element Part Numbers
27.2 Tubing and element part numbers 1.6mm wall tubing for 520R pumpheads STA-PURE Series inch Marprene Bioprene 1/50 902.0005.016 933.0005.016 — 1/32 902.0008.016 933.0008.016 — 1/16 902.0016.016 933.0016.016 966.0016.016 902.0032.016 933.0032.016 966.0032.016 3/16 902.0048.016 933.0048.016 966.0048.016 902.0064.016 933.0064.016 966.0064.016 5/16 902.0080.016 933.0080.016 966.0080.016... - Page 115 913.A064.016 5/16 913.A080.016 Note: 1.6mm wall STA-PURE Series PFL and STA-PURE Series PCS tubing are supplied in 305mm lengths. 2.4mm wall tubing for 520R2 pumpheads inch Marprene Bioprene Pumpsil 1/50 — — — 913.A005.024 1/32 — — — 913.A008.024 1/16 902.0016.024 933.0016.024 913.A016.024...
- Page 116 2.4mm wall elements for 520RE pumpheads 0-2 bar (0-30 psi) pressure rated elements Industrial inch Marprene TL Pumpsil Neoprene 902.0032.PFQ 913.A032.PFQ 920.0032.PFQ 902.0064.PFQ 913.A064.PFQ 920.0064.PFQ 902.0096.PFQ 913.A096.PFQ 920.0096.PFQ Sanitary STA-PURE STA-PURE inch Bioprene TL Pumpsil Series PCS Series PFL 933.0032.PFT 913.A032.PFT 961.0032.PFT 966.0032.PFT...
- Page 117 4-7 bar (60-100 psi) pressure rated elements Industrial inch Marprene TH 902.H032.PFQ Sanitary STA-PURE Series inch Bioprene TH 933.H032.PFT 961.H032.PFT m-530un-en-08...
-
Page 118: Pumphead Spares
27.3 Pumphead spares 520R/520R2 520REL/520REM/520REH Assembly Part Number Description number 520R 053.1011.100 520R2 053.1011.2L0 520REL 053.1011.EL0 520REM 053.1011.EM0 520REH 053.1011.EH0 Pumphead guard complete with tool- MNA2050A (520R, 520R2) unlockable latch Track assembly for cased pumps complete with spring-loaded tube MNA2045A (520R, 520R2) clamps MNA2043A (520R - 1.6mm wall tube) MNA2001 (520R2 - 2.4mm wall tube) -
Page 119: Pumping Accessories
Assembly Part Number Description number MNA2006A (520R, 520R2) Bottom (LH) tube clamp MN2002M (520R, 520R2) Tube clamp location plug Drain plug MN2131M (520RE) Top (RH) tube clamp MNA2005A (520R, 520R2) MN2002M (520R, 520R2) Tube clamp location plug Guard latch spring MN2034B MN2005M Guard latch spring cartridge... - Page 120 Pump Accessory Description Part code compatibility 059.5001.000 All models 505AS Filling stand Dispensing lance for use 059.5052.000 All models 520AL with 520AFN filling needles 059.5101.000 All models 505AFN Filling needle set Filling needle 1.6mm 059.5100.016 All models bore Filling needle 3.2mm 059.5100.032 All models bore...
-
Page 121: Performance Data
Performance data 28.1 Performance curves Flow rates of suction and discharge pressures for the pumphead at different drive speeds. This data was produced pumping water at ambient temperature. Marprene continuous tubing, 1.6mm wall, 200rpm, clockwise rotation 8.0mm 6.4mm 4.8mm 3.2mm 1.6mm suction (bar) pressure (bar) - Page 122 Marprene continuous tubing, 1.6mm wall, 200rpm, counter-clockwise rotation 8.0mm 6.4mm 4.8mm 3.2mm 1.6mm suction (bar) pressure (bar) Marprene continuous tubing, 2.4mm wall, 200rpm, clockwise rotation 9.6mm 8.0mm 6.4mm 4.8mm 3.2mm 1.6mm suction (bar) pressure (bar) m-530un-en-08...
- Page 123 Marprene continuous tubing, 2.4mm wall, 200rpm, counter-clockwise rotation 9.6mm 8.0mm 6.4mm 4.8mm 3.2mm 1.6mm suction (bar) pressure (bar) Marprene TL element, 0-2 bar (0-30psi), 200rpm, counter-clockwise rotation 9.6mm 6.4mm 3.2mm Suction (-) bar Pressure (+) bar m-530un-en-08...
- Page 124 Sta-Pure element, 0-2 bar (0-30psi), 200rpm, counter-clockwise rotation 9.6mm 6.4mm 3.2mm Suction (-) bar Pressure (+) bar Marprene TM element, 2-4 bar (20-60psi), 200rpm, counter-clockwise rotation 6.4mm 3.2mm Suction (-) bar Pressure (+) bar m-530un-en-08...
- Page 125 Sta-Pure element, 2-4 bar (30-60psi), 200rpm, counter-clockwise rotation 6.4mm 3.2mm Suction (-) bar Pressure (+) bar Marprene TH element, 4-7 bar(60-100psi), 200rpm, counter-clockwise rotation 3.2mm Suction (-) bar Pressure (+) bar m-530un-en-08...
-
Page 126: Trademarks
Trademarks Watson-Marlow, LoadSure, Qdos, ReNu, LaserTraceability, Pumpsil, PureWeld XL, Bioprene, Marprene are registered trademarks of Watson-Marlow Limited. Tri-Clamp is a registered trademark of Alfa Laval Corporate AB. STA-PURE Series PCS and STA-PURE Series PFL are trademarks of W.L.Gore and Associates. EtherNet/IP™... -
Page 127: Disclaimers
Disclaimers The information contained in this document is believed to be correct but Watson- Marlow Fluid Technology Group accepts no liability for any errors it contains and reserves the right to alter specifications without notice. WARNING: This product is not designed for use in and should not be used for, patient- connected applications. -
Page 128: Publication History
Publication history All versions updated, combined to single source and unified to Issue 4 09.18 m-530un-gb-02 530 U/UN pump First published 12.15. Issue 2 05.17. m-530en-01 530 EN pump First published 04.2020 m-530un-en-08...
Need help?
Do you have a question about the 500 Series and is the answer not in the manual?
Questions and answers