Table of Contents
Advertisement
Quick Links
Advertisement
Table of Contents

Related Manuals for GARDASOFT GigE Vision TR-RC Series


Summary of Contents for GARDASOFT GigE Vision TR-RC Series
- Page 1 TR-RC120/122 LED Lighting Controllers Issue 004 User manual www.gardasoft.com...
- Page 2 Deliberate acts of endangerment and vandalism are not covered by this document and must be considered by the installer. While care has been taken in the preparation of this document Gardasoft Vision Ltd will not accept any liability for consequential loss of any kind except those required by law.
-
Page 3: Table Of Contents
TR-RC1xx - User Manual Contents Getting started TR-RC features - a summary GigE VisionTM Safety precautions Heat Electrical General Installation guidance (disclaimer) Sicherheitsvorkehrungen Hitze Elektrik Allgemeines Haftungsausschluss Mesures de sécurité Chaleur Électricité Général Clause de non-responsabilité Mounting the TR-RC Environmental considerations Connecting the TR-RC Power Lighting output... - Page 4 TR-RC1xx - User Manual 10.2 Front panel commands 10.2.1 Startup 10.2.2 Setting the light rating 10.2.3 Setting up continuous output 10.2.4 Setting up switched output 10.2.5 Setting up pulsed operation 10.2.6 Setting time periods 10.2.7 Setting the internal trigger timer 10.2.8 Using the key lock 10.2.9...
-
Page 5: Getting Started
TR-RC for the desired operation as described in Section 10, Configuration commands. We recommend that you visit www.gardasoft.com for application notes on this product. There is also a support web page there, which has information on trouble- shooting problems. -
Page 6: Safety Precautions
TR-RC1xx - User Manual Safety precautions Read this before using the TR-RC. Always observe the following safety precautions. If in doubt, contact Gardasoft Vision Ltd. The following symbols are used in this guide: Warning: Read the instructions to understand the possible hazards. -
Page 7: Installation Guidance (Disclaimer)
This information is for guidance only. Installers must perform their own risk assessment specific to each installation. While Gardasoft Vision Ltd has taken every care in the preparation of this advice, Gardasoft Vision Ltd and Gardasoft LLC accept no liability for damages of any kind except those required by law. -
Page 8: Sicherheitsvorkehrungen
Sicherheitsvorkehrungen Bitte lesen Sie dieses Dokument, bevor Sie die TR-RC verwenden. Beachten Sie immer die folgenden Sicherheitshinweise. Bei Fragen wenden Sie sich an Gardasoft Vision Ltd. Die folgenden Symbole werden in dieser Anleitung verwendet: Warnung: Lesen Sie die Anleitung, um mögliche Gefahrenquellen zu verstehen. -
Page 9: Allgemeines
Diese Angaben dienen lediglich der Orientierung. Der Monteur muss für jede Installation eine eigene spezifische Risikobewertung durchführen. Gardasoft Vision hat bei der Zusammenstellung dieser Empfehlungen größtmögliche Sorgfalt walten lassen. Gardasoft Vision und Gardasoft LLC übernehmen über das gesetzlich erforderliche Maß hinaus keine Haftung für Schäden aller Art. -
Page 10: Mesures De Sécurité
TR-RC1xx - User Manual Mesures de sécurité Veuillez lire la notice avant d’utiliser le TR-RC. Respectez toujours les mesures de sécurité qui suivent. En cas de doute, contactez Gardasoft Vision Ltd. Les symboles suivants sont utilisés dans ce manuel: Attention: Lisez les consignes afin de bien comprendre les dangers encourus. -
Page 11: Général
Ces informations sont seulement à titre indicatif. Les installateurs doivent établir leur propre évaluation de risques pour chaque installation. Gardsoft Vision a préparé minutieusement ces conseils, mais Gardasoft Vision et Gardasoft LLC déclinent toute responsabilité concernant les dommages de toute nature à l’exception de ceux requis par la loi. -
Page 12: Mounting The Tr-Rc
TR-RC1xx - User Manual Mounting the TR-RC Environmental considerations Mount the TR-RC unit vertically or horizontally on the DIN rail to allow the display to be read easily. If the average output power exceeds 15W, the TR-RC must be mounted vertically to allow air to pass through it. -
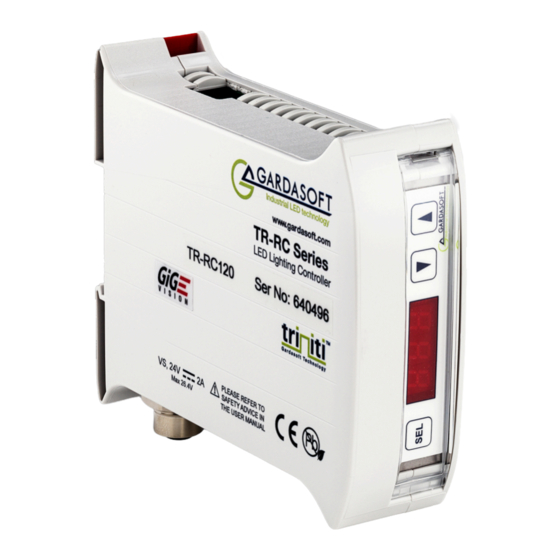
Page 13: Connecting The Tr-Rc
TR-RC1xx - User Manual Connecting the TR-RC Refer to Section 11.1, Specifications and ratings for the ratings of the connections. The TR-RC’s connections are shown below (a TR-RC120 is illustrated): Power Any power supply derived from mains electricity must have a Safety Extra Low Voltage (SELV) output. -
Page 14: Trigger Input
TR-RC1xx - User Manual the current or voltage rating of the light. Refer to Section 10, Configuration commands for more information about this. The lighting output connections and triniti sense lines must not be commoned to any other controllers or grounded in any way. The lighting output connections are shown below: Trigger input The trigger input is a Smart Input;... -
Page 15: Ethernet
TR-RC1xx - User Manual In operating environments where there is a high level of radiated electrical noise, use a shielded cable for the trigger input as shown opposite: Ethernet The RJ45 connector requires a straight-through cable to connect to a network switch, hub or router. -
Page 16: General Description
TR-RC1xx - User Manual General description Three modes of operation are provided for the light output: Continuous – the output is constant, but variable between 0% and 100% in steps of 0.1%. Pulse (strobe) – the output is pulsed once per trigger. The delay from trigger to pulse, the pulse duration and the brightness can all be set. -
Page 17: Triggering
TR-RC1xx - User Manual Triggering Trigger pulses should have a minimum pulse width of 2µs. You can set the sense of the TR-RC trigger input. Do this by setting the P flag from the front panel (see Section 10.2, Front panel commands), the web page (see Section 9, Webpage configuration) or the RE command (see... -
Page 18: Internal Trigger
TR-RC1xx - User Manual NPN signal You can connect an NPN open collector drive to the TR-RC’s input. Use the connections shown opposite. If the P flag is set to ‘1’ the TR-RC output turns on when the driving transistor turns on. To reverse this, set the P flag to ‘0’. -
Page 19: Safesense
TR-RC has been power-cycled. For further information on this feature, see the application note, APP936 – SafeSense Technology, available from www.gardasoft.com/Downloads/. SafePower The TR-RC’s SafePower needs no intervention from the user for its operation. -
Page 20: Fault Detection
TR-RC1xx - User Manual Fault detection The TR-RC can detect a range of errors when connected to a light. The displayed error codes are shown below with their reasons. Error Reason Internal power dissipation is too high. Output turned off. Output current to lighting is too low. -
Page 21: Ethernet Address
DHCP server. Otherwise the TR-RC has a fixed IP address, subnet mask, and gateway address. DHCP mode or the IP address can be set or read using the GardasoftMaint program available from www.gardasoft.com/Downloads. The GardasoftMaint window is shown below: —... -
Page 22: Dhcp
TR-RC1xx - User Manual GardasoftMaint allows you to view the controllers on your network, change their IP addresses and upgrade their firmware if it becomes necessary. In the messaging section of GardasoftMaint, you can communicate with your controller using the commands explained in Section 10, Configuration commands. -
Page 23: Webpage Configuration
RC's webpages. You can also type the controller’s IP address (displayed in GardasoftMaint) into your web browser, which will display the Main page. GardasoftMaint software is available from www.gardasoft.com/Downloads. Main page The main page (shown below) is the first to open when you access the TR-RC's web pages. -
Page 24: Configuration Page
TR-RC1xx - User Manual Configuration page The configuration page allows you to set up the lighting parameters, view the light data, and view the measurements the TR-RC makes during operation. You can set the mode (continuous, pulsed, or switched), the light's brightness and pulse settings. -
Page 25: General Setup Page
TR-RC1xx - User Manual General setup page On the general setup page (shown below), you can set a password for the TR-RC and send it commands. Refer to Section 10, Configuration commands for the commands you can use to operate the TR-RC. —... -
Page 26: Configuration Commands
TR-RC1xx - User Manual Configuration commands In addition to configuring the TR-RC using its web page interface, you can configure it from the front panel or using the Ethernet connection. Both of these methods are described in this section along with general information about setting up lights. - Page 27 TR-RC1xx - User Manual current rating. The firmware version number is then displayed, for example , and then the unit is ready for operation. When the TR-RC is not being configured, the display shows the status of the lighting output as shown below: The TR-RC displays an error if a light is connected but no rating specified.
-
Page 28: Setting The Light Rating
TR-RC1xx - User Manual 10.2.2 Setting the light rating Press and hold SEL for 1 second and follow the keystrokes below: CH1 is displayed. Use the p and q but- tons to scroll to rAt. Press the SEL button. Use the p and q buttons to select the method you require to set the rating of the light: Cur for current and Vol for voltage. -
Page 29: Setting Up Switched Output
TR-RC1xx - User Manual 10.2.4 Setting up switched output Press and hold SEL for 1 second and follow the keystrokes below: CH1 is displayed. Press the SEL button. Use the p and q buttons to select SOn (Other options displayed are SPu and SCo). -
Page 30: Setting Time Periods
TR-RC1xx - User Manual dEL is displayed. Press the SEL button to set up the pulse delay time. Refer to Setting time periods. Press the SEL button. PUL is displayed. Press the SEL button to set up the pulse width. Refer to Setting time periods. Press the SEL button. -
Page 31: Setting The Internal Trigger Timer
TR-RC1xx - User Manual E-2 is displayed. Press the SEL button to enter times values from 10ms to 5s. Use the p and q buttons to select the required value in steps of 10ms. Press the SEL button. Use the p and q buttons to scroll to E-3 to enter time values from 1ms to 999ms. -
Page 32: Using The Key Lock
TR-RC1xx - User Manual 10.2.8 Using the key lock You can lock the TR-RC front panel keypad so unauthorised users cannot change the configuration. To do this you can set a numeric code from 0 to 255, which provides moderate protection. To lock the keypad, press and hold SEL for 1 second and follow the keystrokes below: CH1 is displayed. -
Page 33: Viewing The Trigger Status
TR-RC1xx - User Manual 10.2.9 Viewing the trigger status You can view the trigger input status and whether the light is pulsing when the TR-RC is set to pulse or switched mode. To do this, press and hold is displayed. Use the p and q keys to scroll to SEL for I second and and press SEL. -
Page 34: Ethernet Commands
Ethernet commands You can configure the TR-RC through the Ethernet connection using UDP or TCP/IP. You can download GardasoftMaint from www.gardasoft.com/Downloads, which allows you to send commands to configure your TR-RC. 10.3.1 Ethernet communication Commands sent in UDP or TCP/IP from a computer to the TR-RC must be sent to destination port 30313. - Page 35 TR-RC1xx - User Manual Multiple commands can be entered on one line by separating them with a semi-colon (;). The TR-RC replies to the commands individually, separating them with and adding the > prompt after the final <LF><CR> command reply. All commands comprise a code of two letters followed by any parameter necessary.
-
Page 36: General Commands
TR-RC1xx - User Manual 10.3.3 General commands Any changes you make using Ethernet commands are not saved permanently until you send the AW command. Report the TR-RC firmware version This command returns the firmware version ruining on the TR-RC. For example, typing: VR returns TR-RC120 (HW101) V001 Set the rating of a light... - Page 37 TR-RC1xx - User Manual Set switched mode This command sets the output to switched mode and allows the brightness to be set: RW1,s Where: s = brightness setting in percent (0 to 999). Set the option flags This command sets the flags for error detection, trigger sense, and SafeSense: RE1,m Where the following code applies:...
- Page 38 TR-RC1xx - User Manual Clear configuration This command clears the configuration and lighting ratings, and turns the output off. The results of any VL, RS, RW, RU, RT, RE, RP, TT, and AW commands are cleared. Show configuration This command shows the configuration of the TR-RC. Type in: A typical reply to this command might be: CH1,MD0,S50.0,0.0,DL1.000ms,PU1.000ms,RT 0.0us,IP1,FL0,CS0.000A,RA0.000A...
- Page 39 TR-RC1xx - User Manual Simulate an input trigger This command simulates an input trigger. If the TR-RC is in pulse mode, it pulses the output once. Enable Ethernet messages This command enables or disables Ethernet messages. Type in: Where: m = 0 to disable Ethernet messages, and m = 1 to enable Ethernet messages.
-
Page 40: Command Summary
TR-RC1xx - User Manual Disable the keypad You may find it necessary to lock the front panel keypad to prevent any unauthorised changes to the settings to the TR-RC. To disable the keypad, type in the following command: KBd,c Where: d = 0 to enable the keypad. - Page 41 TR-RC1xx - User Manual Command Example Effect KB1,23 Disable the keypad buttons on the front panel. Set the unlock code to 23. Generate one trigger pulse. Show the unit's configuration details. — —...
-
Page 42: Tr-Rc Reference Information
TR-RC1xx - User Manual TR-RC reference information This section of the user manual contains information about the TR-RC’s specification, ratings and restrictions, and event and error codes. 11.1 Specifications and ratings TR-RC120 TR-RC122 User interface Ethernet and pushbutton Output channel One constant current output with SafeSense Up to 1.2A continuous Up to 1.25A continuous... -
Page 43: Restrictions
TR-RC1xx - User Manual 11.2 Restrictions The following timings and restrictions are applied when commands are entered. Exceeding these values causes an error to be returned. The keypad interface prevents invalid values being entered at the controller. 11.2.1 Continuous mode The maximum continuous output current is 1.2A for theTR-RC120 and 1.25A for the TR-RC122. -
Page 44: Event Codes
TR-RC1xx - User Manual 11.3 Event codes On receipt of a GT1 command, event messages are sent by the TR-RC over its Ethernet link when a light is connected or an error occurs. The message format is: Evt1,<event code> Some event codes are displayed on the TR-RC’s front panel; these are shown in red. -
Page 45: Error Codes
TR-RC1xx - User Manual 11.4 Error codes Some error codes are displayed on the TR-RC’s front panel; these are shown in red. Error Reason number Err 1 A parameter value is invalid. Err 2 Command not recognised. Err 3 A numeric value is in the wrong format. Err 4 Wrong number of parameters. - Page 46 TR-RC1xx - User Manual Error Reason number Err 39 The internal protection has prevented SafePower voltage going too high. Err, 40, 41, Fatal error: The unit is outputting more current than expected. Err 42, The output current is too high. Err 43, The requested output current requires too high a voltage.
- Page 47 TR-RC1xx - User Manual — —...
- Page 48 TR-RC1xx - User Manual Issue 004 - February 2017 © Copyright 2017 Gardasoft Vision Ltd Gardasoft LLC Gardasoft Vision Ltd Oak Ridge Road Trinity Court Weare Buckingway Business Park New Hampshire Cambridge CB24 4UQ UK 03281 USA tel: +44 1954 234970...
Need help?
Do you have a question about the GigE Vision TR-RC Series and is the answer not in the manual?
Questions and answers