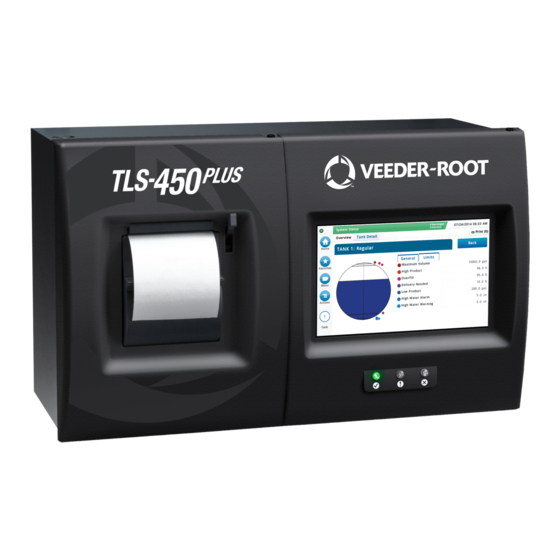
Veeder-Root TLS-450PLUS Manual
Board and software replacement/upgrade
Hide thumbs
Also See for TLS-450PLUS:
- User manual ,
- Troubleshooting manual (127 pages) ,
- Install, setup, & operation manual (98 pages)

Related Manuals for Veeder-Root TLS-450PLUS


Summary of Contents for Veeder-Root TLS-450PLUS
- Page 1 • Manual No: 577014-076 Revision: B TLS-450PLUS Console Board And Software Replacement/Upgrade...
- Page 2 If “lost” equipment is delivered at a later date and is not needed, Veeder-Root will allow a Return to Stock without a restocking fee. Veeder-Root will NOT be responsible for any compensation when a customer chooses their own carrier.
-
Page 3: Table Of Contents
Figure 13. Locating TLS-450PLUS CPU Board iButton ...........9 Figure 14. Install iButton Flange Facing Up .............9 Figure 15. Remove TLS-450PLUS CPU Board Battery Isolator Strip ....10 Figure 16. Inserting Data Display Cable End Into CPU Board Connector .....10 Figure 17. -
Page 4: Contractor Certification Requirements
This manual does not provide troubleshooting information. Contractor Certification Requirements Veeder-Root requires the following minimum training certifications for contractors who will install and setup the equipment discussed in this manual: Installer Certification (Level 1): Contractors holding valid Installer Certification are approved to perform wiring and conduit routing;... -
Page 5: Safety Warnings
Routing conduit for power wires into the intrinsically safe compartment can result in fire or explosion resulting in serious injury or death. Related Documents 577014-073 TLS-450PLUS Console Site Prep And Installation Manual 577014-075 TLS-450PLUS Console Troubleshooting Guide Precautions Against Static Electricity Before removing electronic components from their anti-static bags read the following static electricity precautions. -
Page 6: Before Turning Off Power
2. From the Home Screen touch Menu > Software Upgrade > DB Backup to view the Database Backup Screen (see Figure 2). Touch the down arrow in the Backup Destination field to select the Backup thumb drive inserted in Step 1, then follow the on-screen instructions to backup TLS-450PLUS console data. System Status... -
Page 7: Replacing The Cpu Board
Temperature 60.8 Actions Water Height Figure 3. Opening The TLS-450PLUS Console Doors LEGEND FOR NUMBERED BOXES IN Figure 3 1. Left (Printer) door 4. Using a T-15 Torx driver, remove the top and bottom screws securing left door and swing door to left. -
Page 8: Figure 4. Remove The Acknowledge Switch Panel Cable From Its Cpu Board Connector
Replacing The CPU Board Before Turning Off Power 2. For right doors with an Acknowledge Switch panel, remove its cable from its connector (J502) on the CPU board (see Figure 4). For right doors with the optional touch display, remove the Display Data cable (pointer 1 in Figure 5) from the CPU board connector. -
Page 9: Figure 6. Remove Ground Wire From Display Door
6. Remove the Ground wire at the top of the Display door (see Figure 6). Figure 6. Remove Ground Wire From Display Door 7. Remove and set aside the TLS-450PLUS Display door by removing the top and bottom hinge shoulder screws (see Figure 7). -
Page 10: Figure 8. Remove Usb Module Cables From Cpu Board
Replacing The CPU Board Before Turning Off Power 8. Remove the two USB module cables from the CPU board USB connectors USB3 and USB4 (see Figure 8). USB1 USB1 USB2 USB2 USB3 USB3 USB4 USB4 Figure 8. Remove USB Module Cables From CPU Board 9. -
Page 11: Figure 10. Locating Sd Card
Replacing The CPU Board Before Turning Off Power Figure 10. Locating SD card 14.Press the outer edge of the SD card towards the read of its enclosure and it should spring out so it can be removed. Remove the SD card from the old CPU board and check that the read/write-protect switch on the side of the card is in the position shown in (item 1 Figure 11). -
Page 12: Figure 13. Locating Tls-450Plus Cpu Board Ibutton
18.Locate the iButton on the old TLS-450PLUS CPU board. Remove the iButton from the old CPU board and install it in the empty socket on the new TLS-450PLUS CPU board (see Figure 13). Make sure the flanged side of the iButton is facing up in its socket (see Figure 14. -
Page 13: Figure 15. Remove Tls-450Plus Cpu Board Battery Isolator Strip
Before Turning Off Power 20.Remove the battery isolator strip from under the battery hold-down clip (see Figure 15). Figure 15. Remove TLS-450PLUS CPU Board Battery Isolator Strip 21.Reconnect the three Ethernet Module cables ENET2 (blue), ENET1 (yellow) and ENET0 (red) from the CPU board (ref. - Page 14 Power up all wireless devices. b. Power up the TLS RF console and wait about 5 minutes, before applying power to the TLS-450PLUS. c. Power up the TLS-450PLUS and wait 5 minutes until the console’s 'Discover Mode' is complete.
-
Page 15: Replacing The Ibutton
1. Follow Steps 1 through 11, in the instructions for “Replacing The CPU Board” beginning on page 4. 2. Locate the iButton on the top rear of the TLS-450PLUS CPU board (see Figure 17). Remove the iButton from its socket on the board. Slide the replacement iButton into the socket with its flanged side facing up in the socket (see Figure 18. - Page 16 Before Turning Off Power 3. Reinstall the TLS-450PLUS CPU board into the console. Line up with slot in back of console wall and make sure board is fully seated in its backplane connector and the front edge is over the standoff pins. Push board front edge onto snap pins to secure it in place.
-
Page 17: Replacing The Sd Card
Replacing The SD Card 1. Perform a DB Backup of the system as instructed in “Before Turning Off Power” on page 3. Turn off, tag and lockout the breaker that supplies power to the WARNING console. 2. Remove both left and right door screws (with a T-15 Torx driver) and swing open both doors to the left (see Figure 3). - Page 18 Replacing The SD Card Before Turning Off Power 7. From the home screen, touch Menu>Software Upgrade> DB Restore and follow the on-screen instructions. 8. Perform a DB Backup as instructed in “Before Turning Off Power” on page 3.
-
Page 19: Installing Software Features
Installing Software Features Before installing a software feature upgrade, perform a system backup using a V-R Backup thumb drive (P/N 332970-004) following the procedure described in “Before Turning Off Power” on page 3. The V-R Backup thumb drive is different from a V-R Software Upgrade thumb drive - the two NOTICE are not interchangeable. - Page 20 For technical support, sales or other assistance, please visit: www.veeder.com...
Need help?
Do you have a question about the TLS-450PLUS and is the answer not in the manual?
Questions and answers