Table of Contents
Advertisement
Quick Links
Advertisement
Table of Contents

Related Manuals for Robe ROBIN Spote


Summary of Contents for Robe ROBIN Spote
- Page 1 Version 1.0 Version 1.2...
-
Page 2: Table Of Contents
Robin Spote Table of contents 1. Safety instructions ......................3 2. Fixture exterior view ...................... 5 3. Installation........................6 3.1 Connection to the mains .................... 6 3.2 Rigging the fixture ...................... 7 3.3 DMX-512 connection ....................9 3.4. Wireless DMX operation ..................10 3.5. -
Page 3: Safety Instructions
Please consider that damages caused by manual modifications to the device are not subject to warranty. The Robin Spote was designed for indoor use and it is intended for professional application only. It is not for household use. - Page 4 Do not block the front lens with any object when the fixture is under operation. The cooling openings should never be covered with cloth or other materials, and never must be blocked. This fixture should not be placed in a built-in installation unless proper ventilation is provided. Only operate the fixture after having checked that the housing is firmly closed and all screws are tightly fastened.
-
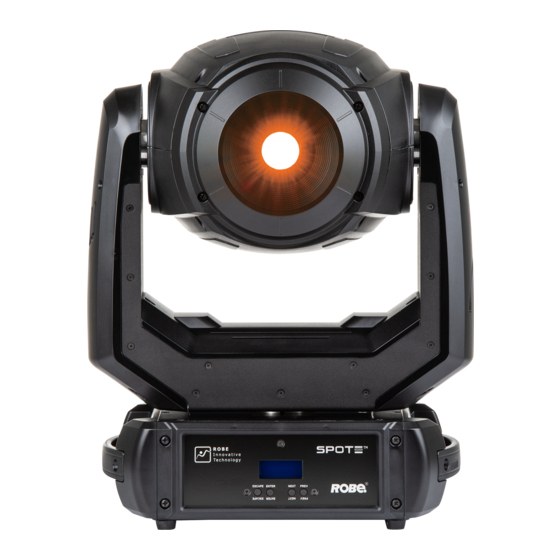
Page 5: Fixture Exterior View
2. Fixture exterior view 1- Moving head 2 - Yoke 3 - Base 4 - Handle 5 - DMX Out 6 - DMX In 7 - Display 8 - Control buttons 9 - Fuse holder 10 - Mains IN 11 - Mains OUT 12 - Tilt lock... -
Page 6: Installation
This device falls under class one and must be earthed (grounded)! Design of the Robin Spote allows to connect several fixtures to AC mains power in one interconnected daisy chain using power input and throughput connectors. Needed daisy chain cords are stated in the chapter “Technical specifications “... -
Page 7: Rigging The Fixture
3.2 Rigging the fixture A structure intended for installation of the fixture (s) must safely hold weight of the fixture(s) placed on it. The structure has to be certificated to the purpose. The fixture (fixtures) must be installed in accordance with national and local electrical and construction codes and regulations. - Page 8 1-Quick-lock fastener 2-Omega holder 3-Trust 4-Clamp 5-Safety wire with a snap hook with screw lock gate 6-Attachment point Truss installation 1. Bolt each clamp (1) to the omega holder (2) with M12 bolt and lock nut through the hole in the holder. 2.
-
Page 9: Dmx-512 Connection
3.3 DMX-512 connection The fixture is equipped with 5-pin XLR sockets for DMX input and output. Only use a shielded twisted-pair cable designed for RS-485 and 5-pin XLR-plugs and connectors in order to connect the controller with the fixture or one fixture with another. DMX output DMX input XLR socket:... -
Page 10: Wireless Dmx Operation
3.4. Wireless DMX operation The external ROBE Wireless CRMX Dongle for compact ROBIN fixtures allows receiving wireless DMX. This module is equipped with the Lumen Radio CRMX module and antenna for receiving DMX signal. CRMX module operates on the 2.4 GHz band. -
Page 11: Wide-Angle Lens Installation
3.5. Wide-angle lens installation Disconnect the fixture from mains before the wide-angle module installing. To install the wide-angle lens 1. Unscrew the four screws (2) to remove the front cover (1) of the head. 2. Unscrew the three screws (3) and remove the covering glass. (4). 3. -
Page 12: Remotely Controllable Functions
4. Remotely controllable functions Colour wheel The colour wheel with 13 dichroic filters rotates in both directions with variable speed which creates wide spectrum of graphic effects. Rotating gobo wheel The rotating gobo wheel includes 9 glass gobos rotating in both directions, indexable, replaceable "SLOT&LOCK” system. -
Page 13: Control Menu Map
5. Control menu map Default settings=Bold print Level 1 Level 2 Level 3 Level 4 Level 5 Level 6 Level 7 DMXA Set DMXA 001-512 DMX Pres Mode 1 Info POn Time Total Reset Aler P Air fil R Ti DMX In 0-255 Dim F... - Page 14 Level 1 Level 2 Level 3 Level 4 Level 5 Level 6 Level 7 Dynamic Sta Alone Music T On, Off Auto Run Test Prog 1 Prog 2 Prog 3 Pr Play Test Prg Prog 1 Prog 2 Prog 3 Pr Edit Prog 1 Step 1...
-
Page 15: Control Menu
Robin Spote will respond to the controller. If you set, for example, the address 25, the Robin Spote will use channels 25 - 49 for control . Please, be sure that you do not have any overlapping channels in order to control each Robin Spote correctly and independently from any other fixture on the DMX data link. -
Page 16: Personality (Pers)
was last reset. In order to reset this counter, press and hold both [NEXT] and [PREV] buttons and the [Enter] button at the same time. Sw Ver - Software versions. Select this item to read the software version of the fixture modules. IC-1 - A pan/Tilt processor. -
Page 17: Manual Control (Manual)
Pr Edit - Editing program. Select this menu to edit or create the program. The Robin Spote has one built-in program and one user-editable program up to 40 steps. Each program step has a step time - during which effects last in the current step and a fade time- during which effects move to new positions. -
Page 18: Reset
5. Press [ESCAPE] button, select next prog. step, press [ENTER] button and repeat steps 3 - 5). 6.7 Reset This option enables the Robin Spote to index all effects and return to their standard positions. 6.8 Special functions (Special) RDM Low - This menu item shows the first part of the RDM identification code. - Page 19 - with the DMX input of the fixture if you using the flash cable RS232/DMX - with the USB input of the Robe Universal Interface if you using the USB cable. Connect DMX output of the Robe Universal Interface with the fixture via a standard DMX cabel.
-
Page 20: Rdm
DMX512, the RDM protocol allows a console or dedicated RDM controller to send commands to and receive messages from specific moving lights. RDM allows explicit commands to be sent to a device and responses to be received from it. The list of commands for Robin Spote is the following. Parameter ID Discovery command SET command... -
Page 21: Error And Information Messages
8. Error and information messages Tilt Err This message will appear after the reset of the fixture if the head´s magnetic-indexing circuit malfunctions (sensor failed or magnet is missing) or the stepping motor is defective or its driving IC on the PCB. The head is not located in the default position after the reset. -
Page 22: Technical Specifications
9. Technical Specifications Electrical Power supply: electronic auto-ranging Input voltage range: 100-240V, 50-60Hz Fuse: T 3.15A/250V ~ Max. power consumption: 130W (power factor 0.88) Mains input: CE - max. 16A ETL - max. 10A Mains output: CE - max. 15A ETL - max. - Page 23 Pan/Tilt Pan movement range 540° Tilt movement range 270° 16 bit movement resolution Automatic Pan/Tilt position correction Remotely controllable speed of pan/tilt Control 2-row LCD display & 4 buttons Readout fixture usage, receiving DMX values, temperatures, etc Built-in analyzer for easy fault finding, error messages Built-in demo sequences Silent fans cooling, Stand-alone operation...
- Page 24 (P/N 1305 2407) Mains Cable PowerCon In TRUE1/open ended, 2m, indoor (P/N 13052445) Mains Cable PowerCon In TRUE1/CEE 16A, 2m, indoor (P/N 10980127) ROBE Wireless CRMX Dongle for compact ROBIN fixtures (P/N 1305 2439) Daisy Chain PowerCon TRUE1 In/Out, EU, 2m, indoor...
-
Page 25: Maintenance And Cleaning
10. Maintenance and cleaning DANGER ! Disconnect from the mains before starting any maintenance work Never use alcohol or solvents for cleaning the front lens and covers of the fixture It is absolutely essential that the fixture is kept clean and that dust, dirt and smoke-fluid residues must not build up on or within the fixture. -
Page 26: Checking Plastic Parts Of The Fixture
10.3 Checking plastic parts of the fixture The plastic parts of the fixture should be checked for damages and beginning cracks at least every two months. If hint of a crack is found on some plastic part, do not use the fixture until the damaged part will be replaced. Cracks or another damages of the plastic parts can be caused by the fixture transportation or manipulation and also ageing process may influence plastic materials. -
Page 27: Photometric Diagrams
11. Photometric diagrams Standard lens Wide-angle lens... -
Page 28: Changelog
Photometric diagrams changed 12/11/2020 DMX chart ver. 1.1 Copyright © 2020 Robe Lighting - All rights reserved Specifications are subject to change without notice. November 12, 2020 Made in ROBE Lighting s.r.o., Palackého 416, 757 01 Valašské Meziříčí, Czech Republic... - Page 29 DMX protocol Robin Spote - DMX protocol Version 1.1 Type of Channel Function Value control 0 - 255 Pan movement by 540° (128=default) proportional Pan Fine 0 - 255 Fine control of pan movement (0=default) proportional Tilt 0 - 255 Tilt movement by 270°...
- Page 30 DMX protocol Type of Channel Function Value control The following RoboSpot related commands are only applicable when the RoboSpot is connected: 225 - 229 RoboSpot enabled step 230 - 234 RoboSpot disabled - except handle faders and pan/tilt step 235 - 239 RoboSpot fully disabled step 240 - 255 Reserved LED frequency selection...
- Page 31 DMX protocol Type of Channel Function Value control 21-25% (CYAN ) 26-30% (MAGENTA) 31-35% (YELLOW) 36-40% (ORANGE) Pan/tilt/zoom is set at 128 DMX (50%), Dimmer is open at 255 DMX (100%). To set a drop of max. light intensity (compared to original light intensity), stay at DMX value for at least 3 sec.
- Page 32 DMX protocol Type of Channel Function Value control 181-185 CTO 3200K step 186-189 UV (Kongo blue) step 190 - 215 Forwards rainbow effect from fast to slow proportional 216 - 217 No rotation step 218 - 243 Backwards rainbow effect from slow to fast proportional 244 - 249 Random colour selection by audio control step...
- Page 33 DMX protocol Type of Channel Function Value control 100-107 Gobo 6 proportional 108-115 Gobo 7 proportional 116-123 Gobo 8 proportional 124-129 Gobo 9 proportional Shaking gobos from slow to fast Rotation - set rotation on channel 16 130-137 Gobo 1 proportional 138-145 Gobo 2 proportional...
- Page 34 0 - 255 Dimmer intensity from 0% to 100% (0=default) proportional Dimmer intensity - fine 0 - 255 Fine dimming (0=default) proportional Copyright © 2020 Robe Lighting s.r.o. - All rights reserved All Specifications subject to change without notice Page 6...
Need help?
Do you have a question about the ROBIN Spote and is the answer not in the manual?
Questions and answers