Table of Contents
Advertisement
Quick Links
Advertisement
Table of Contents

Related Manuals for Robe Robin ProMotion ADM


Summary of Contents for Robe Robin ProMotion ADM
- Page 1 Version 1.7...
-
Page 2: Table Of Contents
Robin ProMotion Table of contents 1. Safety instructions ......................3 2. Fixture exterior view ...................... 5 3. Installation........................6 3.1 Connection to the mains .................... 6 3.2 Rigging the fixture ...................... 7 3.3 Positioning the Robin ProMotion ................8 3.4 Additional base covers installation ................. 10 3.5 Installing the wide-angle lens .................. -
Page 3: Safety Instructions
FOR YOUR OWN SAFETY, PLEASE READ THIS USER MANUAL CAREFULLY BEFORE POWERING OR INSTALLING YOUR ROBIN ProMotion ! Save it for future reference. This device has left our premises in absolutely perfect condition. In order to maintain this condition and to en- sure a safe operation, it is absolutely necessary for the user to follow the safety instructions and warning notes written in this manual. - Page 4 Air vents and slots in the fixture head and base are provided for ventilation to ensure reliable operation of the device and to protect it from overheating. Do not block the light output with any object when the fixture is under operation. The openings should never be covered with cloth or other materials, and never must be blocked.
-
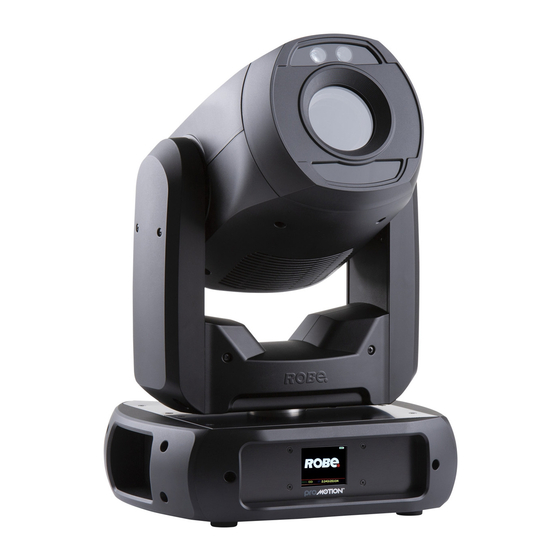
Page 5: Fixture Exterior View
3 - Base 4 - Display 5 - Pan lock 6 - Tilt lock Note: the Robin Promotion ADM is equipped with an automatic distance meter which enables autofocus of the fixture. 7 - Ethernet OUT (RJ45) 8 - Ethernet IN (RJ45) -
Page 6: Installation
3. Installation Fixtures must be installed by a qualified electrician in accordance with all national and local electrical and construction codes and regulations. 3.1 Connection to the mains For protection from electric shock, the fixture must be earthed! The Robin ProMotion is equipped with auto-switching power supply that automatically adjusts to any 50-60Hz AC power source from 100-240 Volts. -
Page 7: Rigging The Fixture
3.2 Rigging the fixture A structure intended for installation of the fixture (s) must safely hold weight of the fixture(s) placed on it. The structure has to be certificated to the purpose. The fixture (fixtures) must be installed in accordance with national and local electrical and construction codes and regulation. -
Page 8: Positioning The Robin Promotion
Rigging via two omega holders: 1-Clamp 2-Omega holders with quarter-turn loks 3-Truss 4- Safety wire 5-Attachment point for safety wire When installing fixtures side-by-side, avoid illuminating one fixture with another! 3.3 Positioning the Robin ProMotion The Robin ProMotion is designed to be installed in one of four possible installation locations: 1. - Page 9 There is a chart of throw distance ratio of 3.5 : 1 to assist you in determining the ideal location for your fixture. Note: There is a tolerance among these numbers due to optical component variations. We recommend that if you intend to permanently install the Robin ProMotion, you should physically test the projection size and dis- tance using the actual fixture before permanent installation.
-
Page 10: Additional Base Covers Installation
3.4 Additional base covers installation The additional base covers cover connectors and the display of the fixture´s base. Disconnect the fixture from mains before base covers installing. To install the base covers: 1. Remove the display cover (1) by loosening the two quarter-turn locks (2) on the cover. 2. -
Page 11: Installing The Wide-Angle Lens
3.5 Installing the wide-angle lens Disconnect the fixture from mains before the wide-angle module installing. To install the wide-angle lens: 1. Remove both covers (1) by loosening the four quarter-turn locks (2) on each cover. 2. Remove the front part (3) of the head by unscrewing the four screws M4x8 (4) and disconnecting cables. 3. -
Page 12: Installing The Automatic Distance Meter (Adm)
3.6 Installing the Automatic Distance Meter (ADM) Disconnect the fixture from mains before installing ADM. To install the ADM 1. Remove both covers (1) by loosening the four quarter-turn locks (2) on each cover. 2. Remove the front part (3) of the head by unscrewing the four screws M4x8 (4) and disconnecting cables from the control PCB (11) 3. -
Page 13: Dmx-512 Connection
3.7 DMX-512 connection The fixture is equipped with 5-pin XLR sockets for DMX input and output. Only use a shielded twisted-pair cable designed for RS-485 and 5-pin XLR plugs and connectors in order to connect the controller with the fixture or one fixture with another. DMX output DMX input XLR sockets:... -
Page 14: Ethernet Connection
3.8 Ethernet connection The fixtures on a data link are connected to the Ethernet with ArtNet communication protocol.The control soft- ware running on your PC (or light console) has to support Art-Net protocol. Art-Net communication protocol is a 10 Base T Ethernet protocol based on the TCP/IP.Its purpose is to allow transfer of large amounts of DMX 512 data over a wide area using standard network technology. -
Page 15: Wireless Dmx Operation
3.9. Wireless DMX operation The wireless version of the fixture is equipped with the Lumen Radio CRMX module and antenna for receiving DMX signal. CRMX module operates on the 2.4 GHz band. To switch the fixture to the wireles DMX operation, select the option "Wireless DMX" from the menu "Receiving Mode"... -
Page 16: Control Menu Map
4. Control menu map Default settings=Bold print Level 1 Level 2 Level 3 Level 4 Level 5 Level 6 Level 7 Fixture Address DMX Address 1-255 ArtNet Universe 0-255 sACN Universe 1-63999 Receiving Mode ArtNet Wireless DMX IP Address IP Net Mask Reset Address Fixture Information Fixture Times... - Page 17 Level 1 Level 2 Level 3 Level 4 Level 5 Level 6 Level 7 Screen Delay 0-10 Intensity LED Engine Ceiling Projection On, Off Rear Projection On, Off Colour Temperature 3200K, 4200K, 5000K, 5500K, 5600K,6500K, 7500K, 8000K,9050K Max. Brightness Gamma Curve 1.8, 2.2, 2.4, B&W, Linear Gaphics Engine...
- Page 18 Add New Step Level 1 Level 2 Level 3 Level 4 Level 5 Level 6 Level 7 Delete Step Reset Functions Reset Grap. Engine Reset Pan/Tilt Reset Focus Reset All User Media Initiaize USB Mirror Media Mirror Program Re-encode Internal Media Delete Internal Media Special Functions...
-
Page 19: Control Menu
5. Control menu The Robin ProMotion is equipped with Robe Graphic Touch Screen (50x40mm / 1.97" x 1.57") which allows you to set the fixture´s behaviour according to your needs, obtain information on its operation and program it, if it has to be used in a stand-alone mode. -
Page 20: Fixture Information
5.2 Fixture information Fixture Times - Use the menu to read a number of fixture operation hours. Total Power On Time - The menu item shows a total number of operation hours since the Robin ProMotion has been fabricated. Lamp On Time - The menu item shows a total number of LED source operation hours since the Robin ProMotion has been fabricated. - Page 21 5.3 Personality Pan Reverse - Use the item to invert pan movement. Tilt Reverse - Use the item to invert tilt movement. Pan/Tilt Mode - Use the menu to set mode of the pan/tilt movement. Speed Mode - Both pan and tilt will move with the same speed as adjusted at the channel 5 "Pan/Tilt speed, Pan/Tilt time".
-
Page 22: Manual Control
If you use only one fixture, the function should be off (gobo switching is faster). For two or more fixtures the function has to be on. Slide Show Timer -The option sets time period (0 - 300 sec.) during which a gobo stay in a position before changing during "Gobos presentation"... -
Page 23: Stand- Alone
5.5 Stand- alone Auto Run - This function allows you to select the program which will be played in the stand-alone mode after switching the fixture on. Selected program (1-9) will be played continuously in a loop. Play Program - Select this menu to run one of 9 programs which have been created or recorded via the menu “Record Program”. - Page 24 flash drive. The user do not have access to the SD memory card which is intended for system files and factory media files. No USB - This item will appear if no USB stick is connected. Initialize USB - This item will appear if an USB stick without folders structure is connected. Press [ENTER] to start initialization.
-
Page 25: Special Functions
Note: There is 29 GB of free space in the fixture available for custom media files, NAS files and programs. Re-encode Internal Media - The option converts custom pictures (only) in the fixture into optimal resolution (1280x720 pixels) for the Robe ProMotion. These converted pictures can be copied back on the USB stick (option "Mirror Media"). -
Page 26: Keystones
6. Keystones If an image output from the Robin ProMotion is at an angle, the image may be skewed. Two keystone channels (Keystoning Vertical, Keystoning Horizontal) in DMX chart adjust the image shape, aspect ratio is kept. Default DMX value for both channels is 128, it means that no keystone correction has been used. The channel "... -
Page 27: Using External Hdmi Input
The keystone options from fixture´s menu (Manual Control --> LED Engine) can be used for external HDM input only. 7. Using external HDMI input If you want to use the external HDMI input of the fixture, you have to activate the external HDMI input via setting DMX value into range of 220-229 on the channel 6 (Special functions). - Page 28 Type the IP address of the Promotion to your web browser, e.g. http://2.170.33.104, enter the user name: robe and the password: 2479 , the status screen of the ProMotion will appear. This screen gives you fast overview of fixture setting and its statuses. The icon allows you to change some values in a corresponding table.
- Page 29 If you have two and more Promotions, the item Discovery allows you to show all connected Promotions. Click on the button Discover and fixtures connected in the network will be displayed. Example for two connected fixtures with IP addresses 2.170.33.104 and 2.1.2.3 Discover button To switch over next fixture, click on its IP address (2.1.2.3) and two tabs will appear.
- Page 30 3. File Transfer Protocol (FTP) Fixtures and computer has to be connected to the Ethernet network at the same way as for Web interface. The FTP server is permanetly running in the fixture, you will need install FTP client on your laptop (PC). Login entry for ftp relation: Host name: IP address of the fixture User name: ftp...
-
Page 31: Nas Operation
9. NAS operation NAS = Network-Attached Storage is a file data storage server (intended Promotion) connected to a computer network providing data access to a group of clients devices (another Promotions). Fixtures have to be connected to the Ethernet network. The media files intended for NAS operation have to be copied to the folder NAS server on the NAS server fixture, to the NAS client fixtures will be copied automatically by means of synchronization between NAS server and NAS clients folders. -
Page 32: Software Update Of The Fixture
It is important to note, that Ethernet network connection (Local LAN) typically needs to be set to 2.x.x.x address, for example 2.0.0.10, assuming that no other computer on the network contains such an address whi- le keeping all ROBE fixtures in default IP settings. Network mask of the computer should be 255.0.0.0... -
Page 33: Rdm
11. RDM This fixture supports RDM operation. RDM (Remote Device Management) is a bi-directional communications protocol for use in DMX512 control systems, it is the new open standard for DMX512 device configuration and status monitoring. The RDM protocol allows data packets to be inserted into a DMX512 data stream without adversely affecting existing non-RDM equipment. -
Page 34: Error And Information Messages
12. Error and information messages In case that some error occurred during fixture reset, the warning icon will appear in the top right corner of the screen. In this case the following menu items will appear after touching the screen. Main menu - standard main menu Display errors - touch the item to see error message (s). -
Page 35: Technical Specifications
13. Technical Specifications Electrical Power supply:......electronic auto-ranging Input voltage range:....100-240V, 50-60Hz Fuse:........T 2A/250V ~ Power consumption :....140W Mains input: CE - max. 16A cETLus - max. 10 A Mains output: CE - max. 15A cETLus - max. 9 A Light engine Light source: RGB+B LED device Light output: 1000 ANSI lumens... - Page 36 Gray box correction Gray box correction from max. diameter to min. diameter of the light beam Strobe Independent strobe effect with variable speed (0.3 - 20Hz) Random strobe effect Dimmer Smooth dimmer from 0 - 100 % Pan/Tilt Max. pan movement range: 540° Max.
- Page 37 Weight 12 kg Dimensions (mm) With additional base covers Accessories 1 x Mounting adaptor CL-regular 2pcs in box (P/N 10980033) 1 x Power cable including powerCON TRUE1 In connector Optional accessories ADM - Automatic Distance Meter (P/N 10980549) Wide anle lens for Robin ProMotion black (P/N 10980547) Aditional Base Covers for Robin ProMotion black (P/N 10980548) Distance meter for Robin ProMotion (P/N 10980549) Installation base covers black (P/N 10980548)
-
Page 38: Maintenance And Cleaning
14. Maintenance and cleaning DANGER ! Disconnect from the mains before starting any maintenance work Important! Never use alcohols (ethanol, methanol, isopropyl alcohol), acetone and another aggressive solvents for cleaning the optical parts of the fixture. It is absolutely essential that the fixture is kept clean and that dust, dirt and smoke-fluid residues must not build up on or within the fixture. -
Page 39: Replacing A Fuse
14.1 Replacing a fuse This replacement has to be realized by a qualified person or ROBE service worker only. Disconnect the fixture from mains before replacing a fuse. To replace the fuse. 1. Disconnect the fixture from mains 2. Remove the front panel plastic cover (1) by unscrewing two screws (2). - Page 40 DMX protocol Robin ProMotion - DMX protocol Version 1.6 Channel Type of Function Value control 0 - 255 Pan movement by 540° (128=default) proportional Pan fine 0 - 255 Fine control of pan movement (0=default) proportional Tilt 0 - 255 Tilt movement by 260°...
- Page 41 DMX protocol Channel Type of Function Value control 124 - 129 Reserved To activate following functions, stop in DMX value for at least 3 seconds. 130-134 Keep aspect ratio On step 135-139 Keep aspect ratio Off step 140 - 149 Pan/Tilt reset step 150 - 179 Reserved 180 - 189 Focus reset...
- Page 42 DMX protocol Channel Type of Function Value control Blue step 248-255 Reserved Colour Effect wheel No function (0=default) step Static effects Horizontal linear shade, white-->black step Horizontal Linear shade, black-->white step Vertical linear shade, black-->white step Vertical linear shade, white-->black step Diagonal shade, white -->black step...
- Page 43 DMX protocol Channel Type of Function Value control RGBY shades step RMBG shades step 47-49 Reserved Dynamic effects Colour changing black -->white, slowly step Colour changing black -->white, fast step Colour changing red -->white, slowly step Colour changing red -->white, fast step Colour changing green -->white, slowly step...
- Page 44 DMX protocol Channel Type of Function Value control Shade green -->white, fast rotation, clockwise step Shade green -->white, slow rotation, anticlockwise step Shade green -->white, fast rotation, anticlockwise step Horizontal linear shade, white-->blue and vice versa, slowly step Horizontal linear shade, white-->blue and vice versa,fast step Vertical linear shade, white-->blue and vice versa, slowly step...
- Page 45 DMX protocol Channel Type of Function Value control Random colours slowly, white between colours step Random colours fast, white between colours step Random colours slowly step Random colours fast step Horizontal black shade -->random colour, slowly step Horizontal black shade -->random colour, fast step Vertical black shade -->random colour, slowly step...
- Page 46 DMX protocol Channel Type of Function Value control Gobos presentation (gobos selected in alphabetical order) step 253-254 Reserved White step Video speed control Optimal speed (0=default) step Pause step 2-127 Speed from min. (1/4 of original speed) to original speed proportional 128-255 Speed from original to max.
- Page 47 DMX protocol Channel Type of Function Value control Moving transition from left --> right Moving transition up --> down Moving transition from down --> up Drop transition Simple transition Pixel transition Transition via blending Transition with white output Crossing transition Picture in picture transition Direct transition Transition with vertical rotation...
- Page 48 DMX protocol Channel Type of Function Value control Inverse white mask Gobo/video movement in horizontal (X) axis Gobo/video movement in vertical (Y) axis Reserved Crossfade effect Addition effect Substraction effect Multiplication effect Minimum effect Maximum effect 196-255 Reserved Effect Speed/Time Type of control 1 Presentation* (time=0.8 sec) (0=default) step...
- Page 49 Dimmer closed, LEDs Off (0=default) step 1 - 255 Dimmer intensity from min. to max., LEDs On proportional * function is active only 10 seconds after switching the fixture on Copyright © 2020-2021 Robe Lighting - All rights reserved Page 10...
Need help?
Do you have a question about the Robin ProMotion ADM and is the answer not in the manual?
Questions and answers