Table of Contents
Advertisement
Advertisement
Table of Contents

Related Manuals for Robe 250 XT


Summary of Contents for Robe 250 XT
-
Page 3: Table Of Contents
WASH 250 XT Table of contents 1. Safety instructions ......................4 2. Operating determinations ..................... 5 3. Description of the device ....................6 4. Installation ........................7 4.1 Fitting the lamp ......................7 4.2 Lamp adjustment ....................... 7 4.3 Adjusting beam eangle..................... 8 4.4 Connection to the mains .................... -
Page 4: Safety Instructions
CAUTION! Keep this device away from rain and moisture! Unplug mains lead before opening the housing! FOR YOUR OWN SAFETY, PLEASE READ THIS USER MANUAL CAREFULLY BEFORE YOU INITIAL START - UP! 1. Safety instructions Every person involved with installation and maintenance of this device have to: - be qualilfied - follow the instructions of this manual CAUTION! -
Page 5: Operating Determinations
2. Operating determinations This device is a moving-head spot for creating decorative effects and was designed for indoor use only. If the device has been exposed to drastic temperature fluctuation (e.g. after transportation), do not switch it on immediately. The arising condensation water might damage your device. Leave the device switched off until it has reached room temperature. -
Page 6: Description Of The Device
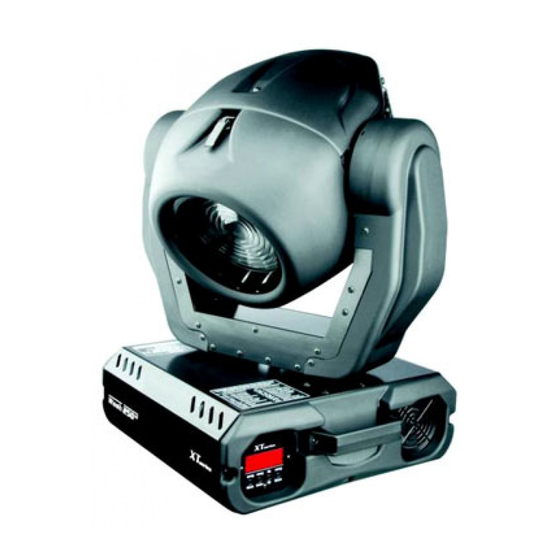
3. Description of the device 1 - Moving Head 2 - Yoke 3 - Base 4 - Carrying handles Rear panel: 5 - Power-switch 6 - DMX output 7 - DMX input 8 - Powercord 9 - Fuseholder Front panel: 10 - Mode-button 11 - Enter-button 12 - Up-button... -
Page 7: Installation
4. Installation 4.1 Fitting the lamp DANGER ! Install the lamps with the device switched off only. Unplug from mains before ! To insert the lamp MSD 250 or MSD 250/2 open the small cover at the rear of head (See the drawings) by loosening the 3 Phillips screws on the cover. -
Page 8: Adjusting Beam Eangle
4.3 Adjusting beam eangle The Fresnel lens system can be configured in the range between 8° and 22° .To set the desired beam angle,remove the front cover by loosening 2 fasteners on this cover and loose 2 adjusting screws on the Fresnel lens unit and adjust the required beam angle.Tighten the adjusting screws again and fix back the front cover. -
Page 9: Rigging The Fixture
(see the drawing). You can fix the WASH 250 XT on a truss via 2 Omega holders or using the mounting plate(it is not the standard part of delivery) or screw the clamps directly to 2 holes (5) in the base. - Page 10 Fixation via a mounting plate 1. Screw 2 clamps (1) to the mounting plate (4) with M12 bolts and lock nuts through the holes in the mounting plate (4). 2. Insert the 4 quick-lock fasteners (3) into the holes on the bottom of the base and tighten fully clockwise. 3.
-
Page 11: Dmx-512 Connection/Connection Between Fixtures
4.6 DMX-512 connection/connection between fixtures The wires must not come into contact with each other, otherwise the fixtures will not work at all, or will not work properly. Controller operation Master/slave operation Only use a stereo shielded cable and 3-pin XLR-plugs and connectors in order to connect the controller with the fixture or one fixture with another. -
Page 12: Dmx Protocol
5. DMX PROTOCOL Mode 1 Mode 2 8 bit Value Function Type of control channel channel 0-255 Pan movement by 530° proportional Tilt 0-255 Tilt movement by 280° proportional Pan fine 0-255 Fine control of pan movement proportional Tilt fine 0-255 Fine control of tilt movement proportional... - Page 13 Mode 1 Mode 2 8 bit Value Function Type of control channel channel channel Colours macros - CMY and color wheel 48-55 Macro 6 step 56-63 Macro 7 step 64-71 Macro 8 step 72-79 Macro 9 step 80-87 Macro 10 step 88-95 Macro 11...
-
Page 14: Controller Mode
The WASH 250 XT is to be operated with a MSD/HSD 250 or MSD 250/2 GY-9,5 lamp. A relay inside of the WASH 250 XT allows you to switch on and off the lamp via the control panel or via your DMX- controller without affecting the rest of the lighting. -
Page 15: Stand - Alone Mode
Fans The WASH 250 XT is cooled by free axial fans - two in the projector head and one in the base. The speed of the fan (and of course the noise) can be continuously reduced if very quiet performance is required. -
Page 16: Functions Of The Control Panel
8. Functions of the control panel The control panel situated on the front side of the base offers several features. You can simply set the DMX address,master/slave mode, read the number of lamp or unit hours, switch On and Off the lamp, run test, make a reset and also use many functions for setting and service purposes. -
Page 17: Slave Control
Press [Up] and [Down] buttons to select the desired option and press [Enter] to see the value or next submenu. Power On time -By this option you can read the total number of the operation hours since the WASH 250 XT has been fabricated. Press [Enter] or [Mode] to return to the menu. - Page 18 - The number of the hours that the WASH 250 XT has been powered On since the counter was last reset.Press [Enter] or [Mode] to return to the menu.In order to reset this counter to 0, you have to hold the [Up] and [Down]-button and press the [Enter]- button.
-
Page 19: Personality Options
[Mode] to return to the menu. 8.4 Personality options These options allow you to modify WASH 250 XT operating behavior. Press [Up] and [Down] buttons to select the desired option and press [Enter] to set the value or to see next submenu. - Page 20 List of the channel settings: Channel Mode 1-16bit (default) Mode 2-16bit 8 bit Tilt Fine Pan Tilt Fine Pan Tilt Pan/Tilt speed Fine Tilt Fine Tilt Fans,Lamp On/Off Pan/Tilt speed Pan/Tilt speed Colours Fans, On/Off lamp Fans, On/Off lamp Cyan Colours Colours Magenta...
- Page 21 Lamp Off if DMX is missing This function allows you to switch Off the lamp automatically after 2 minutes if DMX signal is missing on the data link. Use the [Up] and [Down] buttons to select "On" if you want to switch Off the lamp or "Off"...
- Page 22 The fan keeps the adjusted low speed until the temperature exceeds max. inside temperature of the fixture, then the WASH 250 XT automatically switches from low to high the fan speed. Note:The modes "Auto" and "HIGH" don´t interact to the DMX value on the channel 6 (0-127)!
-
Page 23: Switching On/Off The Lamp
Default settings Press [Enter] to reset all fixture personalities (not the adjusting functions) to the default values. On the display will appear "rSt" meaning that the fixture makes the reset. See the table of personality setting and their default positions. Personality Display Default values... -
Page 24: Test Sequences
This function allows you to run a special demo-test sequences without an external controller, which will show you some possibilities of using WASH 250 XT. Press [Up] and [Down] keys to select the "Mod1" or "Mod2" sequences. The "Mod1" is suitable for projections on the wall, ceiling or ground without any head-movement, the "Mod2"... - Page 25 (playing is forced by the master). Editing program This menu item allows you to select a program to edit or create.The WASH 250 XT has one built-in program ("tESt") and the 3 free programs,each up to 99 steps.
-
Page 26: Reset Function
8.8 Reset function Press [Enter] button to run a reset. This option enables the WASH 250 XT to index all effects (functions) and return to their standard positions. 8.9 Special functions Use the [Up] and [Down] buttons to browse through the special functions and select the one by pressing [Enter]. - Page 27 Fixture code The option contains identification code (1-9999) for the fixture, which is used for the master/slave operation. Adjusting the default positions of the colour and CMY By this function you can calibrate and adjust the colour and CMY to their standard/right positions. Use the [Up] and [Down] keys to browse through the adjusting menu - the display shows step by step these messages: "PAn, Tilt,F.Pan,F.Tilt, SPEd, Func,Colo, CYAn, MAGE, YELL, MACr, EFFE, Stro, dimr, FCAL"...
-
Page 28: Error And Information Messages
After having calibrated required functions press [Enter] to confirm (or [Mode] to cancel and return to the menu without reset by the "A.rES." function) and use the "A.rES." function in order to write the calibration values to the memory (EEPROM) and to make a reset in order to check the new adjusted positions of the colour and CMY wheels. -
Page 29: Technical Specifications
MA.Er. (Master error) The message informs you that the fixture was addressed as a master and DMX signal is connected to its input.Disconnect the DMX controller from fixture's input and address the fixture as the master again. 10. Technical specifications Power supply: EU-model-Voltage......208/230/240V AC, 50/60 Hz ~ -Fuse......T 3.15 A@230V... - Page 30 Colours: -CMY - colours mixing system -6 dichroic-filters plus white -Red,green,blue colors and 3200K, 5600K, UV filters -Colour-wheel continuos rotation in both directions (rainbow effect) Beam effects: -Beam shaper -Wide and flat beam can stepplesly be rotated by 90° -Frost filter for softer beam Strobe: -Strobe effect with variable speed (1 - 10 flashes per second) Dimmer:...
- Page 31 Rigging: -Stands directly on the floor -Mounts horizontally or vertically with 2 clamps -2 truss orientation -Safety chain/cord attachment point Temperatures: -Maximum ambient temperature t : 45° C -Maximum housing temperature t (steady state): 80° C Minimum distances: Min.distance from flammable surfaces: 0,5m Min.distance to lighted object: 1,0m Dimensions and weight: -Length of base (including handles):...
-
Page 32: Maintenance And Cleaning
11. Maintenance and cleaning It is absolutely essential that the fixture is kept clean and that dust, dirt and smoke-fluid residues must not build up on or within the fixture. Otherwise, the fixture‘s light-output will be significantly reduced. Regular cleaning will not only ensure the maximum light-output, but will also allow the fixture to function reliably throughout its life. -
Page 33: Appendix
12. Appendix 12.1 Changing the power supply settings Both the transformer and the ballast must be connected correctly for the local AC voltage and frequency. The wrong settings can cause poor performance or demage of the moving head.The factory settings are printed next to the power switch.
Need help?
Do you have a question about the 250 XT and is the answer not in the manual?
Questions and answers