Table of Contents
Advertisement
Advertisement
Table of Contents

Related Manuals for Robe Robin miniPointe


Summary of Contents for Robe Robin miniPointe
- Page 1 Version1.4...
-
Page 2: Table Of Contents
Robin miniPointe Table of contents 1. Safety instructions ......................3 2. Fixture exterior view ...................... 5 3. Installation........................6 3.1 Connection to the mains .................... 6 3.2 Changing the lamp ..................... 7 3.3 Lamp adjustment ....................... 8 3.4 Rigging the fixture ....................10 3.5 DMX-512 connection .................... -
Page 3: Safety Instructions
Please consider that damages caused by manual modifications to the device are not subject to warranty. The Robin miniPointe was designed for indoor use and it is intended for professional application only. It is not for household use. - Page 4 If the fixture has been exposed to drastic temperature fluctuation (e.g. after transportation), do not switch it on immediately. The arising condensation water might damage your device. Leave the device switched off until it has reached room temperature. Do not shake the fixture. Avoid brute force when installing or operating the fixture. This fixture was designed for indoor use only, do not expose this unit to rain or use near water.
-
Page 5: Fixture Exterior View
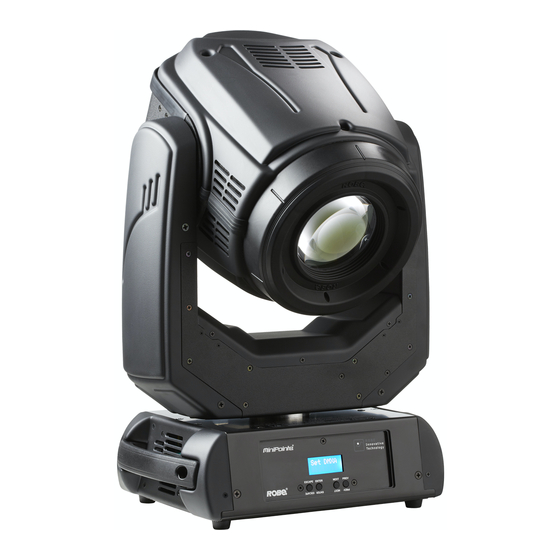
2. Fixture exterior view 1 - Front lens 2 - Tilt lock 3 - Pan lock 4 - Base 5 - Moving head 6 - Arm The head should be locked for transportation- the tilt lock (2) and the pan lock (3) have to be in the locked positions. -
Page 6: Installation
Green /Yellow Green Earth Design of the Robin miniPointe allows to connect several fixtures to AC mains power in one interconnected daisy chain using power input and throughput connectors. Needed daisy chain cords are stated in the chapter “Technical specifications “... -
Page 7: Changing The Lamp
3.2 Changing the lamp DANGER ! Install the lamp with the fixture unplug from mains ! To insert the new lamp. 1. Disconnect the fixture from mains and allow it to cool at least 20 minutes. 2. .Loosen the two quarter-turn fasteners (1) on a lamp cover and remove the lamp cover (2) to get into lamp compartment. -
Page 8: Lamp Adjustment
3.3 Lamp adjustment The lamp holder is aligned at the factory. Due to differences between lamps,the fine adjustment may improve light performance. For lamp adjustment serve four slots in the lamp assembly. Slots A - for adjustment of the lamp horizontally Slots B - for adjustment of the lamp vertically To adjust the lamp in the fixture. -
Page 10: Rigging The Fixture
3.4 Rigging the fixture A structure intended for installation of the fixture (s) must safely hold weight of the fixture(s) placed on it. The structure has to be certificated to the purpose. The fixture (fixtures) must be installed in accordance with national and local electrical and construction codes and regulation. - Page 11 Truss installation via 2 Omega holders Truss installation via mounting adapter 1-Fixture 2-Truss 3-Clamp 4-Mounting adapter 5-Quarter-turn fasteners 6-Safety wire 7-Omega holder When installing fixtures side-by-side, avoid illuminating one fixture with another! DANGER TO LIFE! Before taking into operation for the first time,the installation has to be approved by an expert!
-
Page 12: Dmx-512 Connection
3.5 DMX-512 connection The fixture is equipped with 5-pin XLR sockets for DMX input and output. Only use a shielded twisted-pair cable designed for RS-485 and 5-pin XLR-plugs and connectors in order to connect the controller with the fixture or one fixture with another. DMX output DMX input XLR socket:... -
Page 13: Wireless Dmx Operation
3.6 Wireless DMX operation The wireless version of the Robin miniPointe is equipped with the Lumen Radio CRMX module and antenna for receiving DMX signal. CRMX module operates on the 2.4 GHz band. Robe Wireless CRMX-LB100 1 - 5-pin XLR (female) -
Page 14: Replacing Colour Filters
3.7 Replacing colour filters Install colour filters with the device switched off only. Unplug from mains before! Colour filters 1. Disconnect the fixture from mains and allow it to cool 20 minutes. 2. Remove the plastic cover of the head /from the side of the lemp driver (1)/ by loosening the 3 quarter-turn fasteners on the cover. -
Page 15: Remotely Controllable Functions
4. Remotely controllable functions Lamp The Robin miniPointe is to be operated with a OSRAM SIRIUS HRI 140W RO lamp. The OSRAM SIRIUS HRI 140W RO with its focusing dichroic reflector is highly efficient and optimized for wide range of light applications Colour wheel This wheel contains 13 replaceable dichroic filters + open.The colour wheel can be positioned between two... -
Page 16: Control Menu Map
5. Control menu map Default settings=Bold print Level 1 Level 2 Level 3 Level 4 Level 5 Level 6 Level 7 DMXA Set DMXA 001-512 DMX Pres Mode 1 Mode 2 Mode 3 Info PO Time Total Reset LA Time Total Reset R Ti... - Page 17 Level 1 Level 2 Level 3 Level 4 Level 5 Level 6 Level 7 I Ef Pos Dim F Store Defaults Lamp On, Off Manual 0-255 Dim F 0-255 Test Prg Static 0-255 Tilt 0-255 Dynamic Sta Alone Music T On, Off Auti Run Test...
- Page 18 Level 1 Level 2 Level 3 Level 4 Level 5 Level 6 Level 7 S1-1 S1-2 S2-1 S2-2 Store On, Off Sw Upd...
-
Page 19: Control Menu
Set DMXA- Use this menu item to set the DMX start address of the fixture, which is defined as the first channel from which the Robin miniPointe will respond to the controller. If you set, for example, the address 36, the Robin miniPointe will use channels 36 - 55 for control (if Mode 1 is selected). -
Page 20: Personality (Pers)
is necessary. If cleaning is required, clean all air filters and change the value in this menu on acceptable level. Min. level of alert period is 10 hours, max. is 300 hours. R Ti - Remaining Time.The item allows you to read the time which remains to cleaning air filters.The time period is set in the menu mentioned above. -
Page 21: Lamp On/Off (Lamp)
controller. In this case, the item has to be On. DMX L On - The item allows you to strike the lamp automatically after 26 seconds if DMX signal is present on the fixture´s DMX input. Lamp Off if not DMX - The item allows you to switch off the lamp automatically after 2 minutes if DMX signal is missing on the fixture´s DMX input. -
Page 22: Test Program (Test Prg)
Pr Edit - Editing program. Select this menu to edit or create the program. The Robin miniPointe has one built-in program and one user-editable program up to 40 steps. Each program step has a step time - during which effects last in the current step and a fade time- during which effects move to new positions. -
Page 23: Reset (Reset)
P/T S a pan/tilt speed Powr - power/special functions ColWh - a colour wheel movement ColWh F a fine colour wheel movement Frost T - a frost time Color T - a colour wheel time STGob T - a static gobo wheel time Pri T - an prism 14.6°/prism 16°... - Page 24 Strobe lamella 2 pos. 2 channel 37 channel 31 channel 42 Sw Upd - The menu item allows you to update software in the fixture via the Robe Universal Interface. The following are required in order to update software: - PC running Windows 95/98/2000/XP/7/8 or Linux - Software Uploader - Robe Universal Interface or Flash cable RS232/DMX (S.N.13050624)
-
Page 25: Rdm
We recommend to cancel all running programs before starting the Software Uploader. 3. Run the Software Uploader program. Select Robe universal Interface (or suitable com, if you use the Flash cable) on the left side of the software uploader screen and then click on the Connect button. -
Page 26: Error And Information Messages
LAMP_ON_MODE DEVICE_HOURS LAMP_HOURS LAMP_STRIKES ...Another options for this command (only for Robe´s fixtures): value PARAMETER_DATA=0x84 - lamp OFF by DMX value on DMX channel value PARAMETER_DATA=0x88 - lamp OFF if DMX is not present ...Commands relative resetable values 8. Error and information messages Lamp Err (Lamp Error) If the ignition of the lamp is 4 times unsuccessful , the display shows “LampErr”, meaning that the lamp could... - Page 27 P14.6 Err (Prism 14.6° Error ) The messages will appear after the reset of the prism 14.6° if this prism is not located in the default position. P14.6R Err (Prism 14,6° Rotation Error ) The messages will appear after the reset of the prism 14.6° if this prism is not located in the default position. P16 Err (Prism 16 Error ) The messages will appear after the reset of the prism 16 if this prism is not located in the default position.
-
Page 28: Technical Specifications
9. Technical Specifications Electrical Power supply:......electronic auto-ranging Input voltage range:....supply 100-240V, 50/60Hz Power consumption*:....260 W at 230V (I=1,15A,power factor 0.97) Mains input: 16A max. (CE ), 10A max. (cETLus) Mains output: 15A max. (CE ), 9A max. (cETLus) *Allow for a deviation of +/-5% Lamp Approved model: OSRAM SIRIUS HRI 140W RO Average service life: 6000 hrs... - Page 29 External Wireless DMX/RDM module (option) Compliance with USITT DMX-512 (1986 & 1990) and 512-A Full DMX fidelity and frame integrity Auto sensing of DMX frame rate and frame size <5ms DMX latency Operational frequency range of 2402-2480 MHz Producer: LumenRadio Pan/Tilt Pan movement range 540°...
- Page 30 Daisy Chain PowerCon In/Out, EU, 2m (P/N 1305 1728 ) Daisy Chain PowerCon In/Out, US, 2m (P/N/ 10980127) ROBE Wireless CRMX Dongle (P/N 10980100 ) Mounting Adaptor for Omega holder (black) (P/N 17030386) Doughty Trigger Clamp (P/N 99011963) Safety wire 35 kg...
-
Page 31: Maintenance And Cleaning
Optional accessories changed 30/04/2018 Pan/Tilt specifications corrected April 30, 2018 Copyright © 2014-2018 Robe Lighting - All rights reserved All Specifications subject to change without notice Made in CZECH REPUBLIC by ROBE LIGHTING s.r.o. Palackeho 416/20 CZ 75701 Valasske Mezirici... - Page 32 DMX protocol Robin MiniPointe - DMX protocol, version 1.0 Mode/channel Type of Mode 1 Mode 2 Mode 3 Function Standard Reduced Extended Value control 16 bit 8 bit 16 bit 0 - 255 Pan movement by 540° proportional Pan Fine...
- Page 33 DMX protocol Mode/channel Type of Mode 1 Mode 2 Mode 3 Function Standard Reduced Extended Value control 16 bit 8 bit 16 bit Open/white proportional Deep Red proportional Deep Blue proportional Yellow proportional Light green proportional Magenta proportional Lavender proportional Pink proportional Dark green...
- Page 34 DMX protocol Mode/channel Type of Mode 1 Mode 2 Mode 3 Function Standard Reduced Extended Value control 16 bit 8 bit 16 bit Prism 14.6°and Prism 16° time Function is off step 1-50 Time of prism movement (0.1 sec. --- > 5 sec.) proportional 1 - 255 Time of prism rotation (0.1 sec.
- Page 35 DMX protocol Mode/channel Type of Mode 1 Mode 2 Mode 3 Function Standard Reduced Extended Value control 16 bit 8 bit 16 bit 20 -127 Prism indexing step 128 - 255 Prism rotation step Prism 14.6° rotation and indexing Prism indexing - set position on channel 10/7/15 0 - 255 Prism indexing proportional...
- Page 36 DMX protocol Mode/channel Type of Mode 1 Mode 2 Mode 3 Function Standard Reduced Extended Value control 16 bit 8 bit 16 bit 92-95 Shape 11 step Dynamic flower effects 96-99 Effect 1 step 100-103 Effect 2 step 104-107 Effect 3 step 108-111 Effect 4 step...
- Page 37 Note: the Beam Shaper channel has priority to the DFE-Shape/Effect selection channel and both channels have priority to Prisms channels Copyright © 2014-2016 Robe Lighting s.r.o. - All rights reserved All Specifications subject to change without notice Page 6...
Need help?
Do you have a question about the Robin miniPointe and is the answer not in the manual?
Questions and answers