Table of Contents
Advertisement
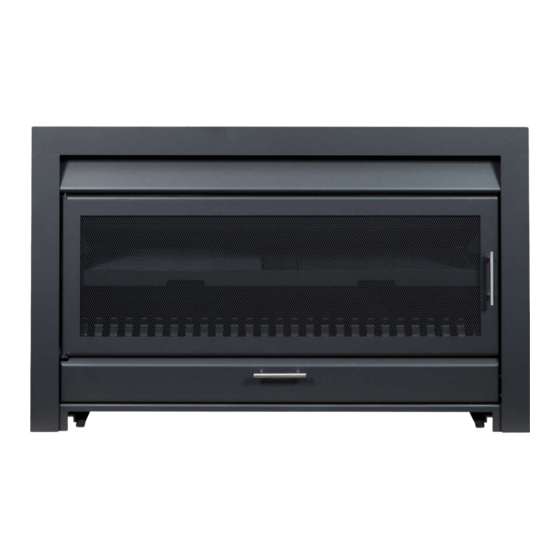
INSTALLATION & OPERATION INSTRUCTIONS FOR
MASPORT MATAKANA 1200
OUTDOOR FIRE & COOKING CENTER FOR NZ
THIS MANUAL CONTAINS IMPORTANT INFORMATION.
PLEASE KEEP IT IN A SAFE PLACE FOR FUTURE REFERENCE.
READ ALL INSTRUCTIONS CAREFULLY BEFORE COMMENCING THE INSTALLATION.
FAILURE TO FOLLOW MAY RESULT IN A FIRE HAZARD AND VOID THE WARRANTY.
Manufactured in New Zealand by:
GLEN DIMPLEX NEW ZEALAND LIMITED
P.O. Box 58473, Botany, Manukau - 2163
Ph: 0800 666 2824
Fax: 09 274 8472
Email: sales@glendimplex.co.nz
Web: www.glendimplex.co.nz
th
12
November 2020
Part No. 552278 V1.0
*Glen Dimplex, New Zealand Ltd, reserves the right to change specifications, the content of this manual, or the design of its product without prior notice.
Advertisement
Table of Contents

Subscribe to Our Youtube Channel
Related Manuals for Masport MATAKANA 1200


Summary of Contents for Masport MATAKANA 1200
- Page 1 INSTALLATION & OPERATION INSTRUCTIONS FOR MASPORT MATAKANA 1200 OUTDOOR FIRE & COOKING CENTER FOR NZ THIS MANUAL CONTAINS IMPORTANT INFORMATION. PLEASE KEEP IT IN A SAFE PLACE FOR FUTURE REFERENCE. READ ALL INSTRUCTIONS CAREFULLY BEFORE COMMENCING THE INSTALLATION. FAILURE TO FOLLOW MAY RESULT IN A FIRE HAZARD AND VOID THE WARRANTY.
-
Page 2: Table Of Contents
PAGE 1.0 INTRODUCTION 1.1 WARNINGS 1.2 IMPORTANT SAFETY INFORMATION & CAUTIONS 2.0 INSTALLATION OF MATAKANA 1200 OUTDOOR FIRE 2.1 MAJOR STEPS FOR MASONRY INSTALLATION 2.2 MAJOR STEPS FOR BUILT-IN ZC INSTALLATION 2.3 ITEMS SUPPLIED WITH THE FIRE 2.4 ITEMS SUPPLIED WITH THE ZERO CLEARANCE KIT 2.5 HANDLING AND TRANSPORT... -
Page 3: Introduction
The Matakana 1200 Outdoor can be installed in a custom-built sound masonry base & chimney or a timber- framed enclosure using a ‘Zero Clearance’ kit. Also, The Matakana 1200 Outdoor fire is tested to and comply with AS/NZS 2918:2001, Appendix B, for installation in a timber-framed enclosure along with a ‘Zero Clearance’ box kit. -
Page 4: Important Safety Information & Cautions
1.2 Important Safety Information and Cautions This appliance is not intended for use by persons (including children) with reduced physical, sensory, or mental capabilities or lack of experience and knowledge unless they have been given supervision or instruction concerning use of the appliance by a person responsible for their safety. -
Page 5: Installation Of Matakana 1200 Outdoor Fire
2.0 Installation of Matakana 1200 Outdoor Fire The Matakana 1200 fire is designed for outdoor use only and should not be specified or installed in the envelope of a building. Failure to follow installation instructions may result in fire damage and void any warranties. -
Page 6: Items Supplied With The Zero Clearance Kit
2.4 Items Supplied With The Zero Clearance Kit Additional zero clearance kit or ZC Box is required for installlation of Matakana 1200 fire into timber framed cavity. The zero clearance box for in-built installation of Matakana 1200 comes on a separate pallet and contains the following items. -
Page 7: Important Considerations Required For Installation Of Matakana 1200 Fire
Ventilation of the masonry or built-in cavity is a requirement for the efficient and safe operation of Matakana 1200 outdoor fire. The ventilation inlet opening should be positioned as low as possible in the cavity. The ventilation outlet at the top can be via additional casings or the outlet opening close to the top of the cavity or chimney chase. - Page 8 5mm gap is between the fire fascia, and the finished cavity opening needs to be maintained to allow for the expansion and contraction of the Matakana 1200’s metal fire. All load-bearing structures must be engineered to bear the heavyweight of the Matakana 1200 Outdoor fire.
- Page 9 3.0 Technical Specifications for Non-combustible Masonry Install (Read all the instructions carefully before starting any building construction of the cavity) Matakana 1200 is an outdoor cooking wood fire which can be used for both heating and cooking. This appliance is designed for outdoor use only.
-
Page 10: Cavity Construction
- 9 -... -
Page 11: Clearances To Combustibles
- 10 -... -
Page 12: Flue Configuration & Flashing Details
Flue Height - Install a minimum of one length of 300mm dia main flue and corresponding casings, as shown in the diagrams above. Additional flue lengths may need to be added depending upon the install's location, the height of the masonry/built-in timber-framed enclosure, or to achieve sufficient flue draft. Make sure the smoke is not likely to blow towards neighboring or adjacent properties. -
Page 13: Installation Stages
- 12 -... -
Page 14: Technical Specifications For Built-In Install
Consult your respective local council for clarification on rules appertaining to the installation of outdoor wood-fire appliances. Matakana 1200 cooking center for Built-In / ZC install has been tested to and complies with wood burner safety standard - AS/NZS 2918:2018... -
Page 15: Timber Frame Overall Dimensions
- 14 -... -
Page 16: Clearances To Combustibles
- 15 -... -
Page 17: Flue Configuration & Flashing Details
Flue Height - Install a minimum of one length of 300mm dia main flue and corresponding casings, as shown in the diagrams above. Additional flue lengths may need to be added depending upon the install's location, the height of the masonry/built-in timber-framed enclosure, or to achieve sufficient flue draft. Make sure the smoke is not likely to blow towards neighboring or adjacent properties. -
Page 18: Installation Stages
- 17 -... - Page 19 a. Place 4 x Welded Leg sub-assemblies on to the inner verticals of the base frame, b. Loosely screw these legs to front and rear verticles of the frame using 8Gx 1½” wood screws. (4 per, total 16) c. Place 2 x Short Base channels and then 2 x Long Base channels to form a frame on the legs.
- Page 20 Centrally locate the ZC Base sub-assembly onto metal frame channels with the front flange flush with the timber base frame's front face. Use holes on the base sub-assy channel as a reference and drill pilot holes into the short base channel. Secure the ZC base sub-assembly to metal frame in the base using 4x 12G x 25 Self-tap screws Depending upon location, use suitable equipment to lift the heavy fire on to the frame.
- Page 21 Assemble the ZC box around the fire by screwing various ZC sub-assemblies one by one using 8G x ½” Screws provided, in the following order: a. ZC Side LH Sub-assembly b. ZC Rear LH Sub-assembly c. ZC Rear RH Sub-assembly (has extra joggles flange) d.
- Page 22 Construct the outer frame as per the details above to suit the required height. On the front face of the frame, screw Metal channels provided, 50mm above the ZC box's top edge. - 21 -...
- Page 23 Build the chimney chase or extent the frame to the required height. Build the ash storage under the timber base frame or on the side of the fire, if required. The ash storage walls should be constructed using non-combustible material and should have a minimum 50mm clearance from the metal frame channels in the base frame or a 50mm ventilated air gap on the sides.
- Page 24 Construct / install floor protector, cladding,flue termination and vents. Ventilation of the built-in cavity is a requirement for the safe operation of the Matakana built-in fire. Locate ventilation inlet as low as possible in the cavity. The ventilation outlet at the top can be via additional casings or the outlet opening close to the top of the cavity or chimney chase.
-
Page 25: Operations Of Matakana 1200 Outdoor Fire
5.0 Matakana 1200 - Operations Before the first light-up, make sure that the Matakana 1200 fire is installed correctly and signed off by an approved installer. All local council's wood fire permission or permit requirements have been completed satisfactorily. 5.1 Important safety Warnings & Cautions ... -
Page 26: Permitted Fuels
The quality of the firewood you burn can have a considerable effect on the cooking performance and quality of the Matakana 1200 outdoor fire. The Matakana 1200 Outdoor fire is designed to burn wood fuel that meets the following criteria:... -
Page 27: Preparing Burner For First Light-Up
- Make sure that all internal components that were removed during installation are put back correctly. - Do not use Matakana 1200 for cooking during initial 2~3 burn cycles. The burn tray is locked in place The rear metal bricks are hung and screwed on the rear of the firebox 3 x Pizza stones are installed in the baking chamber under the main firebox. -
Page 28: Using Matakana For Cooking
The chamber under the fire tray can be used for cooking pizzas, baking, or just as a warmer box. Do not use Matakana 1200 fire for cooking purposes during initial 2~3 burning cycles or spraying with high-temperature paint during regular maintenance. -
Page 29: First Light-Up For Cooking
5.11 Using Weather Cover Matakana 1200 outdoor fire comes with a St/St weather cover to protect the fire's interior when the appliance is not running or not used for an extended period. The cover can be attached to the front face of the fascia with the two quarter-turn latches. -
Page 30: Maintenance
Matakana 1200 Replacement Parts Some parts of the Matakana 1200 outdoor fire are considered consumable. These parts will wear out or degrade over time. The life of these parts will vary upon How frequently the fire is used Type of fuel. -
Page 31: Troubleshooting
6.0 Troubleshooting. Smoke Spillage during the operation or cooking. There can be several reasons and remedies for smoke spillage out the front door. The causes can be Insufficient height of the flue for a particular location. The close proximity of large trees, tall building, or a landmass Different climate or atmospheric conditions, topography can contribute to this issue. - Page 32 - 31 -...
-
Page 33: Warranty Registration
GLEN DIMPLEX WARRANTY REGISTRATION MATAKANA 1200 OUTDOOR FIRE Thank you for purchasing a Masport Fire. We ask you to complete the following information and return to the Glen Dimplex Warranty Registration Department on the following address: New Zealand P O Box 58473, Botany, Manukau 2163, Auckland... - Page 34 - 33 -...
-
Page 35: Warranty
Australia by Glen Dimplex Australia Pty Ltd. (together referred to as "Glen Dimplex") This warranty is provided to the first domestic purchaser of a Masport Matakana 1200 Outdoor Fire. It applies from the date of purchase from or through an authorized Masport Fire Distributor in relation to each product or component for the period below. - Page 36 Damage caused by incorrect use or the burning of treated or painted wood, driftwood, or other fuels which are not recommended; Travel costs for a distance greater than 50 km from the nearest approved Masport Heating Service Agent. (The location of the Wood Fire must be advised to Glen Dimplex or its sales agents at the time of purchase or using warranty registration form) ...
Need help?
Do you have a question about the MATAKANA 1200 and is the answer not in the manual?
Questions and answers