Table of Contents
Advertisement
Quick Links
Advertisement
Table of Contents

Related Manuals for Eaton ExoCab34


Summary of Contents for Eaton ExoCab34
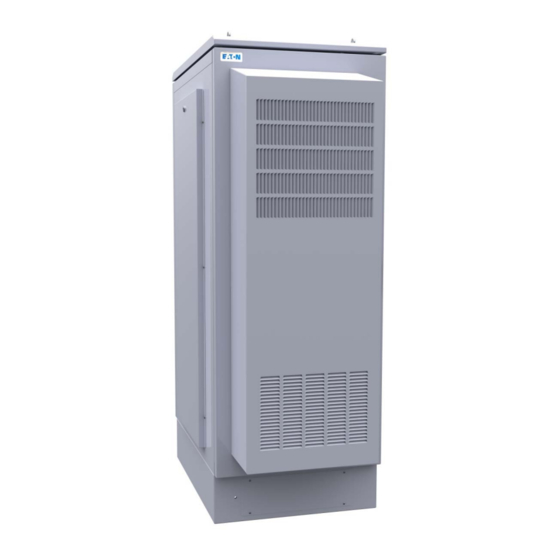
- Page 1 USER’S AND INSTALLATION GUIDE ExoCab34 Outdoor Enclosure...
- Page 2 The contents of this manual are the copyright of the publisher and may not be reproduced (even extracts) without the written approval of Eaton Corporation. Every care has been taken to ensure the accuracy of the information contained in this manual, but no liability can be accepted for any errors or omission. The right to make design modifications is reserved.
-
Page 3: Table Of Contents
11. Appendix C Wiring diagrams ............................30 11.1 ExoCab34 with heat exchanger door or air conditioner ..................... 30 12. Appendix D ExoCab 34 outdoor enclosure datasheet ....................31 13. Appendix E Concrete plinth drawing .......................... 34 ©Eaton Corporation 2018. -
Page 4: How To Read This Manual
These symbols indicate a hazardous situation or action. Symbols are used to warn of situations which may cause environmental damage and personal injury. General warning symbol Explosion and fire hazard Electrical hazard Corrosive hazard Battery hazard ©Eaton Corporation 2018. All rights reserved. Revision 0.1 Page 4 of 35... -
Page 5: Prohibited Action Symbols
Italic type highlights notes and new terms when they are defined. Screen type represents information that appears on the screen or LCD. ©Eaton Corporation 2018. All rights reserved. Revision 0.1 Page 5 of 35... -
Page 6: Safety Instructions
Do not open or mutilate batteries. Released electrolyte may be toxic and is harmful to the skin and eyes. IMPORTANT: The battery may consist of multiple parallel strings. Make sure that you disconnect all strings before installation. ©Eaton Corporation 2018. All rights reserved. Revision 0.1 Page 6 of 35... - Page 7 Keep the surroundings of the UPS uncluttered, clean, and free from excess moisture. Observe all DANGER, CAUTION, and WARNING notices affixed to the inside and outside of the equipment. ©Eaton Corporation 2018. All rights reserved. Revision 0.1 Page 7 of 35...
-
Page 8: Audience
People who use the ExoCab34. • This document provides guidelines for how to install, commission and operate the ExoCab34 and a UPS installed in the ExoCab34. The reader is expected to know the fundamentals of electricity, wiring, electrical components and electrical schematic symbols. -
Page 9: Introduction To Eaton Exocab34
The ExoCab34 includes a galvanised steel or aluminium mounting plinth and lifting eyes. The cabinet is constructed from marine-grade aluminium and stainless steel for long life in harsh environments. When fitted with an Eaton UPS or DC power equipment, full remote monitoring by web / SNMP can be provided. Cooling options The ExoCab34 has various cooling options as shown in Figure 1 ExoCab34 cooling options. -
Page 10: Thermal Overview
Recommended for any equipment, including equipment needing a high level of protection and equipment with a restricted temperature rating. Internal temperature is maintained at a stable level. Air conditioner ©Eaton Corporation 2018. All rights reserved. Revision 0.1 Page 10 of 35... -
Page 11: Battery Cooling
The batteries may be cooled by a door mounted TEC cooler. Exploded views The diagrams below show the key parts of each cabinet option. Door or optional rear cover Standard Vented ©Eaton Corporation 2018. All rights reserved. Revision 0.1 Page 11 of 35... - Page 12 ExoCab34 outdoor cabinet User and Installation Guide Door or optional rear cover Heat exchanger Door or optional rear cover Air conditioner Figure 2 Exploded views ©Eaton Corporation 2018. All rights reserved. Revision 0.1 Page 12 of 35...
-
Page 13: Equipment Mounting Options
18U at the top and 15U below. Equipment may be mounted directly on the bottom and mid shelf. Top + Bottom 19 inch equipment mounting Optional compartment divider fitted Figure 3 Equipment mounting options ©Eaton Corporation 2018. All rights reserved. Revision 0.1 Page 13 of 35... -
Page 14: Cabinet Equipment Mounting Dimensions
Cabinet Equipment Mounting Dimensions Cable entry in bottom of cabinet and compartment divider Top View (cross section of cabinet) Full Cabinet - Front View Split Cabinet - Front View ©Eaton Corporation 2018. All rights reserved. Revision 0.1 Page 14 of 35... -
Page 15: Equipment Mounting Restrictions
If the divider fitted there is a vent to direct air to the upper cabinet. Heat exchanger Side (Section view) Keep 2U at the top clear. Allows free air flow. Side (Section view) Air conditioner ©Eaton Corporation 2018. All rights reserved. Revision 0.1 Page 15 of 35... -
Page 16: Preparation
The site selected for the cabinet must have adequate clear space around the cabinet for access and/or ventilation. Figure 4 Refer to for clearances needed. Check there are no cables or pipes below the site that may be damaged by excavation work. ©Eaton Corporation 2018. All rights reserved. Revision 0.1 Page 16 of 35... - Page 17 M10 Bolt Top view Door opening space required Figure 4 Installation clearances Standard and Fresh Air Cooled Air Conditioned Heat Exchanger Figure 5 Overall Cabinet Dimensions ©Eaton Corporation 2018. All rights reserved. Revision 0.1 Page 17 of 35...
- Page 18 M10 grade 12.7 galvanized bolts, in the positions shown. Hold down position (4 places) ø 200 Cable entry ducts Cabinet Plinth Concrete Base Concrete Base - Top View With sectioned cabinet plinth ©Eaton Corporation 2018. All rights reserved. Revision 0.1 Page 18 of 35...
-
Page 19: Place Cabinet
If on an existing concrete floor mark and drill holes. Use the four M10 grade 12.7 galvanized bolts and washers supplied. Re-fasten the plinth access panels to the cabinet. Plinth access covers Procedure complete ©Eaton Corporation 2018. All rights reserved. Revision 0.1 Page 19 of 35... -
Page 20: Fit Air Conditioner Roof (If Required)
6. Fasten door hinge plate to Lift into position. Re-fit circlip to the hinge door using fasteners from Secure with the hinge pin. the old door (3 places) pin. ©Eaton Corporation 2018. All rights reserved. Revision 0.1 Page 20 of 35... -
Page 21: Install Cables
Do not remove the factory-fitted transit insulation covers from the batteries until access to the battery terminals is required. ©Eaton Corporation 2018. All rights reserved. Revision 0.1 Page 21 of 35... -
Page 22: Mount Equipment
Follow equipment instructions when mounting additional equipment in the ExoCab34. The ExoCab34 includes standard 19 inch mounting rails. The ExoCab34 is usually supplied with a UPS or DC power supply pre-mounted. Refer to section 3.7 for mounting dimensions. Refer to section 3.8 for restrictions on mounting position for the various cabinet variants. -
Page 23: Troubleshooting
ExoCab34 outdoor cabinet User and Installation Guide Troubleshooting Use the table below to troubleshoot minor installation and operational problems. For additional assistance see contact Eaton Return items for replacement or repair with a completed Equipment Incident Report Problem Possible Cause... -
Page 24: Replacing A Cooling Fan (Heat Exchanger Cooled Cabinet)
The cabinet has two cooling fans located in the heat exchanger door. Step 1 - Switch off AC supply Turn off or unplug the AC supply to the cabinet. ©Eaton Corporation 2018. All rights reserved. Revision 0.1 Page 24 of 35... - Page 25 Remove heat exchanger access panel. Remove fan attached to mounting bracket. Remove fan. Remove duct Remove external cover Remove fan and mounting bracket Remove cover ©Eaton Corporation 2018. All rights reserved. Revision 0.1 Page 25 of 35...
- Page 26 Remove fan attached to mounting bracket. Remove fan. Remove duct Remove cover Remove fan and mounting bracket Fan replacement Removed fan on mounting bracket Remove fan from bracket ©Eaton Corporation 2018. All rights reserved. Revision 0.1 Page 26 of 35...
- Page 27 The fans will operate at low speed when the ambient air temperature is 20°C or below. Fan speed will increase up to maximum speed as the ambient air temperature rises above 20°C. Procedure complete ©Eaton Corporation 2018. All rights reserved. Revision 0.1 Page 27 of 35...
-
Page 28: Appendix A - 93Ps20 / 93Ps40 Ups Options
User and Installation Guide 9. Appendix A – 93PS20 / 93PS40 UPS options Layout Refer also to the appropriate UPS User’s and Installation Guide, supplied separately. 93PS40 Layout 93PS20 Layout ©Eaton Corporation 2018. All rights reserved. Revision 0.1 Page 28 of 35... -
Page 29: Appendix B - 9Px Ups Option
ExoCab34 outdoor cabinet User and Installation Guide 10. Appendix B – 9PX UPS option Refer also to the appropriate UPS User’s and Installation Guide, supplied separately. 9PX-6000 Layout 9PX-1500 Layout ©Eaton Corporation 2018. All rights reserved. Revision 0.1 Page 29 of 35... -
Page 30: Appendix C Wiring Diagrams
ExoCab34 outdoor cabinet User and Installation Guide 11. Appendix C Wiring diagrams 11.1 ExoCab34 with heat exchanger door or air conditioner ©Eaton Corporation 2018. All rights reserved. Revision 0.1 Page 30 of 35... -
Page 31: Appendix D Exocab 34 Outdoor Enclosure Datasheet
Very low maintenance. Air conditioned Provides a high degree of environmental protection with high heat dissipation and wide operating temperature range. Other versions to special order. Features UPS, DC power, battery and other equipment options 34U of equipment space Sealed, fresh air, heat exchanger and air conditioned options. Cost effective High level of protection from the environment Durable aluminium exterior and stainless steel internal parts. Three‐point locking. Lock to customer requirements, including triangle key, lock barrels compatible with other Eaton cabinets, etc. Anti‐graffiti finish ©Eaton Corporation 2018. All rights reserved. Revision 0.1 Page 31 of 35... - Page 32 ExoCab34 outdoor cabinet User and Installation Guide ©Eaton Corporation 2018. All rights reserved. Revision 0.1 Page 32 of 35...
- Page 33 Plinth Aluminum Color/Finish Ghost Grey or Karaka Green Anti-graffiti powder coat In the interests of continual product improvement all specifications are subject to change without notice ©Eaton Corporation 2018. All rights reserved. Revision 0.1 Page 33 of 35...
-
Page 34: Appendix E Concrete Plinth Drawing
ExoCab34 outdoor cabinet User and Installation Guide 13. Appendix E Concrete plinth drawing ©Eaton Corporation 2018. All rights reserved. Revision 0.1 Page 34 of 35... - Page 35 24 Hour Emergency Hotline 1300 303 059 0508 697 378 Australia New Zealand Eaton Industries Eaton Industries Company 10 Kent Road 106 Wrights Road, Mascot 2020 NSW, Australia Christchurch 8041, NZ T 1300 877 877 T 03 335 3126 E aupqsales@eaton.com...
Need help?
Do you have a question about the ExoCab34 and is the answer not in the manual?
Questions and answers