Table of Contents
Advertisement
Advertisement
Table of Contents

Subscribe to Our Youtube Channel
Related Manuals for PetNovations CatGenie 120


Summary of Contents for PetNovations CatGenie 120
- Page 2 Addendum to the CatGenie 120 Owners Manual You own the new 120 model. ® The 120 has new features suggested by current CatGenie 120 owners. CatGenie Gives You 4 Ways to Customize Cat Activation HOURCATACTIVATION HOURCATACTIVATION 14 Hrs Awake / 10 Hrs sleep.
-
Page 3: Safety Instructions
ON POWER SOURCES While PetNovations, Inc. reserves the right to change design Before operating the CatGenie, check that your local power and specifications without notice, we do alert our customers supply is identical to the CatGenie operating voltage, which is about upgrades and product improvements. -
Page 4: Table Of Contents
CatGenie Serial Number Serial Number is on the back of the Processing Unit. 12O OWNER’S GUIDE CUSTOMER SUPPORT TABLE OF CONTENTS Please call or email Customer Support if you see visible damage to your CatGenie or if you have cat adjustment Safety Instructions.......... -
Page 5: Catgenie Anatomy
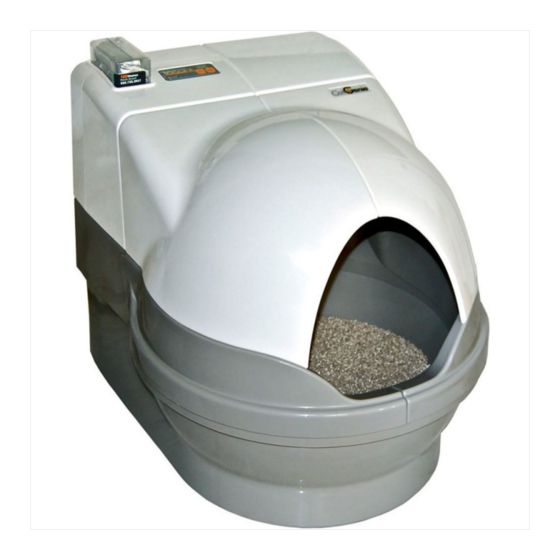
ANATOMY OF THE CATGENIE 12O Control Panel Genie Eyes Use to program Sees when cat is in the Start Cycle. Beeps Bowl. Won’t start Cycle & Blinks warn of errors Hopper Cover for 10 minutes Store GenieHand, SaniSolution Hides Hopper 12O Cartridge Dispenses exact amount Hopper... -
Page 6: Catgenie Faqs
CATGENIE FAQs SaniSolution Hopper Cover Smart Cartridge IS THE SANISOLUTION CLEANER SAFE FOR MY CAT? Yes, SaniSolution is safe for cats. Its ingredients are like those used by veterinarians to disinfect their operating areas. Liquid in the Cartridge is highly concentrated. In this form, it is safe as long as it is in the Cartridge. HOW LONG DOES THE SANISOLUTION LAST? Processing Unit On Cat Activation,one SaniSolution Cartridge is good for 240 washes. -
Page 7: Control Panel
CONTROL PANEL Your CatGenie communicates with BEEPS & BLINKS. CARTRIDGE LEVEL CHECK CARTRIDGE LED INDICATOR LEDs & BUTTONS Lights when Cartridge has 10 Cycles Tell how many wash cycles remain. left. Stays lit until Cartridge is empty Press and Release both BUTTONS. and replaced. -
Page 8: Program Cat Activation
ABOUT CAT ACTIVATION With Cat Activation, the CatGenie cleans 10 minutes after your cat does his business. If another cat needs to use the potty, the Unit resets and delays for another 10 minutes, etc. The Unit will not start if a cat is using it. The Genie Eyes watch for that. When set for CatActivation, the Cartridge switches from 120 doses of SaniSolution to 240 doses. -
Page 9: Program Child Lock
MORE ABOUT AUTO START AUTO SETUP TIME EXAMPLES. What’s the best time to run your CatGenie? If you want it to run Cats usually defecate within half an hour after eating a main meal. Cat experts tell us that cats once a day at 8:15am... -
Page 10: Washable Granules
WASHABLE GRANULES never need changing. KEEP FILLED TO THIS LEVEL While the Washable Granules never need changing, they do need to be replenished. Just add Granules when the amount falls below the fill-level line, which is indicated by an indentation inside the Bowl. -
Page 11: Catgenie Setups
SETUPS. See Simple Setup Guide for Complete Directions. LAUNDRY or UTILITY ROOM BATH or POWDER ROOM 1. Turn off the laundry’s cold-water supply valve. 2. Unscrew your washing 1. Shut off cold-water line on toilet or sink and machine’s cold-water supply hose from its valve. 3. Attach washer hose to unscrew water flex hose. -
Page 12: Spare Parts
HOW TO GET INSIDE YOUR CATGENIE if you need to replace a part. the GenieHand . Push Arm and Clip back into the opening. To remove To take apart your CatGenie, move the CatGenie away from the Brim, push on Black Button for leverage as you pull up the Brim back. wall. -
Page 13: Trouble Shooting
TROUBLE SHOOTING. TIP: To avoid 90% of problems, set your CatGenie on Cat Activation. If you have a 1, 2, 3, or 4 Error, a Beep sounds the Error number. You could also The Error LED lights and the number LED lights which Error. have a problem that Both lit LEDs alternate blinks. - Page 14 ERROR 3. Hear Beeps. Error LED & LED 3 lit. Cycle Complete. CatGenie is not draining. CAUTION: Before fixing, feel whether the Washable Granules are WET, DAMP or DRY. Follow A, if Granules are DRY • Follow B, if Granules are WET or DAMP GRANULES ARE DRY but not washed.
-
Page 15: Errors Without Warnings
WATER OR DRAINAGE PROBLEMS. NO ERROR INDICATED. 5. CLEAN WATER is around the Base of the CatGenie. Granules are DRY. A: TURN OFF Laundry or Bathroom Water Supply Line. Unplug CatGenie. Wait 5 minutes and wipe up the water. Search for the highest wet point for the source of the leak. Tighten all plastic knobs by hand. Tighten all metal-to-metal connections with a wrench. - Page 16 POWER PROBLEMS: NO ERROR INDICATED 10. YOU PRESS START BUTTON and CatGenie BEEPS/BLINKS and/or WON’T START. A. You may have pressed the START/PAUSE BUTTON too fast or too lightly. Firmly Press the Button again and release. CatGenie answers with a Beep and should start a Cycle. If nothing happens, you may have a power problem. See #11 below. B.
-
Page 17: Catgenie Maintenance
CATGENIE MAINTENANCE To keep your CatGenie running smoothly and to prevent problems like those seen on pages 12 through 15, and on 17 and 18, take these simple precautions. TIP: RUN ON CAT ACTIVATION Tests prove that CatGenie performs 1O times A. -
Page 18: Clear Clogs
Need 2 STEPS to CLEAR a CLOG Professional Start with STEP 1. If not successful, go to STEP 2, page 18. Help? Call us at Or please call our service reps in Pennsylvania 888-735-3927 who will happily guide you to success. Have your serial # ET 9a-11p WD Remove Processing Unit... - Page 19 BEFORE TAKING STEP 2, take your CatGenie apart. 1) Remove Hopper Cover and Processing Unit. Rest Unit on a towel. Lean it against a wall. 2) Unclip the GenieHand. 3) Push its Clip though the Brim. 4) Remove Brim by pushing on Knob for leverage.
-
Page 20: Technical Modes
CATGENIE TECH Only go here if directed from the Trouble Shooting pages or when on the phone with a Customer Service Representative. CatGenie Tech has 6 Component Modes, which enable you to check if your CatGenie functions work or not. It also has 2 Test Modes. By pushing the 2 Buttons on the Control Panel as directed, you can easily find what ails your CatGenie. -
Page 21: Fcc Notice & Warning
2. Increase the separation between equipment and receiver B. If this product is found to be defective, PetNovations, Inc. will replace the defective parts at no charge to the 3. Connect the equipment to an outlet original owner (and with PROOF of PURCHASE if not bought through PetNovations). Such replacement services on a circuit different from that to which shall be rendered solely by PetNovations, Inc.
Need help?
Do you have a question about the CatGenie 120 and is the answer not in the manual?
Questions and answers
LED 2 and Error lights with beeps. Have checked inlets and drainage pipe. Cleaned whole unit. Replaced water sensor. Still begins error message shortly after cycle begins and water present in bowl.
If the LED 2 and Error lights beep on the PetNovations CatGenie 120, it indicates an "Error 2." This means there is an issue related to the water sensor or a clog. After checking inlets, drainage pipes, cleaning the unit, and replacing the water sensor, the error may still persist if the water sensor is not properly installed, not clean, or if there is a clog in the system that has not been fully cleared. Ensure the water sensor is securely in place, clean, and free of lime buildup. Also, inspect the unit for any remaining blockages.
This answer is automatically generated
@Mr. Anderson Water sensor has been replaced. Definitely no blockages. System starts error code after water bowl is filled. Will recommence cycle of I lift then immediately replace processing unit
Even after replacing the cartridge, the machine vacillates red and green lights between the cartridge, ten percent and error message.it constantly beeps and flashes back and forth red to green.
If the PetNovations CatGenie 120 shows red and green lights and beeps after replacing the cartridge, it indicates an issue with the cartridge. Possible causes include:
1. No Cartridge Installed – The Cartridge LED and Error LED will blink alternately, and the CatGenie will not start. Ensure a cartridge is properly inserted.
2. Incorrect Cartridge Placement – If the cartridge is not placed correctly, the unit will beep. Ensure the notch on the cartridge is positioned at the rear.
3. Cartridge-User Counter Cycle – If the 2-beep warning reactivates, it means the system is still detecting an issue. Replacing the cartridge with a fresh one should resolve the problem.
Ensure the cartridge is correctly placed and contains SaniSolution for proper operation.
This answer is automatically generated