Subscribe to Our Youtube Channel
Summary of Contents for PetNovations CatGenie
- Page 1 The World’s Only Self-Flushing, Self-Washing Cat Box Your G U I D E ™ S U C C E S S F U L CAT G E N I E O P E R AT I O N © 2007 PetNovations, Inc.
-
Page 2: Safety Instructions
Power Consumption: 20W (Cleaning Cycle-17Minutes) the Genie Electric Cord. 1200W (Drying Cycle-17 Minutes) If you are not going to use the CatGenie for an extended Approximate Weight: Total CatGenie: 25 lbs. (Includes period of time, disconnect the CatGenie from the electric outlet. -
Page 3: Table Of Contents
CatGenie Terms........ -
Page 4: Control Panel Explanation
2. AUTO SETUP Button Once programmed, automatically STARTS Cleaning Cycles. • Use to Program the TIMES that you want the CatGenie to run • Use to Program the NUMBER of washes (one to four) per day. See Page 5. BEEPS & BLINKS HOW DO I RESTART A WASH 3. -
Page 5: Automatic Start Setup
3 times a day at 6am, 2pm, 10pm... program For example, if you want your CatGenie to run at 2 am and 2 pm, you at any of those times must program the Auto Setup at either 2 am or 2 pm. -
Page 6: Tips For Best Catgenieoperation
Dried-out, hardened solids also make the impeller’s job difficult. So BRUSHING YOUR CAT HELPS flush and brush often. A good brushing is healthy for your cats and your CatGenie. AUTOMATIC & MANUAL STARTS. The combination gives you more control and more versatility. -
Page 7: Sanisolution Smart Cartridge
One-Beep Warning will sound again. To stop the Beep, Press & Release the Start Cycle/Pause Button. The Cartridge LED will stay lit to remind you that only 3 wash portions remain and that CatGenie can not run on empty. Empty Cartridge or No Cartridge: After 60 cleaning cycles, the Cartridge is empty. -
Page 8: Bath & Laundry Room Setups
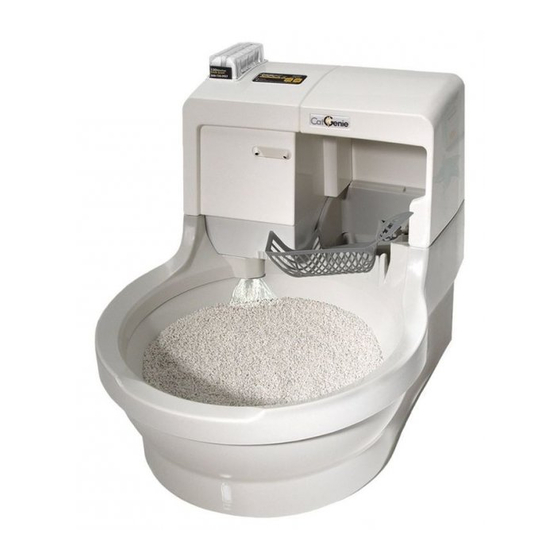
INSIDE YOUR SIMPLE SETUP ™ CATGENIE See Simple Setup Guide for Complete Directions. SaniSolution Smart Cartridge Hopper Cover Processing Unit GenieHand GenieEyes Cat Sensor BATHROOM SETUP 1. Shut off the cold water by turning the valve on the toilet or sink Brim cold-water supply line all the way counter-clockwise. -
Page 9: Installing Spare Parts
Lean Unit against the wall. Unclip GenieHand . sible for removal if necessary. Clean out any Granules in the Base. WARNING: Unless Manual instructs otherwise, always unplug the Genie Electric Cord before working on your CatGenie. HOW TO REPLACE PARTS. -
Page 10: Trouble Shooting Guide
TROUBLE SHOOTING Read down the PROBLEM column on the left to find which applies to your CatGenie ™ BEEPS & BLINKS WARN OF PROBLEMS Solution Problem Probable Cause A. Part of the Hopper is clogged A. Do not unplug Genie Electric Cord. -
Page 11: How To Eliminate Clogs
Methods 1 & 2 work, Press Start Cycle/Pause Button for exactly 4 seconds then Release. It could take awhile for the CatGenie to cycle through. When cycle completes, CatGenie is dry and fixed or it will Beep an error. Follow error directions on page 10. STEP B METHOD 2 If nothing works, refer to page 14, STEP 2, Cleaning the CatGenie. -
Page 12: Control Panel
Solution A. Press & Release Start Cycle/Pause again. A. Start Cycle/Pause pressed too fast. B. Plug CatGenie into a different outlet and test the B. No electric power, or a circuit breaker 8. You press the CatGenie outlet with another appliance. -
Page 13: Faqs About Catgenie
™ FAQS ABOUT CATGENIE How long is the Cleaning Cycle? What happens if my cat is in the CatGenie when it is set Scooping, washing and sanitizing take 17 minutes. Drying takes to start automatically? an additional 17 minutes. The CatGenie has sensors, GenieEyes, which delay the cleaning cycle until your cat is safely out of the unit. -
Page 14: Cleaning The Catgenie
CatGenie apart. STEP 1. TAKING CATGENIE APART. A. Move the CatGenie about a foot away from the wall. Place a folded thick towel on the floor between the back of the CatGenie and wall. Remove Hopper Cover and put aside. - Page 15 B. Coil the Genie DrainHose inside the Base. Take Base, Brim, and Hopper Cover back to the CatGenie site. Make sure the Genie DrainHose is in the groove in the back of the Base. Place the Base back by the Processing Unit.
-
Page 16: Fcc Notice & Warning
Granules and used Cartridges. Carefully return and send the clean harmful interference to radio communications. CatGenie in as close to original condition and in its original carton to qualify for a full refund. Please include your reason for return. Extra supplies that are used or However, there is no guarantee that interfer- opened are not eligible for refunds.


Need help?
Do you have a question about the CatGenie and is the answer not in the manual?
Questions and answers